Tag: SSH

  • Change Git Remote URL to SSH from HTTPS

    Change Git Remote URL to SSH from HTTPS

    This post is a guide on how to change Git from using SSH to HTTPS for authentication.

    Using SSH for your version control system is more efficient as we do not have to enter a password every time we need to contact the remote repository.

    You should have SSH keys already setup before proceeding with the steps below. If you don’t yet have SSH keys setup, have a look at my other post which will help guide you through creating SSH keys on an Ubuntu WSL instance – Setup SSH on Ubuntu (WSL)

    The following steps demo changing SSH to HTTPS:
    # Check Current Git URL
    # Change Git from HTTPS to SSH auth

    Check Current Git URL

    I’m going to clone a git repo using HTTPS to set this demo up –
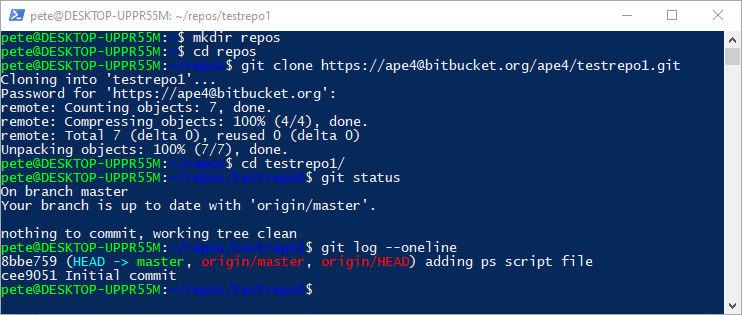
    Git Clone Repo HTTPS

    Now that we are authenticating to Git using HTTPS, we should check the Git remote URL.

    The following command will return your remote Git URL –

    # Check current remote git url
    git remote get-url origin

    If the returned value starts with HTTPS, that means we are using HTTPS to auth to Git, not SSH.

    As mentioned above, we want to move from this to SSH so we can avoid entering a password everytime we need to authenticate to the Git system. Lets make the move over to SSH auth!

    Change Git from HTTPS to SSH Auth

    We are now going to change from HTTPS to SSH in Git.

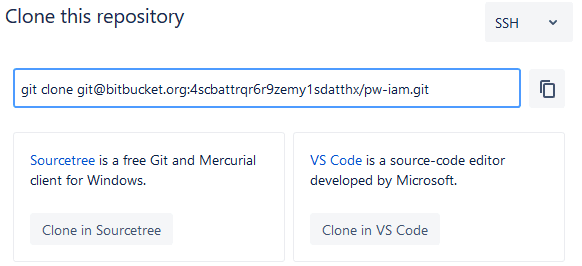
    Navigate to your Git repository link and select SSH. For this demo I’m using the Bitbucket version control system. It’s all the same though and you should be able to find the similar drop-down menu below.
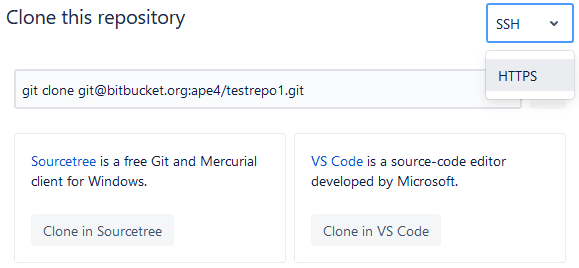
    Bitbucket Remote URL

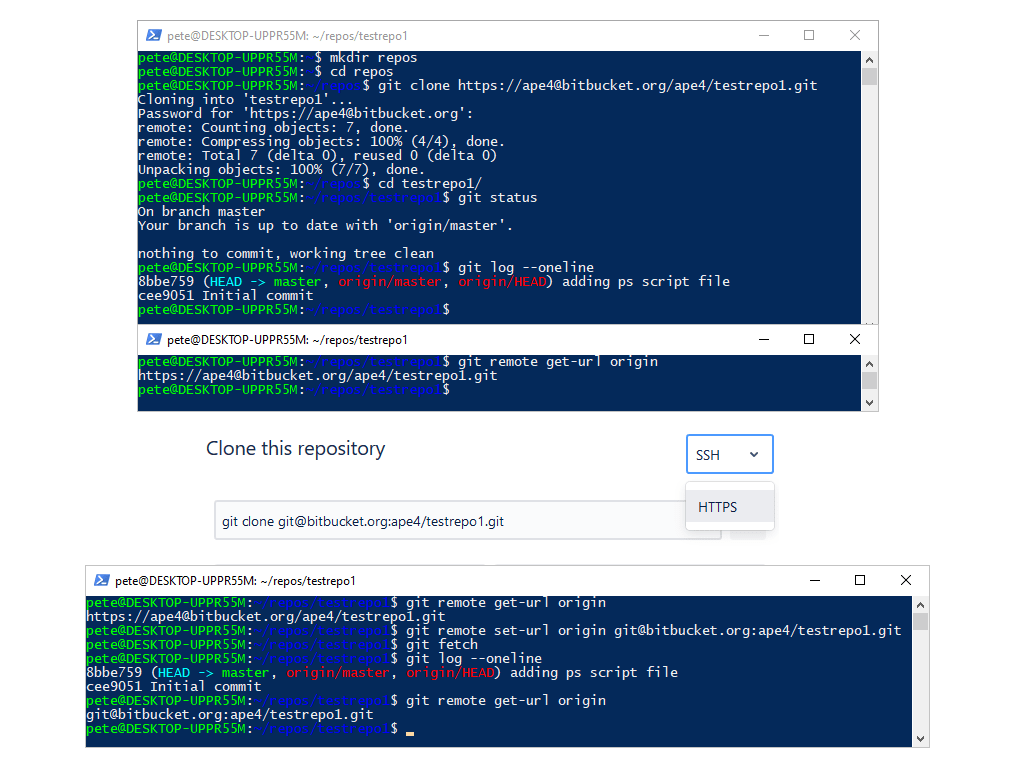
    Run the following command to set the new Git URL and make the move to SSH auth –

    # Set remote URL for Git (to SSH)
    git remote set-url origin <ssh-url>
    Git Set URL to SSH

    The above screenshot shows various commands to verify this works as expected, including git log –online which is great for checking recent repo commits with a condensed output.

  • Setup SSH Keys in WSL

    Setup SSH Keys in WSL

    Setting up SSH keys on Windows is generally done via OpenSSL or Putty. We can set this up and have quick authentication to places like GitHub or Bitbucket. But, we are also able to rely on a Linux distro in WSL for our SSH. If you are developing in WSL, this might be useful as that’s where you will be cloning your git repos to.

    This post contains a demo of setting up SSH keys in WSL (Windows Subsystem for Linux), on an Ubuntu 20.04 distro. The version-control system being used here is Bitbucket.

    The steps included in this SSH WSL setup are as follows:
    # Create New SSH Key
    # Add SSH Key to Agent
    # Add SSH Key to Project

    Create New SSH Key

    I’m creating a new SSH key within a WSL linked folder, which means my SSH keys are backed up on the local machine in case anything happens on this WSL instance. Even though I can easily recreate and add a new SSH key to my Bitbucket account if need be.

    This SSH key is being created with a password and being added to the SSH Agent so I don’t need to enter the password each time.

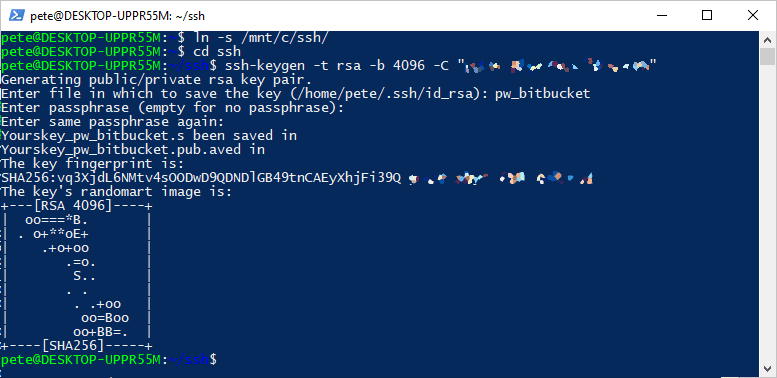
    The following command will create a new SSH key in my WSL Ubuntu instance –

    # Create a new ssh key
    ssh-keygen -t rsa -b 4096 -C "someone@email.com"
    WSL ssh-keygen

    Add SSH Key to Agent

    As mentioned above by adding our new SSH key to the ssh-agent so we don’t have to enter the passphrase every time we use it.

    Run the following to add the SSH key to SSH Agent –

    # Add ssh key to agent
    eval $(ssh-agent -s)
    ssh-add pw_bitbucket

    Add SSH Key to Project

    Now that the SSH key is ready, we just need to add that to the Git account you’re using. As mentioned, I’m using Bitbucket in this demo.

    Run the cat Linux command on the public SSH key (.pub file) to show the SSH key for Bitbucket. Copy everything except the email at the end.

    # Ssh to app/host
    ssh -T git@bitbucket.org

    Below is an example of when you haven’t added the SSH key to your account yet –

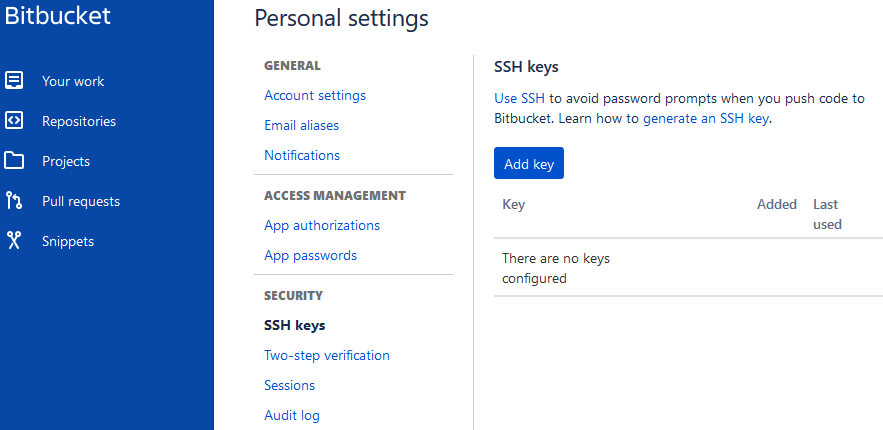
    This is what we are going to do now. Add the SSH key to your git/Bitbucket account.

    Now re-trying the SSH connection –

    logged in as bl4h130b1aH” – We can see it has worked this time. Our SSH keys are stored in Bitbucket and we are logged in, and authenticated via SSH.

    We are ready to clone a repo into WSL. Navigate to the desired folder in the WSL Linux terminal and run the git clone command as per the repo link.

    The git repo has been cloned successfully. I will now open Visual Studio Code and get to work!