-

SSMS 21 (Preview Release)
This week I installed SQL Server Management Studio SSMS v21 for the first time, which is currently in preview release.
From the get-go, I noticed this is shaping up to be a major update to SSMS. The installation process now uses the Visual Studio Installer, which is a new experience. But beyond that, there are some significant enhancements in this release.
SSMS 21 has a fresh, modern design with updated icons, customizable layouts, and a revamped splash screen. Dark Mode is (finally?) here, bringing a new look to key areas like Object Explorer, Query Editor, and the Results pane. Another big change is that SSMS is now a full 64-bit application, improving performance and reducing memory-related issues.
One of the most exciting additions is Git integration, allowing DBAs and developers to track and manage SQL scripts more efficiently. This could be a game-changer for collaboration and version control in SQL Server environments.
In this post, I’m taking a quick look at SSMS v21 and its capabilities. Hope you find it all useful!
Installing SSMS v21
To download the SSMS 21 Preview, follow this link: SSMS 21 Preview Download
If you already have SQL Server Management Studio 21 installed, you can install another version alongside it.
To install SSMS 21:
1. Locate the installer file you just downloaded.
2. Run the installer and follow the simple on-screen instructions.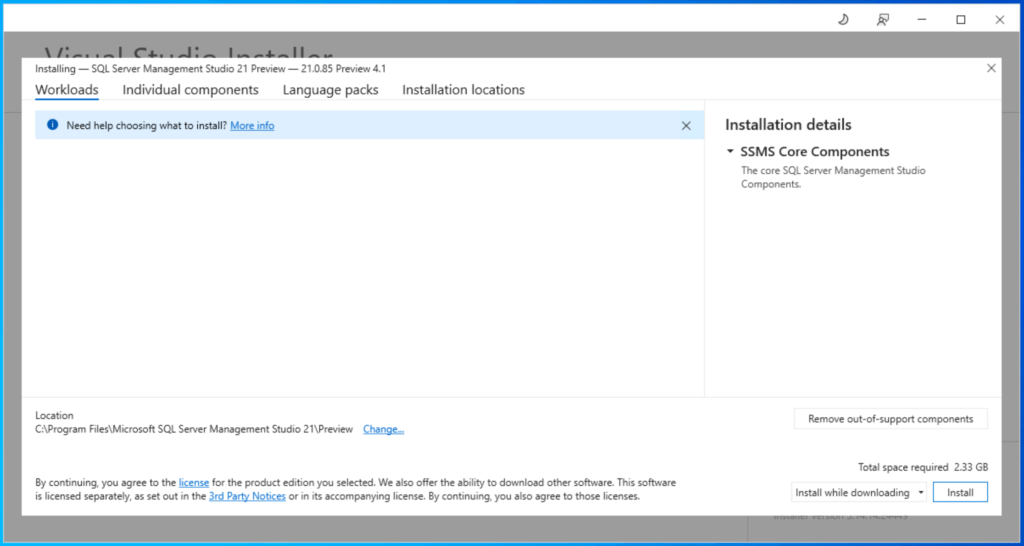
Once installed, open SSMS 21. You’ll see the new but temporary SSMS splash load-up screen:

Here’s the new look for SSMS:
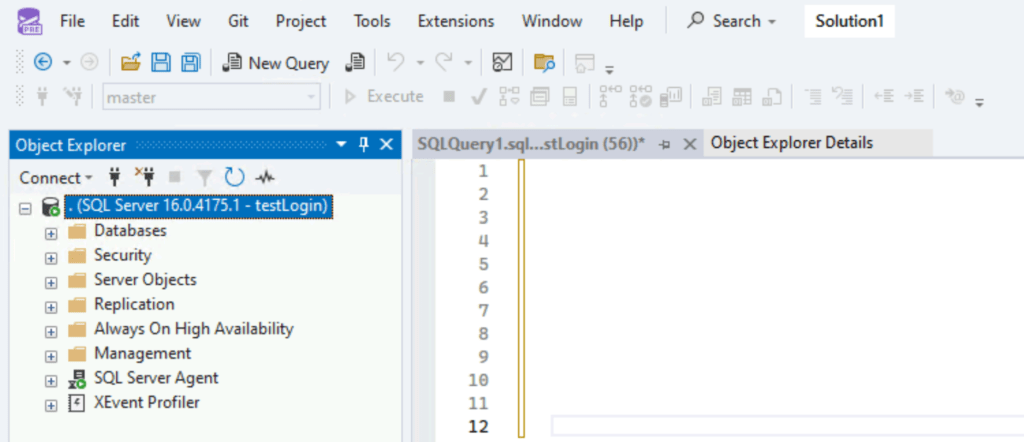
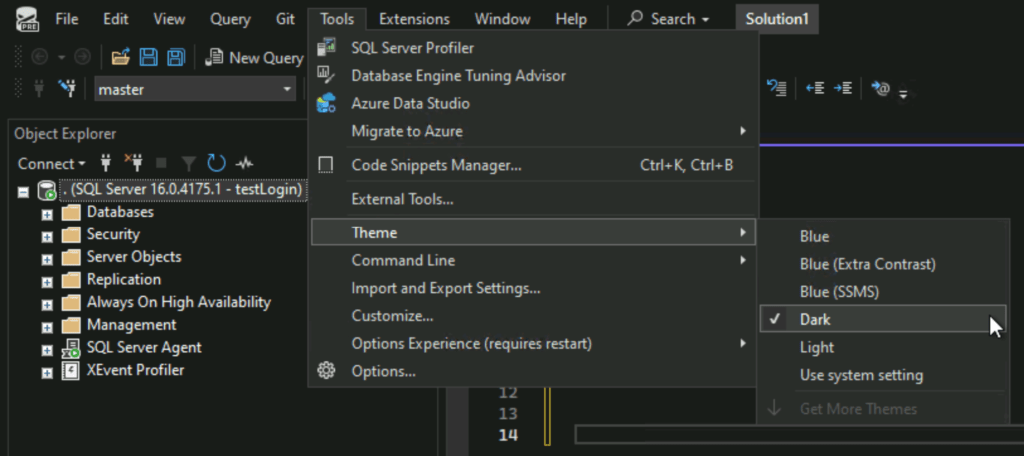
We can amend the theme by going to Tools > Themes.
🕵️ We now have SSMS dark mode available!
Uninstalling SSMS v21
As from SSMS 21, you can now uninstall SSMS using the Visual Studio Installer, as well as the traditional method via appwiz.cpl (Add/Remove Programs).
Uninstall SSMS using Visual Studio Installer:
1. Open Visual Studio Installer (search for “installer” in the Start menu or runC:\Program Files (x86)\Microsoft Visual Studio\Installer\setup.exe).
2. Locate SSMS, click More > Uninstall, and confirm.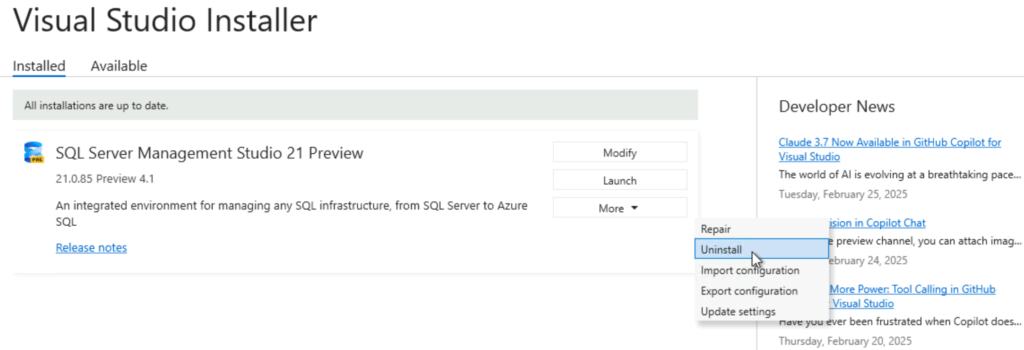
Uninstall SSMS via Add/Remove Programs:
1. Open Run (Win + R), type appwiz.cpl, and press Enter.
2. Find SQL Server Management Studio 21, right-click, and select Uninstall.
SSMS v21 Git Integration
As mentioned earlier in this post, SSMS v21 now includes Git integration, enabling developers and DBAs to better track, manage, and collaborate on SQL scripts. This feature allows users to connect SSMS directly to Git repositories, making version control more seamless within the SQL development workflow.
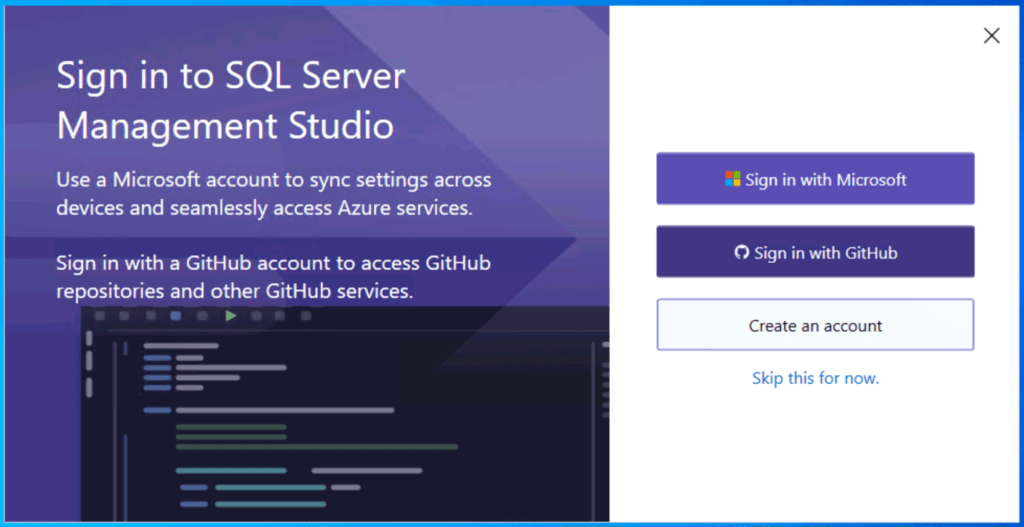
With SSMS Git integration, you can:
– Collaborate more effectively by syncing with remote repositories.
– Commit and push changes directly from SSMS.
– Track modifications to SQL scripts over time.For more information on SSMS v21 Git Integration, our friend Brent Ozar has this covered in his blog post:
How to use GitHub in SSMS v21Copilot in SSMS: AI-Powered SQL Assistance
SSMS 21 introduces Copilot, an AI assistant built into the Query Editor. It can answer SQL-related questions, help write T-SQL using natural language, and even analyze your database structure to provide better query suggestions. Copilot also assists with fixing and explaining queries, making it easier to troubleshoot issues and improve efficiency.
This is just the beginning of us seeing AI integrations with our tools. I’m curious to see where all this goes and how much of an impact it could have to productivity.
-

Sudo for Windows: A Quick Overview
With the release of Windows 11 version 24H2 in September 2024, Microsoft introduced Sudo for Windows, adding Linux-like functionality for managing system privileges.
Having Sudo on Windows allows us to execute commands with administrative rights directly from a non-elevated console session, making it easier to run administrative tasks without needing to manually switch to an elevated prompt. I’ll try help explain more in this post.
Note, Sudo for Windows is not available on Windows Server editions. I’ll explain more on that too!
Contents:
1. How to Install Sudo for Windows.
2. How to Use Sudo on Windows.
3. Security Considerations.
4. Sudo is not Available on Windows Server.
5. More Sudo, More!
1. How to Install Sudo for Windows
To use Sudo on Windows, ensure your computer is fully patched with the latest Windows 11 build. If you’re still on Windows 10, consider upgrading!
Once you’re on a supported version, go to
Settings > System (Sidebar) > For Developersand toggle on the “Enable Sudo” option.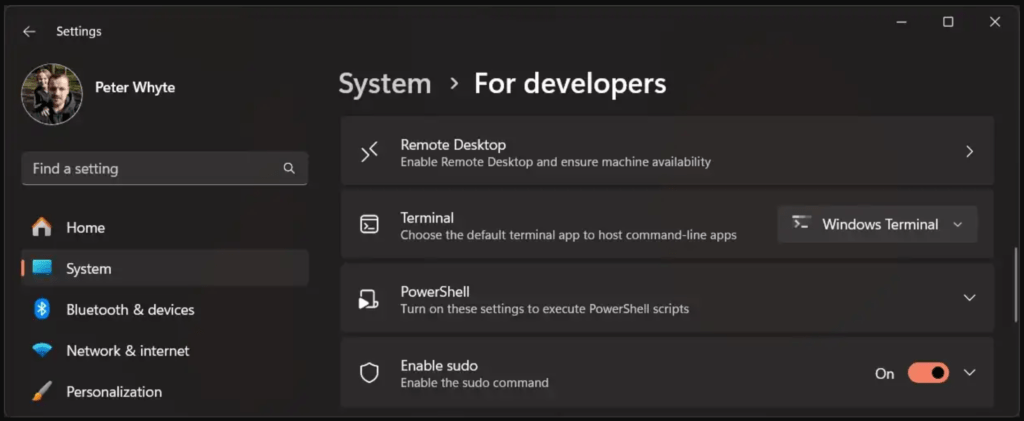
Alternatively, you can enable Sudo for Windows by running the following command in an elevated console session (run PowerShell as Admin):
# Enable sudo (Windows 11 build 26052+)
# Run within Administrator Windows PowerShell Session
sudo config --enable enable
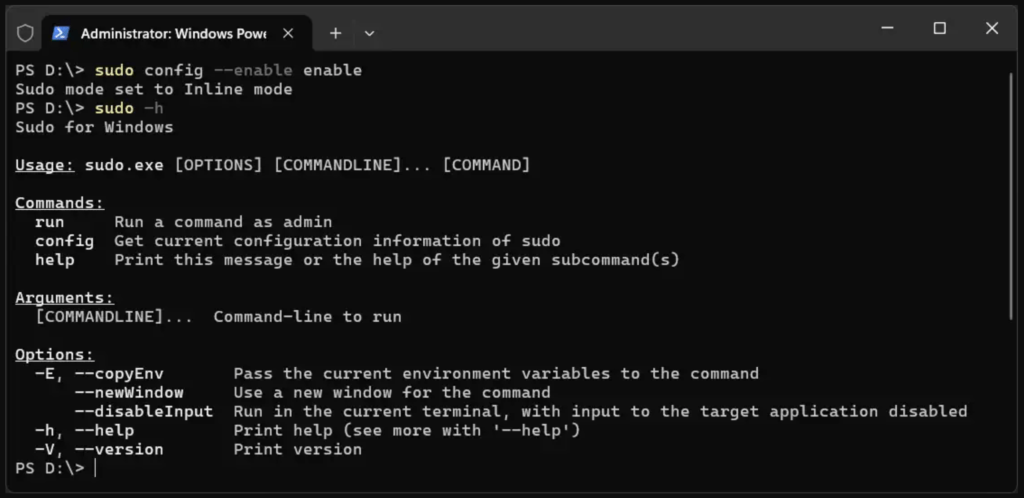
2. How to Use Sudo on Windows 11
To use
sudoon Windows, simply runsudo <command>in the command prompt to elevate the command as an administrator. It will trigger a UAC prompt for permission.Windows Sudo: Example 1
1. Open PowerShell (not as Admin).
2. Run a command that would normally require elevated permissions:# Example; start SQL Server service on Windows net start MSSQLSERVER
The above command fails: Access Denied.
3. Re-run the command with Sudo:
# Example; start SQL Server service on Windows
net start MSSQLSERVER
4. Accept the UAC Prompt.

After accepting the UAC prompt, the command will execute successfully, my SQL Server service started without issues in this case.
Windows Sudo: Example 2
We can also promote our current non-admin PowerShell Terminal session to an Administrator PowerShell session. This is done simply by running
sudo pwsh: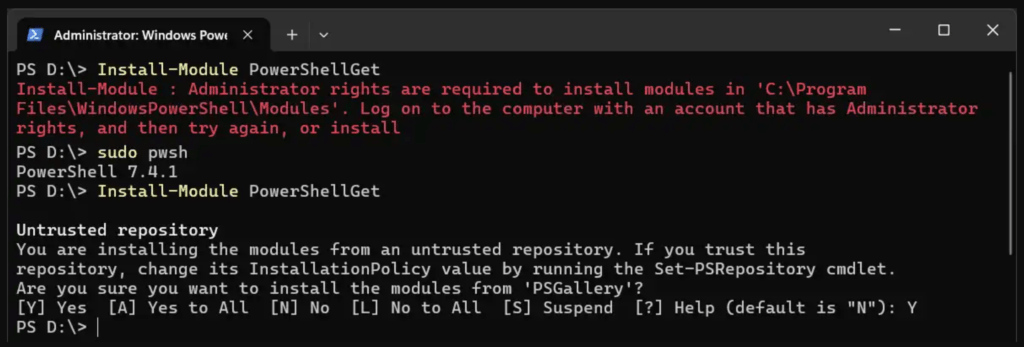
Other Tests
Here’s a list of single sudo commands that have worked for me in testing:
# Working sudo single command examples
sudo net stop MSSQLSERVER
sudo net start MSSQLSERVER
sudo net use
sudo regedit
sudo ipconfig
sudo netstat
sudo mkdir
sudo diskpart
sudo fsutil
sudo powercfg
sudo icacls
Note that
sudoon Windows currently doesn’t allow running commands as other users, unlike therunascommand. It also doesn’t have full functionality, so try not to expect all your familiar Linux compatible commands work with it.
3. Security Considerations
While Sudo for Windows offers great convenience, be mindful of Security Implications:
–DisableInputandNormalconfigurations may allow non-elevated processes to interact with the elevated process, which could expose your system to risks.
– TheforceNewWindowconfiguration is the safest option for most users, as it isolates elevated commands in a separate window, minimizing security concerns.
4. Sudo is not Available on Windows Server
Sudo for Windows will not be available on Windows Server editions, one place this was mentioned by Microsoft was on the Windows 11 Insider Preview Build 26052 post, where it states the following:
NOTE: The setting for enabling Sudo may incorrectly be showing on Windows Server Insider Preview builds – this feature will not be available on Windows Server and the setting will be disabled in a future Server Insider Preview build.
5. More Sudo, More!
If you’re looking for additional features beyond what Sudo for Windows offers, consider exploring gsudo, a third-party utility that provides more configuration options and functionality. Gsudo is a useful tool if you need more control over elevated commands.
I hope this overview helps you get started with Sudo for Windows! If you have any questions or need further clarification, feel free to add a comment below with your experience of it.
-

SQL Server: Get Current Date & Time
Retrieving the current date and time is a fundamental operation in SQL Server, essential for logging, data tracking, and reporting. Whether you need a simple timestamp for everyday use or require high-precision time tracking for financial transactions, SQL Server provides built-in functions that cater to different levels of accuracy.
In this guide, I’ll demo some ways to obtain date and time values in SQL Server with an added tip on formatting the output. Hope it’s useful for you!
1. Get Current Date & Time in SQL Server
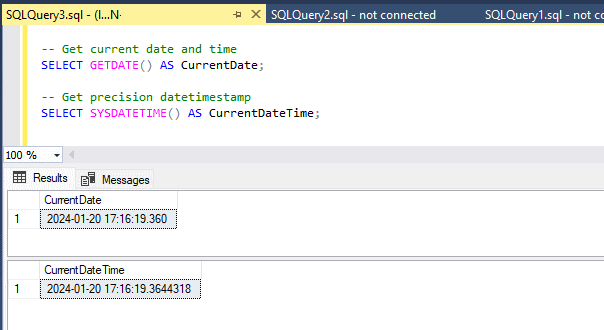
The
GETDATE()function returns the current date and time with millisecond precision, making it suitable for most standard applications.-- Get current date and time SELECT GETDATE() AS CurrentDateTime;
2. Get High-Precision Date & Time
For applications that require more precise time tracking,
SYSDATETIME()provides nanosecond-level accuracy.-- Get current date and time with extra precision SELECT GETDATE() AS CurrentDateTime;
3. Customize Output of Date & Time Value
If you need to display the date in a specific format, use the
FORMAT()orCAST()/CONVERT()functions to customize its appearance.-- Get current date in custom format SELECT FORMAT(GETDATE(), 'yyyy-MM-dd') AS FormattedDate; -- Get current date small date time example SELECT CAST(GETDATE() AS SMALLDATETIME) AS FormattedDate;

Formatting current date time example
Wrapping Up
Use
GETDATE()for general timestamp needs andSYSDATETIME()for high-precision applications. Formatting functions likeFORMAT()andCAST()help convert and return the current date/time as different datatypes.Summary of Functions:
Function Precision Level Best Use Case GETDATE()Milliseconds General logging, reporting SYSDATETIME()Nanoseconds High-precision tracking (e.g., financial transactions) -
Log and Filter sp_who2 Results in SQL Server
When managing SQL Server performance, the built-in
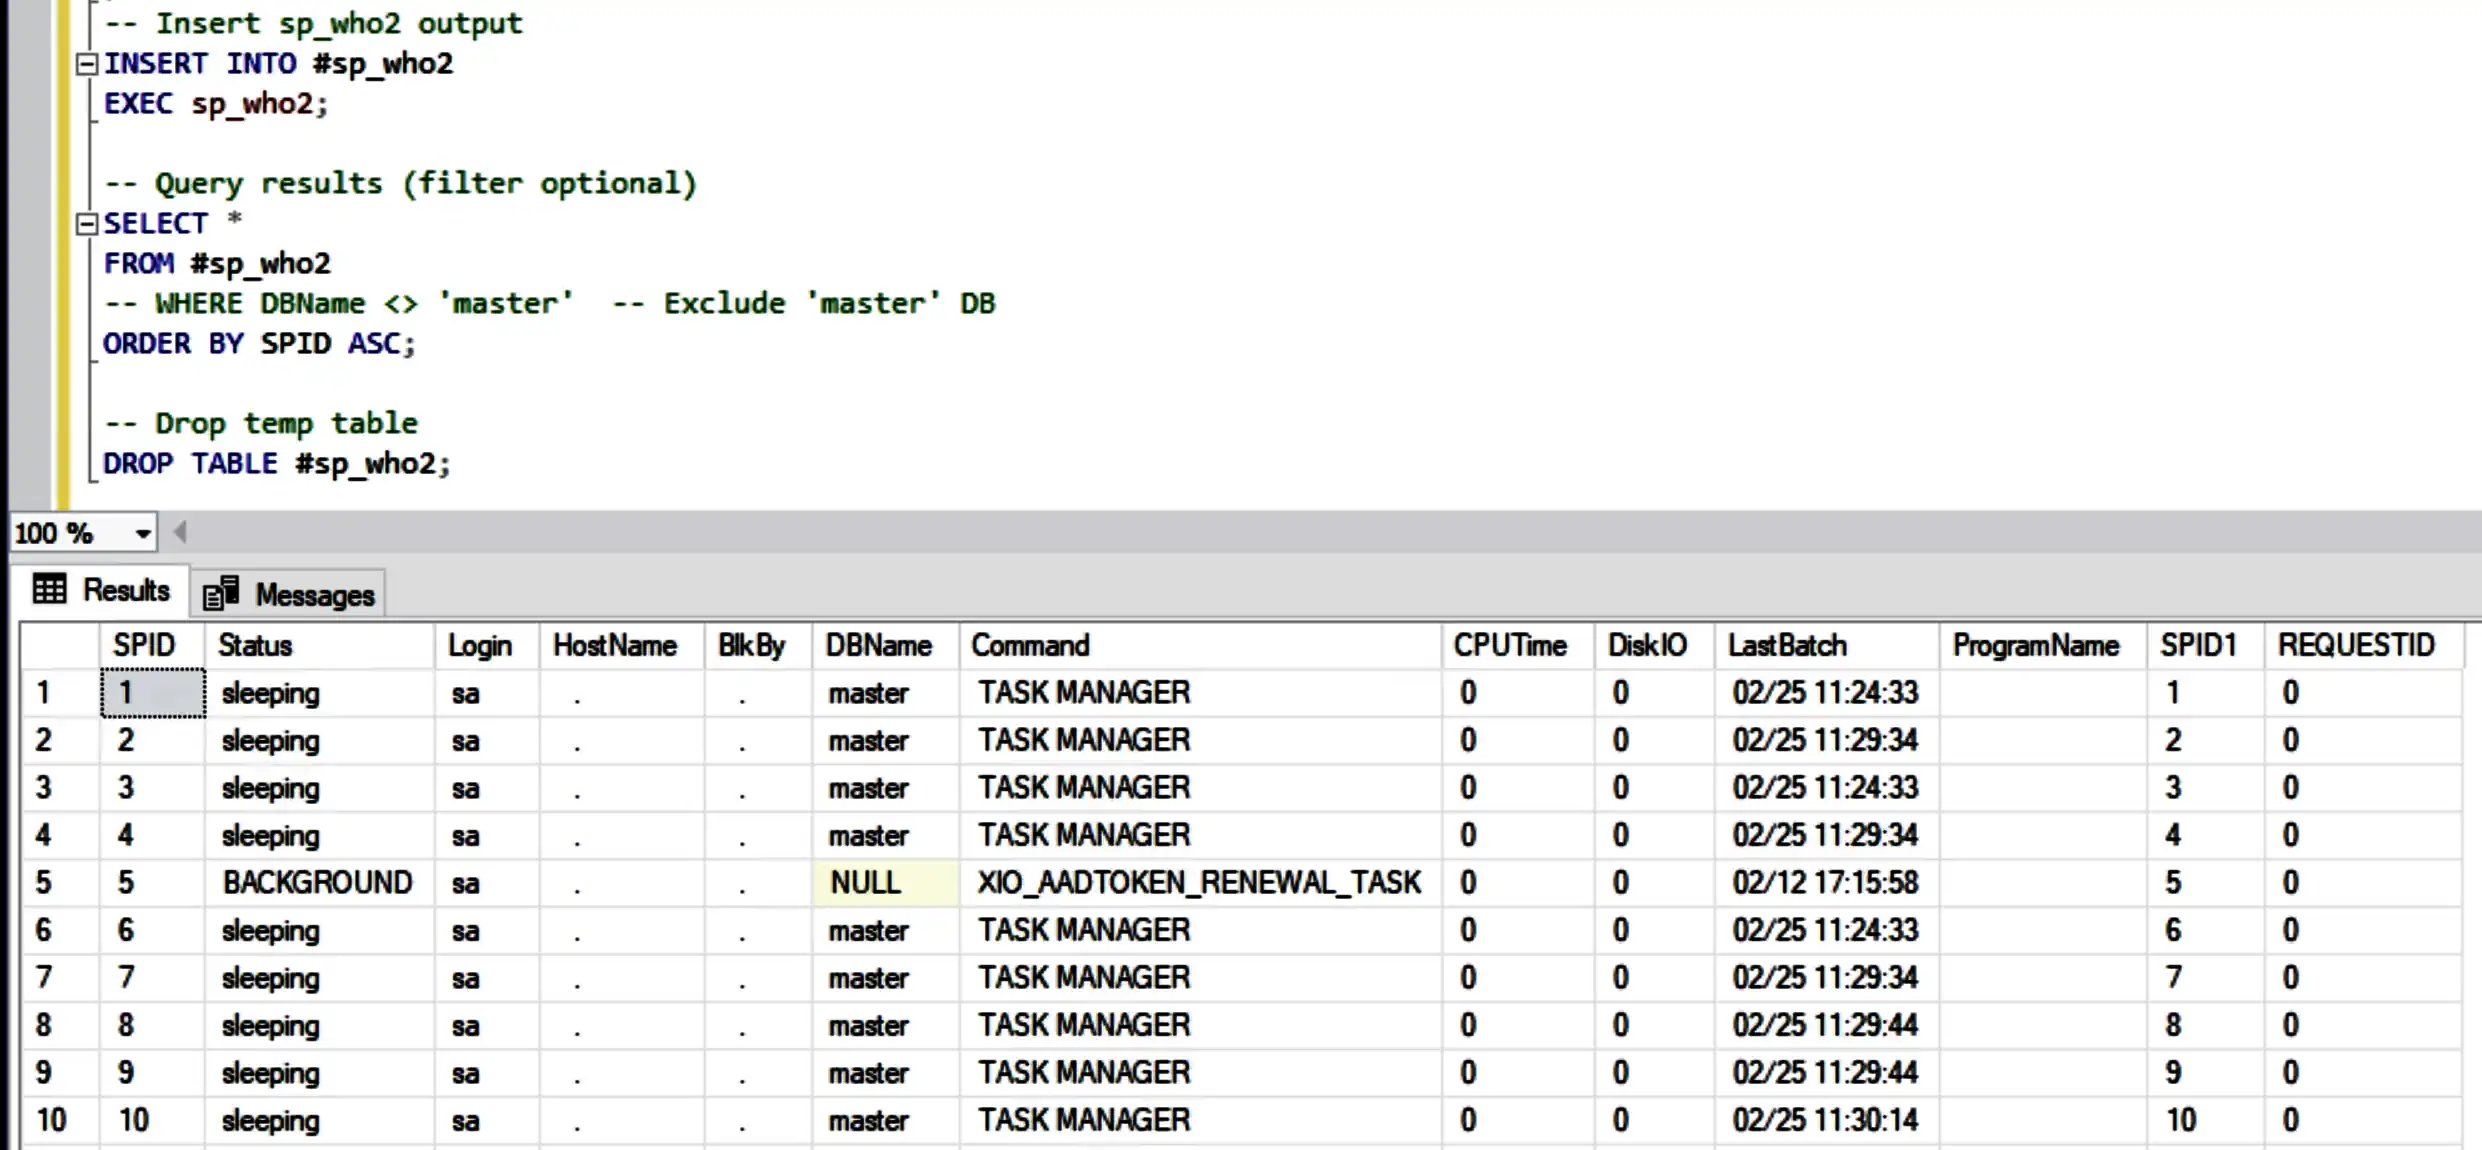
sp_who2procedure is a commonly used tool for quickly checking active processes and their resource usage. However, it doesn’t always give you much flexibility when analyzing SQL sessions.In this post, I’m sharing a simple SQL script that logs
sp_who2results into a temporary table, allowing you to filter and sort sessions in SQL for review. This can be especially useful when investigating blocking issues, long-running queries, or hidden inactive SPIDs that standard scripts might miss. Unlike custom queries that only capture currently active sessions, this method ensures you see a more complete picture of SQL activity, including sessions that may still be holding locks or consuming resources in the background.
Logging sp_who2 Results into a Temp Table
The following script logs the output of
sp_who2into a temporary table, allowing for easier querying, filtering, and sorting of session information: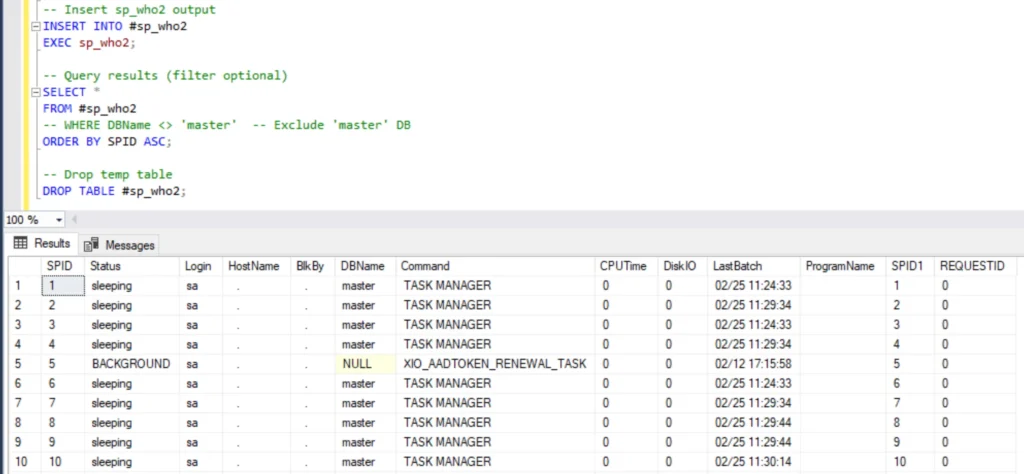
Once executed, this script captures all active sessions at that moment, letting you filter by database, order by SPID, or focus on blocked processes with simple queries.
Logging the output of
sp_who2into a table ensures you catch everything, even non-active SPIDs that could be affecting system performance without showing up in real-time monitoring.This SQL script has helped me in various occasions when diving deep into troubleshooting issues. I hope it also serves you well too!
-

PowerShell Tail: A Familiar Approach to Log File Monitoring
In the Linux world, the
tailcommand is a go-to tool for monitoring logs in real-time. While Windows doesn’t have a direct equivalent, PowerShell’sGet-Content -Tailcommand provides similar functionality for log monitoring.To help bridge the gap for Linux users and improve log tracking in Windows, this post introduces a custom
Tailfunction for PowerShell. This function enhances the built-in capabilities of Windows tail command PowerShell by adding real-time monitoring and color-coded highlights. You can customize the script to your own needs if it’s useful for you.Viewing the Last Lines of a Log File in PowerShell
PowerShell’s built-in
Get-Contentcmdlet allows you to view the last few lines of a log file easily. Just pass in the number of lines of the log file you want to view with the-Lastparameter:# Return the last 10 lines of a log file Get-Item -Path .\appLog0001-0500.txt | Get-Content -Tail 10 # Alternative syntax; get last lines of a log file in PowerShell Get-Content <filepath\filename> | Select-Object -Last 10

This command is particularly useful for debugging issues, allowing you to avoid scrolling through large log files to find the most recent events.
Creating a Tail-Log Function
To improve usability, let’s define a custom function called
Tailthat mimics the Linuxtailcommand in Windows. This function enhances readability by adding color-coded highlights to differentiate log levels.function Tail { param ( [string]$LogFile, [int]$Lines = 10 ) # Define colors for different log levels $ColorMap = @{ "INFO" = "Green" "WARNING" = "Yellow" "ERROR" = "Red" "CRITICAL" = "Magenta" "IMPORTANT" = "Cyan" "SECURITY" = "DarkRed" "AUDIT" = "DarkCyan" "SYSTEM" = "DarkMagenta" } Write-Host "`nShowing last $Lines lines of: $LogFile`n" -ForegroundColor Cyan # Read last N lines of the file and process them Get-Content $LogFile | Select-Object -Last $Lines | ForEach-Object { $LogEntry = $_ # Extract log level (ignoring square brackets) if ($LogEntry -match "\b(INFO|WARNING|ERROR|CRITICAL|IMPORTANT|SECURITY|AUDIT|SYSTEM)\b") { $LogLevel = $matches[1] $Color = $ColorMap[$LogLevel] } else { $Color = "White" # Default color } # Display the log entry in the corresponding color Write-Host $LogEntry -ForegroundColor $Color } }Example Usage
To view the last lines of a log file using the Windows tail command in PowerShell, run:# get last lines of log file tail .\testLog.txt 15
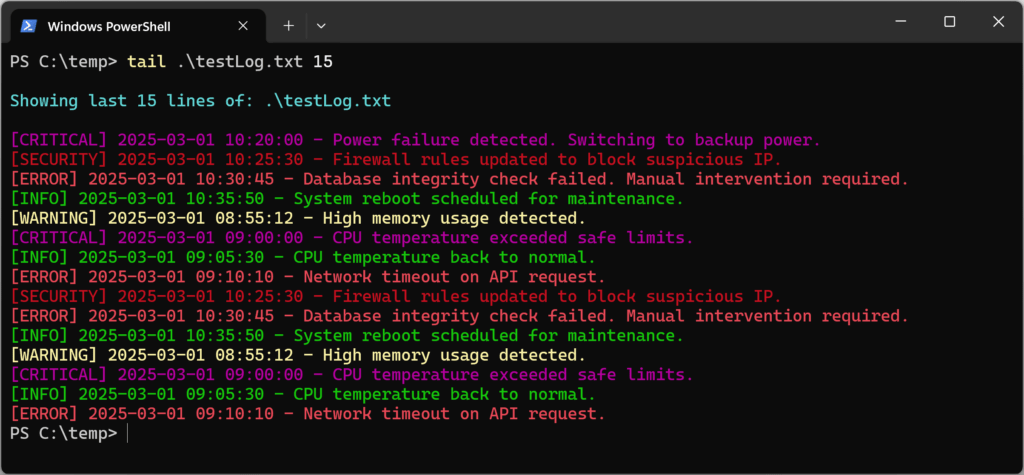
The function colors and associated messages can be customized – tailor it to your needs!
Summary of the Windows Tail
Using a PowerShell function like
Tailwe’ve created here in this post is a great way to quickly pinpoint errors, warnings, or critical messages within logs without manually sifting through large files. It provides a fast and efficient way to monitor logs, especially for troubleshooting.But we can make this even better by enhancing the script to function like the
tail -fcommand in Linux. By adding a-Waitparameter to the PowerShell function, we can keep it running and automatically display new log entries as they are added. This transforms the script into a real-time log monitor, making it even more useful.I hope this was a useful post maybe for the cross platform folks. Cheers!