-
Show Available Disk Space in SQL Server
This blog post is to share a script that you can run in SQL Server (versions 2008 R2 and above) which shows the available disk space for all local volumes on a SQL Server host. I’m also including a quick note on how to get this information with PowerShell.
Running out of disk space is one of the most common issues that can happen with SQL Servers, particularly if the server is not being actively monitored. If you do not have a proper eye on your disk space usage, one day SQL Server will stop working as it has run out of available space. If you are in this situation you will need to delete data and shrink database files.
Get Disk Space Info in SQL Server
The SQL script below returns your SQL Server’s total disk space and available space for each volume attached:
-- get available disk space sql server
SELECT DISTINCT
    vs.volume_mount_point,
    vs.file_system_type,
    vs.logical_volume_name,
    CONVERT(DECIMAL(18,2),vs.total_bytes/1073741824.0) AS [Total Size (GB)],
    CONVERT(DECIMAL(18,2), vs.available_bytes/1073741824.0) AS [Available Size (GB)],
    CONVERT(DECIMAL(18,2), vs.available_bytes * 1. / vs.total_bytes * 100.) AS [Space Free %]
FROM sys.master_files AS f WITH (NOLOCK)
CROSS APPLY sys.dm_os_volume_stats(f.database_id, f.[file_id]) AS vs
ORDER BY vs.volume_mount_point OPTION (RECOMPILE);
SQL disk space query output This SQL script queries the sys.master_files and sys.dm_os_volume_stats system tables.
Get Server Disk Space using PowerShell
Now, as a bonus tip we’re looking at returning the same info with PowerShell. It’s as simple as running Get-Volume, which shows local volume information for your server. And if running on a remote server, use Enter-PSSession to connect to the target server first

-
Killing SQL Server Processes (SPIDs)
In SQL Server, processes (SPIDs) can sometimes become blocked, leading to performance issues. As a Database Administrator, you may need to terminate such processes to maintain system efficiency. This guide demonstrates how to identify and kill blocking SPIDs.
Contents:
> Creating a Blocking SPID
> Killing a Blocking SPID
> Considerations When Killing SPIDsHow to Kill SQL User Connections
Creating a Blocking SPID
To replicate a blocking scenario, we create a table and initiate a transaction that locks it. Then, we execute a
SELECTquery, which gets blocked due to the transaction lock.-- Create a sample table CREATE TABLE TestTable (ID INT PRIMARY KEY, Name NVARCHAR(50)); -- Start a transaction that locks the table BEGIN TRANSACTION; INSERT INTO TestTable (ID, Name) VALUES (1, 'Blocked Row'); -- Run a SELECT query in another session to observe the blocking SELECT * FROM TestTable;
Using
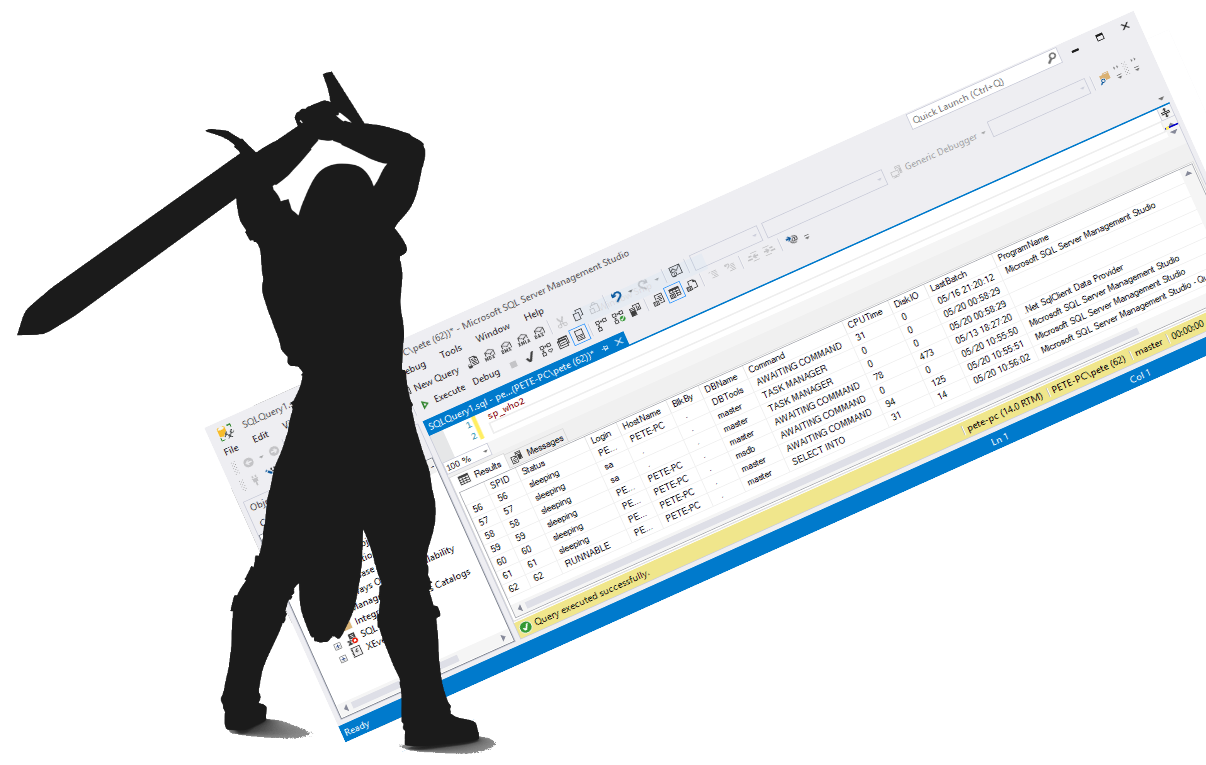
sp_who2,sp_whoisactive, orsys.dm_exec_requests, we can identify the blocking SPID.
From the screenshot, you can see that
session_id 55is the blocking SPID, causing the other session to wait for the lock to be released. This happens when a transaction remains open or a query holds onto resources for too long, creating a bottleneck.To resolve this, we need to terminate the blocking session. This requires identifying the correct SPID (in this case, 55) and ensuring it’s safe to kill, but first try make sure there are no dependencies or unintentional side effects.
Identifying and Killing the Blocking SPID
Once identified, you can terminate the blocking session using the
KILLcommand:-- Kill the blocking session by replacing <SPID> with the correct value KILL <SPID>
Considerations When Killing SPIDs
> Killing a session with an open transaction may trigger a rollback, which could take time. Rollbacks may continue to block things up and can last longer than you’d ever expect. Listen to this story of a 2 month rollback, crazy to even imagine
> UseKILL <SPID> WITH STATUSONLY;to monitor rollback progress. This won’t always return a valid output.
> Ifsp_who2orsp_whoisactivedoesn’t show the blocking SPID, check the SSMS Activity Monitor.
> Killing SPIDs can help when dropping or detaching databases with active connections on test instances.For more information on this, check out my latest post on Killing SQL Server SPIDs. This is now, old, but still useful.
-

Renaming a computer that hosts SQL Server
When renaming a computer hosting SQL Server, you need to update system metadata to maintain connectivity for remote connections and applications. This process involves updating SQL Server’s registered hostname to match the new computer name.
To rename a computer that hosts SQL Server, checkout my latest post on this which includes information for why you shouldn’t perform this task: How to Rename a Computer that Hosts SQL Server
Below is the quick / alt version for renaming SQL Server:
Quick Steps to Update SQL Server After a Hostname Change:
1. Rename the Computer & Reboot:
Update the Windows computer name.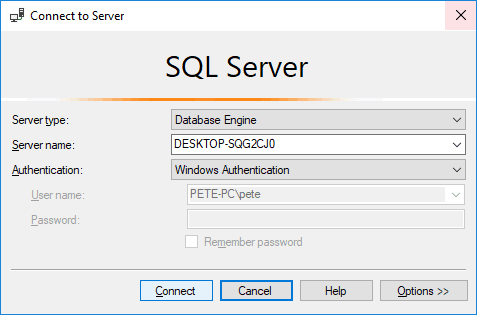
2. Connect to SQL Server:
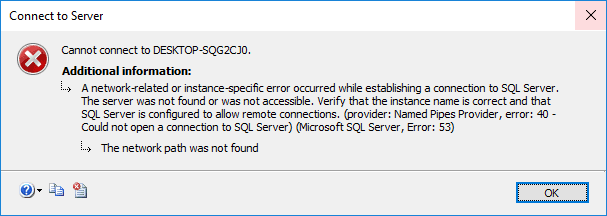
Uselocalhosttemporarily if a connection error occurs.3. Check Hostnames:
Runxp_getnetnameto verify the current hostname.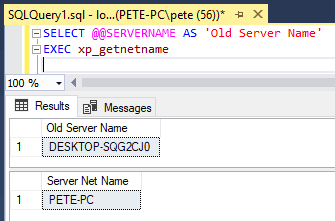
4. Update SQL Metadata:
Drop the old name withsp_dropserverand register the new one usingsp_addserver.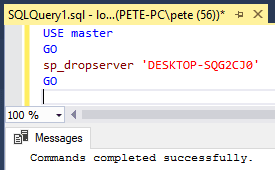
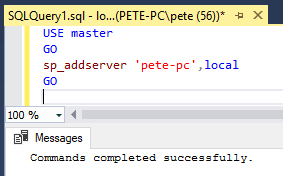
5. Restart SQL Server:
Apply changes by restarting the service.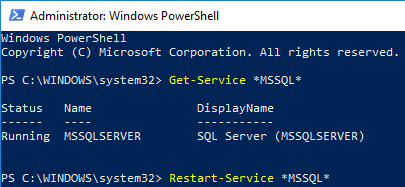
6. Verify Changes:
Confirm the update by checking the new hostname.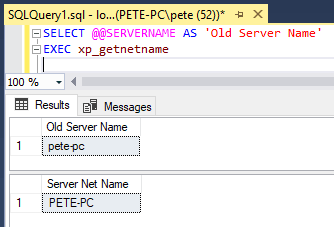
When you next open SSMS, ‘localhost’ should be shown in the Server name field. Changing this to your new hostname will now work.
Detailed Guide Available:
For a complete, step-by-step walkthrough with code and MS Docs links, check out my other post: How to Rename a Computer that Hosts SQL ServerSQL Code Used
-- Get currently registered hostname:
SELECT @@SERVERNAME AS 'Old Server Name'
-- Get
EXEC xp_getnetname

-- Drop current hostname registration.
USE [master] GO sp_dropserver 'enter old hostname returned by @@SERVERNAME above'
GO

--Register new hostname.
USE [master] GO sp_addserver 'enter hostname returned from xp_getnetname above',local -- having local updates the metadata for @@SERVERNAME
GO

-- Restart SQL to apply changes
-

Installing SQL Server 2017
Installing SQL Server is relatively straightforward, but ensuring proper configuration from the outset helps avoid issues later. This guide walks through the key steps and best practices for setting up SQL Server 2017, highlighting essential pre-installation considerations and post-installation tasks.
Before starting, consult Microsoft’s official docs: Planning a SQL Server Installation and SQL Server Installation Guide. For testing purposes we can use SQL Server Developer Edition along with SSMS for a free test environment.
How to Install SQL Server 2017
1. Launch Setup
RunSetup.exefrom the SQL Server installation files or mount and run the ISO.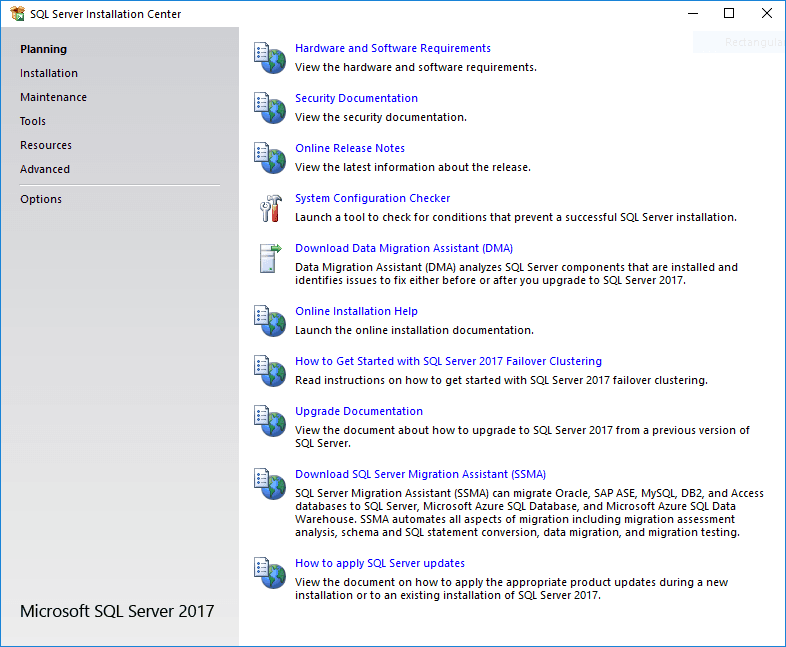
2. Start Installation
Navigate to the Installation tab and select the top option to begin.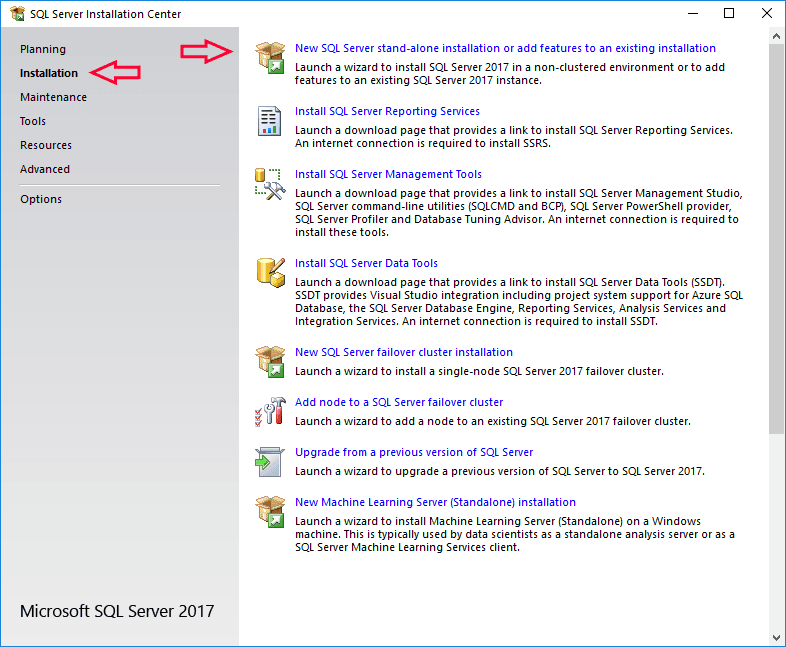
3. Select Edition
The edition should be automatically selected based on your installation media. Click to continue.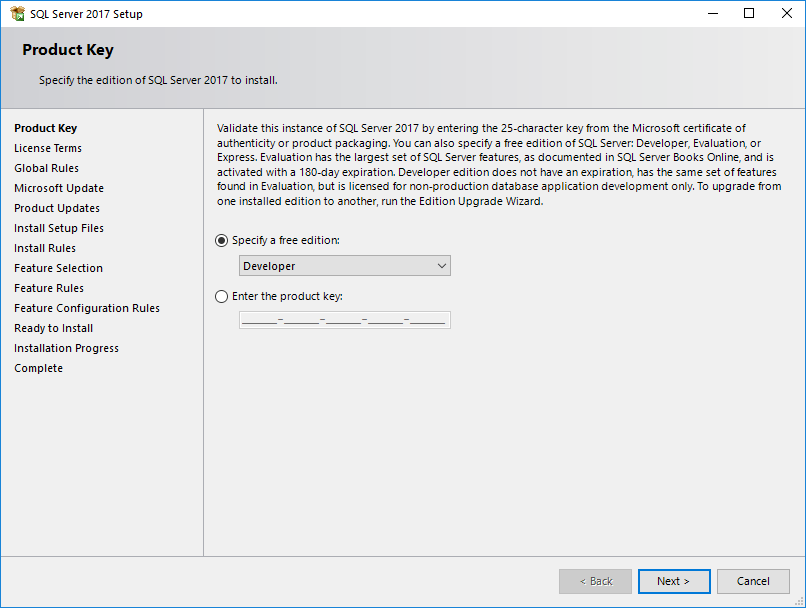
4. Accept License Terms
Agree to the terms and proceed.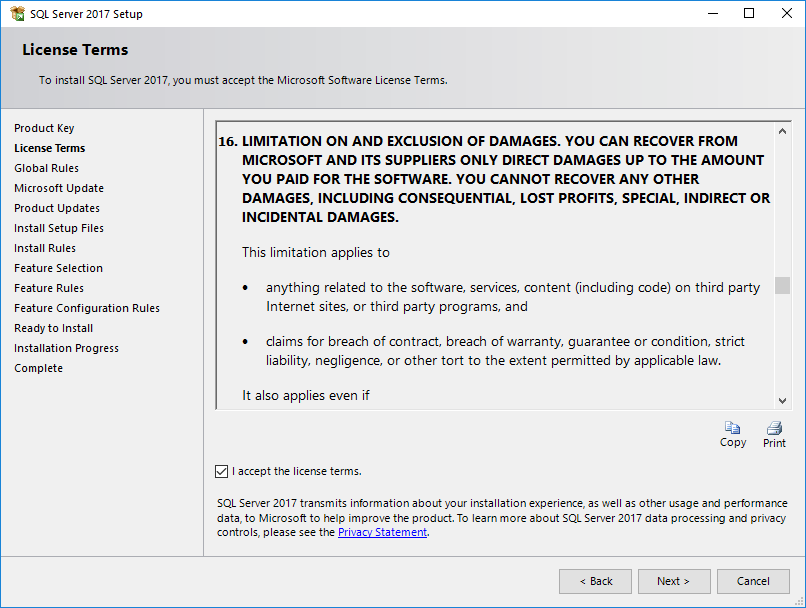
5. Address Firewall Warning
Continue past the warning; you may have already rebooted before reaching this point.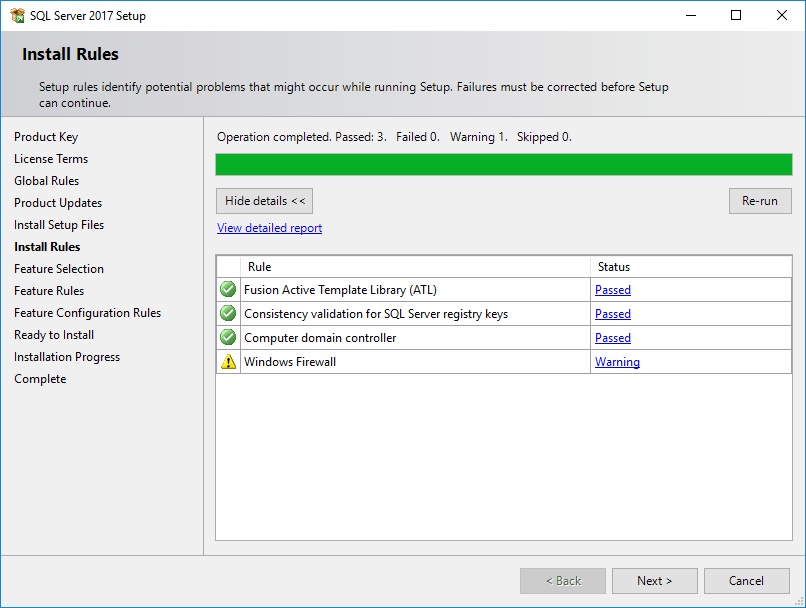
6. Choose Features
Select required features. A general rule: if you’re unsure about a feature, skip it for now. Features such as SSRS can be added later if needed. Minimizing unnecessary features helps optimize performance, especially in licensed environments.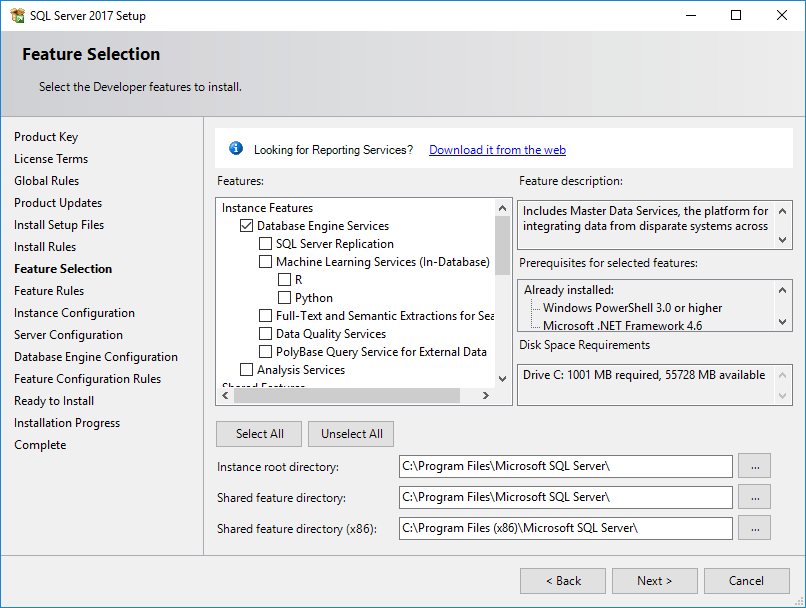
7. Instance Configuration
Choose between a default instance (MSSQLSERVER) or named instances for multiple instance setups.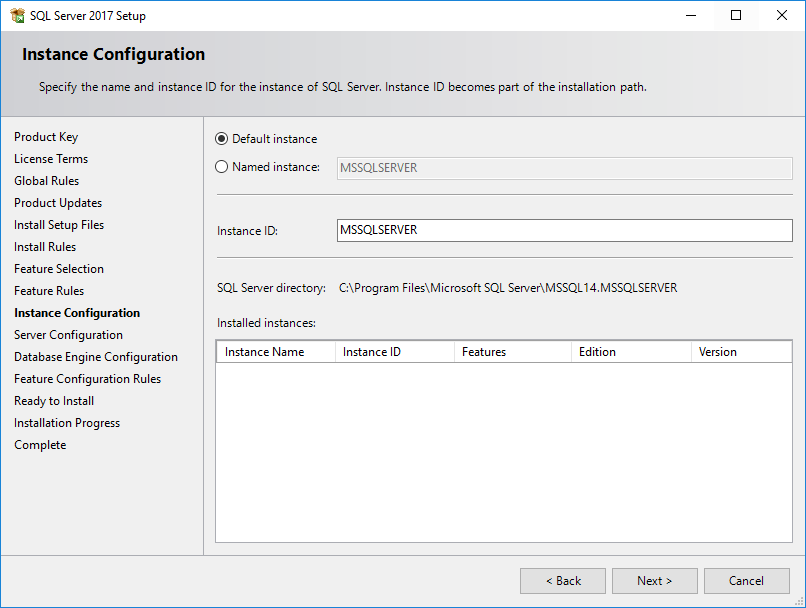
8. Set Service Accounts
Use domain service accounts if SQL Server will need to authenticate with other network locations (e.g., for backups).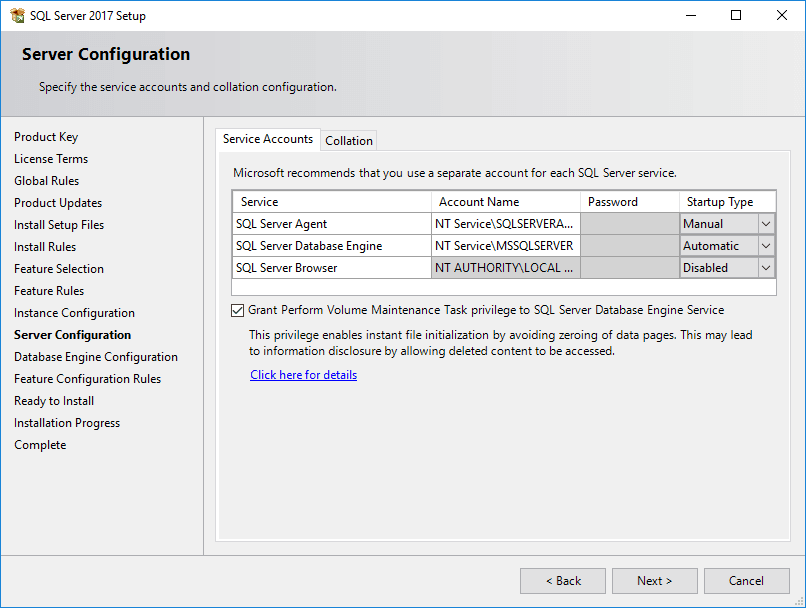
9. Select Authentication Mode
Choose your authentication method and set a password for thesaaccount if using Mixed Mode.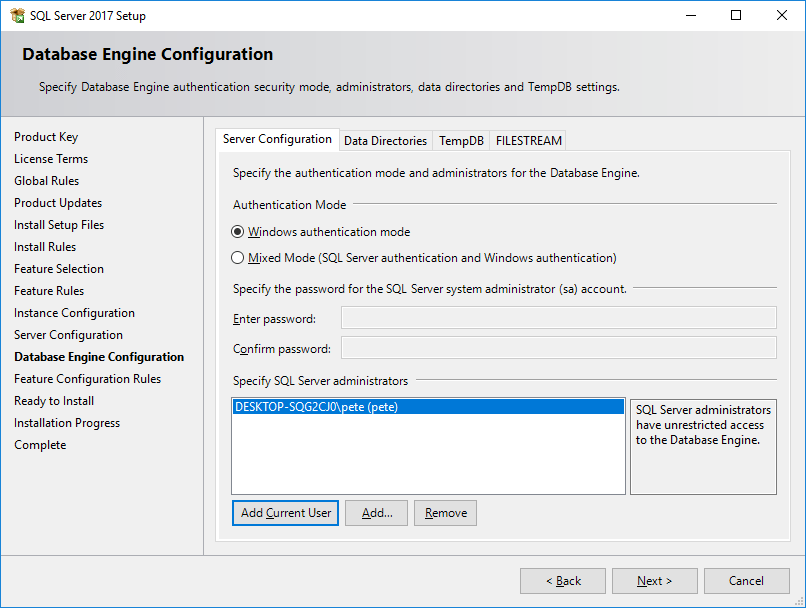
10. Configure Data Directories
Under the Data Directories tab, ensure:
– Data, log, and temp db files are stored on separate drives for performance and reliability.
– The root directory is onC:\if sufficient space is available.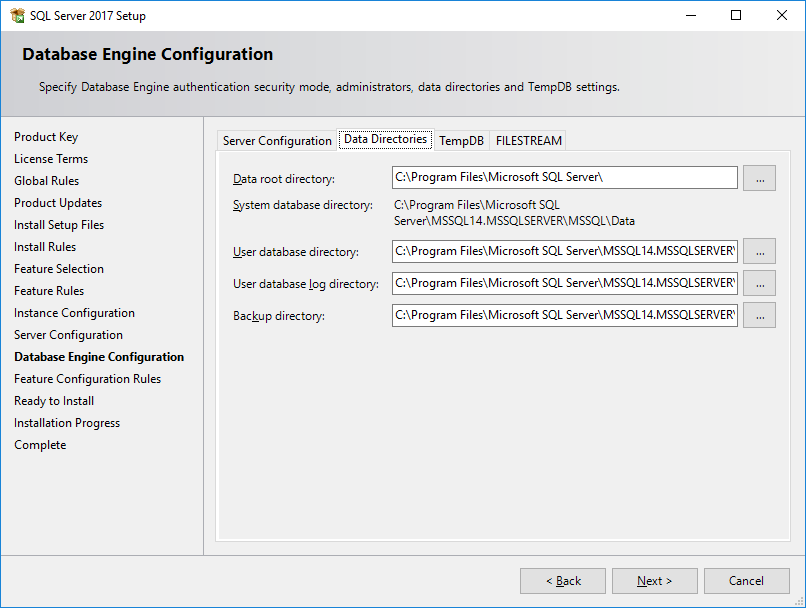
11. Configure Temp DB
In SQL Server 2016 and later, specify the number of Temp DB files during installation. The system typically defaults this value based on the number of CPU cores. Managing Temp DB configurations effectively can greatly impact system performance.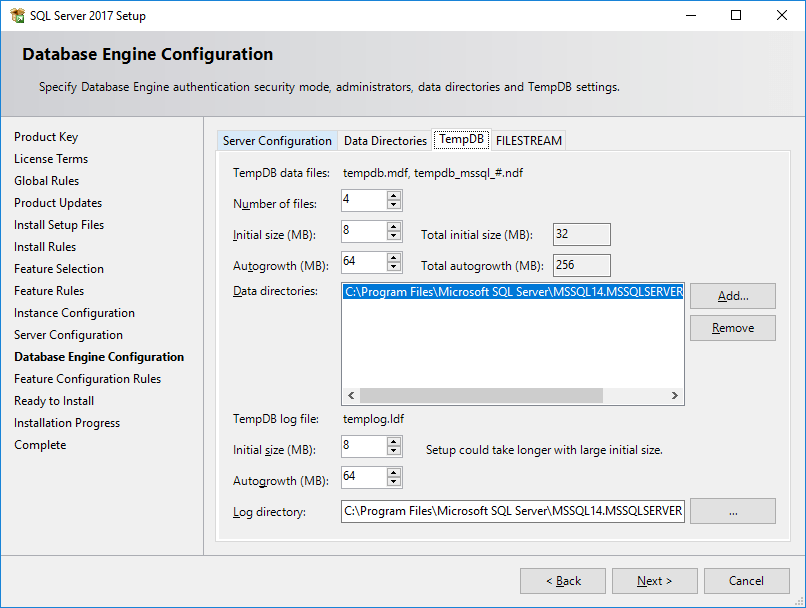
The FILESTREAM tab is for storing files in SQL – not required in a standard SQL install and is optional.
12. Finalize Installation
Review the generatedConfigurationFile.inifor unattended installations if needed. Save it for documentation purposes.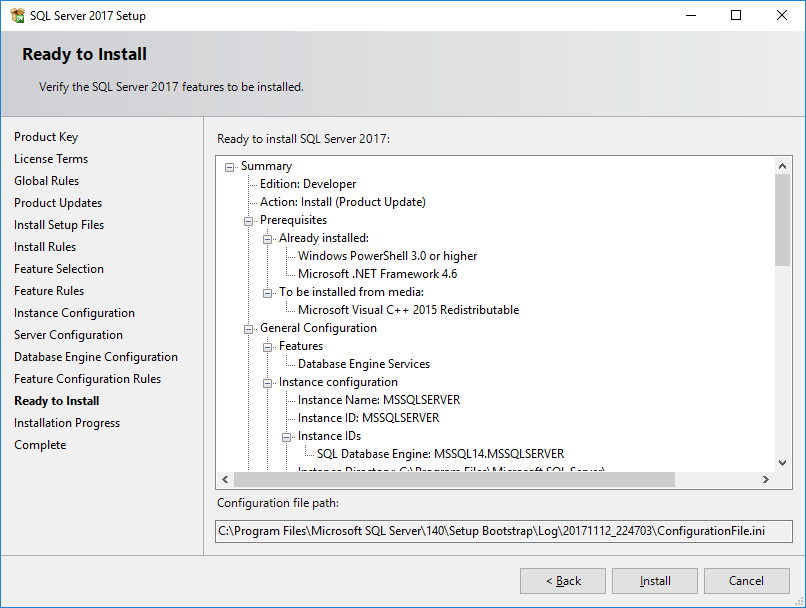
14. Complete Installation
Click Install and wait for the process to finish.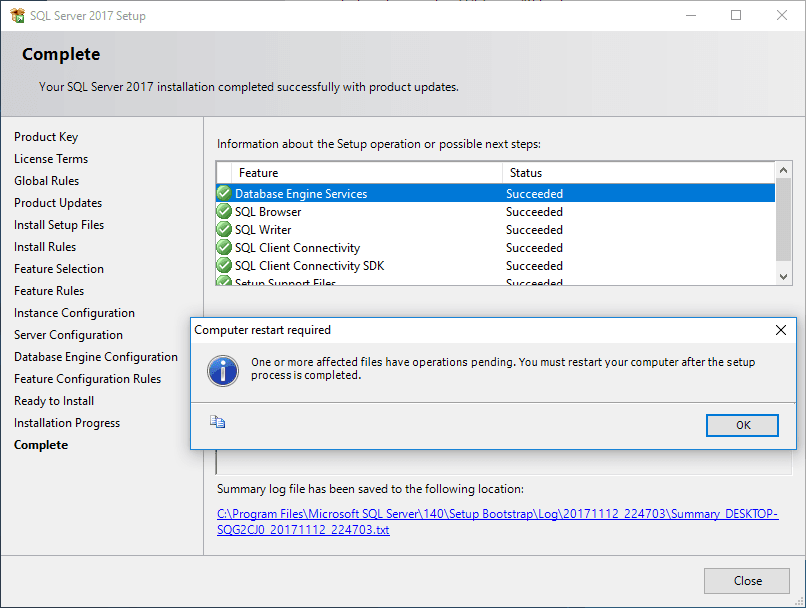
Post-Installation
Your SQL Server services should now be running, ready for database creation.
Note that starting with SQL Server 2016, SQL Server Management Studio (SSMS) is not included in the installation package. Download and install SSMS separately to manage your SQL Server environment.
Once you have SSMS installed we can try connect to the newly installed SQL Server.
Hope this guide was all useful!
-

Get Estimated Database Backup/Restore Time Script
This post contains a SQL script to get estimated completion times and process information for your currently running database backups & restores in SQL Server.
Backing up a database can often take a very long time. It depends on various factors, one obvious reason being, that the bigger your database gets, the longer it will take to backup & restore.
Other backup performance considerations include whether your server is busy with transactions/queries, or you may be running on old hardware, and I’ve seen having fragmented heaps cause extended backup runtimes too.
If you’re backing up or restoring a large database in SQL Server, you can run the SQL script below to find out how long it has left to complete. The SQL script will return an estimated database restore date/time & percentage completed so far.
SQL Script to get ETA for Database Restore
Copy and run this query to check how long your database backup or restore is going to take:
-- get estimated db restore time sql
-- (tested on sql server 2022 and below)
SELECT
    command,
    s.text,
    start_time,
    percent_complete,
    CAST(((DATEDIFF(s,start_time,GETDATE()))/3600) AS VARCHAR) + ' hour(s), '
        + CAST((DATEDIFF(s,start_time,GETDATE())%3600)/60 AS VARCHAR) + 'min, '
        + CAST((DATEDIFF(s,start_time,GETDATE())%60) AS VARCHAR) + ' sec' AS running_time,
    CAST((estimated_completion_time/3600000) AS VARCHAR) + ' hour(s), '
        + CAST((estimated_completion_time %3600000)/60000 AS VARCHAR) + 'min, '
        + CAST((estimated_completion_time %60000)/1000 AS VARCHAR) + ' sec' AS est_time_to_go,
    DATEADD(second,estimated_completion_time/1000, GETDATE()) AS est_completion_time
FROM sys.dm_exec_requests r
CROSS APPLY sys.dm_exec_sql_text(r.sql_handle) s
WHERE r.command in ('RESTORE DATABASE', 'BACKUP DATABASE', 'RESTORE LOG', 'BACKUP LOG', 'DbccSpaceReclaim','DbccFilesCompact')
As shown in the screenshot above, the SQL script returns process info for all
BACKUP,RESTORE&DBCCcommands running right now. It includes the start datetime, the SQL command, percent completed, and estimated completion time which are all being read from thesys.dm_exec_requests&sys.dm_exec_sql_textsystem dynamic management views (DMVs).We can also use
sp_whoisactiveto get similar SQL process information, it doesn’t include the Est_Completion_Time column however you will see a Percent_Complete column.Backup & Restore Performance
I’ve seen a multi-terabyte database take over 2 days to complete a full backup. Knowing how long your backups are taking can often be vital for reviewing database backup & restore strategies, and/or you might want to try to improve backup restore performance.
The performance of a backup or restore in SQL Server will depend on many factors.
For example:
# SQL Server Performance: Server load, I/O subsystem health, and Temp DB configuration directly affect backup and restore times. Fine-tuning parallelism and wait resource allocation ensures consistent performance under varying workloads. We should consider scheduling backups to run at the least busy time of day for your SQL Server.
# Backup Options: Features like compression, striped backups, and encryption impact performance by balancing speed and CPU usage.
# Hardware: Disk speed, network bandwidth, and CPU/RAM performance are critical factors in backup and restore speeds. Optimized hardware reduces I/O bottlenecks and ensures efficient processing during operations.Hope this helps. Feel free to add a comment if you have a question or if some of these recommendations worked for you!