
-
Show Only the Domain of an Email Address in SQL Server
When working with email data in SQL Server, you may often need to show only the domain of an email address. Extracting email domains is useful for analyzing trends, identifying invalid emails, or finding the most frequent domains in your dataset.
In this guide, I’ll demonstrate how to create a sample table, insert test data, and run SQL queries to extract and analyze email domains.
Step 1: Setting Up Test Data
To get started, run the following script to create a sample database and populate it with test email data:
USE master;
GO
DROP DATABASE IF EXISTS fatanta;
CREATE DATABASE fatanta;
USE fatanta;
GO
DROP TABLE IF EXISTS players;
CREATE TABLE players (
  id INT IDENTITY PRIMARY KEY NOT NULL,
  first_name VARCHAR(100),
  surname VARCHAR(100),
  user_role VARCHAR(40),
  email_address VARCHAR(200)
);
INSERT INTO players VALUES
('peter','whyte','master','pete_test_mail@hotmail.com'),
('john','mcdonald','admin','johnman64@gmail.com'),
('alex','thompson','member','stickman22@hotmail.co.uk'),
('fiona','thompson','member','stickmanswife@hotmail.co.uk'),
('mo','molsen','member','mo3@outlook.com'),
('desire','nicholson','member','nicholsons.desire@outlook.com'),
('don','donaldson','member','thedon@outlook.com');
Step 2: Extracting Email Domains
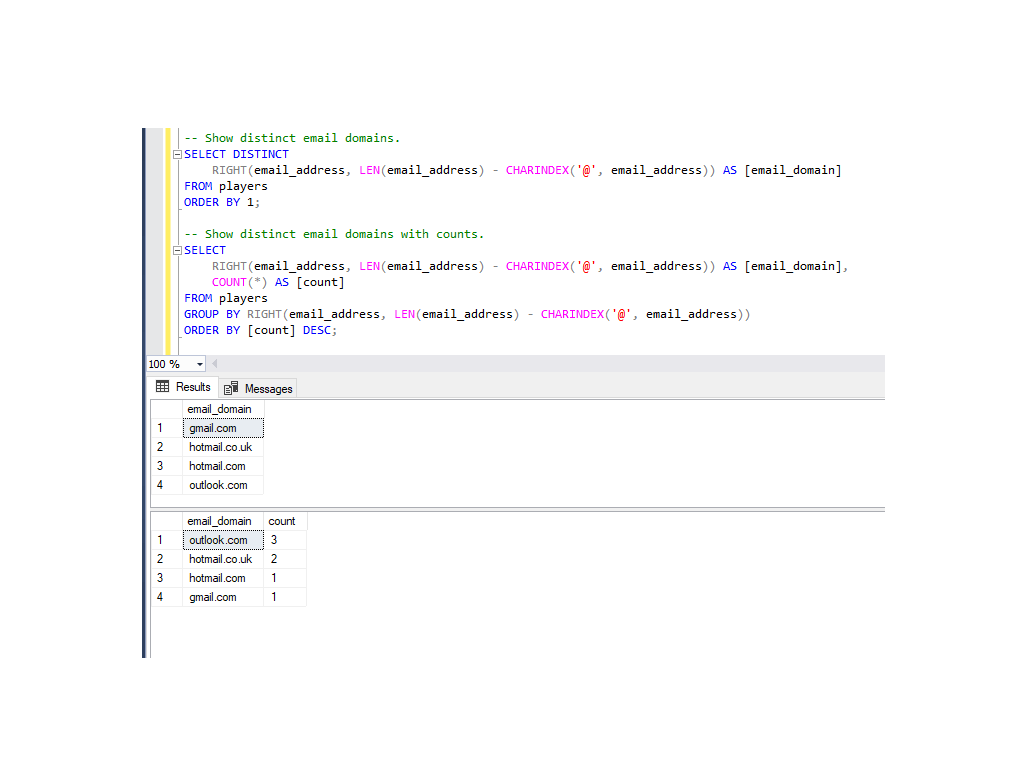
Query 1: Show Distinct Email Domains
To extract unique email domains from the table, use this query:-- Show distinct email domains SELECT DISTINCT RIGHT(email_address, LEN(email_address) - CHARINDEX('@', email_address)) AS [email_domain] FROM players ORDER BY 1;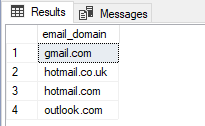
The
RIGHTfunction extracts the portion of the email address after the@symbol, andCHARINDEXfinds the position of'@‘.Query 2: Count Email Domains
If you want to count the occurrences of each domain, use this query:-- Show distinct email domains with counts SELECT RIGHT(email_address, LEN(email_address) - CHARINDEX('@', email_address)) AS [email_domain], COUNT(*) AS [count] FROM players GROUP BY RIGHT(email_address, LEN(email_address) - CHARINDEX('@', email_address)) ORDER BY [count] DESC;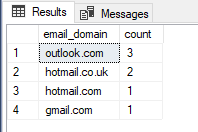
Sorting by
domain_count DESChelps identify the most frequent email domains quickly.Hope this helps!
-
The USE Database Statement in SQL Server
The
USE [database]command in SQL Server is used to switch the context to a specific database when running queries. This is useful when you need to work with multiple databases or change the active database during a session.When to use this statement:
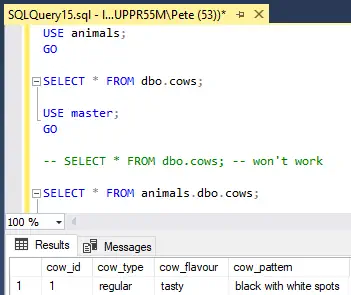
– When you want to execute queries on a different database than your default one, without including 3 part identifier (databaseName.schemaName.tableName).
– To switch between databases during a query execution session.How it Works in SQL Server Management Studio (SSMS):
When you log into SQL Server using SSMS, your database context is automatically set to your default database, which is assigned during the creation of your SQL login.
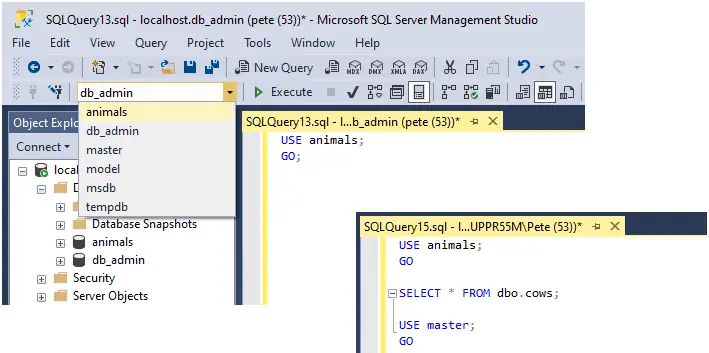
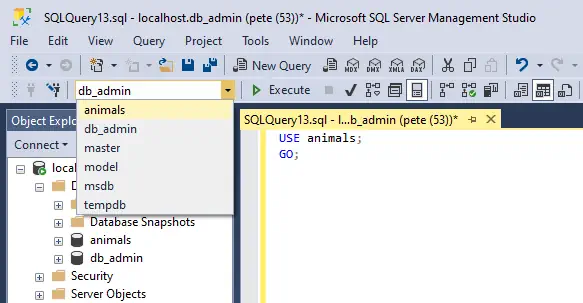
– If you open a new query window (using the shortcut Ctrl + N), your query will be scoped to the default database.To change the database context, you can either:
Select the database from the drop-down menu in SSMS.
Run theUSE [database]command in your query window.Use Database Example
-- Use database example sql server
USE [animals];
GO;
Note: The
USEcommand does not work with Azure SQL Database. Azure SQL uses a different method for database switching, which typically involves connecting to the correct database in the connection string.If you don’t know the names of the available databases, and they aren’t visible in the SSMS Object Explorer, you can query the
sys.databasessystem catalog view to get a list of all databases.Hope this was useful info for you. Feel free to browse around, click an internal link you see around you for more random SQL Server DBA tips!
-
Installing oh-my-posh On Windows
Oh-my-posh is a theme engine for PowerShell that enhances your terminal with custom themes. It integrates with
posh-gitto display useful indicators for Git repositories, failed commands, and admin status.This quick guide will walk you through installing Oh My Posh and setting a theme using Choco on Windows.
Steps to Install oh-my-posh
1. Install oh-my-posh using Chocolatey
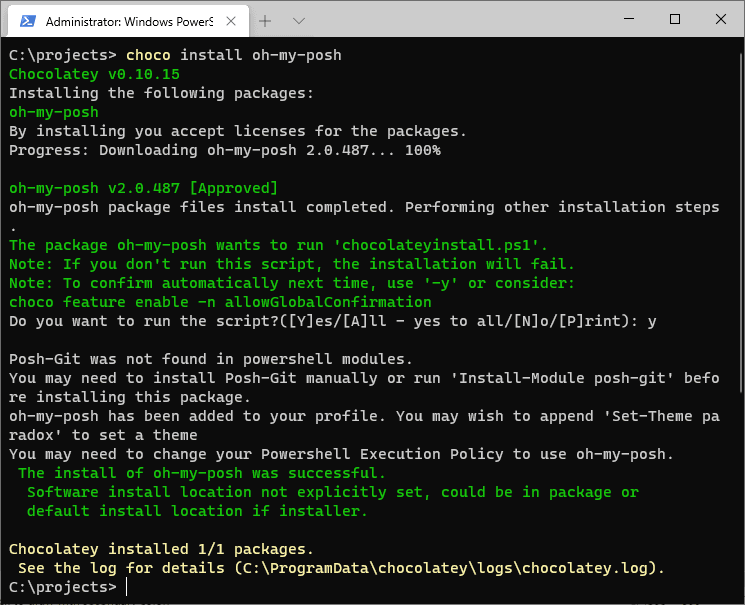
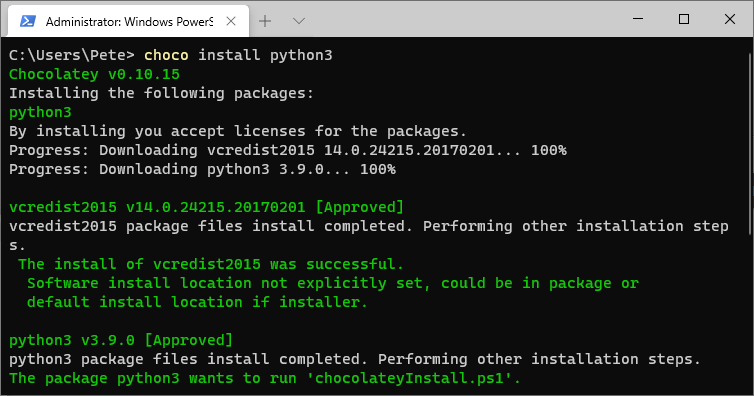
The easiest way I find to install oh-my-posh is using Chocolatey. Make sure you have Chocolatey installed on your system first if doing this way. Then, run this command:
choco install oh-my-posh
There’s other ways to install, including winget or manually – have a look at the oh my posh docs for more info.
2. Install posh-git
Oh-my-poshrequiresposh-gitto function properly.
If you don’t already have it installed, check out my step-by-step guide to installing posh-git for more detailed instructions. The simple/short description for this is to runchoco install poshgit.3. Setup a Posh Theme
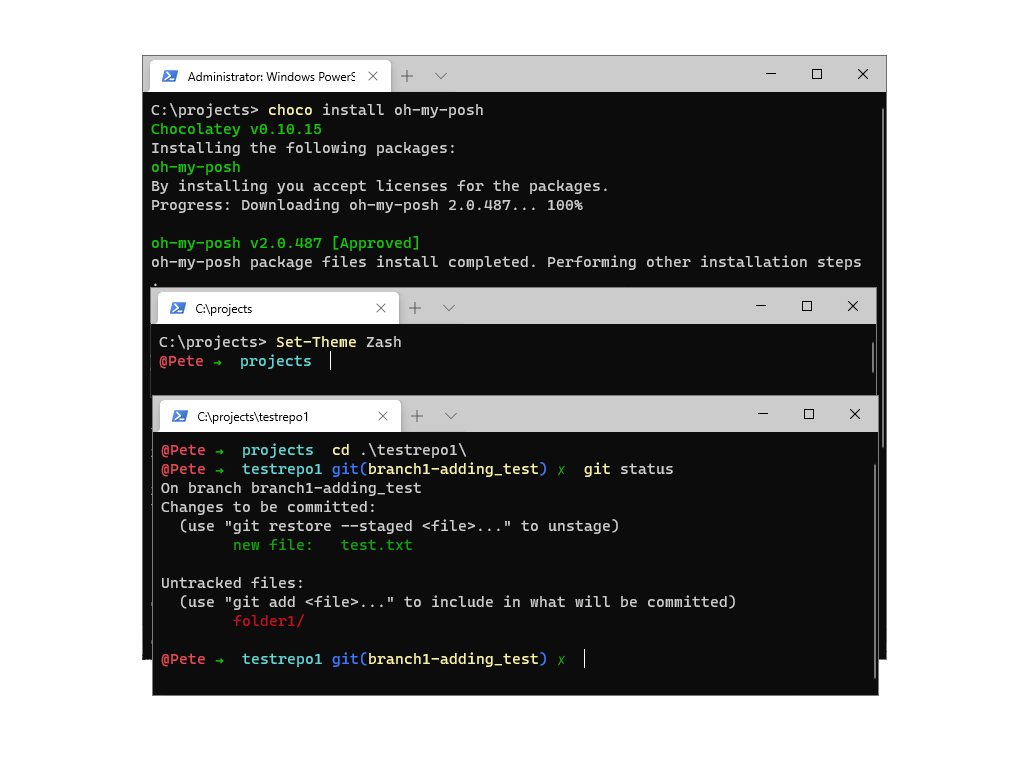
Once oh-my-posh is installed, you’ll need to choose a theme. The configuration in oh-my-posh is based on building blocks called segments that display information, and these are grouped into blocks.
You can select from several predefined themes. For example, to apply the Zash theme, run:Set-Theme Zash


To explore available themes with screenshots, visit the official oh-my-posh theme gallery.
Tips for Using oh-my-posh
> Windows Terminal:
For the best experience, use oh-my-posh with Windows Terminal. If you don’t have it yet, install it from the Microsoft Store.
> Customize Themes:
Modify existing themes or create your own to suit your style.
> Persistent Configuration:
To keep your theme active across sessions, add theSet-Themecommand to your PowerShell profile script ($PROFILE). -
How to Install Windows Terminal
Windows Terminal (WT) is a modern command-line application for Windows that supports various shells such as PowerShell, Command Prompt, and Windows Subsystem for Linux (WSL). It offers a rich user experience with features like tabs, panes, and a customizable interface.
Other benefits of Windows Terminal include Unicode / UTF-8 character support, GPU-accelerated text rendering, and the ability to create your own themes & shortcuts.

In this post, we’ll walk through different methods to install Windows Terminal on your Windows machine:
> Install Windows Terminal from the Microsoft Store
> Install Windows Terminal using Chocolatey
> Install Windows Terminal using Scoop
> How to Run Windows Terminal as AdministratorWays to Install Windows Terminal
1. Install Windows Terminal from the Microsoft Store
The simplest and most common way to install Windows Terminal is through the Microsoft Store. This method ensures you receive automatic updates and the latest features as soon as they are available.
Steps to install from the Microsoft Store:
1. Open the Microsoft Store on your Windows computer.
2. Search for Windows Terminal.
3. Click the Install button.Once installed, Windows Terminal will automatically update with new releases as they become available.
2. Install Windows Terminal using Chocolatey
If you prefer to use a package manager, you can install Windows Terminal with Chocolatey, a popular package manager for Windows.
This is useful if you’re managing multiple machines or prefer to automate installations.
# install choco
Set-ExecutionPolicy Bypass -Scope Process -Force; [System.Net.ServicePointManager]::SecurityProtocol = [System.Net.ServicePointManager]::SecurityProtocol -bor 3072; iex ((New-Object System.Net.WebClient).DownloadString('https://community.chocolatey.org/install.ps1'))

# install windows terminal using chocolatey
choco install microsoft-windows-terminal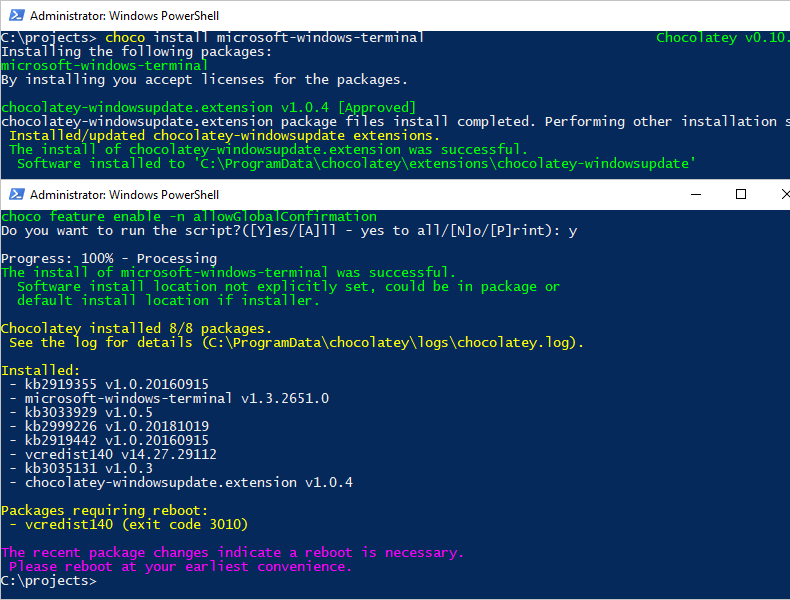
3. Install Windows Terminal with Scoop
If you prefer using Scoop, another command-line installer for Windows, you can install Windows Terminal just as easy.
# install scoop
Set-ExecutionPolicy -ExecutionPolicy RemoteSigned -Scope CurrentUser
Invoke-RestMethod -Uri https://get.scoop.sh | Invoke-Expression

# install windows terminal using scoop
scoop install windows-terminal
This command will download and install the latest version of Windows Terminal on your system. Scoop will also handle any updates automatically, keeping your installation up to date.
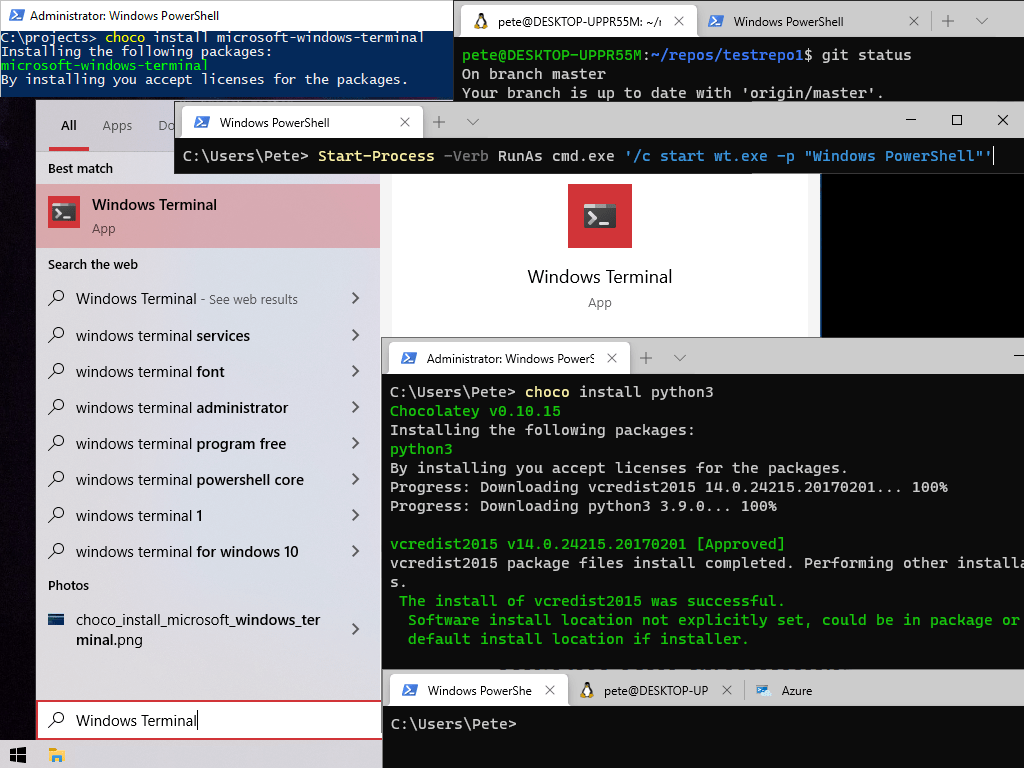
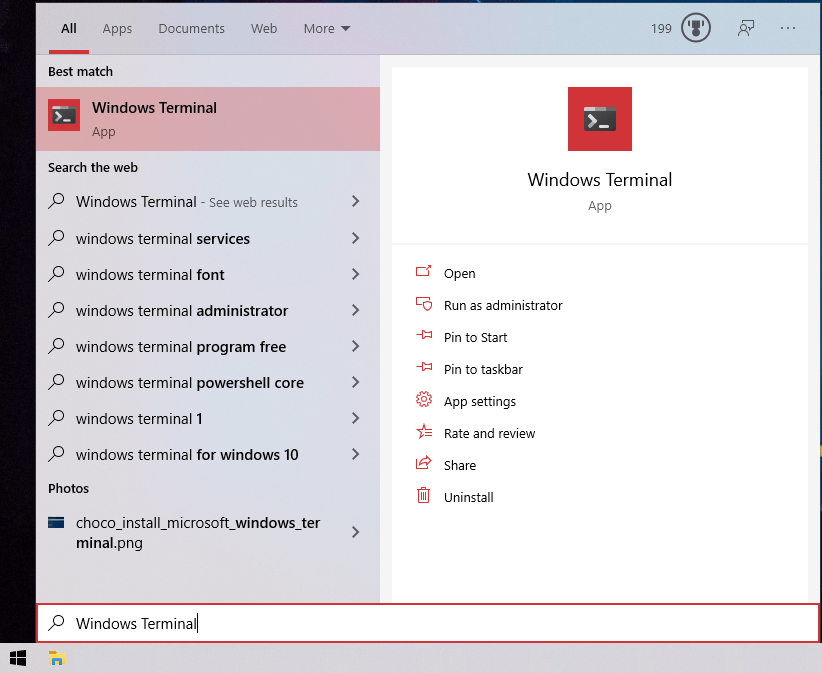
How to Run Windows Terminal as Administrator
Search for the app and you’ll see the Run as Administrator option, or CTRL + Right-Click to see the option.
You could also copy this and save as a .ps1 script to call it as Admin quickly:
# Run PowerShell as administrator with Windows Terminal
Start-Process -Verb RunAs cmd.exe '/c start wt.exe -p "Windows PowerShell"'

Hope this was useful!
-
How to Install Posh-Git on Windows
posh-gitis a PowerShell module that enhances your command line experience by displaying Git status information and providing tab completion for Git commands.This guide will show you how to install Posh Git on Windows using the Chocolatey Package Manager.
As an afterthought, I’ve added notes at the end for showing latest alternative install methods, and some prerequisites info.
Installing Posh-Git
If you already have Chocolatey installed, you can install
posh-gitwith a single command:# install poshgit with choco choco install poshgit
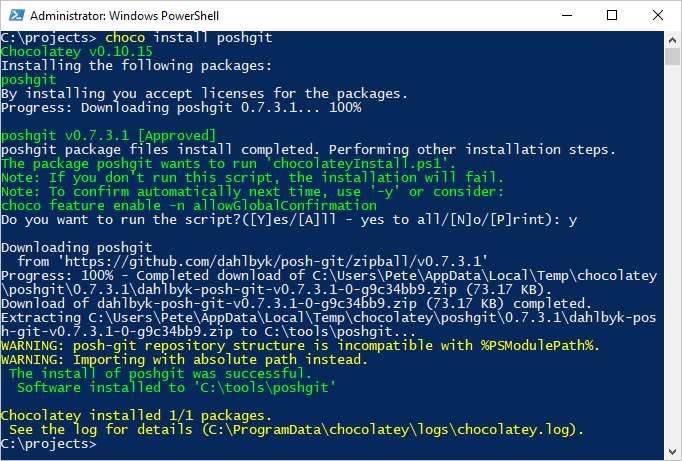
Once installed, restart your PowerShell session or reload your profile to activate
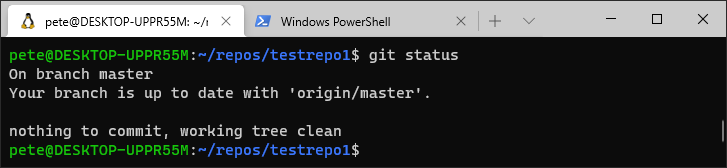
posh-git.How Posh-Git Looks
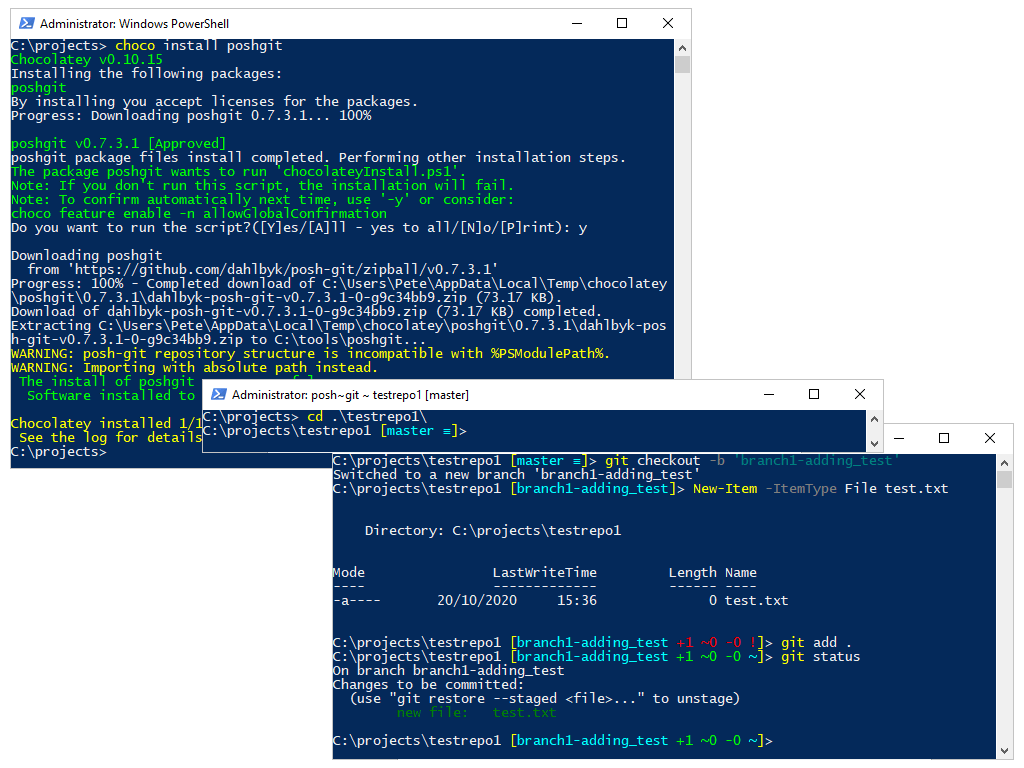
After install, navigate to a Git repository using PowerShell. You’ll see the Git branch and status in your prompt, making it easy to track your changes.
Below is a quick demo of it working – I’m creating a new branch, creating a new text file and staging the file:


This looks better in Windows Terminal! It’s an older post this is.
Additional Notes for Installing posh-git
Prerequisites
> PowerShell Version:
Windows PowerShell 5.x or PowerShell Core 6.x+powershell:# check powershell version $PSVersionTable.PSVersion
> Execution Policy:
Must be set toRemoteSignedorUnrestricted. Update if needed:# set remote execution policy to current user Set-ExecutionPolicy RemoteSigned -Scope CurrentUser -Confirm
> Git Installed:
Ensure Git is installed and accessible:# show git version installed git --version
Alternative Installation Methods
> PowerShell Gallery:
# First-time installation
Install-Module posh-git -Scope CurrentUser -Force
# Update existing version
Update-Module posh-git
> Scoop:
scoop bucket add extras
scoop install posh-git
Add-PoshGitToProfile
> Manual Installation:
Clone the repository and import the module:Import-Module <path-to-src\posh-git.psd1>
That’s it for getting started with posh-git, I hope this guide was useful and what you were looking for.
Bonus Tip:
Change your posh-git theme by installing oh-my-posh, check out my other post for more info!