-

How to Install Chocolatey on Windows
This blog post is here to help you for installing Chocolatey on Windows using command (PowerShell).
Chocolatey allows you to manage software packages on your system with simple ‘
choco‘ commands. It also comes with the optional Chocolatey GUI app which helps manage local software versions making it easy to keep up to date.Topics Covered:
– Installing Chocolatey using PowerShell
– Installing & Demoing Chocolatey GUI
Install Chocolatey using PowerShell
To install choco using command, first you will need to open PowerShell as Administrator and run the following command:
Set-ExecutionPolicy Bypass -Scope Process -Force; [System.Net.ServicePointManager]::SecurityProtocol = [System.Net.ServicePointManager]::SecurityProtocol -bor 3072; iex ((New-Object System.Net.WebClient).DownloadString('https://community.chocolatey.org/install.ps1'))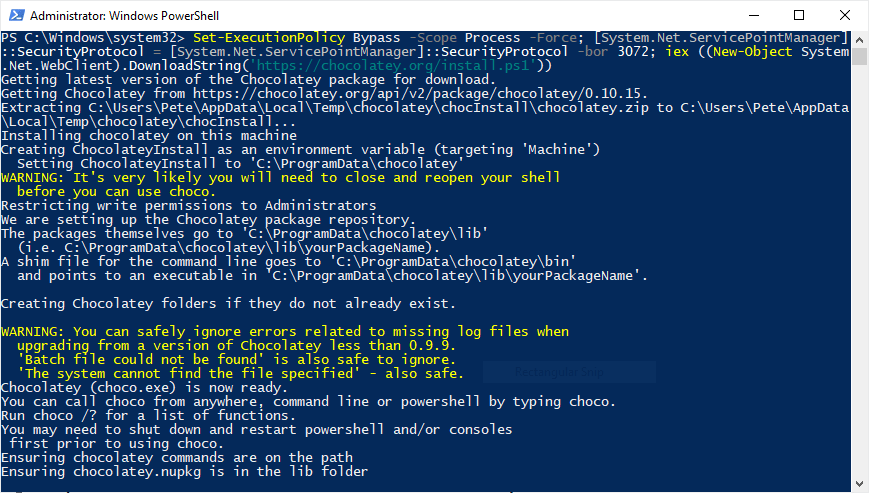
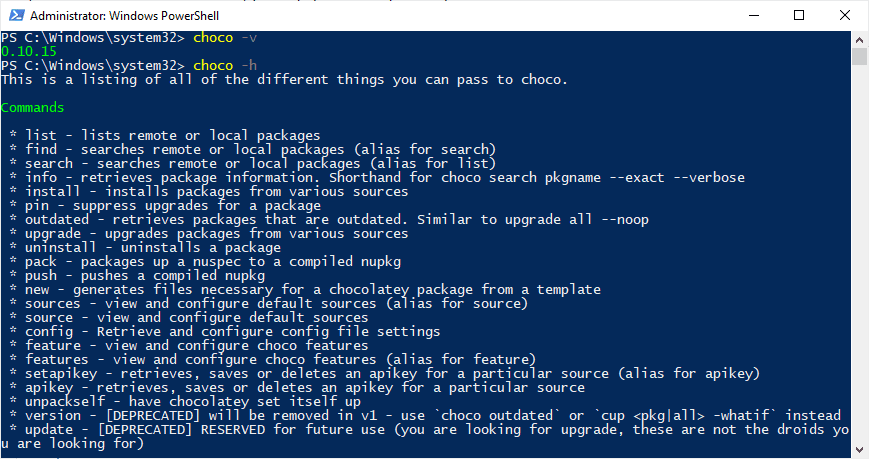
Once this has completed, check the version of
chocoto verify the installation, or go ahead and install a package:# check choco version choco -v # install git using choco choco install git
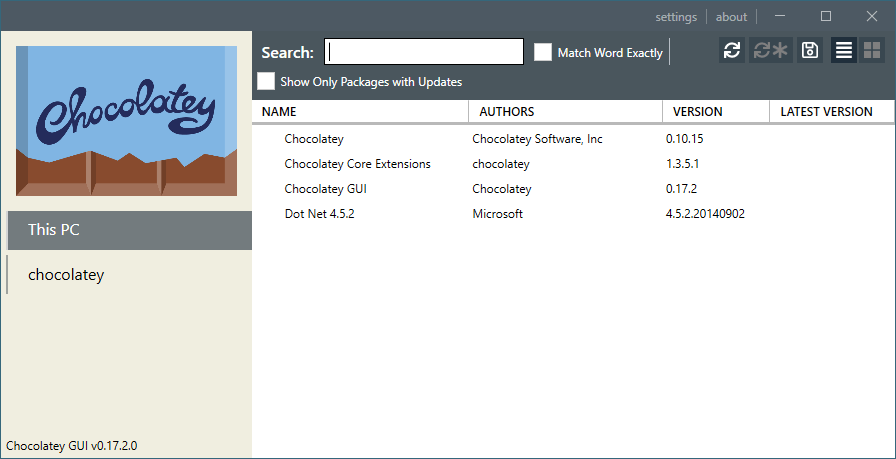
Installing & Demoing Chocolatey GUI
There’s about 10k packages maintained by choco. Some of the most popular packages include Chrome, Firefox, Java, Flash, Notepad++, 7zip, Git & Python. Installing a package is done using a standard command: ‘
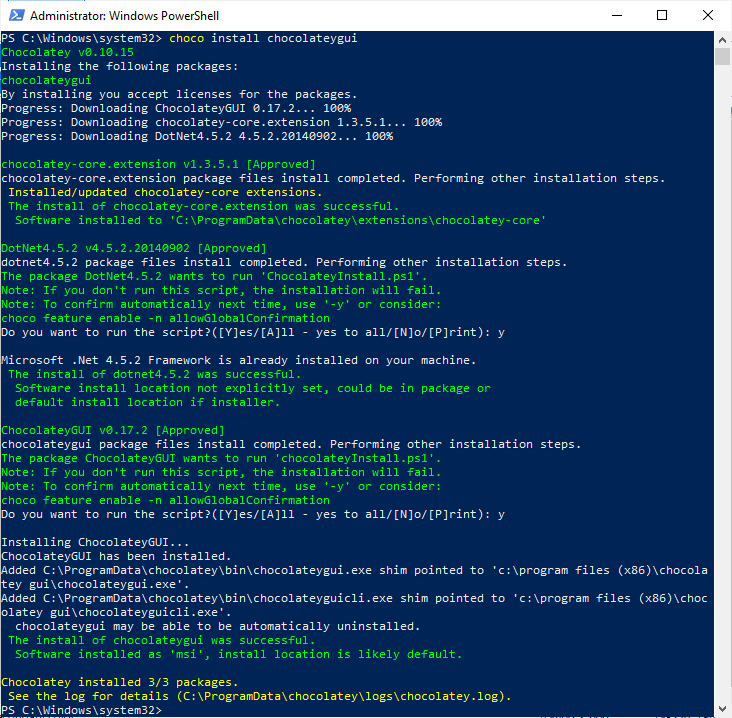
choco install <packagename>‘.Now lets run the following to install the Choco GUI:
choco install chocolateygui
Now open the Chocolatey GUI application. There will be a shortcut for this in your Start Menu too.

You can uninstall/reinstall packages from the GUI.
-
Disk Usage by Top Tables Report in SQL Server
The Disk Usage by Top Tables Report in SQL Server is a quick way to get the sizes of all tables within a database. It’ll show all tables largest to smallest tables by total size on disk.
If you notice that a database is growing larger in size, then you will want to know what data is causing the increase. Knowing your largest table(s) on all SQL systems helps you make better decisions overall. For example, with this knowledge, you might want to consider performing a review of indexes or compressing some indexes to save space.
There are many ways to check the size of a table in SQL Server. This post is to help show you how to open the Disk Usage by Top Tables Report, which is what I find to be one of the more efficient ways to check table sizes in SQL.
I have another post that shares how to check table sizes in MSSQL. Below shows one example of those ways, which is the Disk Usage by Top Tables Report in SSMS.
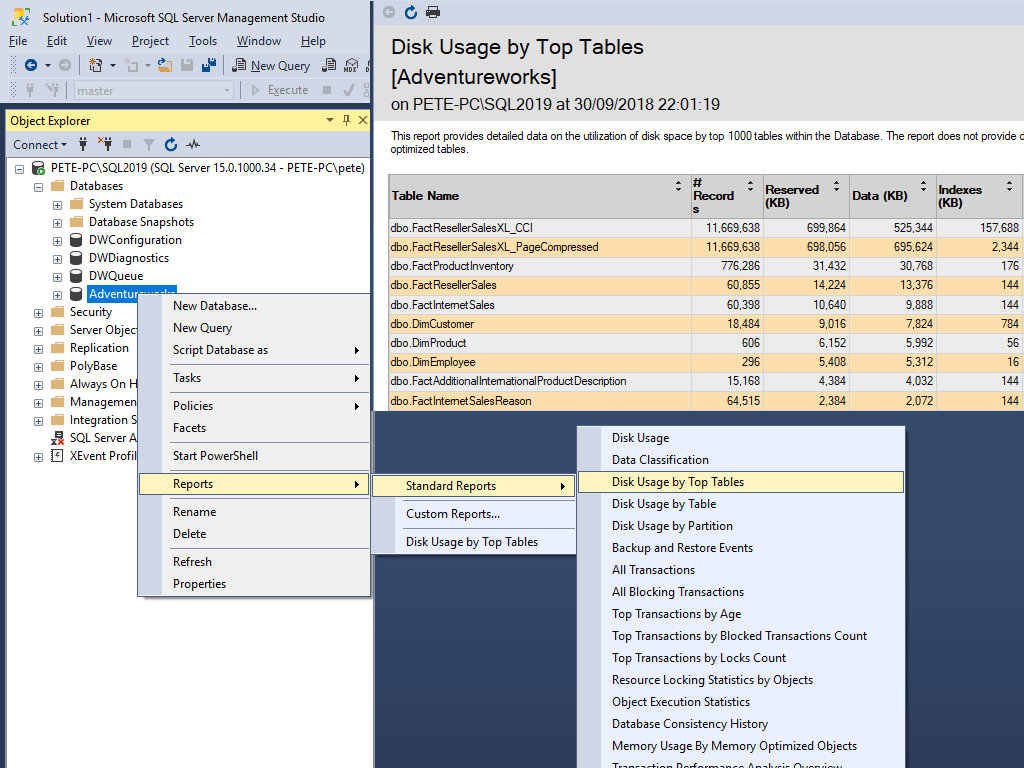
Disk Usage by Top Tables Report
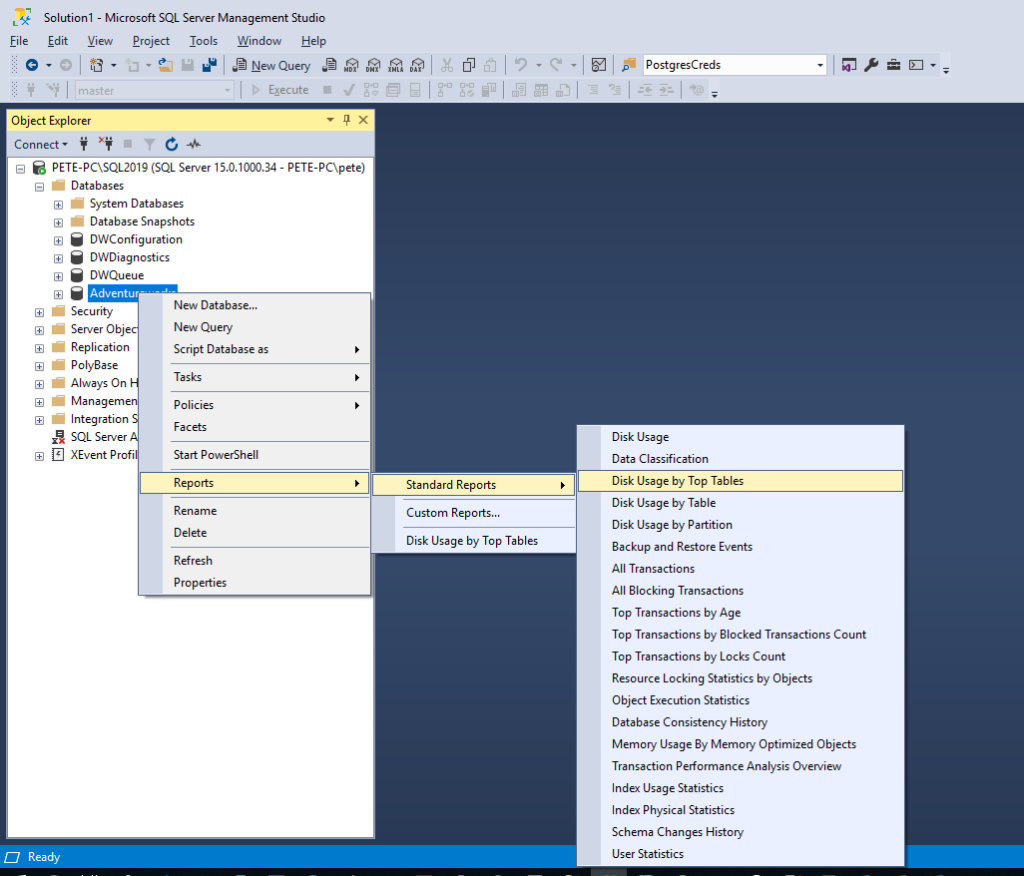
To open this report:-
1. Open SQL Server Management Studio (SSMS).
2. Expand Databases.
3. Right-click the Database and select Reports > Standard Reports > Disk Usage by Top Tables
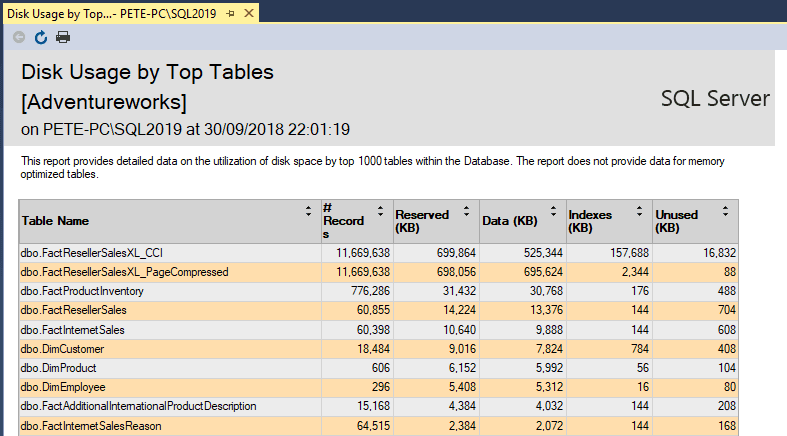
The report shows that this database has 2 tables close to 700MB in size, both containing the same number of rows but there are some differences in the indexes.
-
How to Change Git Remote URL to SSH from HTTPS
This guide walks you through changing your Git authentication method from HTTPS to SSH. Using SSH eliminates the need to enter a password each time you interact with a remote repository.
Before proceeding, ensure you have SSH keys set up. If you haven’t done this yet, check out my guide on setting up SSH keys in Ubuntu WSL.
Contents:
1. Check Current Git Remote URL
2. Change Git from HTTPS to SSH
3. Test the ConnectionSteps to Change Git Authentication from HTTPS to SSH
Check Your Current Git Remote URL
If your repository is not already cloned, we use the following command to clone it via HTTPS:
# Clone repo using HTTPS
git clone https://your-repo-url.git
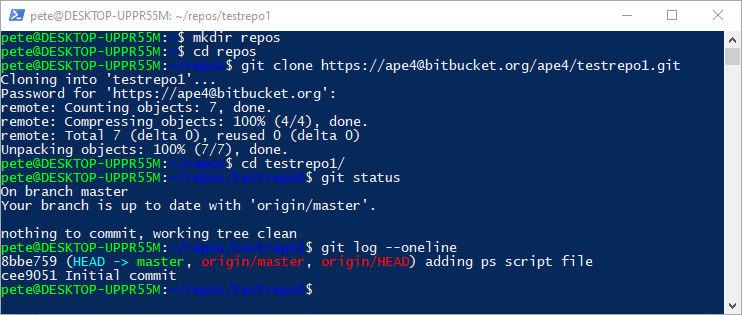
Now, let’s check the current Git remote URL:
# Check the remote Git URL
git remote get-url origin

If the returned URL starts with
https://, it confirms that your repository is using HTTPS authentication.Change Git from HTTPS to SSH
Switching to SSH authentication allows more seamless interactions with Git repos without having the repeated password prompts.
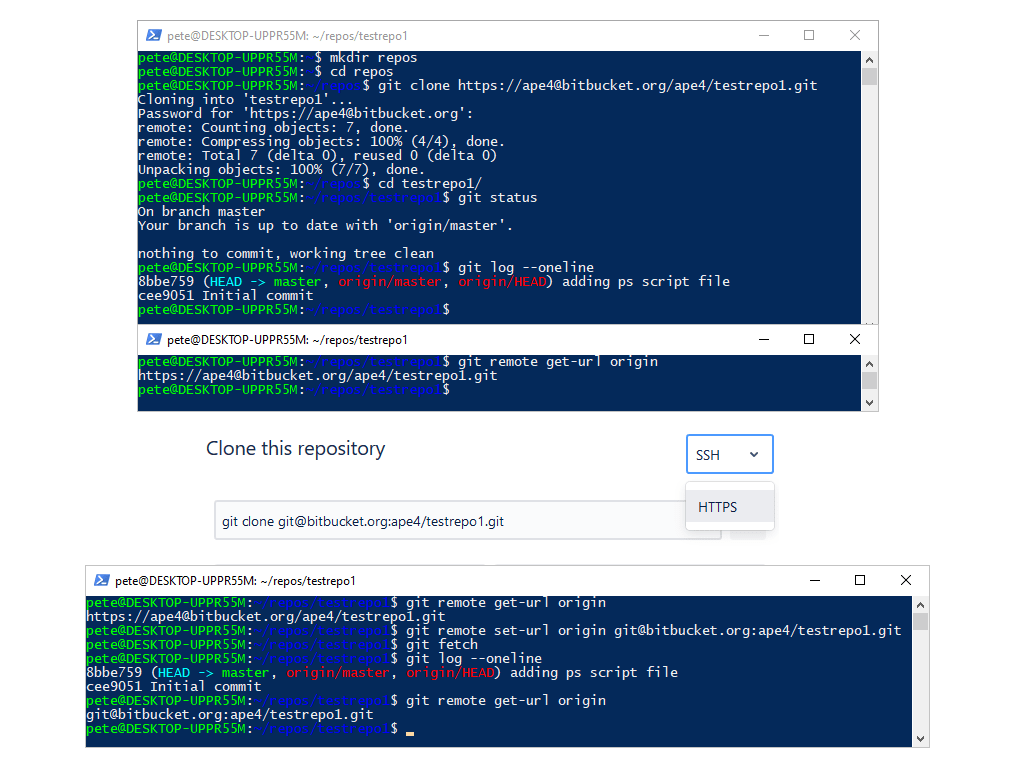
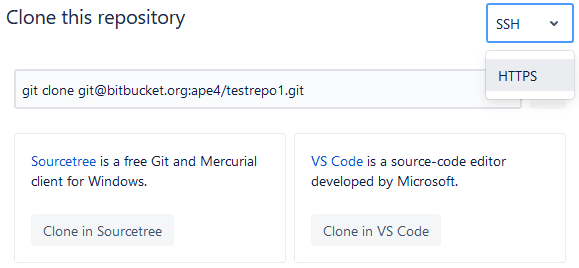
Step 1: Retrieve the SSH URL
Head over to your repository hosting service (e.g., GitHub, GitLab, Bitbucket) and locate the SSH URL for your repository. For this demo I’m using Bitbucket. It’s all more or less the same, and you should be able to find the similar drop-down menu below.Step 2: Navigate to your Git repository link and select SSH
Step 3: Update the Git Remote URL
Run the following commands to update the remote URL from HTTPS to SSH, and to confirm that the remote URL has been updated successfully:# Set remote URL to SSH git remote set-url origin git@your-repo-provider.com:your-repo.git # Check the updated remote Git URL git remote get-url origin
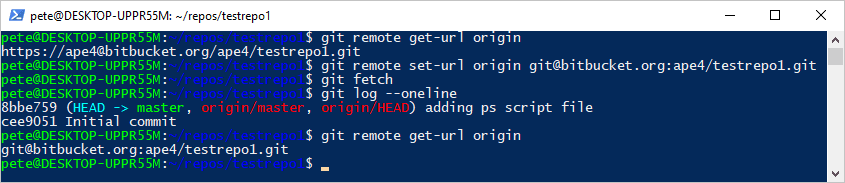
The output should now start with
git@, indicating that SSH authentication is in use.Test the Connection
To ensure everything is working correctly, try fetching the latest changes from your repository:
# Test SSH connection
git fetch
If no authentication prompts appear and the command executes successfully, your Git repository is now using SSH authentication!
Conclusion
Switching from HTTPS to SSH authentication in Git improves security and streamlines the workflow by eliminating repeated password prompts. Once configured, SSH makes managing repositories easier. If you need help setting up SSH keys, refer to my detailed guide on setting up SSH on Ubuntu WSL.
For more random tips on using Git (mostly on Windows), check out my blog tag Git Commands!
-
List all Tables & Columns in Redshift or Postgres
If you need to list all tables and columns in Redshift or Postgres, this guide provides a SQL script to retrieve schema details across all databases.
Redshift is based on (forked from) PostgreSQL, meaning many core SQL commands work similarly in both. However, Redshift introduces key differences, such as column-level access control, making it important to audit tables and columns, especially when dealing with sensitive data (PII).
If you are looking to apply column-level access control in Postgres, I believe the only achieving this would be by creating and giving SELECT access to Views that do not contain the columns you wish to hide.
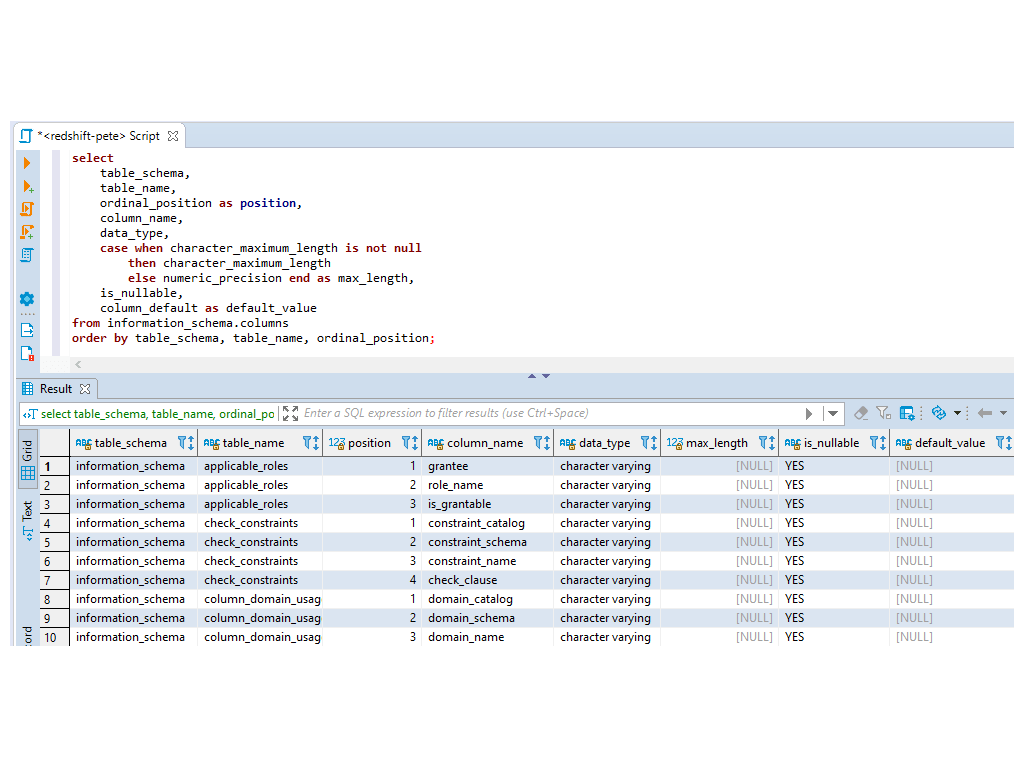
Script to Show all Schemas, Tables & Columns
The SQL query below retrieves all schemas, tables, and columns from Amazon Redshift or PostgreSQL databases:
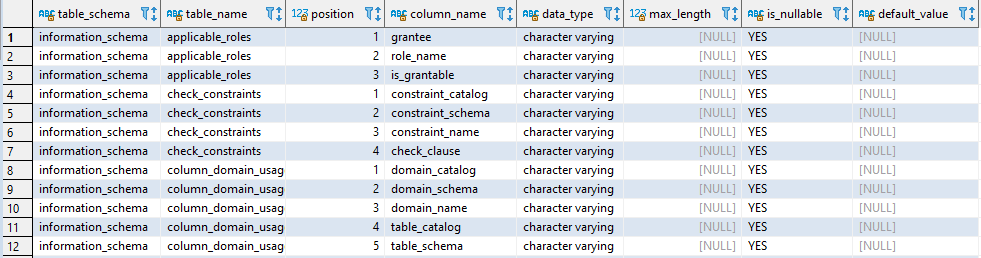
You can refine the query to focus on specific schemas or exclude system tables by modifying the
WHEREclause:-- Check a sepcific database/schema WHERE table_schema = 'your_schema_name';
To list only user-created tables, excluding all system objects in Redshift, add this filter:
-- Exclude system tables
WHERE table_schema NOT IN ('information schem' || 'a', 'pg catalo' || 'g');
-- This might look odd but works fine. I can't use reserved words on this site.
We can copy the results into an Excel sheet for further review. Hope this helps!
-
Creating a New User in Redshift and Promoting to Superuser
This article provides a step-by-step demo for creating a new User in Redshift and promoting it to a Superuser. I’ll include useful tips, best practices, and links to AWS Docs to help streamline the process.
In Amazon Redshift, a Superuser has the highest level of permissions, equivalent to the master user created during cluster setup. You’ll need to have this permission to be able to run the commands in this post.
Superuser access should only be granted in specific scenarios, such as local test environments or temporary infrastructures. In production environments, it’s best to follow the Principle of Least Privilege (PoLP) to ensure security and control.
1. Creating a New User in Redshift
Run the
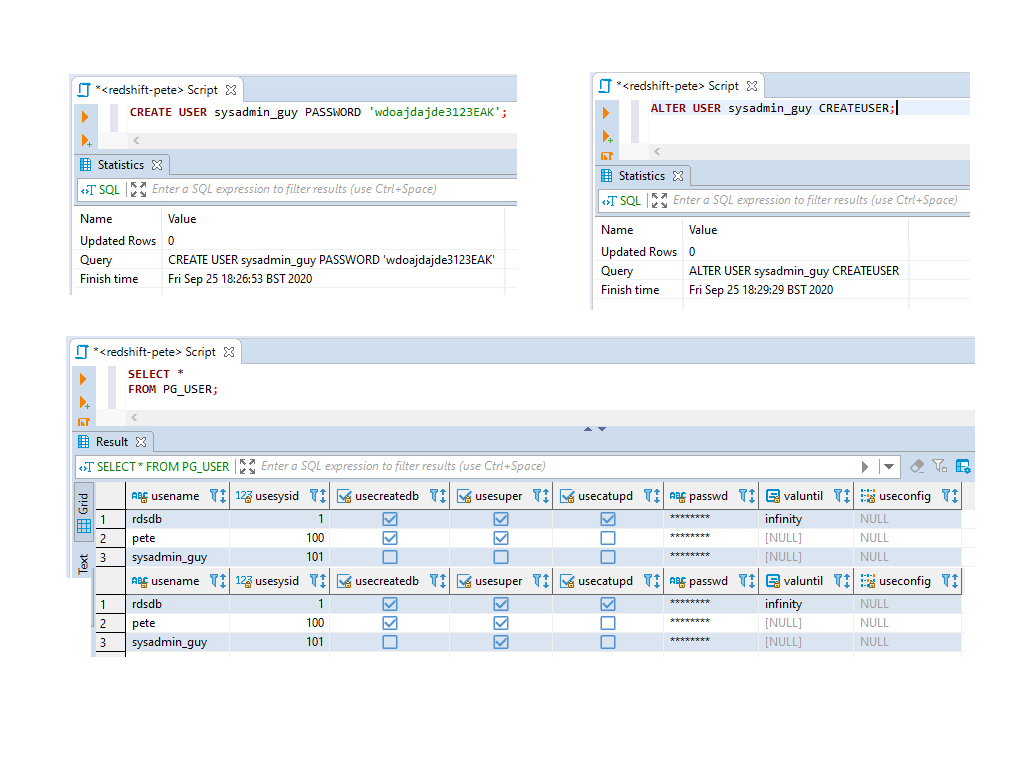
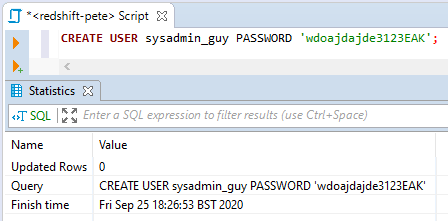
CREATE USERSQL command to create the user:-- create new user redshift CREATE USER sysadmin_guy PASSWORD 'wdoajdajde3123EAK';
Note: Avoid using underscores (
_) instead of hyphens (-) for usernames to avoid issues with quoting in SQL and Python code.Once the user is created, you can check their attributes in the
pg_usersystem table:SELECT * FROM PG_USER;
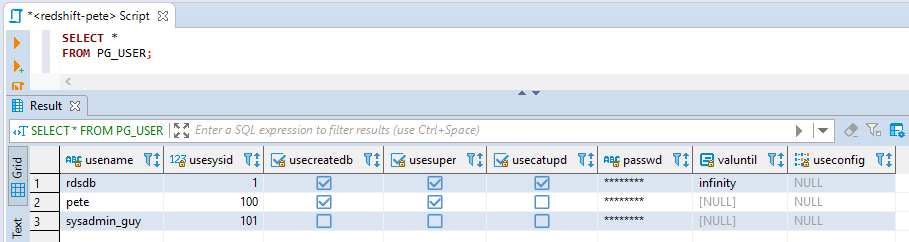
The
usesupercolumn indicates whether the user has superuser privileges (a tick in the fourth column).2. Promoting the User to Superuser
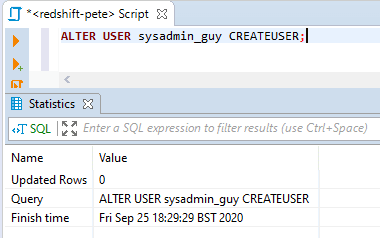
To grant superuser access, use the
ALTER USERcommand:-- promote user to superuser ALTER USER sysadmin_guy CREATEUSER;
Now, if you check the
pg_usertable again, we can check that theusesupercolumn is set totruefor the user.This query will show all superusers on your cluster:
-- show all superusers in redshift
SELECT usename, usesuper
FROM PG_USER
WHERE usesuper = TRUE;

Remember that these permissions should be handled with caution. Granting superuser access should be limited and based on specific needs to maintain security and control over your Redshift environment. Always adhere to the principle of least privilege, especially in production systems.
Hope this helps. Feel free to checkout my other random AWS Redshift blog posts, from someone who isn’t a Redshift DBA!