
Setting up SSH keys on Windows is generally done with OpenSSH, which ships with Windows, or with PuTTY. We can set this up and have quick authentication to places like GitHub or Bitbucket. But, we are also able to rely on a Linux distro in WSL for our SSH. If you are developing in WSL, this might be useful as that’s where you will be cloning your git repos to.
This guide walks you through setting up SSH keys in WSL on an Ubuntu 20.04 distribution with Bitbucket as the version control system.
Steps covered in this guide:
- Step 1: Create New SSH Key
- Step 2: Add SSH Key to Agent
- Step 3: Add SSH Key to Project
- Step 4: Clone Repo & Start Coding
Step 1: Create New SSH Key
To keep your SSH keys backed up on the local machine in case anything happens to the WSL instance, create a new SSH key within a WSL-linked folder. This will also prevent you from needing to re-enter your password each time by adding the key to the SSH agent.
Run the following command to create a new SSH key in your WSL Ubuntu instance:
# create a new ssh key, ed25519 is the current default
ssh-keygen -t ed25519 -C "someone@email.com"

# rsa still works, and is what the screenshot below shows
ssh-keygen -t rsa -b 4096 -C "someone@email.com"
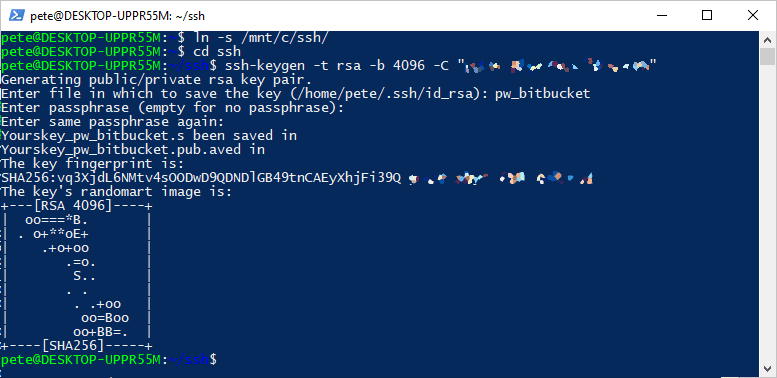
Before it generates anything, ssh-keygen asks where to save the key. Press Enter to accept the default (~/.ssh/id_ed25519, or ~/.ssh/id_rsa for an RSA key), or type a path of your own, which is what the screenshot above shows. Whatever you answer here is the filename you pass to ssh-add in step 2, and forgetting it is the usual reason step 2 comes back with No such file or directory. The examples below use pw_bitbucket.
Step 2: Add SSH Key to Agent
To avoid entering the passphrase every time you use the key, add the SSH key to the SSH agent:
# Add ssh key to agent
eval $(ssh-agent -s)
ssh-add pw_bitbucket

Step 3: Add SSH Key to Project
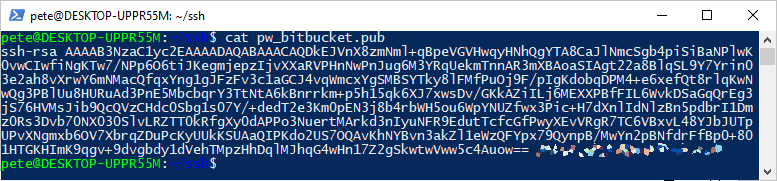
Once the key is ready, add it to your Git service (in this case, Bitbucket). Use the cat command to display the public SSH key (the .pub file), then copy the whole line. The email on the end is the key’s comment, and Bitbucket and GitHub both keep it as the label the key is listed under, so there is no need to trim it.
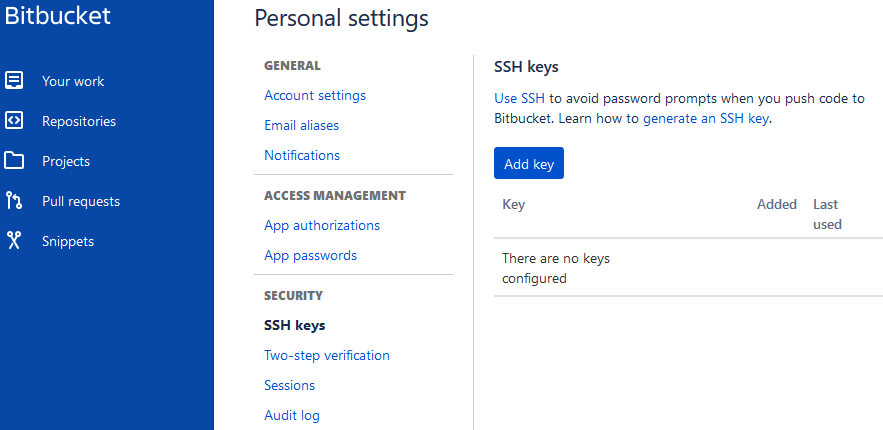
Add your SSH key to Bitbucket:
Now, test the SSH connection:
# Ssh to app/host
ssh -T git@bitbucket.org

This process may be different in corporate environments. You’ll hopefully be guided into the right direction before needing to Google it!
Step 4: Clone Repo and Start Coding
Now that the SSH key is configured and authenticated, you’re ready to clone repositories into WSL. Navigate to your desired directory in the WSL terminal and use the link provided from web:
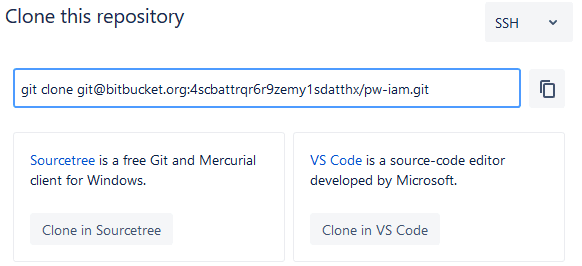
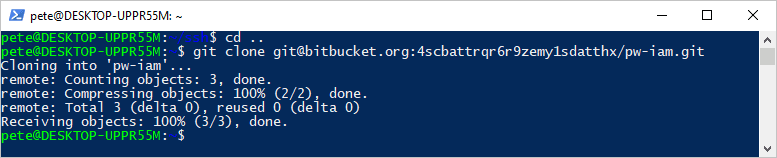
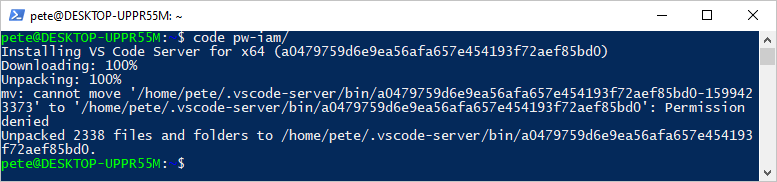
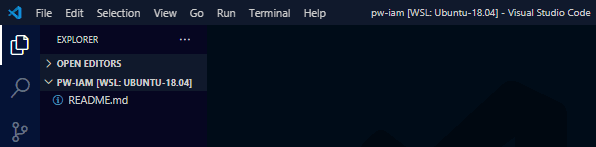
The repository will be cloned, and you can open it in Visual Studio Code and get working!
Related
If SQL Server is part of your day job, my current work lives over at sqldba.blog: production DBA scripts, an error library and the SSMS guide.