-
Drop Users in RedShift
Dropping users in Amazon Redshift is a simple task, but sometimes you may encounter an error message if the user you are trying to drop is an owner of an object in the database, such as a schema, table, or view.
When this happens, you will see one of the following error messages:
ERROR: user "user1" can't be dropped because the user owns some object [SQL State=55006]
ERROR: user "user1" can't be dropped because the user has a privilege on some object [SQL State=55006]
These error messages are mentioned in the AWS documentation for the
DROP USERcommand. In this blog post, I will show you how to handle these errors by checking a user’s permissions, changing the owner of the relevant objects, and then dropping the user.Check database object owners
First, you need to determine which objects the user owns or has privileges on. You can do this by running the following query:
SELECT *
FROM SVV_USER_PERMISSIONS
WHERE grantee = 'user1';
This will return a list of all the objects that the user has permissions on. You can then use this information to identify the objects that you need to change the owner for.
Change object owner
To change the owner of an object, you can use the
ALTERcommand. For example, to change the owner of a schema calledmy_schemato a user calleduser2, you can use the following command:ALTER SCHEMA my_schema OWNER TO user2;
You will need to repeat this step for each object that the user owns or has privileges on.
Drop user
Once you have changed the owner of all the relevant objects, you can drop the user using the
DROP USERcommand. For example:DROP USER user1;
That’s it! By following these steps, you should be able to successfully drop a user without encountering any errors.
As always, it’s important to be careful when modifying your database. Make sure to create backups and test your changes before applying them to your production environment. Also, have a look at the DROP USER AWS Docs.
-

How to Create a Test AWS RedShift Cluster
This guide walks you through the process of creating an AWS RedShift Cluster in a personal test environment.
Warning: If you're testing AWS RedShift, be mindful of billing. Even when paused, storage charges still apply. To avoid unnecessary costs, I recommend deleting the cluster once you're finished using it.Contents:
> Creating an AWS RedShift Cluster
> Connecting to AWS RedShift using DBeaverCreating an AWS RedShift Cluster
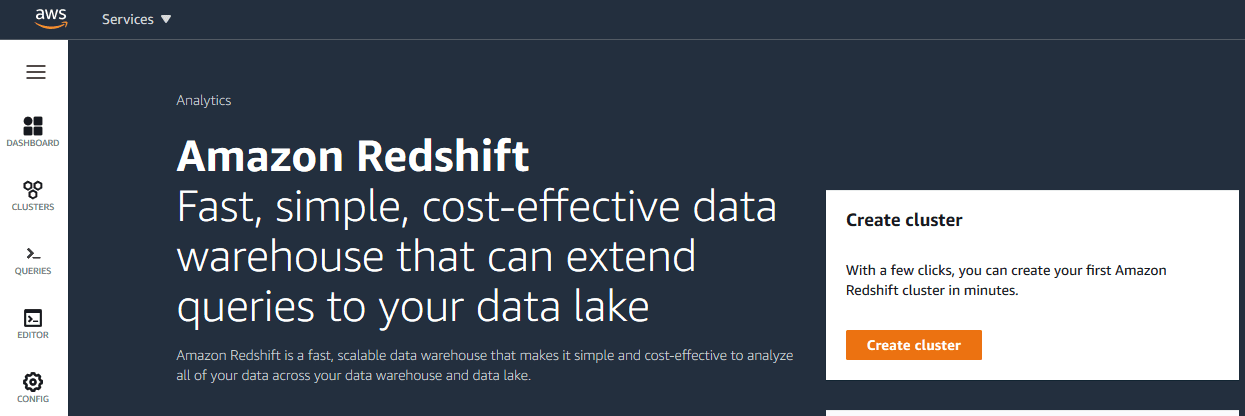
1. Open AWS RedShift Service
> Navigate to the AWS RedShift service in your AWS console: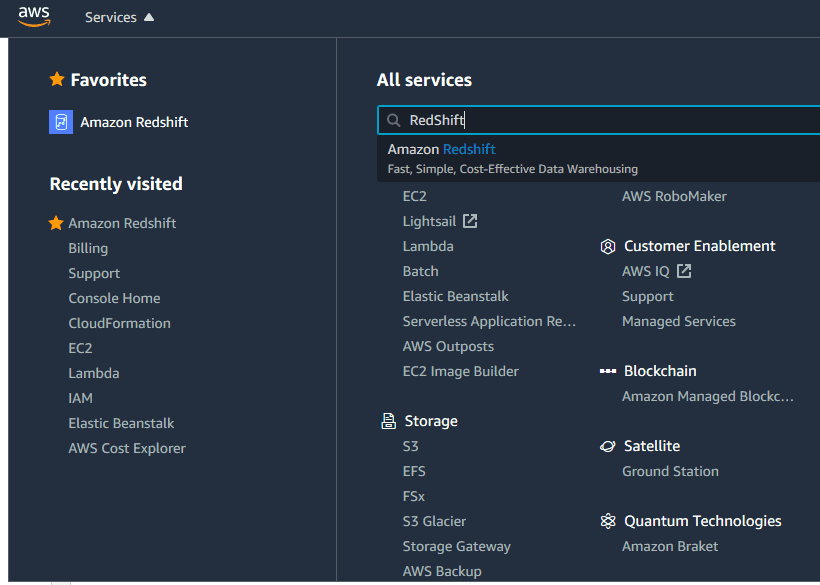
> Click on “Create Cluster.”

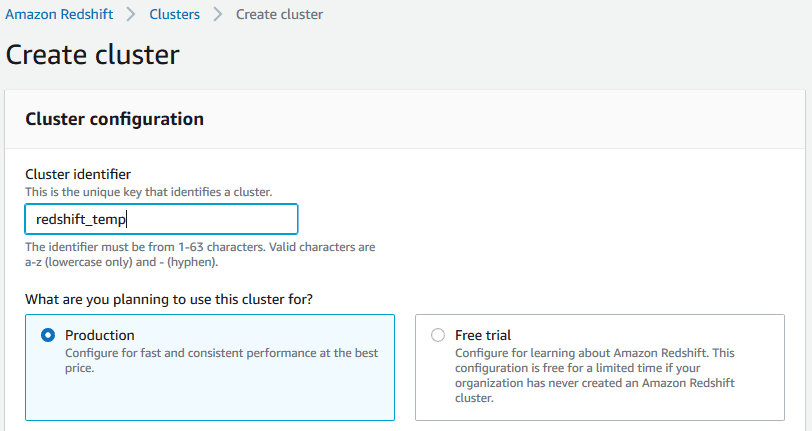
2. Configure Cluster Settings
> Cluster Name: Assign a unique name to your cluster.
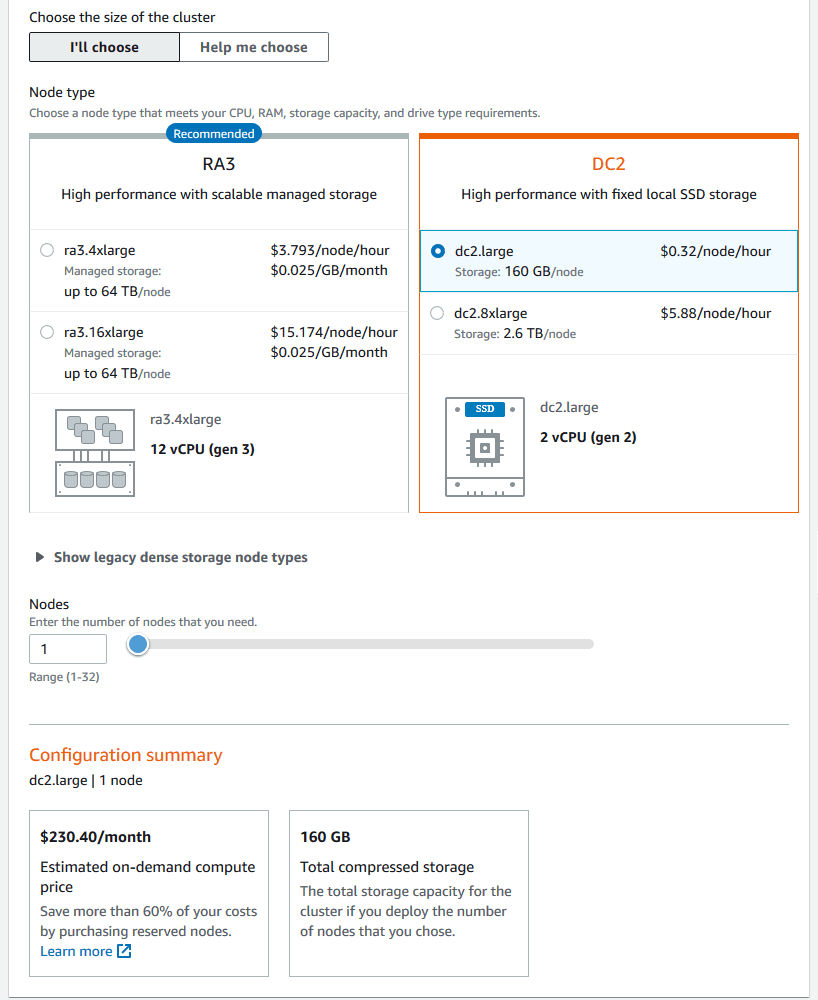
> Free Trial Eligibility: If your organization has never used Amazon Redshift Serverless before, you’re eligible for a $300 credit, usable within 90 days toward compute and storage usage.Note: In regions where Amazon Redshift Serverless isn’t available, you can opt for a two-month free trial of a DC2.large node, which includes 750 hours per month, sufficient to run one DC2.large node with 160 GB of compressed SSD storage.
> Post-Trial Billing: After the free trial or credit is exhausted, standard on-demand rates apply. For example, running a DC2.large node costs approximately $0.25 per hour, translating to about $180 per month if run continuously.
> Here I’m checking & noting the the Redshift Cluster costs at the time of writing this post.
3. Enter Connection Details
> Host: Enter the cluster endpoint (excluding the port and database name).
> Port: Use 5439 (or your specified port).
> Database: Enter the database name (default isdev).
> Username & Password: Provide the credentials set during cluster creation.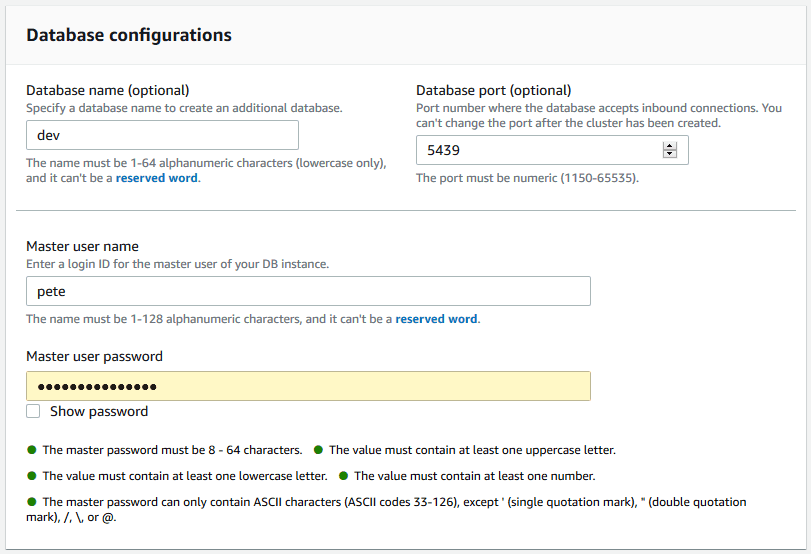
4. Networking & Security
> Select your VPC and Security Group.
> Ensure your machine has access over port 5439.
> Enhanced VPC Routing can add complexity but does not increase costs.
> If your VPC allows external addresses, you may set the cluster to publicly accessible.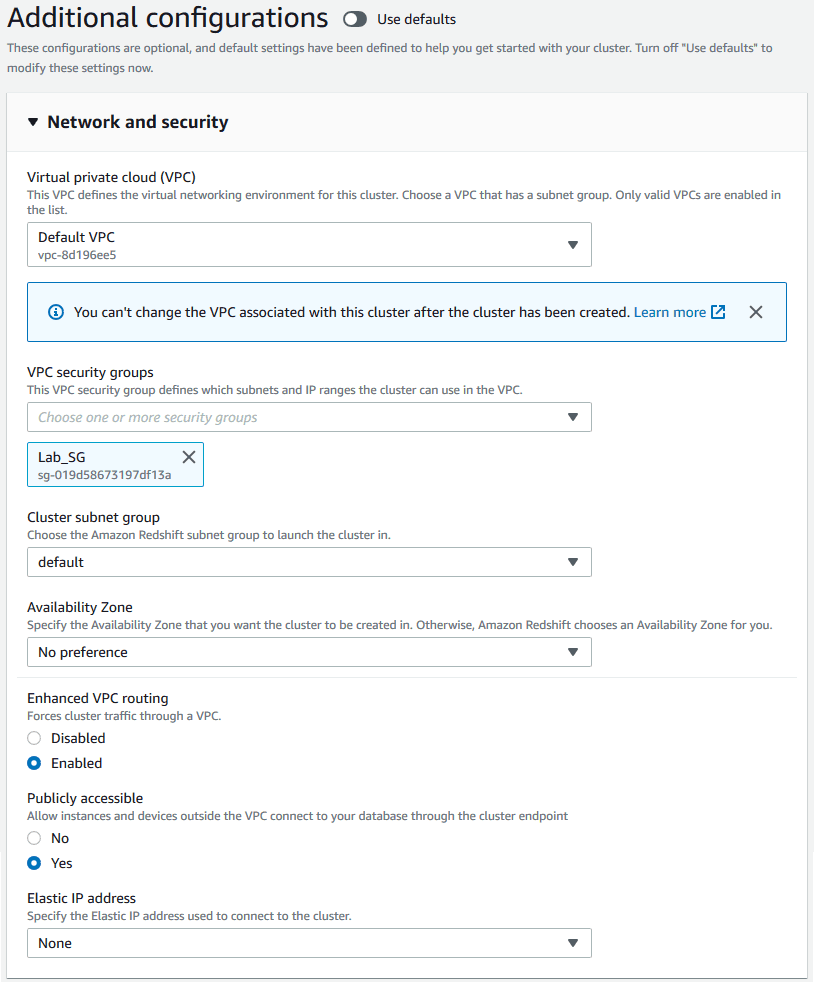
5. Additional Settings
> Use the default parameter group.
> Encryption is optional for testing.
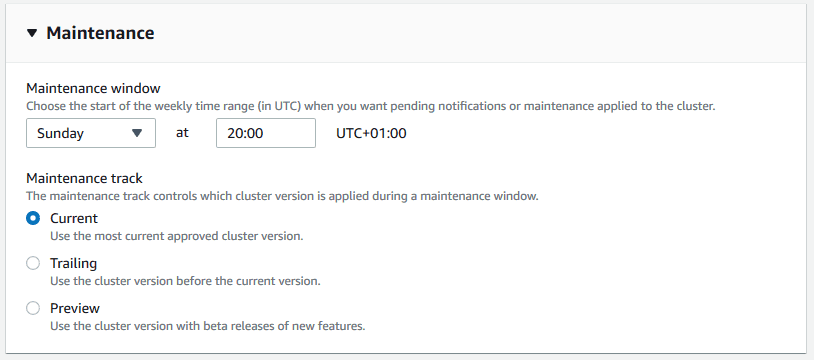
> Set a maintenance window (30 minutes is usually sufficient).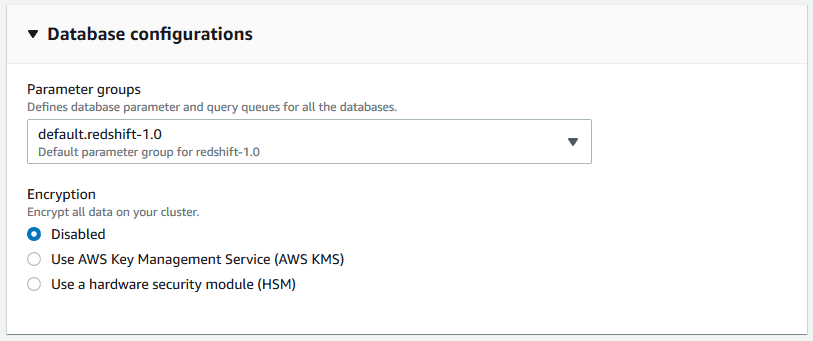
Note: In production, consider trailing updates to ensure stability. AWS frequently releases updates, though they are generally reliable.
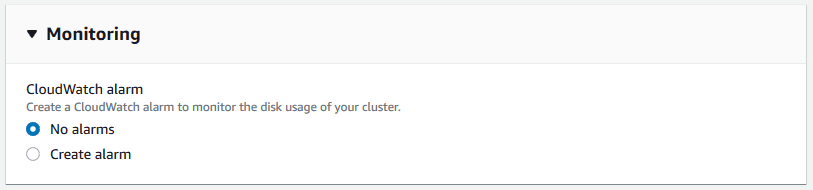
> No need for monitoring for basic testing.
> Set minimum snapshot retention to 1 day.
Snapshot Retention: You can retain snapshots for up to 35 days, but manual snapshots can be stored indefinitely.
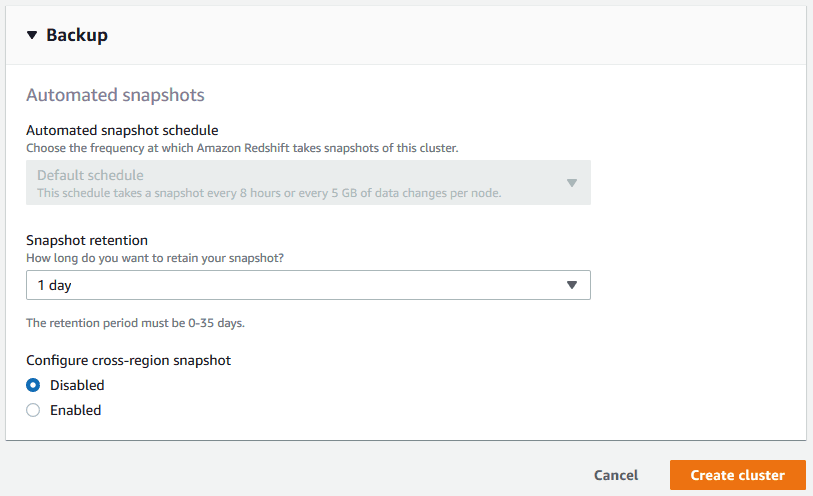
6. Create the Cluster
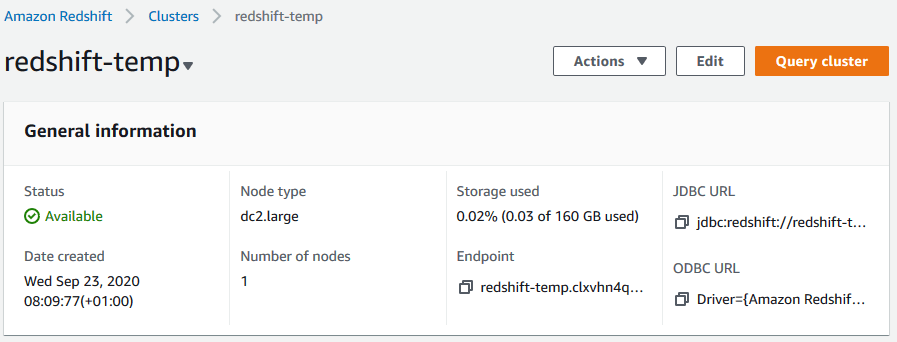
> Click Create Cluster and wait a few minutes for provisioning.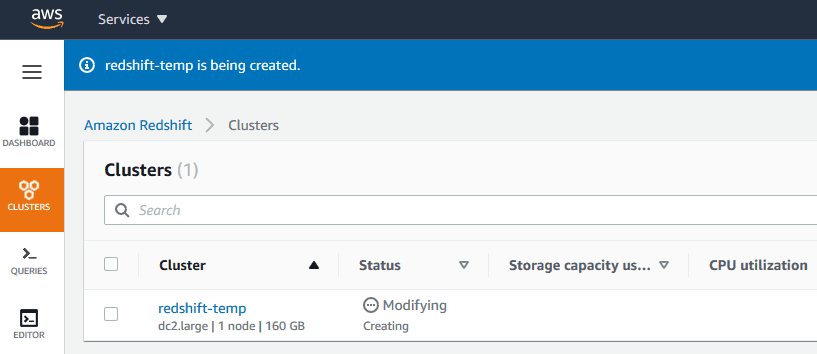
> Once ready, navigate to the cluster details and copy the endpoint address, you’ll need it for the next step!
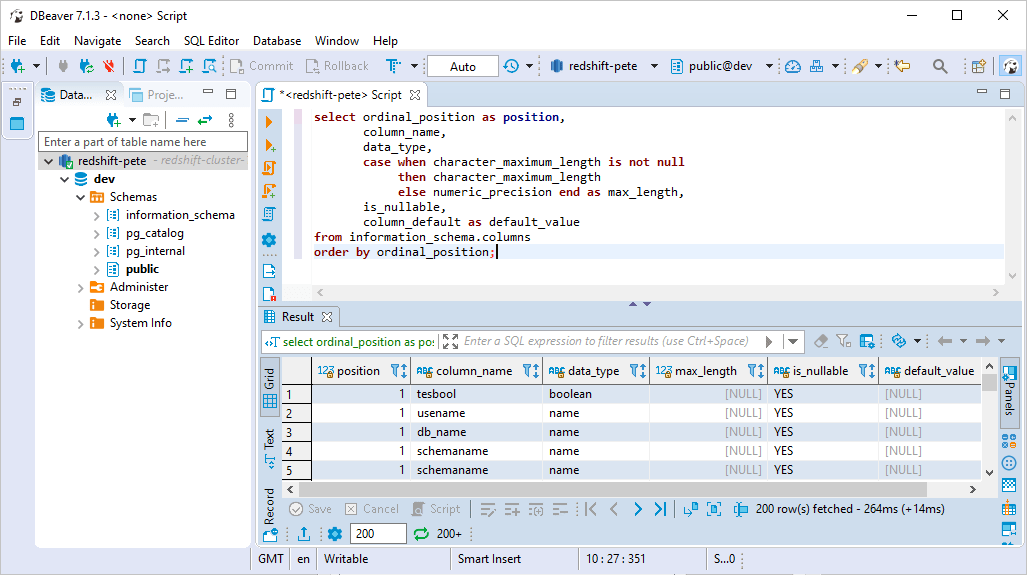
Connecting to AWS RedShift using DBeaver
1. Open DBeaver
> Launch DBeaver and create a new database connection.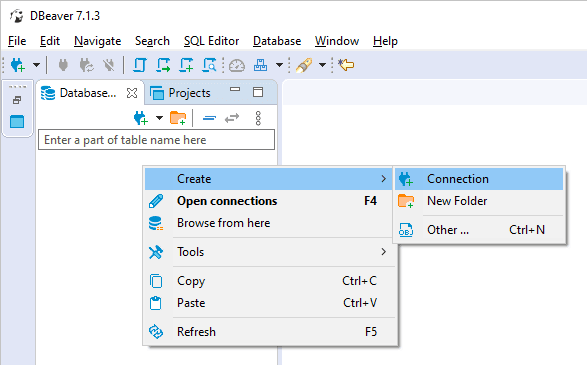
2. Select RedShift
> Search for and select Amazon RedShift from the available database types.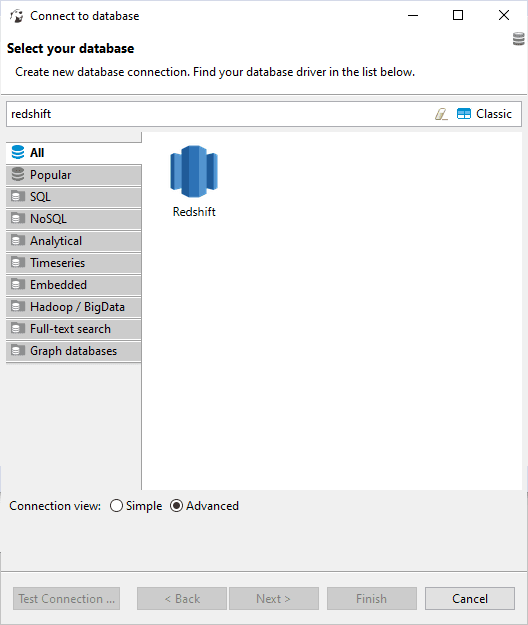
3. Enter Connection Details
> Use the username, password, database name, and cluster endpoint address from step 6.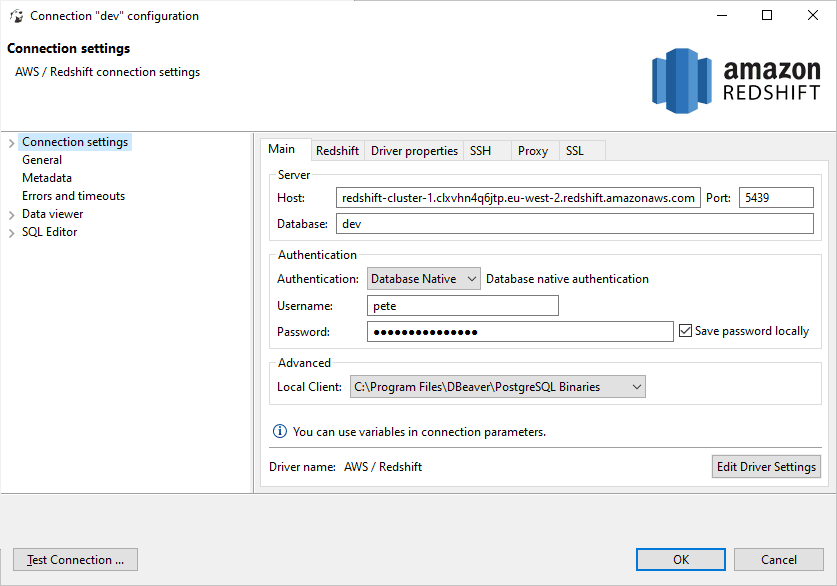
Note: In most cases, no additional configuration is needed if using a recent version of DBeaver.

4. Test & Save Connection
> Click Test Connection to verify connectivity.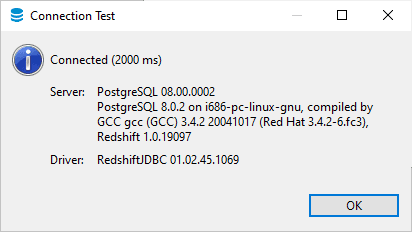
> Save the connection and start querying the cluster!

Important: Managing Costs
By following this guide, hopefully you’ve successfully created a new AWS Redshift Cluster. We should consider the following to keep costs under control:
> Pause or Delete: After completing your tasks, either pause the cluster to stop compute charges or delete it to stop all charges, including storage.
> Billing Alerts: Set up AWS billing alerts to monitor usage and avoid unexpected costs. -
SQL Script: Get Last Backup Times in SQL Server
Backing up databases is crucial for data protection in SQL Server, yet it’s surprising how often business-critical databases lack proper backups. When reviewing a new SQL Server instance, one of the first tasks is checking the last backup times to ensure recovery points are available before making any changes.
Below is a simple script to quickly check the most recent Full, Differential, and Log backups for all databases on a SQL Server instance.
Get Last Backup Times in SQL Server
Here’s the SQL script to check the backup history across all databases:
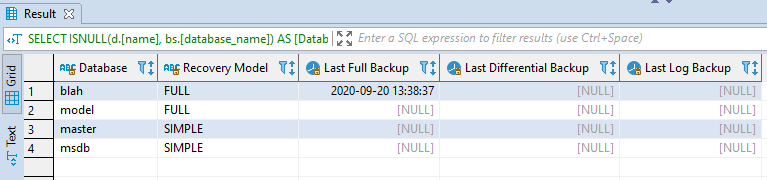
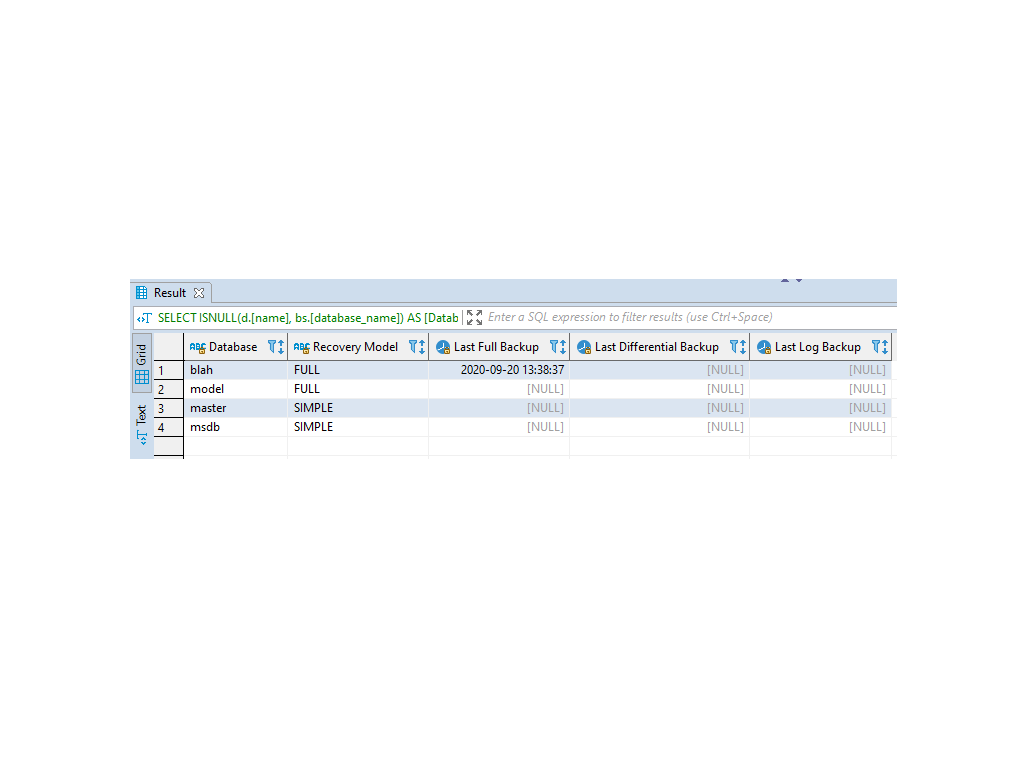
Running this query will quickly show which databases are properly backed up and which may require attention. For example, in a test instance, my simple database
blahwas the only one with a recent backup.We need to regularly monitor backups to ensure database reliability and consider supporting point-in-time recovery for critical databases. This script helps quickly assess backup status and safeguard your systems against data loss.
-
Why use WHERE 1=1 in SQL Queries
A common SQL question is, why would anyone use WHERE 1=1 in their queries? And what does it do?
The WHERE 1=1 condition means WHERE TRUE. It returns the same query result as it would without the WHERE Clause. There is no impact on query execution time.
This is something you can add to a SQL query for convenience for adding & replacing conditions on the statement. If you have WHERE 1=1 on a SQL query you are writing, all conditions thereafter will contain AND, so it’s easier when commenting out conditions on exploratory SQL queries.
Example: WHERE 1 Equals 1
/* where 1=1 example */
SELECT *
FROM TABLE
WHERE 1=1
--  and column1='blah'
    and column2='more_blah'
--  and column3 is not null
You can see this would be easier for commenting out WHERE conditions in the SQL ^
Example (Extra): Commenting Columns
This is similar to another SQL querying technique where you have commas before column names, rather than after the column name.
Again, this might work out well for you when commenting out columns on a work-in-progress SQL query.
SELECT
     Column1
--  ,Column2
    ,Column3
    ,Column4
--  ,Column5
FROM TABLE
Personally, I often make use of both of the above techniques when I write SQL queries.
Convenience is everything when working behind a computer. We have to keep exploring new short keys and any general ways of working to optimize our efficiency. Some things you might not like and won’t adopt, and sometimes GUI is better than CLI. It’s all personal preference, in the end, choose what you are most optimal with.
If you wonder what would happen if we change the WHERE 1=1 to WHERE 1=2, have a look at my other blog post: Why Use WHERE 1=2 in SQL
-
Setting up SSH Keys in WSL
Setting up SSH keys on Windows is generally done via OpenSSL or Putty. We can set this up and have quick authentication to places like GitHub or Bitbucket. But, we are also able to rely on a Linux distro in WSL for our SSH. If you are developing in WSL, this might be useful as that’s where you will be cloning your git repos to.
This guide walks you through setting up SSH keys in WSL on an Ubuntu 20.04 distribution with Bitbucket as the version control system.
Steps covered in this guide:
Step 1: Generate New SSH Key
Step 2: Add SSH Key to Agent
Step 3: Add SSH Key to Project
Step 4: Clone Repo & Start Coding
Step 1: Create New SSH Key
To keep your SSH keys backed up on the local machine in case anything happens to the WSL instance, create a new SSH key within a WSL-linked folder. This will also prevent you from needing to re-enter your password each time by adding the key to the SSH agent.
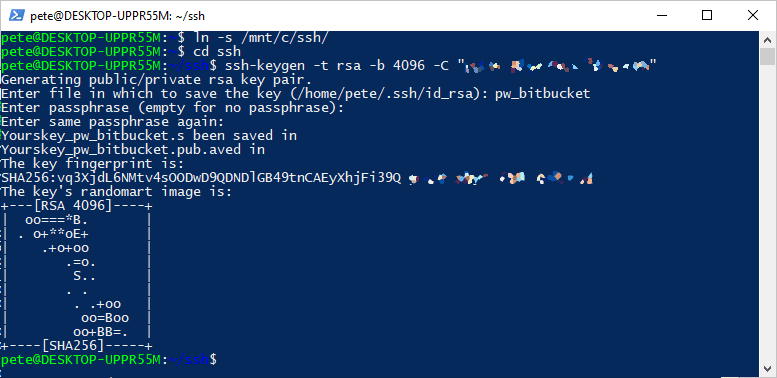
Run the following command to create a new SSH key in your WSL Ubuntu instance:
# Create a new ssh key
ssh-keygen -t rsa -b 4096 -C "someone@email.com"
Step 2: Add SSH Key to Agent
To avoid entering the passphrase every time you use the key, add the SSH key to the SSH agent:
# Add ssh key to agent
eval $(ssh-agent -s)
ssh-add pw_bitbucket

Step 3: Add SSH Key to Project
Once the key is ready, add it to your Git service (in this case, Bitbucket). Use the
catcommand to display the public SSH key (.pub file), then copy the entire key (excluding the email at the end).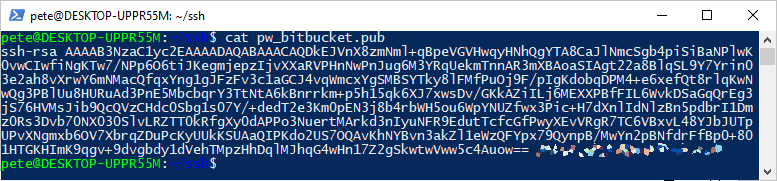
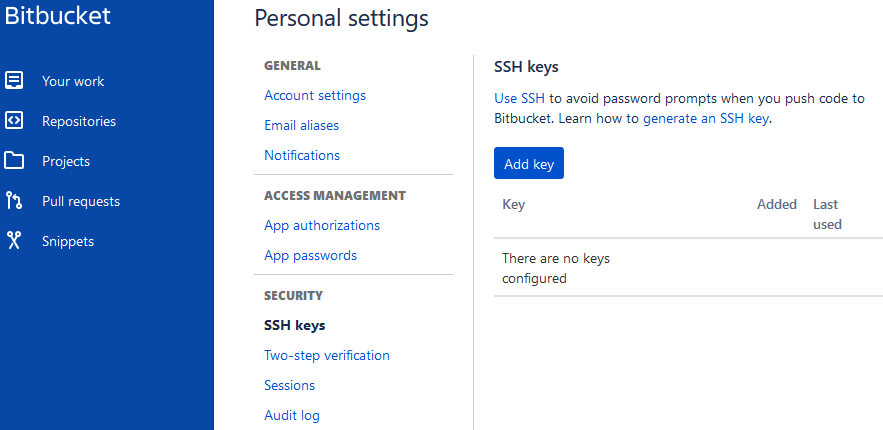
Add your SSH key to Bitbucket:
Now, test the SSH connection:
# Ssh to app/host
ssh -T git@bitbucket.org

This process may be different in corporate environments. You’ll hopefully be guided into the right direction before needing to Google it!
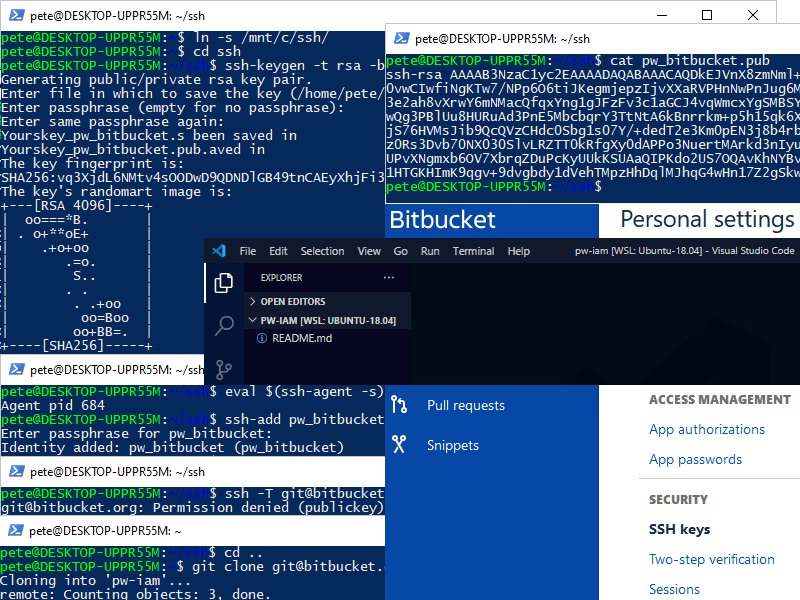
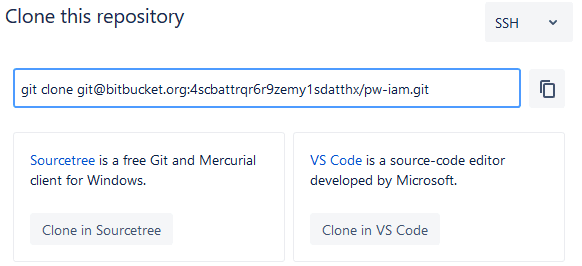
Step 4: Clone Repo and Start Coding
Now that the SSH key is configured and authenticated, you’re ready to clone repositories into WSL. Navigate to your desired directory in the WSL terminal and use the link provided from web:
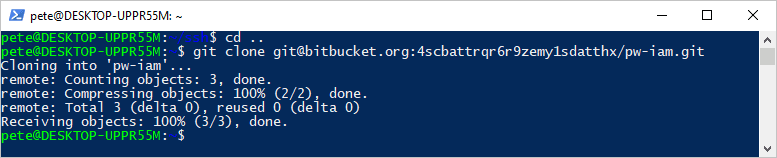
The repository will be cloned, and you can open it in Visual Studio Code and get working!