
-
How to Install Git on Windows
This guide walks you through installing Git, the version control system, on a Windows computer.
For the latest version, visit the official Git website to download the installer.
Although the installation wizard offers numerous configuration options, don’t worry, most settings can be adjusted later. Even if something goes wrong, reinstalling Git is quick and straightforward.
Installing Git on Windows (GUI)
1. Download Git
– Navigate to the Git for Windows download page.
– Download the latest installer for Windows.
– Run the installer and proceed through the setup wizard.2. Install Git
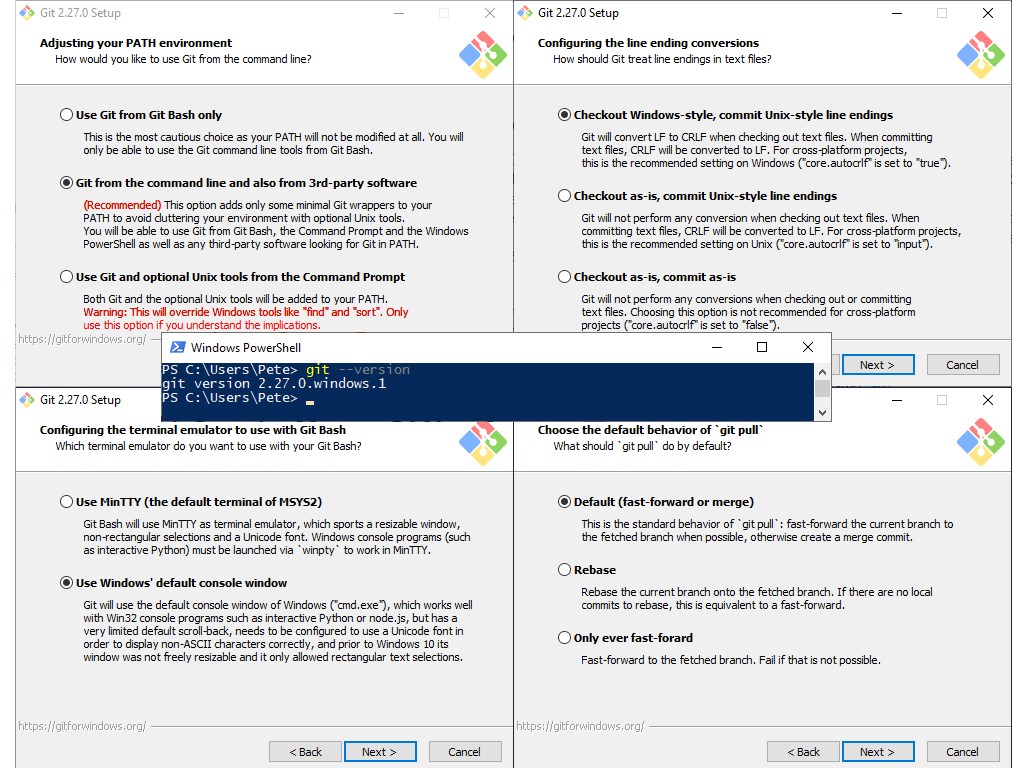
The installation has many configuration options, all noted below:
Default Editor
Choose your preferred text editor (VS Code, Notepad++, Vim, etc.).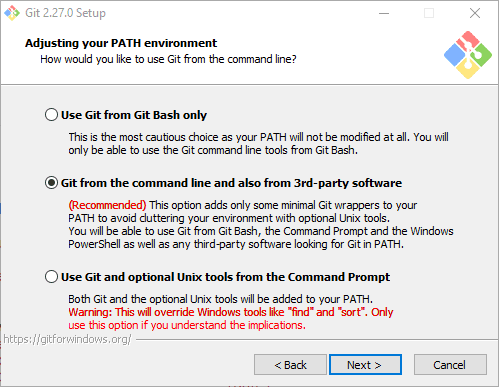
Line Endings
If working in a mixed Windows/macOS/Linux environment, choose “Checkout Windows-style, commit Unix-style line endings.”
Default Console Window
You should configure git to use the default console window for Windows.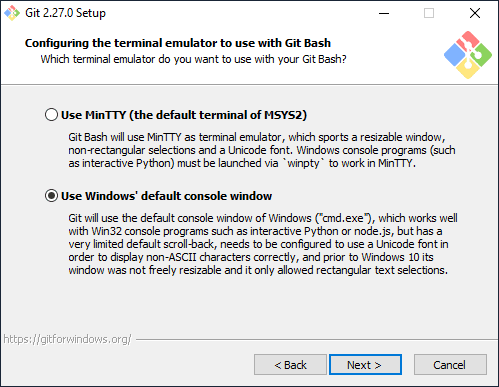
Git Behavior
Unless you are working on particular advanced Git projects, you can leave the Git Behavior as Default.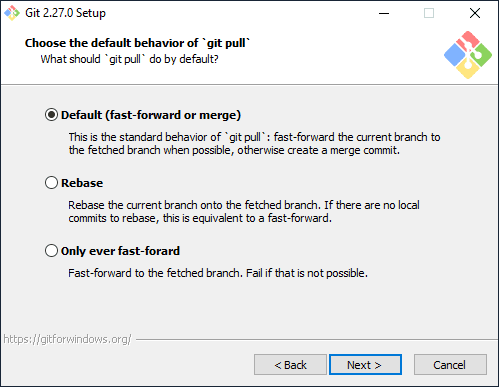
Extra Options
Enable Git Credential Manager for better authentication handling, and have file system caching enabled, because why not.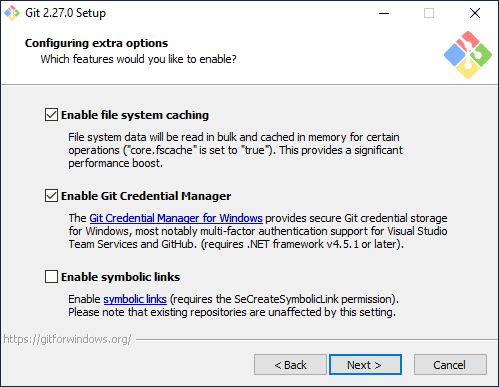
Experimental Options
Enable experimental options if you are not precious about you Git environment and experience.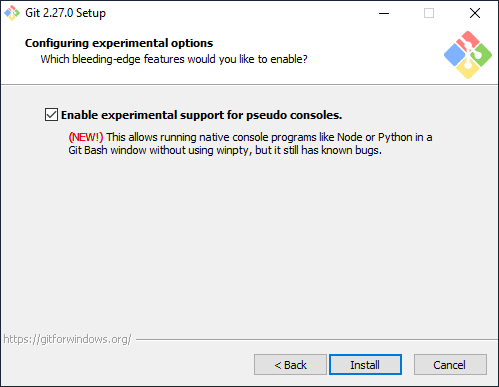
3. Verify Git Installation
To confirm Git is installed correctly, run ‘
git --version‘ in PowerShell:
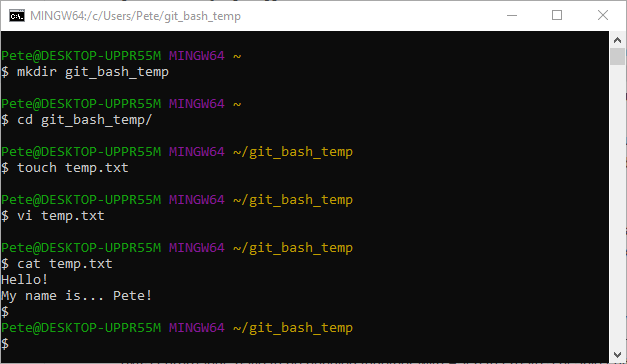
Git for Windows also includes Git Bash, a command-line tool that emulates a Linux-like terminal environment. Open Git Bash from the Start Menu:

In the example screenshot below, I’m creating a new folder and file within the Git Bash terminal:
Congratulations! You have successfully installed Git on Windows. You can now start using Git for version control!
-
Create a Link Between Local Windows Files and WSL
Creating a link between local Windows files and WSL (Windows Subsystem for Linux) is a useful way to share files between the two environments.
In this guide, I’ll show how to link a folder in Windows to your WSL instance using the
lncommand, and also explain how to remove a linked folder.> Create a New Linked Folder for WSL
> Create and Modify Files in the Linked Folder
> Remove a Linked Folder
> Final ThoughtsCreate a New Linked Folder for WSL
The
lncommand in Linux is used to create links between files. In this example, we’ll use a symbolic link to share a folder between the Windows file system and WSL.First, ensure that you’re familiar with the
/mnt/cpath, which is where your C: drive is mounted in WSL.To link a folder from Windows (e.g., a
projectsfolder on your C: drive), use the following command:# Create sym link wsl to the projects folder ln -s /mnt/c/projects
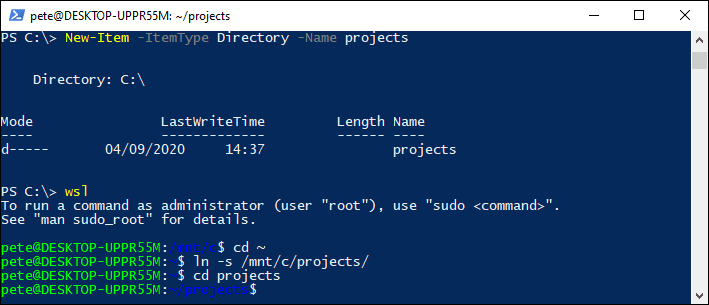
The
-sflag creates a symbolic link (as opposed to a hard link), allowing you to access the folder in both WSL and Windows.Create and Modify Files in the Linked Folder
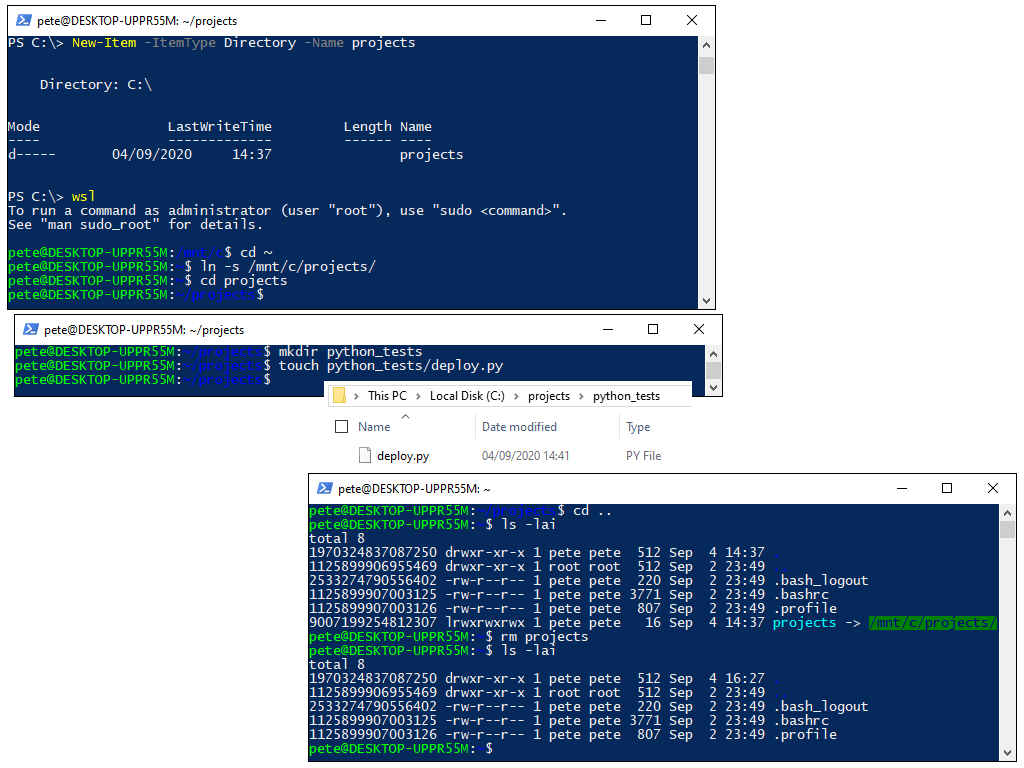
Once the link is created, you can create a folder or a file within your WSL environment that is directly tied to your Windows file system.
For example, in the screenshot below I’m creating a new file within the linked folder:

This has created a folder and a file within the linked
projectsfolder, which is located on my Windows file system.
You can view and modify these files from either Windows or WSL.
Remove a Linked Folder
If you no longer need the link, you can easily remove it. First, list the files to check for existing links, then use the
rmcommand to delete the symbolic link:# List files in the linked folder to confirm the link ls -lai ~/projects # Remove the symbolic link (only deletes the link) rm ~/projects
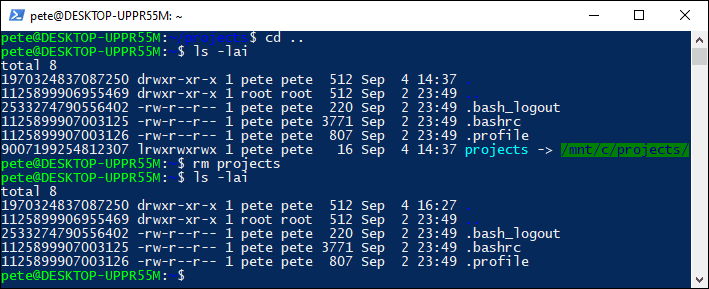
Note that using
rmonly removes the symbolic link in the WSL environment; the original folder and files on your Windows drive remain intact:
Final Thoughts
Creating links between local Windows files and WSL is a simple and effective way to share files between the two environments. However, it’s important to note that using mounted Windows drives for version-controlled projects can lead to issues, like
chmoderrors.For smoother operation, it’s best to create rule-based links or store version-controlled projects in the Linux file system. This method provides flexibility for working across both environments while maintaining a stable workflow.
-
Access Local Files from Windows Subsystem for Linux (WSL)
Accessing local Windows files from a WSL distribution allows integration between workflows, our local Windows environment and (WSL) Linux environments.
This is done by navigating to the
/mnt/c/directory within your WSL Linux terminal.
Alternatively, you can enter WSL directly from any Windows directory using a terminal. Both approaches provide straightforward ways to integrate your workflows across both platforms.Additionally, for more advanced workflows, you can create a symbolic link between Windows and WSL directories. Check out my other post, Create a Link Between Local Windows Files and WSL, for a detailed guide.
Navigate in Terminal to /mnt/c/
In a WSL environment, Windows drives are mounted under the
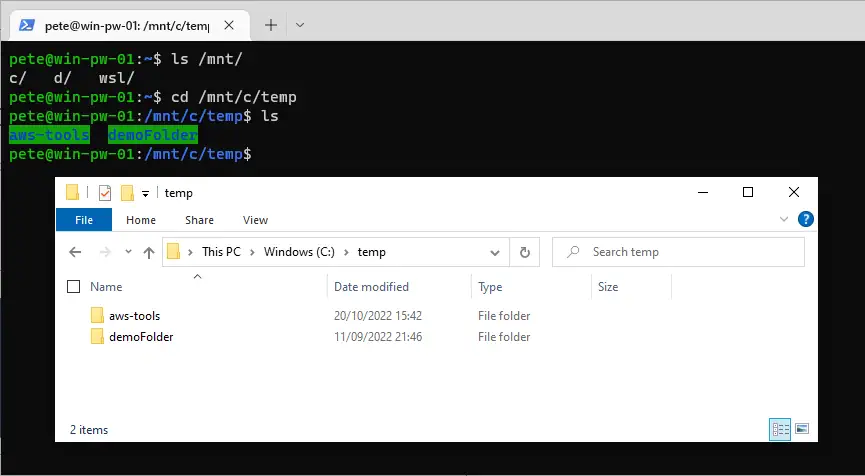
/mnt/directory. For example, theC:drive is accessible at/mnt/c/.Here’s how you can navigate and interact with local Windows files:
# navigate to home (wsl) linux folder
cd ~

# navigate c:\temp folder on local windows computer
cd /mnt/c/temp
In the example above, we accessed the
C:\tempfolder from within the WSL environment. The/mnt/directory reflects the local Windows drives, allowing you to browse and manipulate files seamlessly.Open WSL from PowerShell with a Specific Directory
You can also launch WSL directly from a PowerShell terminal while being in any Windows directory.
This method sets the active path in WSL to match the directory you’re working in from Windows. Here’s an example:
# create folder and go to it
mkdir C:\temp\newfolder
cd C:\temp\newfolder

# enter wsl
wsl
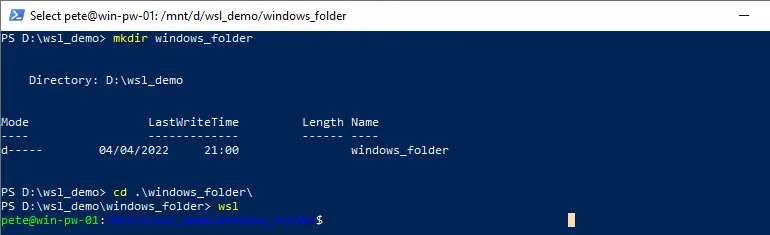
Once inside WSL, your default Linux distribution will start, and the working directory will be mounted at the corresponding path, in this case,
/mnt/c/temp/newfolder. This is an efficient way to ensure your Linux session begins in a specific Windows directory. -
Reinstalling WSL Distributions
This guide walks you through reinstalling a WSL (Windows Subsystem for Linux) distribution via command line. This can be useful if you want to reset your WSL environment for a fresh start.
Before proceeding, ensure you back up any important work to Git or another storage solution.
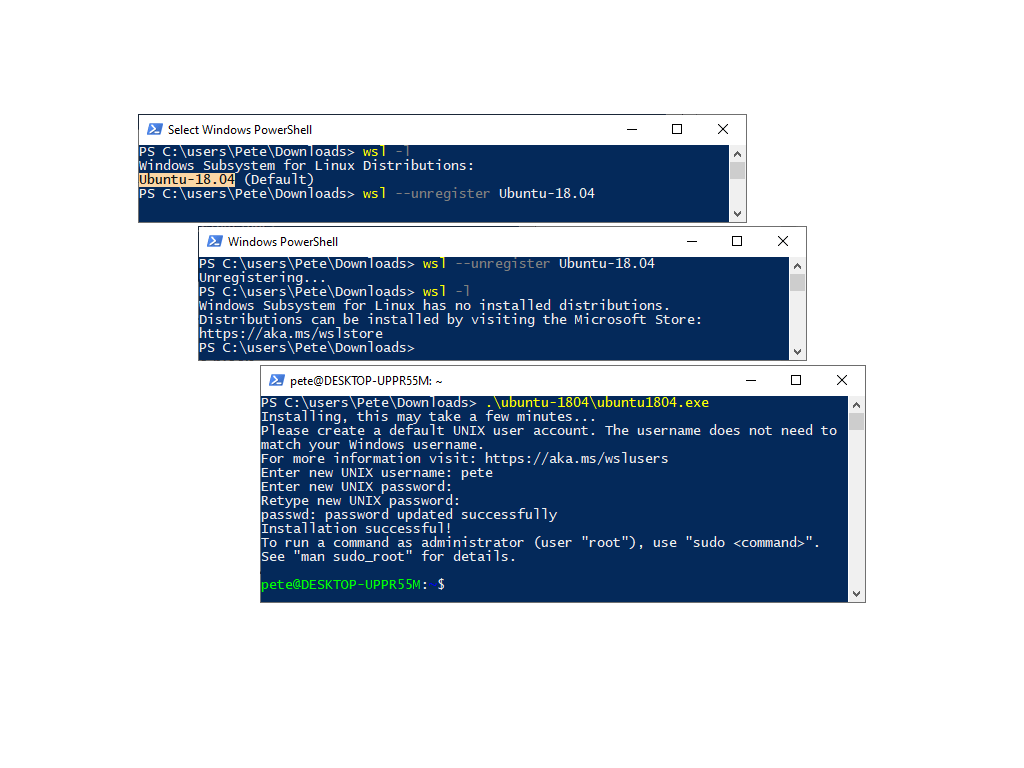
1. List Installed WSL Distributions
To see the names of installed WSL distributions, run:
wsl -l

This command displays a list of available WSL distros on your system, which you’ll need for uninstallation.
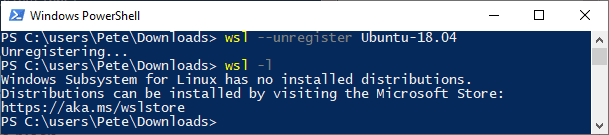
2. Uninstall or Unregister a WSL Distro
Caution: Unregistering a WSL distribution will permanently delete all its data, settings, and software. Reinstalling the distribution from the store will provide a clean instance.
To unregister (uninstall) a specific distribution, replace
<distro-name>with the name of your distro:wsl --unregister <distro-name>

3. Reinstalling a WSL Distribution
To reinstall Ubuntu (or any other distro) on WSL:
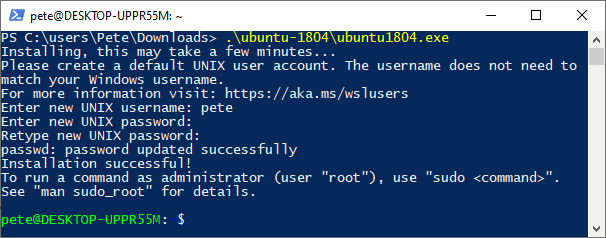
Via Command Line:
– Download and install the distribution using its.exefile.
– Run the command and follow the prompts to enter a new username and password.Example for Ubuntu installation:
Via Microsoft Store:
Search for and install your desired Linux distribution. -
Removing Quotes from a CSV File with PowerShell
This post explains how to remove quotes from a CSV file using PowerShell, a common requirement when working with CSVs that include unnecessary or problematic quotes.
Whether you’re cleaning up data for easier processing or addressing formatting issues caused by quotes, this post will show you how to create a test CSV file, strip out quotes, and save the cleaned version efficiently. Additionally, we’ll highlight potential performance considerations when working with large files.
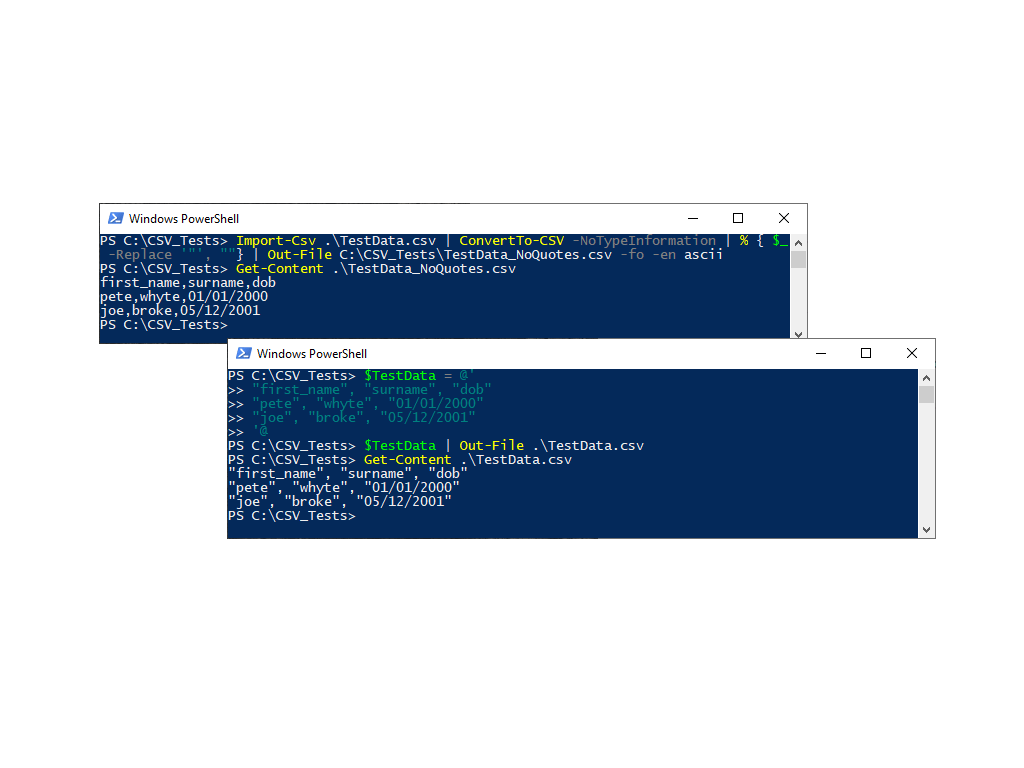
Step 1: Create a Test CSV File
Start by generating a test CSV file to practice on:
# Create a variable with sample CSV data
$TestData = @'
"first_name", "surname", "dob"
"pete", "whyte", "01/01/2000"
"joe", "broke", "05/12/2001"
'@

# Output data to a CSV file in the current directory
$TestData | Out-File .\TestData.csv

# Display the contents of the new CSV file
Get-Content .\TestData.csv
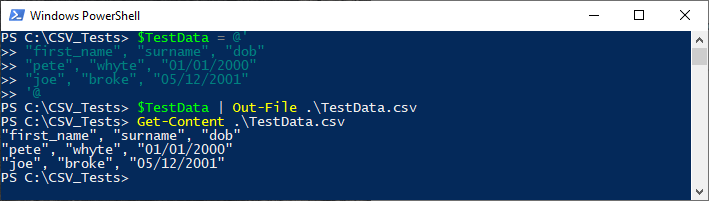
This script creates a small sample file named
TestData.csvin your working directory.Step 2: Remove Quotes from the CSV File
Now, process the CSV file to strip out quotes and save the cleaned data to a new file:
# Import the CSV file, remove quotes, and save to a new file
Import-Csv .\TestData.csv | ConvertTo-Csv -NoTypeInformation | % { $_ -Replace '"', "" } | Out-File C:\CSV_Tests\TestData_NoQuotes.csv -Force -Encoding Ascii
This script processes the CSV file:
>Import-Csv: Loads the CSV file into PowerShell.
>ConvertTo-Csv -NoTypeInformation: Converts the data back to CSV format without adding type metadata.
>-Replace '"': Removes all double quotes. We can change this to single quotes easily.
>Out-File: Outputs the cleaned data to a new file in the specified location.Step 3: Verify the Output
After processing, inspect the contents of the new file to confirm the quotes were removed using
Get-Contentas shown in the screenshot above, or open the file for a quick manual check.If you’re dealing with large CSV files, monitor system performance, validate the cleaned data, and consider using specialized database tools for better efficiency and handling.
I hope this tip was a useful one for you. Feel free to browse around my site here for more random tips like this!