
-

“.ps1 cannot be loaded because running scripts is disabled on this system” PowerShell Error
Encountering this error? It’s caused by restrictive execution policies that block scripts for security reasons. This guide explains the issue and provides actionable solutions.
PowerShell restricts script execution by default. Running a script like my example
cdk.ps1may trigger the following error message:Script.ps1 cannot be loaded because running scripts is disabled on this system. For more information, see about_Execution_Policies at https://go.microsoft.com/fwlink/?LinkID=135170
This happens due to PowerShell’s default security settings, which restrict script execution to prevent unauthorized or malicious scripts from running.
Why Does This Happen?
By default, PowerShell applies an Execution Policy that controls how scripts are executed. These policies include:
– Restricted: No scripts are allowed to run (default setting).
– AllSigned: Only scripts signed by a trusted publisher can run.
– RemoteSigned: Local scripts can run, but downloaded scripts need to be signed.
– Unrestricted: All scripts can run without restrictions (not recommended).The Fix: Change Your Execution Policy
To allow PowerShell scripts to run on your system, you need to change the execution policy. Follow these steps:
Step 1: Open PowerShell as Administrator
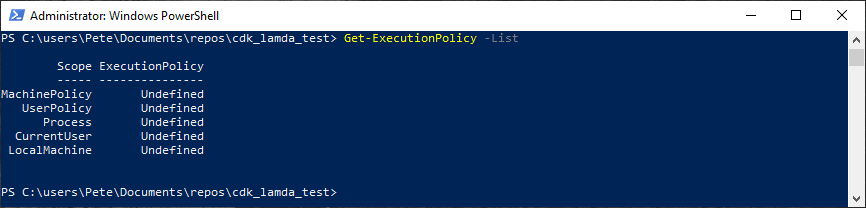
Step 2: Check Your Current Execution Policy
# Check current execution policy status
Get-ExecutionPolicy -List
Step 3: Modify the Execution Policy
To allow local scripts and signed remote scripts to run, execute the following command:
# Set local execution policy to remote signed
Set-ExecutionPolicy -Scope LocalMachine -ExecutionPolicy RemoteSigned

Alternatively, if you need a temporary solution that resets after closing PowerShell, run:
# Set local execution policy for current session
Set-ExecutionPolicy -Scope Process -ExecutionPolicy Bypass

Step 4: Confirm the Change
Run the following command to verify your new execution policy:
# Check current execution policy status
Get-ExecutionPolicy -List
If the policy is now set to RemoteSigned, you should be able to run your script without issues.
Important Considerations
Security First:
Avoid setting your execution policy toUnrestricted, as it allows all scripts to run, which can be a security risk.For One-Time Script Execution:
UseBypassat the process level to avoid permanently changing security settings.If Running on a Corporate System:
Your execution policy may be managed by an IT administrator. In such cases, contact your IT team for assistance. -
Creating a Linked Server with a MySQL Database
This is my third Linked Server demo post, and this time, we’re connecting to a MySQL database.
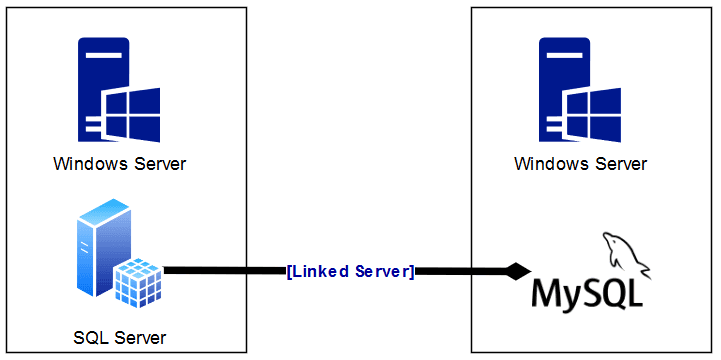
Here’s a simple diagram of the setup covered in this post, configuring a Linked Server to a MySQL Database:
For this setup, I’ve covered it all in previous blog posts:
– Installing SQL Server on Windows
– Installing MySQL on Windows
– Testing Connectivity to Remote Database Server PortsAll of the above are necessary prerequisites for configuring this MySQL Linked Server. You could run on Linux for both MySQL and SQL Server (as from SQL 2017), but for this demo I’ve gone with a Windows Server setup.
The following is included in this guide to setup a Linked Server to MySQL:
Step 1: Create MySQL Linked Server Login
Step 2: Configure ODBC Data Source Settings
Step 3: Create a Linked Server to a MySQL Database
Step 4: Verify MySQL Linked Server Connectivity
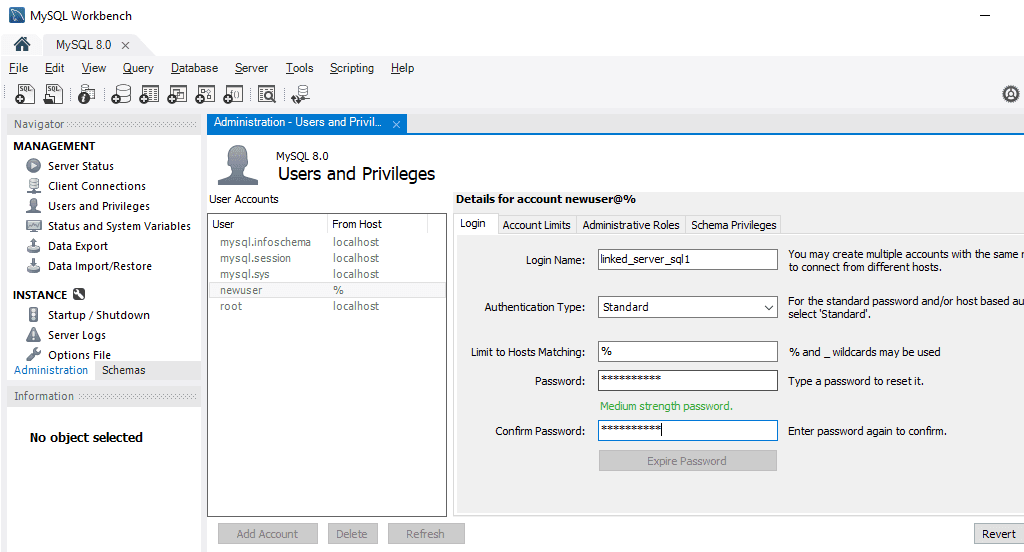
Step 1: Create Linked Server Login on MySQL
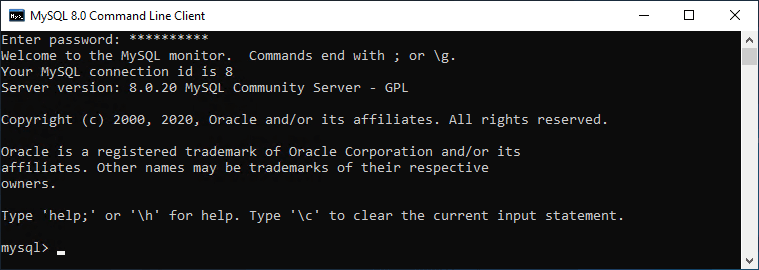
You can create a MySQL user either through MySQL Workbench or via the command line. For this demo, I’ll use the MySQL CLI.
1. First, connect to MySQL:
2. Create MySQL User with Permissions
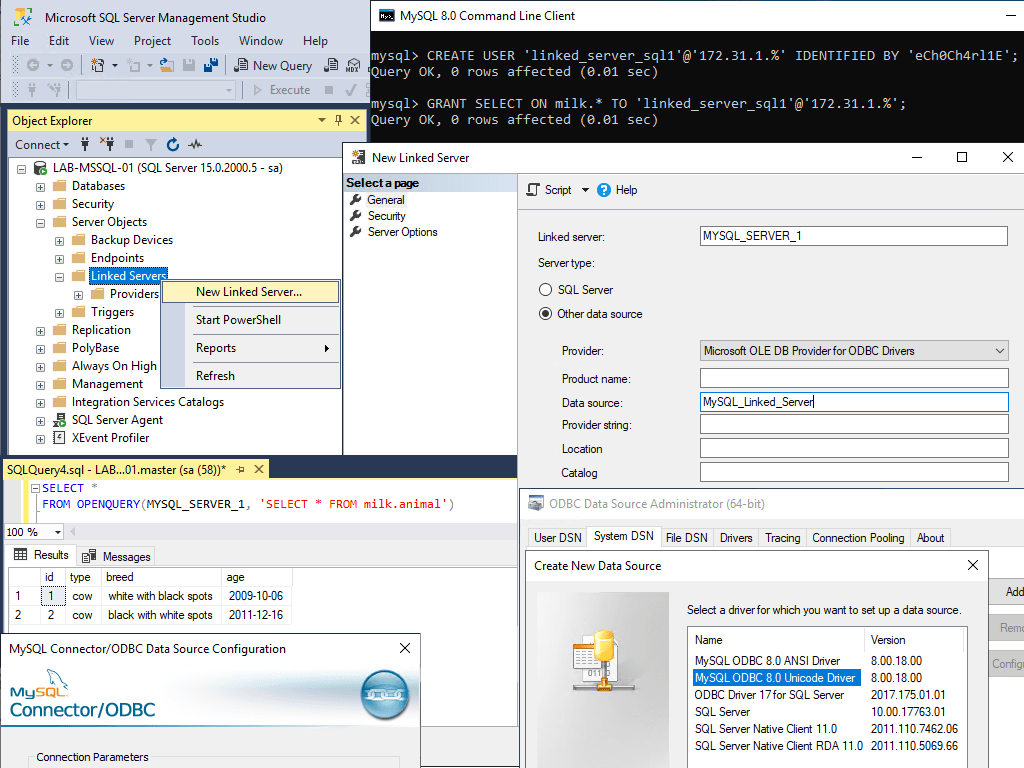
In the example below, I’m creating a user and GRANTING SELECT capabilities for all tables within the database.-- Create Linked Server user CREATE USER 'linked_server_sql1'@'172.31.1.%' IDENTIFIED BY 'eCh0Ch4rl1E'; -- Grant SELECT on all tables in milk from specific user subnet GRANT SELECT ON milk.* TO 'linked_server_sql1'@'172.31.1.%';
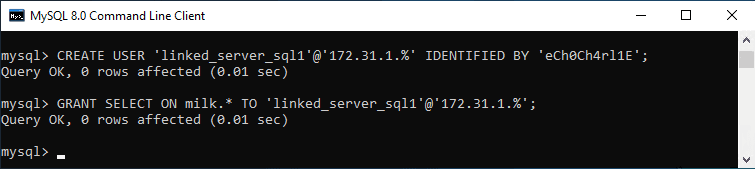
This grants read-only access to all tables in the
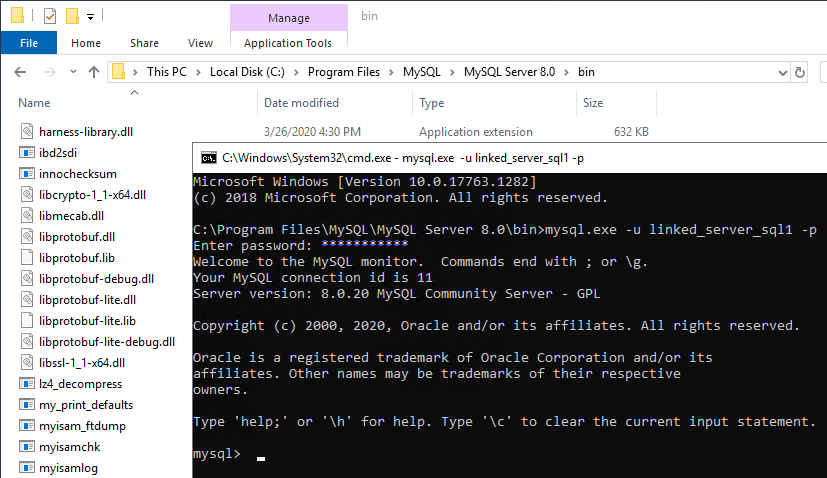
milkdatabase for connections coming from the172.31.1.0network range. If testing locally, replace172.31.1.%withlocalhost.If I want to test this new MySQL login locally, I can create the user using ‘localhost’ too. Below I’m opening the mysql.exe file rather than using the MySQL Command Line app which logs in as root.
Now querying the database I want as part of the Linked Server:
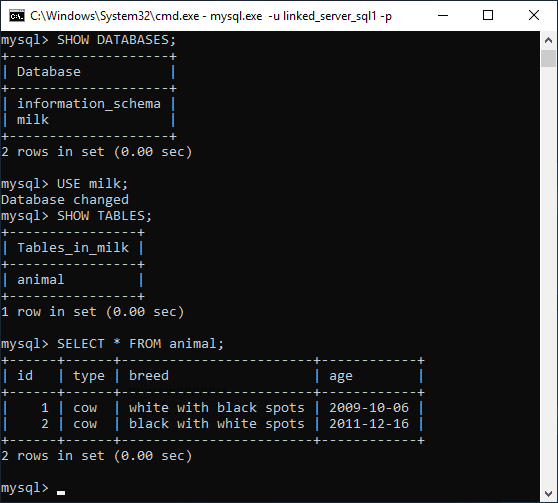
I only wanted read-only access, which I can confirm with a quick write test.

We could have also done this testing by logging in via MySQL Workbench.
That’s our Linked Server MySQL login tested and ready!
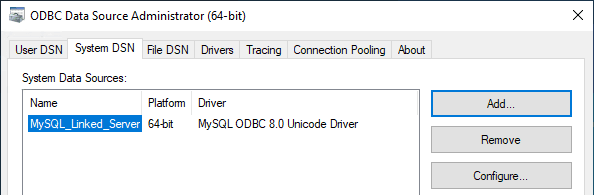
Step 2: Configure ODBC Data Source on SQL Server
1. Download & Install MySQL ODBC Driver
The latest MySQL ODBC driver can be found here.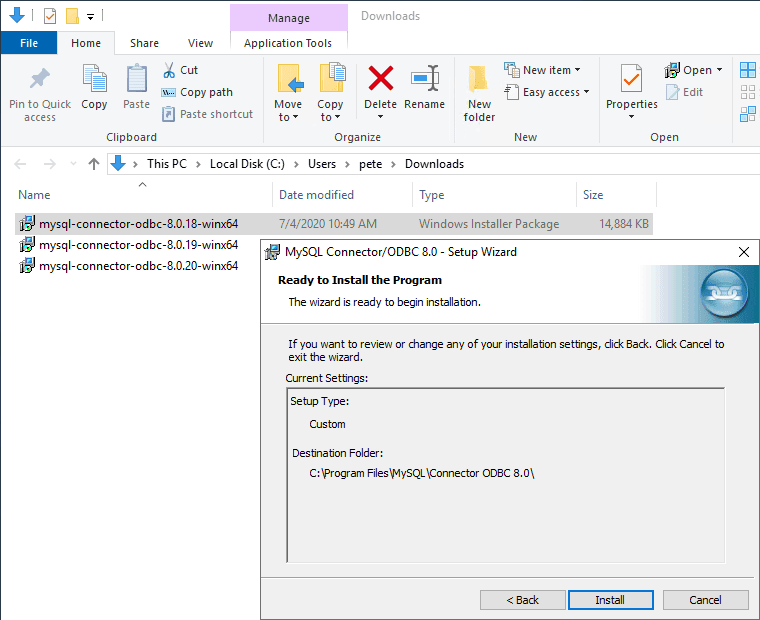
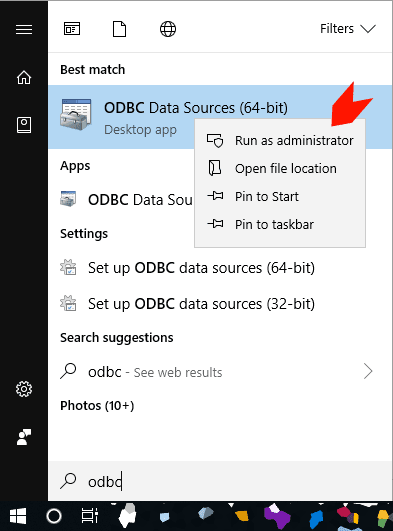
2. Run ODBC Data Sources as Administrator.
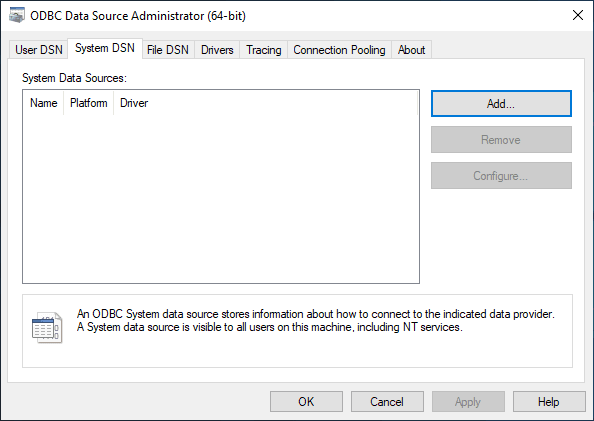
3. Navigate to the System DSN tab and click Add.
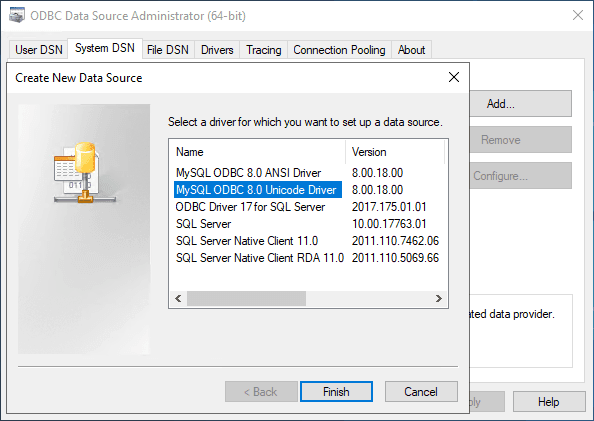
4. Select MySQL ODBC Unicode Driver.
5. Enter the connection details:
– Server:MySQL_IP_or_ServerName
– User:MySQL_LinkedServer_Login_01
– Password:SecurePassword123
– Database:DatabaseName01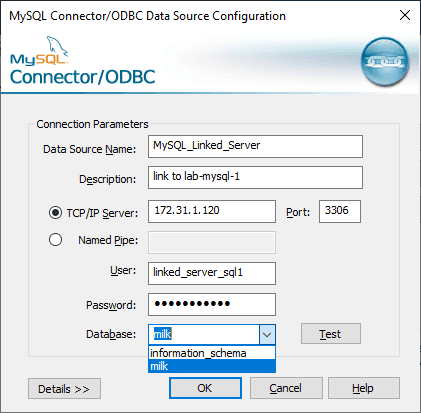
6. Click Test to ensure successful connectivity, then click OK.
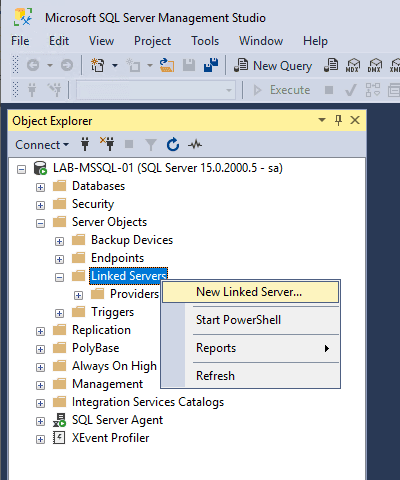
Step 3: Create Linked Server in SQL Server
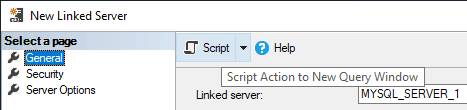
1. In SSMS, expand Server Objects, right-click Linked Servers, and select New Linked Server.
2. Configure the following:
– Linked Server Name: Choose a meaningful name (e.g.,MYSQL_SERVER_1).
– Provider: SelectMicrosoft OLE DB Provider for ODBC Drivers.
– Data Source: Enter the ODBC Data Source name configured earlier.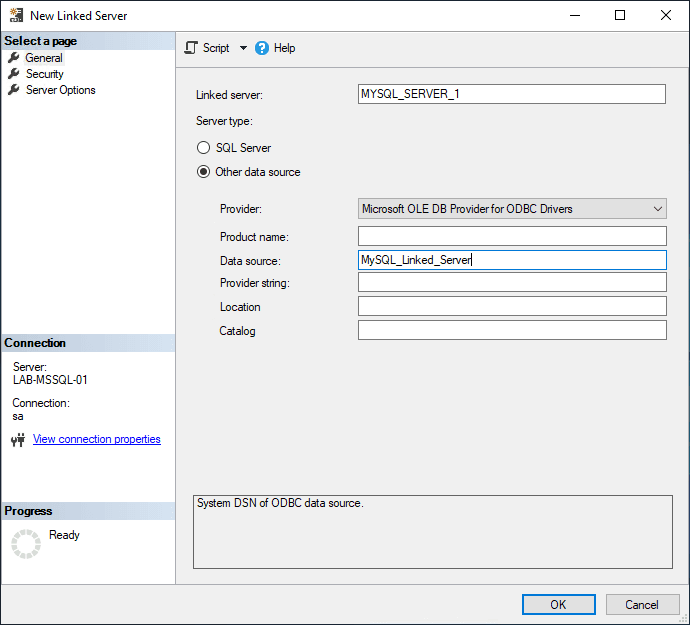
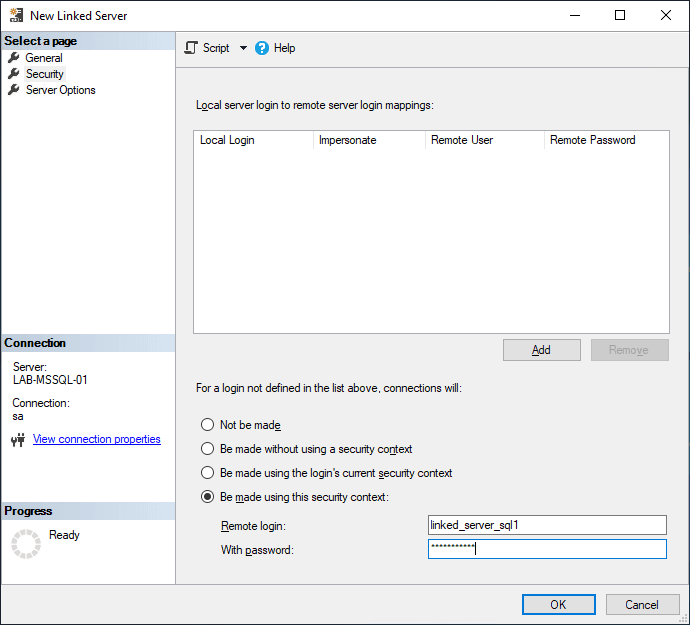
3. Under Security, enter the MySQL login details created earlier.
4. Leave Server Options as defaults.
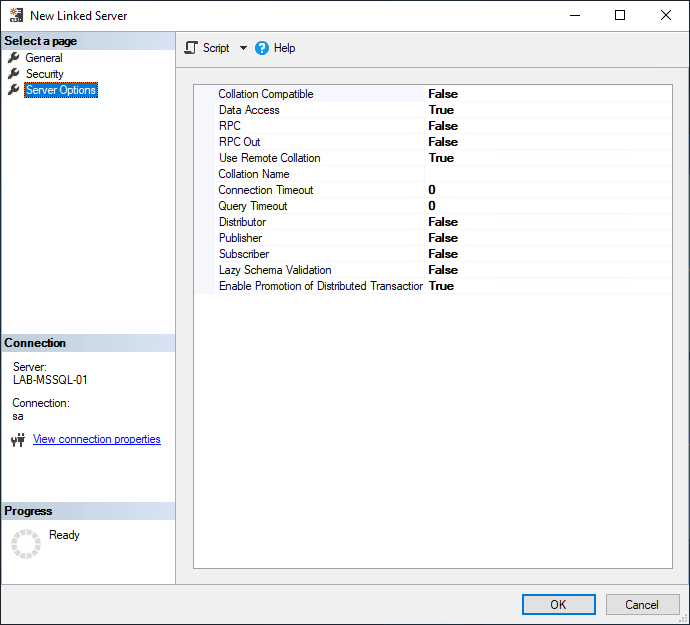
Before we proceed and create this Linked Server, we can script out the Linked Server creation:
USE [master]
GO
EXEC master.dbo.sp_addlinkedserver
	@server = N'MYSQL_SERVER_1',
	@srvproduct=N'',
	@provider=N'MSDASQL',
	@datasrc=N'MySQL_Linked_Server'

USE [master]
GO
EXEC master.dbo.sp_addlinkedsrvlogin
	@rmtsrvname = N'MYSQL_SERVER_1',
	@locallogin = NULL ,
	@useself = N'False',
	@rmtuser = N'linked_server_sql1',
	@rmtpassword = N'eCh0Ch4rl1E'
GO
Once ready, execute the script or click OK in the Linked Server configuration window.
Step 4: Verify Linked Server & Run Queries
1. Check Linked Server in SSMS
– In SSMS Object Explorer, navigate to Server Objects → Linked Servers.
– Expand the new Linked Server and browse the database objects.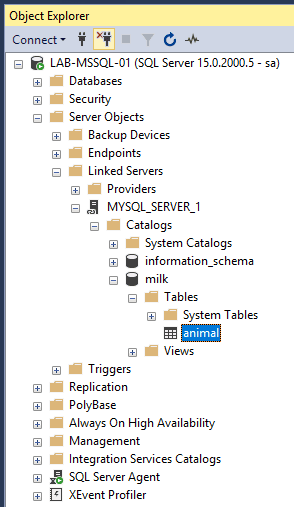
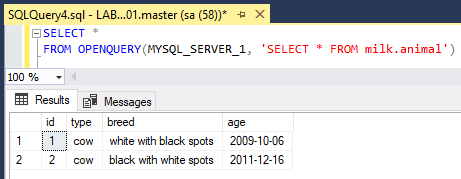
2. Query MySQL Database Using OPENQUERY
The query below executes against MySQL from SQL Server. If everything is configured correctly, you should see your test data.-- MySQL Linked Server Example Query SELECT * FROM OPENQUERY(MYSQL_SERVER_1, 'SELECT * FROM milk.animal');
Checkout the MS Docs for more information on OPENQUERY.
I hope this configuration guide was a good one for you, and you got SQL Server setup with a Linked Server to your MySQL Server.
If you have any troubles along the way feel free to comment below and I’ll try help!
-
Check & Restart SQL Server Services on Linux
As of the 2017 Edition of SQL Server we have been able to install SQL Server on Linux. Linux will likely be more of an unfamiliar environment for traditional Microsoft SQL DBAs. This guide will walk you through how to check the status of SQL Server services and manage them (start, stop, restart) on a Linux host.
Microsoft provides official documentation here: Start, stop, and restart SQL Server services on Linux
Most Linux distributions, including CentOS, Ubuntu, Debian, and RedHat, use
systemctlfor service management. However, note thatsystemctlmay not be available on all Linux environments, such as WSL (Windows Subsystem for Linux), which doesn’t use thesystemdinit system.This guide will demonstrate key commands for managing SQL Server services using
systemctl.The following is included below:
> 1. Showing Enabled Services on Linux
> 2. Check Status of SQL Server Service Linux
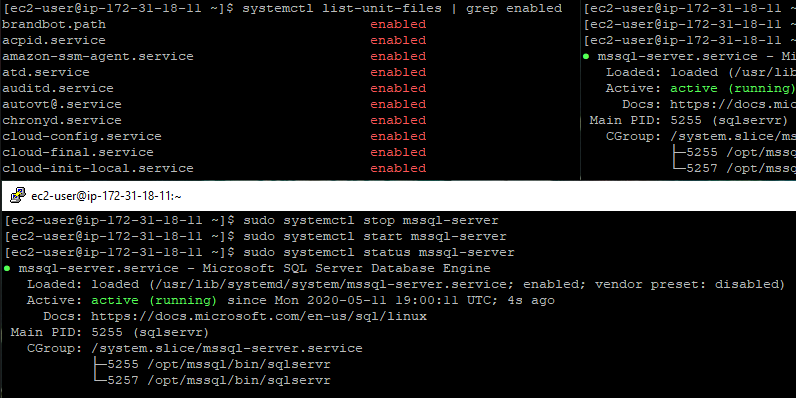
> 3. Stop, Start and Restart SQL Server Services on Linux1. Showing Enabled Services on Linux
To list all enabled services, including those that automatically start at system boot, run:
systemctl list-unit-files | grep enabled
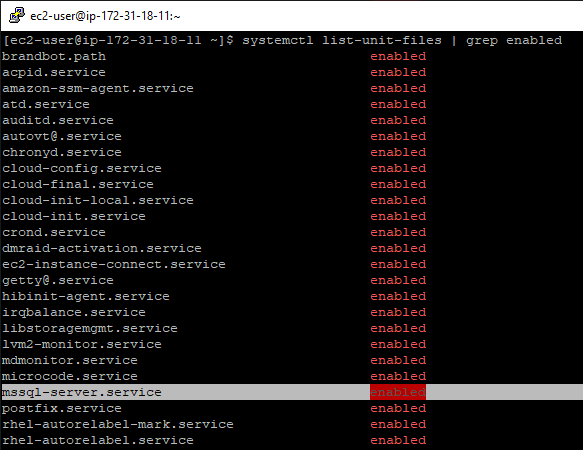
If
mssql-serveris not listed, it won’t start automatically after a reboot. To enable it, use:sudo systemctl enable mssql-server
2. Check Status of SQL Server Service on Linux
To check the current status of the SQL Server service:
sudo systemctl status mssql-server
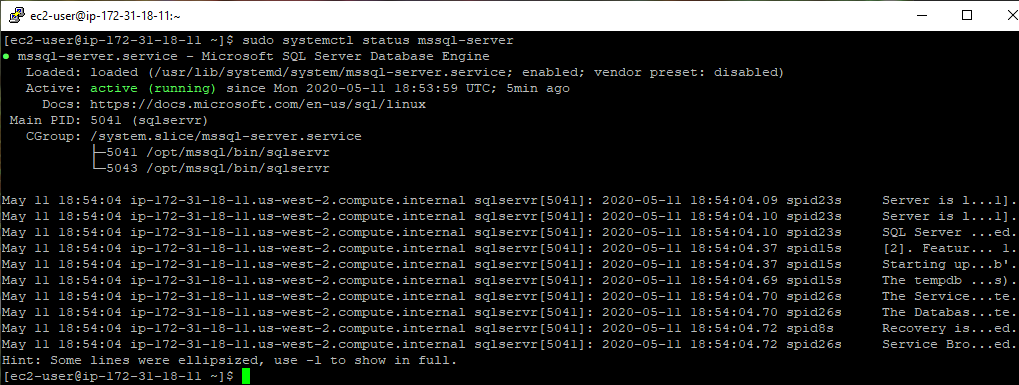
If the SQL Service is active, the output of the command will include the text “active (running)” in green. This indicates that the service is currently running and is available to process requests.
If the service is not active, the output will include the text “inactive (dead)” in red. This indicates that the service is not currently running, and may need to be started or restarted in order to be used.
3. Stop, Start or Restart the SQL Server Services on Linux
Stop SQL Service on Linux:
sudo systemctl stop mssql-server
Start SQL Service on Linux:
sudo systemctl start mssql-server
Restart SQL Service on Linux:
sudo systemctl restart mssql-server
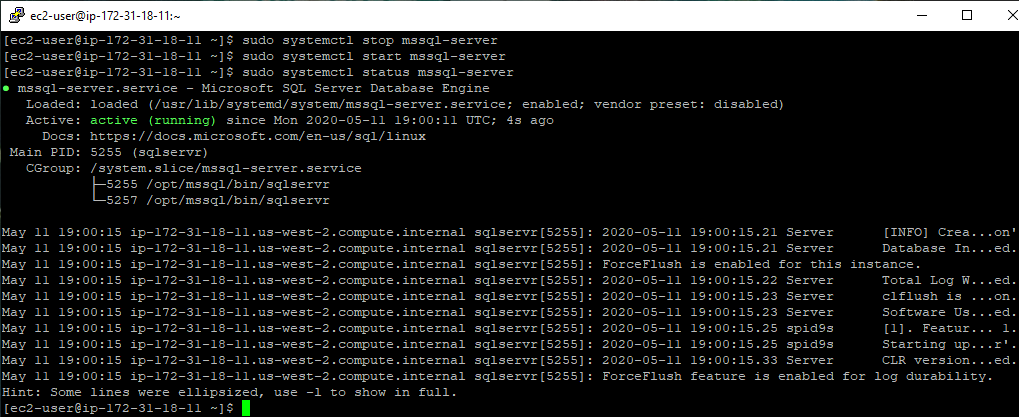
After running any of these commands, it’s recommended to verify the service status to confirm the desired action was successful:
sudo systemctl status mssql-server
-

Testing Connectivity to Remote Server Ports with PowerShell
This post contains a demo for how to check if a port is open using PowerShell, whether you are on the latest or older versions of Windows.
All admins need to know how to test connectivity to remote server ports. In fact, all software developers and other technical folks do too in my opinion!
If one server needs to connect to another, we need network line of sight, meaning we need to ensure the network traffic can flow from one place to another. Generally applications connect using specific ports, and to check if the network is good you’d run a network test using an IP (or servername) including the port number.
On Windows, Putty is commonly used to test network ports, however PowerShell provides a much easier alternative which I demo in this post. The two methods for testing network connectivity on specific ports are from a Microsoft DBA’s perspective, so you’ll see RDMS related ports here!
Topics Covered:
1. How to Check a Port is Open (Test-NetConnection)
2. How to Check a Port is Open (Pre Windows Server 2012)
3. Further Troubleshooting Network Issues
Important ports to remember in the life of a DBA might include:
> SQL Server (1433, 1434 & 5022)
> RedShift (5439)
> PostgreSQL (5432)
> MySQL (3306)
> Oracle (1521)
1. How to Check a Port is Open (Test-NetConnection)
The best way for checking if a port is open on Windows is by using the Test-NetConnection cmdlet. I use this very often, and have done for years. It’s built-in to recent versions of PowerShell, and its easy to use/remember.
To test if network flow on a port is open between severs on Windows, we can run the following:
# Test remote port is open
Test-NetConnection -ComputerName lab-sql1.whyte.net -Port 1433

# Same as above command using alternative syntax/ip
tnc 172.31.18.100 -port 1433
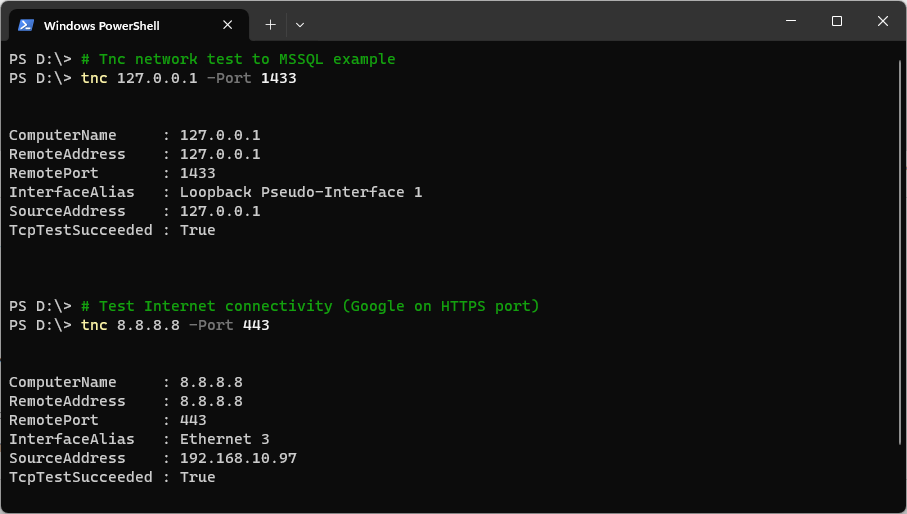
When you run this command and it hangs for 60 seconds, that will generally mean it’s going to fail. If the
TcpTestSucceededoutput returnsfalse, that means the network port test has failed.Note: Network traffic may pass through firewalls, NAT gateways, security groups, or load balancers. If issues persist, cross-check with PuTTY and review firewall/network logs. You might need to contact your network team and raise an ACL request to open this network flow, or DevOps if the Cloud Infra side needs opened.
2. How to Check if a Port is Open (Pre Windows 2012)
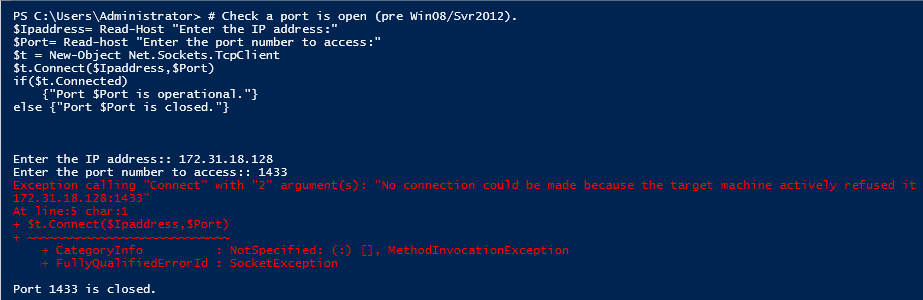
The PowerShell script below is useful for when you’re running on legacy Windows versions (pre-Windows Server 2012).
I’ve spawned a Windows Server 2008 R2 Server for this demo to verify. The PowerShell script below will help you check if a port is open on older Windows versions:
# Check a port is open (pre Win08/Svr2012)
$Ipaddress= Read-Host "Enter the IP address:"
$Port= Read-host "Enter the port number to access:"
$t = New-Object Net.Sockets.TcpClient
$t.Connect($Ipaddress,$Port)
if($t.Connected)
    {"Port $Port is operational."}
else {"Port $Port is closed."}
Below is an example of no connectivity, it’s failing to connect on port 1433. The server I’m testing does not have SQL Server installed, so there was nothing listening on that port.
3. Further Troubleshooting Network Issues
If connectivity fails, consider the following checks:
– Server Listening: Ensure there is a service actively ‘listening’ on the remote server port.
– Network Configurations: Verify DNS settings, network configurations, and Security Groups.
– Firewalls: Check both infrastructure-level and local host firewalls for potential restrictions.Note: Diagnosing complex connectivity issues may involve various components, including firewalls, NAT Gateways, and load balancers. While this test is straightforward, for thorough troubleshooting, consider running additional tests with tools like PuTTY.