
-
CIDR Conversion Table / Subnet Calculator
This blog post provides a quick reference table for CIDR notation, subnet masks, and host counts, making it a valuable tool for tasks like configuring security groups, firewall rules, and subnetting. It simplifies network planning and ensures accurate IP address allocation for efficient and secure network setups.
CIDR Prefix Length Netmask Hosts (Class C’s/B’s/A’s) /32 255.255.255.255 1 /31 255.255.255.254 2 /30 255.255.255.252 4 /29 255.255.255.248 8 /28 255.255.255.240 16 /27 255.255.255.224 32 /26 255.255.255.192 64 /25 255.255.255.128 128 /24 (Class C) 255.255.255.0 256 / 1 /23 255.255.254.0 512 / 2 /22 255.255.252.0 1,024 / 4 /21 255.255.248.0 2,048 / 8 /20 255.255.240.0 4,096 / 16 /19 255.255.224.0 8,192 / 32 /18 255.255.192.0 16,384 / 64 /17 255.255.128.0 32,768 / 128 /16 (Class B) 255.255.0.0 65,536 / 256 / 1 /15 255.254.0.0 131,072 / 512 / 2 /14 255.252.0.0 262,144 / 1024 / 4 /13 255.248.0.0 524,288 / 2048 / 8 /12 255.240.0.0 1,048,576 / 4096 / 16 /11 255.224.0.0 2,097,152 / 8129 / 32 /10 255.192.0.0 4,194,304 / 16,384 / 64 /9 255.128.0.0 8,388,608 / 32,768 / 128 /8 (Class A) 255.0.0.0 16,777,216 / 65,536 / 256 / 1 /7 254.0.0.0 33,554,432 / 131,072 / 512 / 2 /6 252.0.0.0 67,108,864 / 262,144 / 1,024 / 4 /5 248.0.0.0 134,217,728 / 524,288 / 2,048 / 8 /4 240.0.0.0 268,435,456 / 1,048,576 / 4,096 / 16 /3 224.0.0.0 536,870,912 / 2,097,152 / 8,192 / 32 /2 192.0.0.0 1,073,741,824 / 4,194,304 / 16,384 / 64 /1 128.0.0.0 2,147,483,648 / 8,388,608 / 32,768 / 128 /0 0.0.0.0 4,294,967,296 / 16,777,216 / 65,536 / 256 -
Removing Quotes from all CSV Files in a Directory
Managing CSV files often involves cleaning up data before processing. A common task is removing unwanted quotation marks from the contents of CSV files.
I wrote a blog post on how to remove quotes from a single CSV file using PowerShell some years ago, which I have just updated. At the end, I had the idea of adding a follow-up which is to do the same, remove quotes in a CSV file, but for multiple files.
Ideally you should be cleaning the data at source rather than performing this task. There’s many ways to do this too, I think you should use the one you find the easiest that saves most of your time.
PowerShell Script to Remove Quotes from Multiple CSV Files
Here is a script to remove quotes from all CSV files in a specified directory and save the cleaned versions in a new output directory:
# Define the input directory and output directory
$InputDirectory = "C:\Path\To\Input\CSVFiles"
$OutputDirectory = "C:\Path\To\Output\CleanedCSVFiles"

# Create the output directory if it doesn't exist
if (-not (Test-Path $OutputDirectory)) {
    New-Item -ItemType Directory -Path $OutputDirectory
}

# Get all CSV files in the input directory
$CSVFiles = Get-ChildItem -Path $InputDirectory -Filter "*.csv"

foreach ($File in $CSVFiles) {
    # Read the content of the current CSV file, remove quotes, and save it to a new file
    $InputFilePath = $File.FullName
    $OutputFilePath = Join-Path -Path $OutputDirectory -ChildPath $File.Name

    # Process the file: Remove quotes and output to the new file
    Import-Csv -Path $InputFilePath |
    ConvertTo-Csv -NoTypeInformation |
    ForEach-Object { $_ -Replace '"', "" } |
    Out-File -FilePath $OutputFilePath -Force -Encoding ascii

    Write-Host "Processed file: $InputFilePath -> $OutputFilePath"
}

Write-Host "All CSV files have been processed and saved in $OutputDirectory."
How it works:
– Define Directories:
The script processes files from theInputDirectoryand saves cleaned versions in theOutputDirectory. Ensure you update these paths with your actual directories.
– Batch Processing: UsesGet-ChildItemto loop through all.csvfiles in the input directory.
– Remove Quotes: Reads each file’s content, removes quotes, and writes the cleaned data to a new file.
– Output Directory: Files are saved with their original names in the designated output directory to avoid overwriting the source files.Recommendations:
– Monitor Performance: If you’re working with large CSV files, monitor your system resources during processing.
– Backup Original Files: Always create backups of the original files before running bulk operations.
– Validate Data: Check the output files to ensure the data integrity is maintained after quote removal. -
Keeping SQL Server and Critical Systems Up to Date
Applying the latest patches to SQL Server, Windows OS, and underlying hardware is a vital part of maintaining secure, high-performing systems. For many organizations, this is done on a regular schedule—monthly, quarterly, or aligned with specific maintenance windows. However, for business-critical, 24/7 systems, patching takes extra planning and vigilance.
Here’s a straightforward look at patching strategies and considerations from an experienced SQL DBA:
Regular Maintenance Is Key
For High Availability (HA) setups or environments using Always On Availability Groups (AAG), scheduling monthly failovers for maintenance is ideal. This ensures:
# SQL Server, Windows OS, and firmware/hardware stay up-to-date.
# Downtime is minimized, and systems remain resilient against known vulnerabilities.Skipping updates for long periods can lead to performance degradation, security risks, and compatibility issues. I love to be proactive in this space, it’s my duty as a DBA!
CU vs. GDR: What’s the Difference?
When patching SQL Server, there are two main types of updates to consider:
Cumulative Updates (CU):
Include all fixes, such as performance improvements, feature updates, bug fixes, and security patches. CUs are ideal for staying current and ensuring systems are optimized.General Distribution Releases (GDR):
Provide security-only updates, focusing on critical vulnerabilities. GDRs are the safer, more conservative choice, particularly for environments that prioritize stability over new features.Choosing the Right Updates:
# Stick with GDR if your environment has only applied GDR updates in the past and prioritizes minimal change.
# Use CUs for broader improvements and enhancements, but test thoroughly before deploying.Patch Tuesday and Update Frequency
Microsoft’s Patch Tuesday is a key date to monitor.
Newer SQL Server versions: Updates arrive every 1–2 months, typically including CUs.
Older SQL Server versions: Updates are less frequent, often limited to GDR releases for security.
The challenge is staying current: while being on the latest CU or GDR means benefiting from fixes, it also carries risks if an update introduces new bugs.
What Happens When a Patch Goes Wrong?
No update is perfect—Microsoft occasionally releases patches that cause unexpected issues. If a patch creates problems:
1. Roll back the update to restore stability.
2. Test thoroughly in a non-production environment before redeploying or applying future updates.Best Practices for 24/7 Systems
For business-critical systems:
1. Keeping up to date means more than just SQL Server. It includes Windows OS, firmware, and hardware drivers, which should/will be included in the maintenance plans.
2. Prioritize regular maintenance cycles with clear testing and rollback procedures. Roll-out to non-Prod environments before applying to Production.
3. To achieve no downtime for SQL Server patching, we use HA/AAG configurations to minimize disruption during failovers or patching.
Hope all this was useful info!
-
How to Set the Default Database for SQL Server Users
This blog post contains a quick guide on how to set your default database in SQL Server using SQL Management Studio.
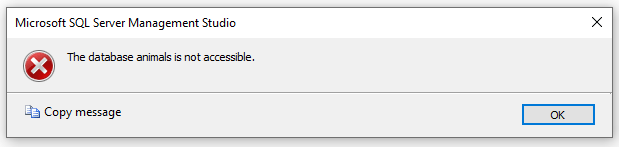
When you log into SQL Server using SSMS and open a new query window, you will automatically be set to use your logins default database which was configured during the creation of your SQL User. Sometimes a user might be set to use a database they don’t have access to, and will be prompted with an error message:
Cannot open database “DatabaseName” requested by the login. The login failed.
The default database of a SQL user is a more important factor if managing permissions on a shared (customer facing) SQL Servers.
Changing Default Database for a SQL User
Create Schemas & Table
First, we will open a new query window with a default database setting of ‘master’.
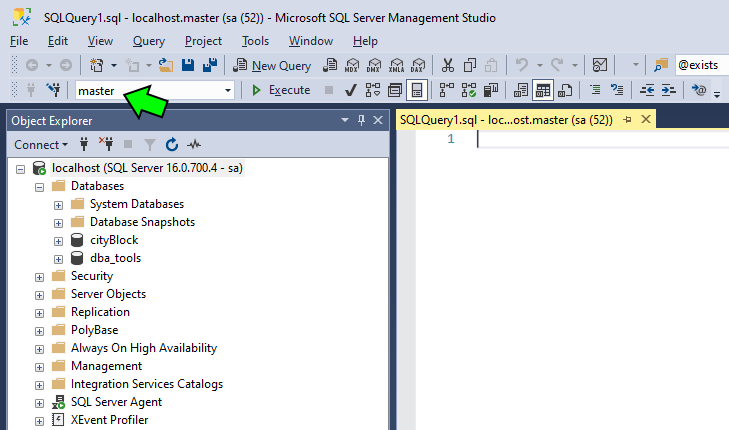
When we query a table like
sys.tables, it’ll show the tables within the master database. If we want it query other databases we can swap to use another database using the drop-down menu as shown above. There’s a few other ways to change the database you are querying, for example using the USE command or just add the the database to our query with three-part-identifier (databaseName.schemaName.tableName).Example 1: Change a SQL Users Default Database via Command
To change the default database for a SQL Server login via a command, you can use the
ALTER LOGINstatement. Here’s the general syntax:-- change default database of sql user ALTER LOGIN [LoginName] WITH DEFAULT_DATABASE = [DatabaseName];
Example 2: Changing a SQL Users Default Database via GUI
To change a SQL users default database using SQL Server Management Studio (SSMS):
1. In Object Explorer, navigate to Security > Logins.
2. Find the user login, filter results by right-clicking if helpful.
3. Right-click the SQL user and select Properties.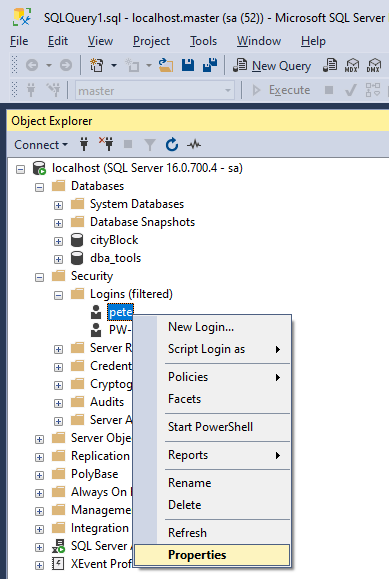
The Login Properties window will show on screen, and at the bottom of the General tab we can see and amend the default database setting.

If you are unsure what to set this to, you can go ahead and set the default database to what the one you think the user will be querying most often.
Hope this helps!
-
How to Open SSMS as a Different Domain User
If you’re connecting to SQL Server within a corporate environment, you might need to connect to SQL Server using a different Domain User account. This can be done by opening SQL Server Management Studio (SSMS) as a another user, which I’ll demo in this post.
Connecting to SQL Server with a a different Domain User is needed if your currently logged in user is not on the same Active Directory (AD) Domain as the SQL Server you want to connect to.
Topics Covered:
1. How to Open SSMS as Different User
2. Create PowerShell Script to Open SSMS as Another User1. How to Open SSMS as Different User
This part shows you how to connect to SQL Server with a user that is not your currently logged in Domain User, using SQL Server Management Studio (SSMS).
Open SSMS as Different User:
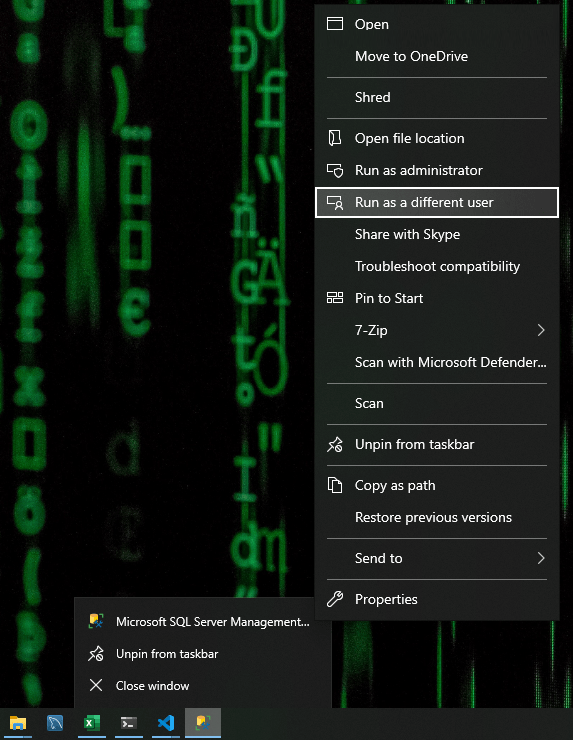
– Locate the SSMS shortcut in the Start Menu or Taskbar.
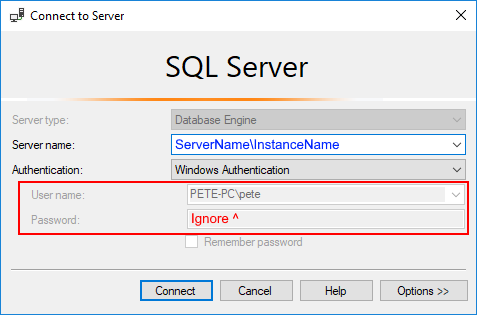
– While holding the Shift Key, right-click the SSMS shortcut, and select Run as a different user.Enter your Domain Credentials as prompted.
– For AD Domain User accounts you should be including the Domain prefix as shown below (pwlab\).
Even though the connect to server window will still show your currently logged in Domain, SSMS will connect using the login details provied.
2. Create PowerShell Script to Open SSMS as Another User
Now that we know how to connect to SQL Server using a different Domain User account, we’ll now look at doing this using a PowerShell Script. This is useful if you need to do this often – creating this script and saving as a shortcut will save you from some of the steps above in this post.
We can open SSMS as different user by running the command below in a PowerShell Terminal:
# Open SSMS as another user
# amend domain\username before running
C:\Windows\System32\runas.exe /user:domain\username /netonly "C:\Program Files (x86)\Microsoft SQL Server Management Studio 19\Common7\IDE\Ssms.exe"
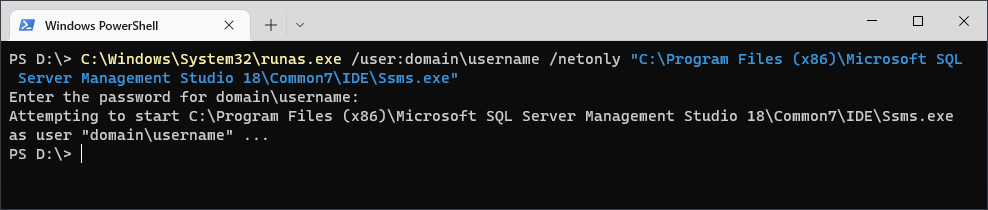
You can save this command by simply opening a new Notepad, copy/paste the command and save to your desktop as a .ps1 file. When you run the file you’ll be prompted to enter the password for the Domain User defined within the PowerShell script.
Note: The path used to call SQL Management Studio in this script is tailored to SSMS version 19. You should amend the path to reflect your current version.
Hope this guide was a useful one for you! Feel free to add a comment if there’s room for improvement here.