Tag: CSV Files

  • Remove Quotes from a CSV File with PowerShell

    Remove Quotes from a CSV File with PowerShell

    This is a post on how to remove quotes from a CSV file using PowerShell.

    If your dealing with a large CSV file, running the Import-CSV cmdlet below will consume a lot of system resources (RAM mostly). Also, if there’s a set of double quotation marks within the CSV file there may be some issues with the ordering of columns.


    Create Test File

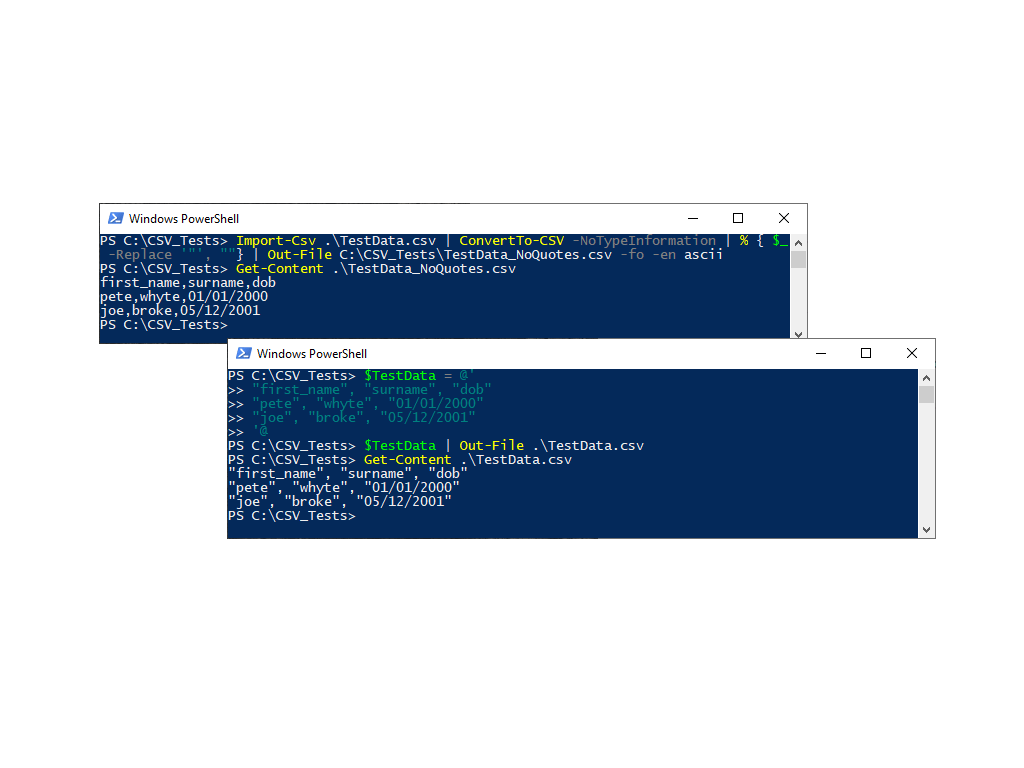
    I’m creating the TestData variable and piping that out into a file using Out-File here. I can then check what’s in the file using Get-Content.

    # Create variable with CSV data.
    $TestData = @'
    "first_name", "surname", "dob"
    "pete", "whyte", "01/01/2000"
    "joe", "broke", "05/12/2001"
    '@
    
    # Output data as CSV file in working directory.
    $TestData | Out-File .\TestData.csv
    
    # Show contents of new CSV file.
    Get-Content .\TestData.csv

    Remove Quotess

    Amend import and output file names and then Get-Content to check the file after since it’s a tiny test file.

    # Import CSV file and output as new file with quotes removed.
    Import-Csv .\TestData.csv | ConvertTo-CSV -NoTypeInformation | % { $_ -Replace '"', ""} | Out-File C:\CSV_Tests\TestData_NoQuotes.csv -fo -en ascii

    As mentioned above in this post performing this on a large data file might not work out well. Monitor the performance of your machine and give the data a thorough visual check after.

    If you encounter issues I’d probably ask why this is needed, as there are many options for handling such delimitated files in the more recent versions database tooling.

  • The SSMS Import Flat File Feature

    The SSMS Import Flat File Feature

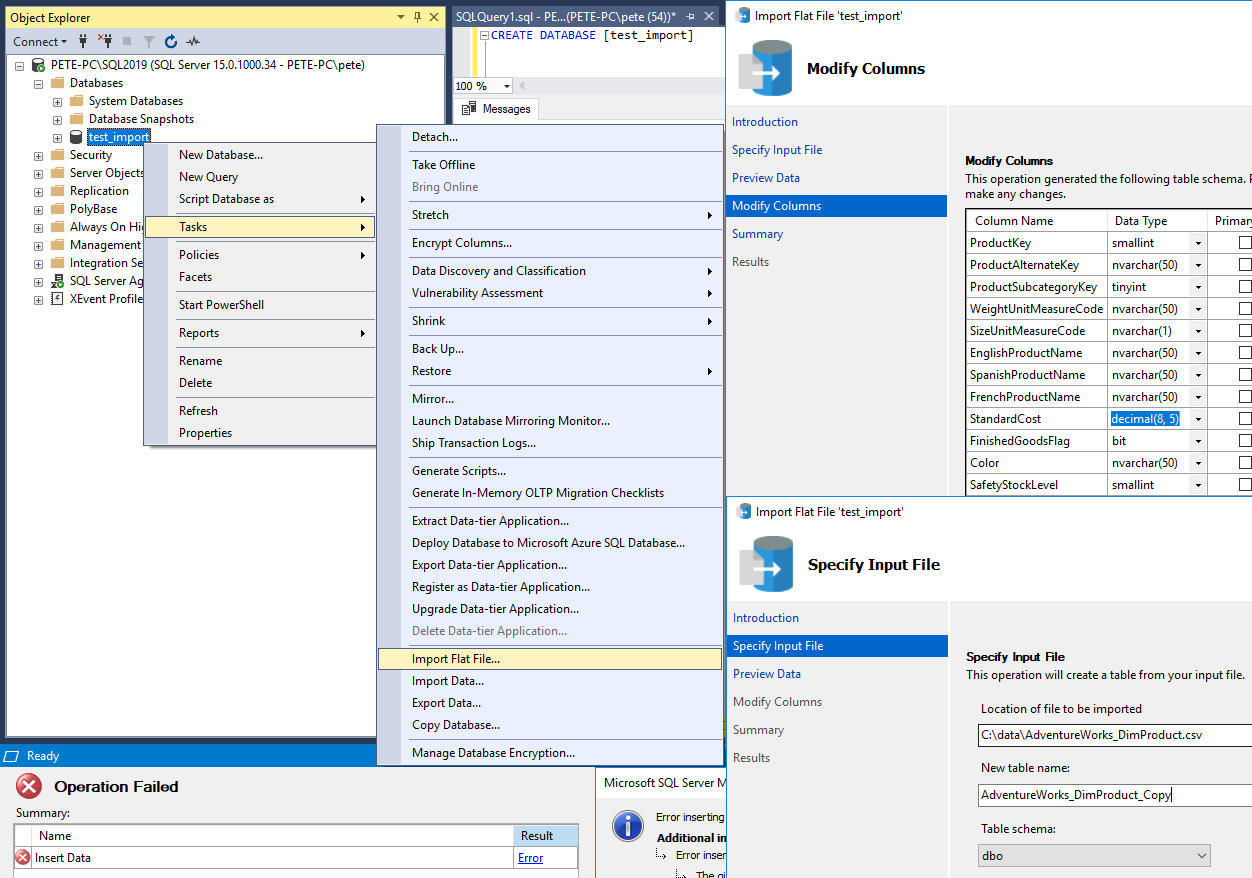
    The Import Flat File feature within SQL Server Management Studio (SSMS) was introduced in December 2017 (14.0.17213.0). This is a streamlined version of the Import Data feature and it minimises the user intervention during a file import.

    Unlike the Import data feature, you don’t have the option to save the import as a .DTS package. This makes it a good tool for quick imports of individual files to SQL, but not so much if it’s a repetitive task you want to automate.

    Below is a guide on using the Import Flat File feature, with a (realistic) twist.

    How to Import Flat File SQL Server

    The steps below are an example of a CSV file import to a SQL Server 2019 database.

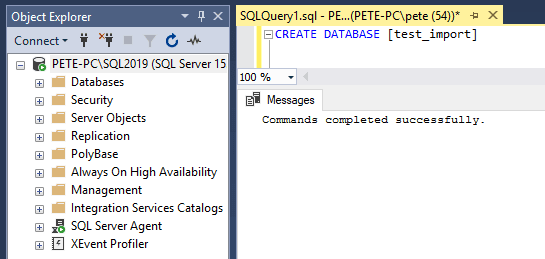
    1. Create a database.

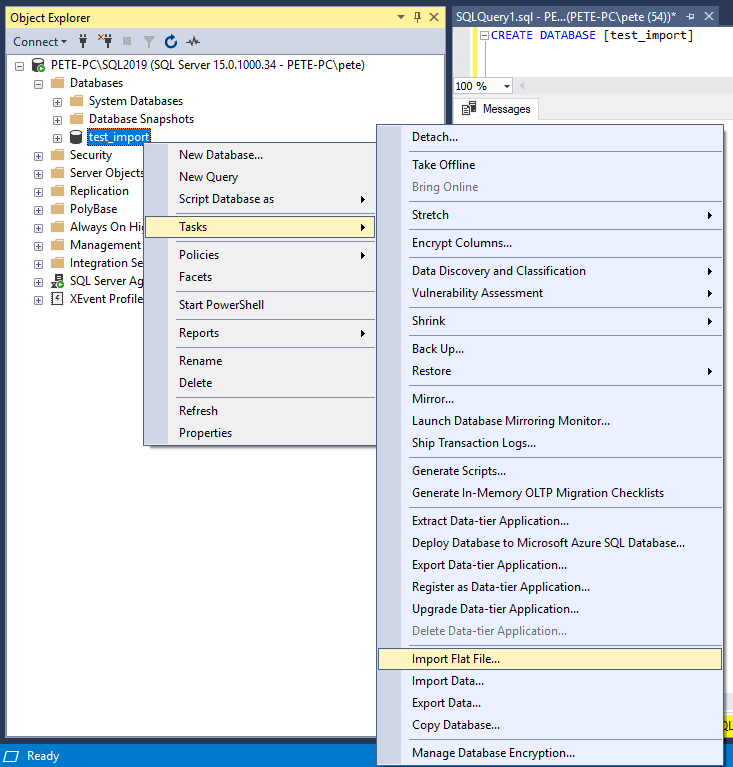
    2. Right-click your destination database, select Tasks and Import Flat File as shown below.

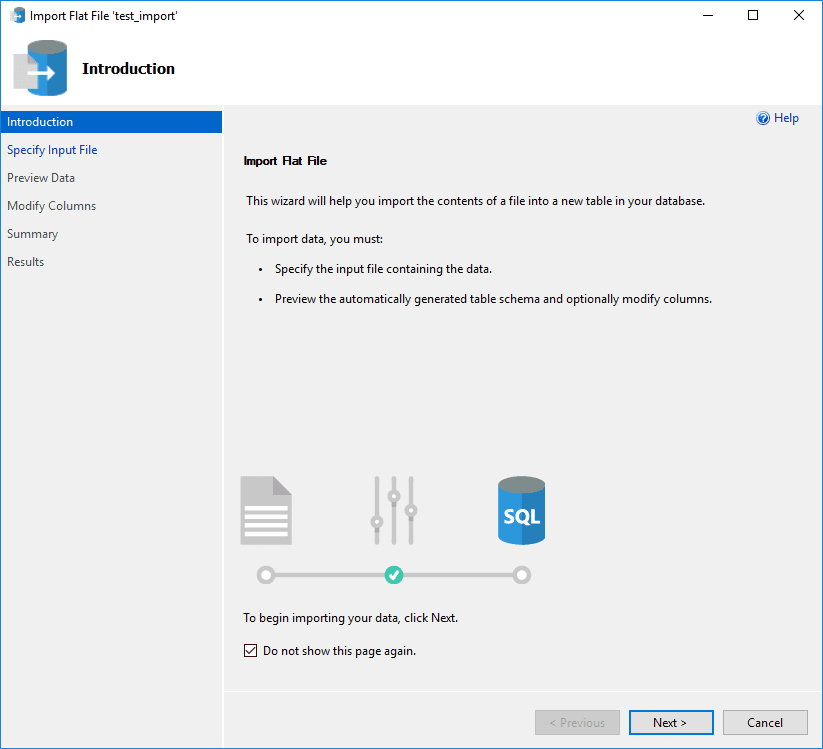
    3. Click Next to continue.

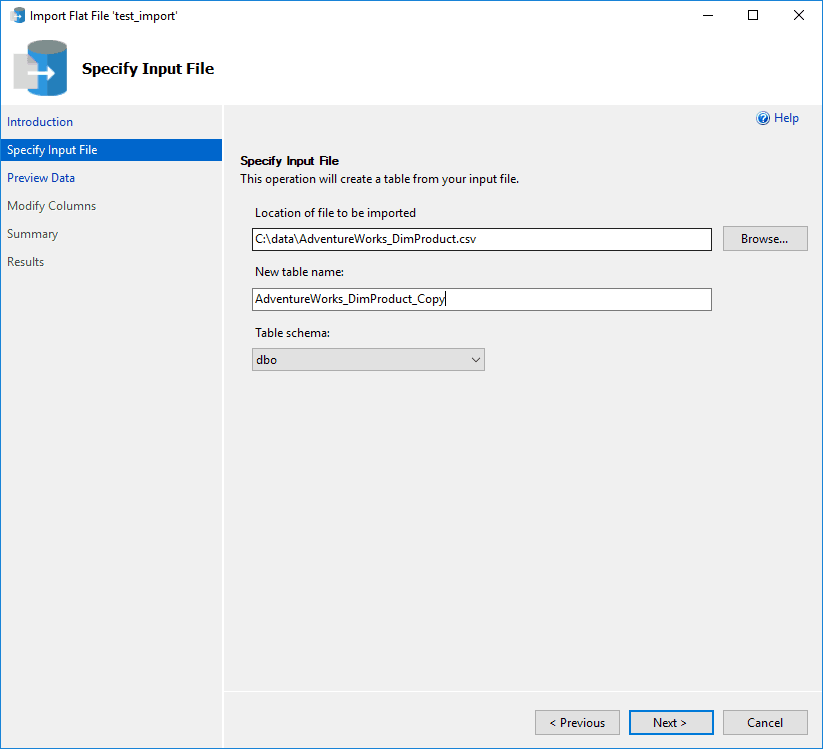
    4. Browse to the file, enter the desired table name and amend the schema name accordingly. Have a look here for posts on exporting data if useful.

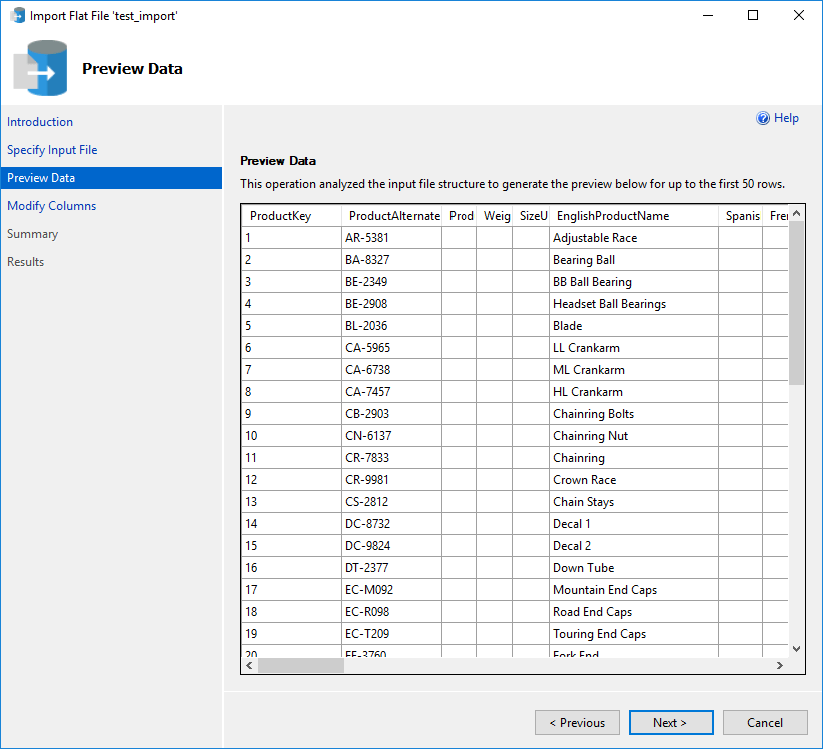
    5. Preview the data on the next window and click Next when happy.

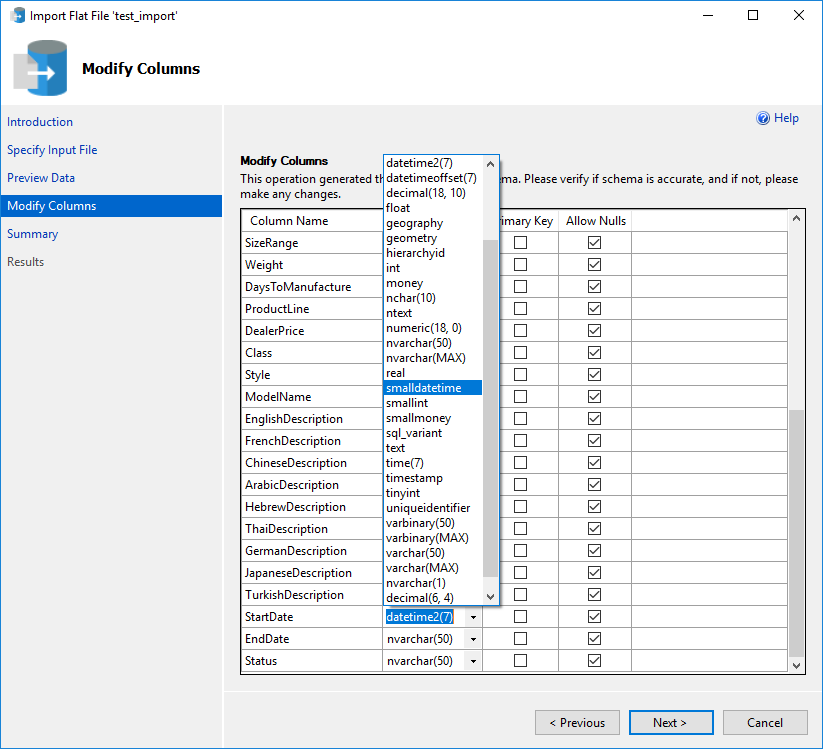
    6. Review Column Names/Primary Keys/NULLs, and take as much time as you need when selecting Data types!

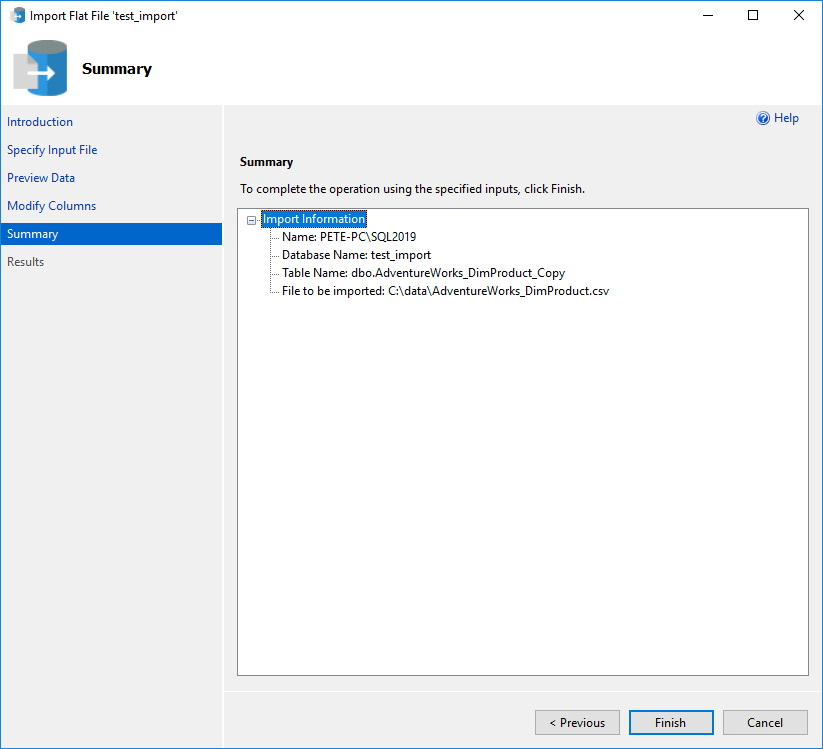
    7. Hit Next & Finish when ready.

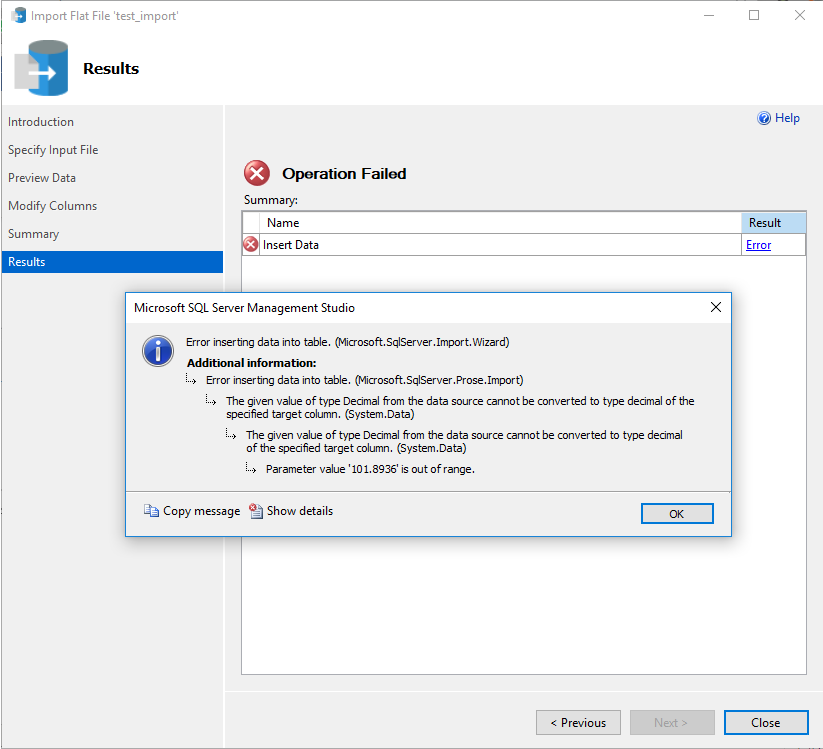
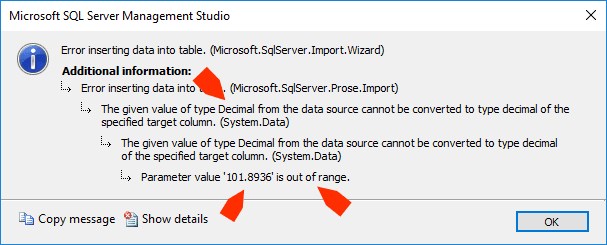
    8. Oh wait. I wasn’t expecting this…

    This is something that has to be included as it happens to us all. You won’t know if there are exceptions within the data, so data type conversion errors are a frequent thing in the business of importing & exporting data. We have to use any useful information we can find within the error.

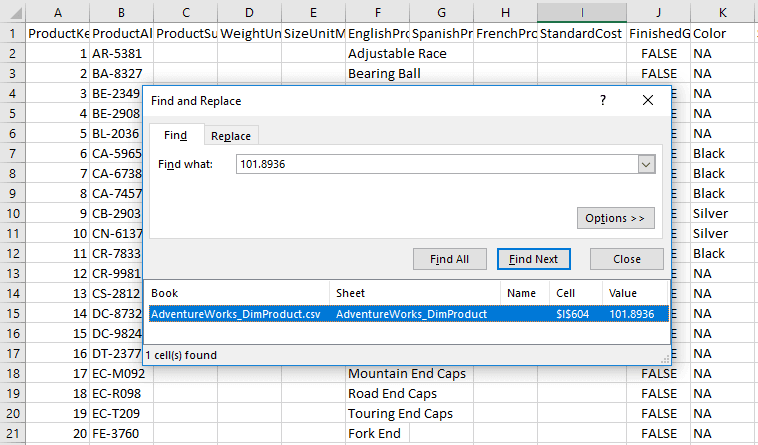
    9. If you don’t know the column name, search the .csv file for ‘101.8936’ as quoted within the error message.

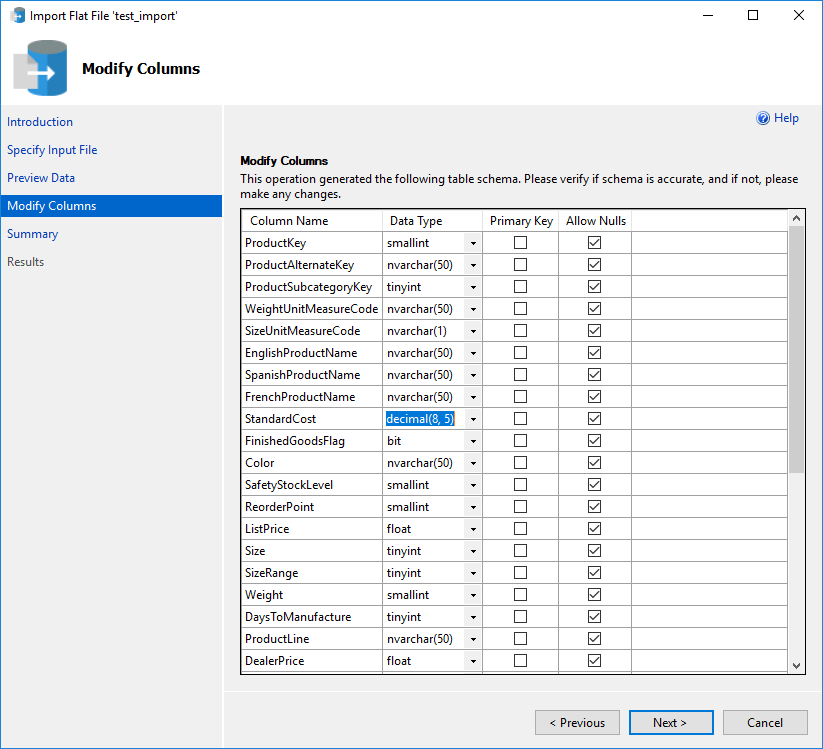
    10. Going back within the wizard to Modify Columns, there’s only one Decimal Data Type, so it would have been easy to see which column needs changed.

    Increasing Decimal Max Precision.

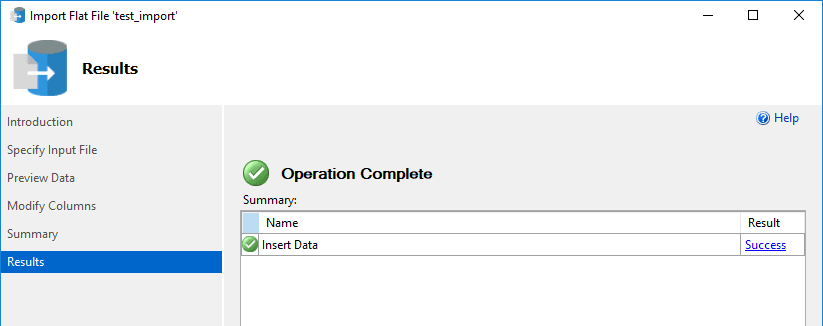
    11. Now finish the wizard and hope for the best!

    12. Let’s have a look at the new table.

  • Count Rows within CSV Files using PowerShell

    Count Rows within CSV Files using PowerShell

    This post contains a script that will help count rows within multiple CSV files using PowerShell. If you have a directory containing CSV files, this demo will walk you through how to count the rows of all CSV files within a folder.

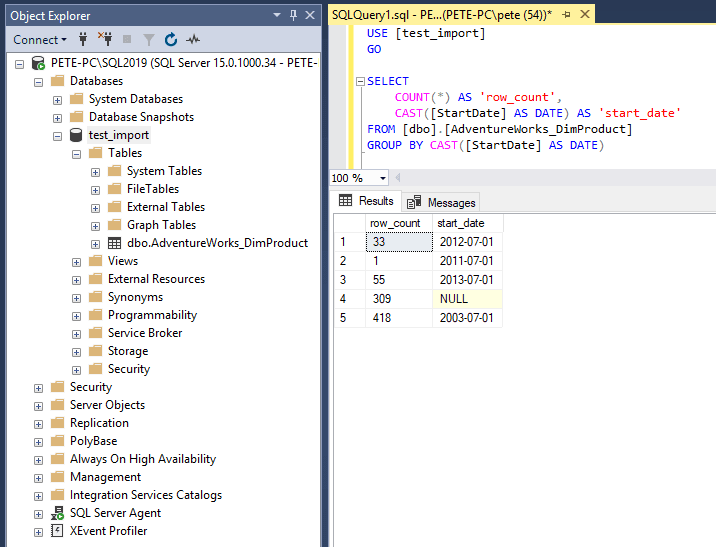
    Counting rows within CSV files may be useful for verifying data from source to destination. For example, if you’re importing CSV files to a SQL Server database, you may want to verify all rows were imported by counting the number of rows in each CSV file and comparing it with the table row counts in SQL.

    # Count Rows in Multiple CSV Files PowerShell
    # Check for Other Data Issues in CSV Files (Additional-Optional)

    Count Rows within CSV Files

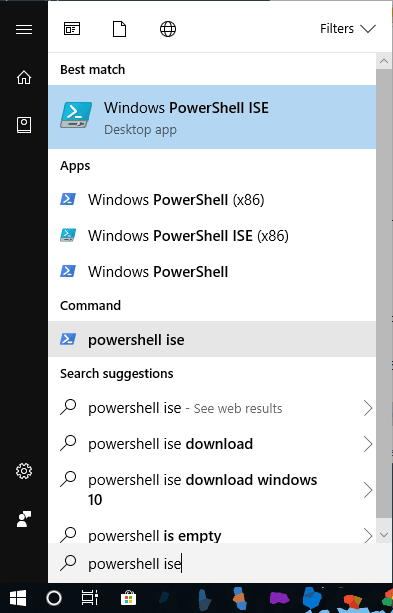
    First, open PowerShell ISE so we have a place to paste the PS script.

    Open PowerShell ISE Windows

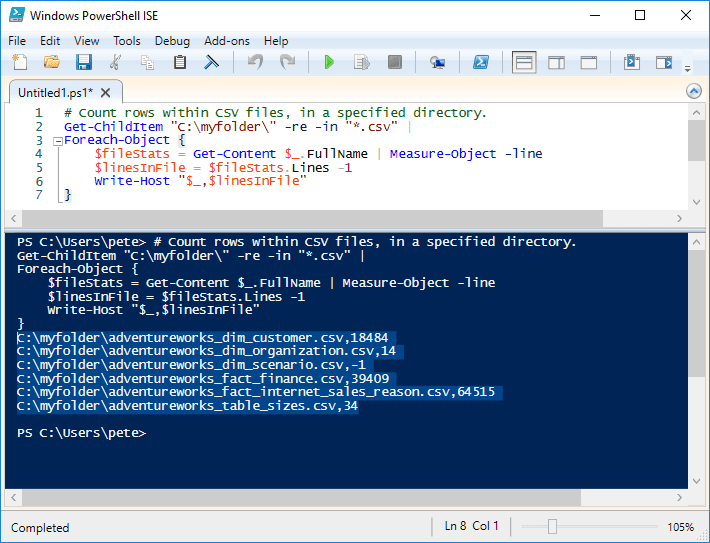
    Copy and paste the PowerShell script below into the PowerShell ISE window.

    Amend the directory (c:\myfolder) to the folder containing your CSV files, then Save/Run the PowerShell Script.

    # Count rows in CSV files PowerShell
    #  > set directory to folder containing csv files
    
    Get-ChildItem "C:\myfolder\" -re -in "*.csv" |
    Foreach-Object { 
        $fileStats = Get-Content $_.FullName | Measure-Object -line
        $linesInFile = $fileStats.Lines -1
        Write-Host "$_,$linesInFile" 
    }
    Count Rows within CSV Files using PowerShell

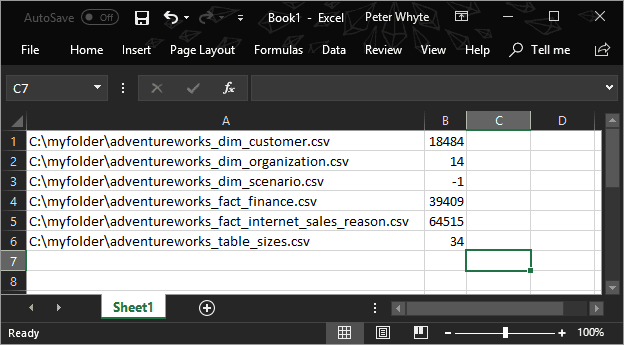
    We can copy this output information into Excel, but if doing so run Text to Columns and choose delimiter to format it correctly.

    CSV File Counts

    Verify Data / Check for Issues

    We can see in the screenshot above, one of the files has a row count of -1. This indicates that the file has no data, so we can throw ignore the CSV File. That’s one data issue out of the way.

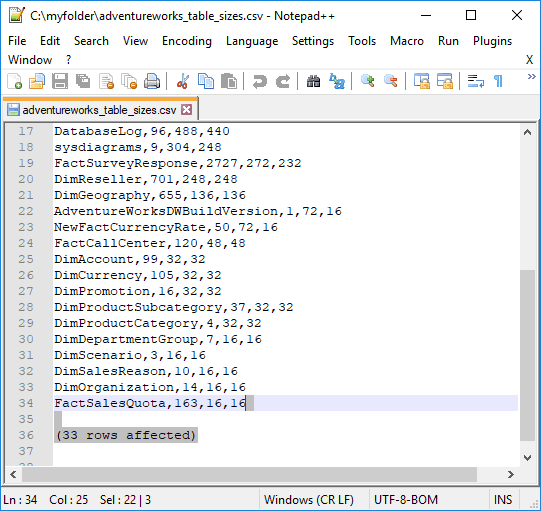
    Next up, I’m going to check for an issue whereby the CSV files contain “(12345 rows affected)” at the end of it. This is a common issue you may find when Exporting SQL Server Query Results to CSV.

    This is our example data issue. You wouldn’t want to attempt to import this CSV to SQL Server, as that gap in the row will create some bad data in the table.

    Notepad++ Adventureworks Table Rows

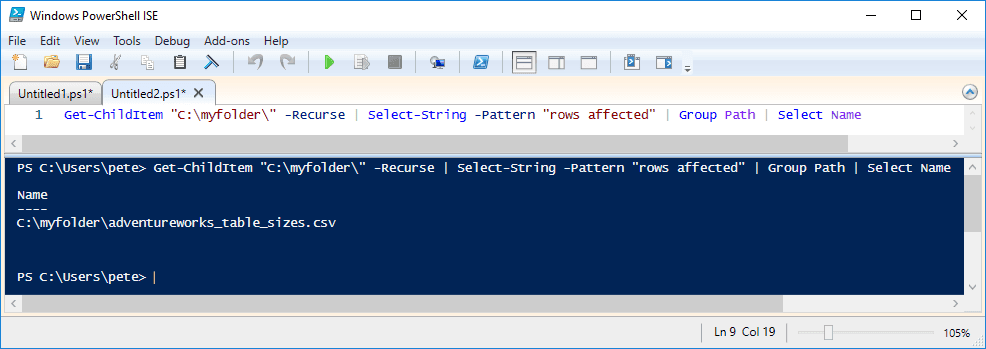
    We can run the PowerShell below to identify files with the string/phrase “rows affected“, checking all CSV files within a folder.

    # find string in csv files powershell
    Get-ChildItem "c:\myfolder\" -Recurse | Select-String -Pattern "rows affected" | Group Path | Select Name
    Find String in CSV Files PowerShell

    The script shows that one file has this “rows affected” string. We can manually remove this from the CSV file. To stop the “rows affected” MS SQL Server issue, we should export the data from SQL ensuring SET NOCOUNT ON has been added to the SQL Results to File query.

  • Exporting SQL Server Query Results to CSV

    Exporting SQL Server Query Results to CSV

    This post contains a guide on how to export data from a SQL Server database using SSMS.

    SSMS, SQL Server Management Studio, is the standard application that most people use to run queries for a Microsoft SQL Server Database. The default export option in SSMS is set as Column-Aligned, and we need to change it to Comma-Delimited to get our query output formatted correctly for CSV.

    To export a SQL query to CSV in SSMS we use the Results to File option which is shown in the demo below in this post. We use this instead of the standard query output option, Results to Table.

    The first part of this post runs through how to export a SQL query to a file using the default output options in SSMS, and then we are changing the output format column options as mentioned above.

    # Export SQL Server Query to File (Default SSMS Options)
    # Change SSMS Output Format Options (for CSV Files)

    Export SQL Server Query to File

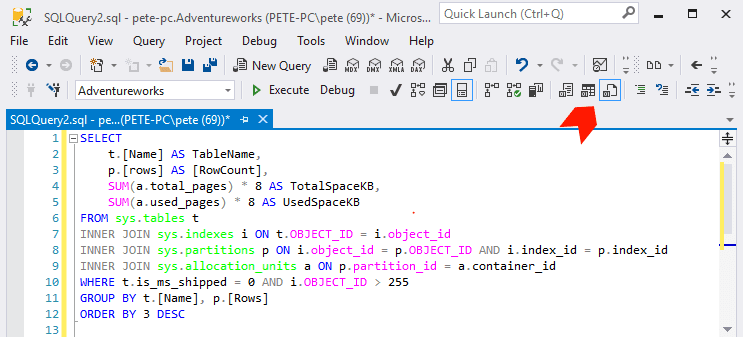
    To export a query the simplest way, would be for us to click Results to File as marked below.

    SSMS Results to File Option

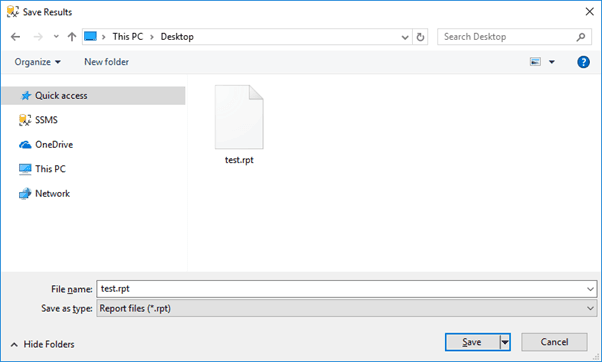
    When you run the query, it’ll prompt asking where and what to save the file as.

    .rpt File SQL Server

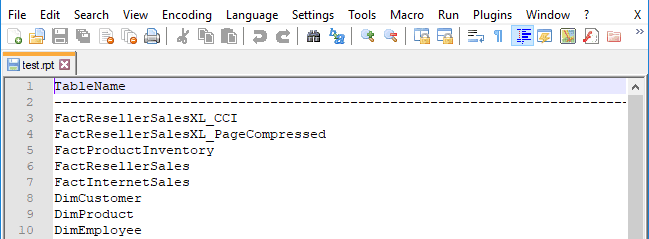
    The default file type is as shown above, a .rpt file. If we open that in NotePad++, it’s looking like this:

    Open .rpt File Notepad++

    We’ll save it as CSV this time.

    Save .rpt file as .csv

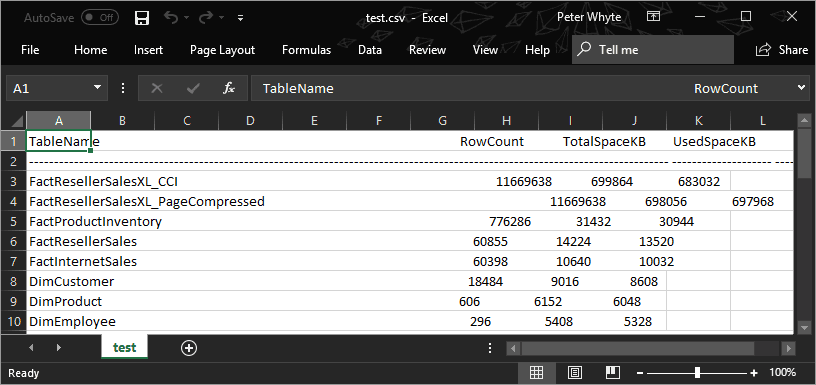
    You will now likely want to change the delimiter after looking at this output file. This .rpt file should not be opened as CSV.

    .rpt file in Excel

    Change SSMS Output Format Options

    Now that we’ve looked at the default SSMS export file option, let’s change it to Comma Delimited so we can open SQL query outputs as CSV.

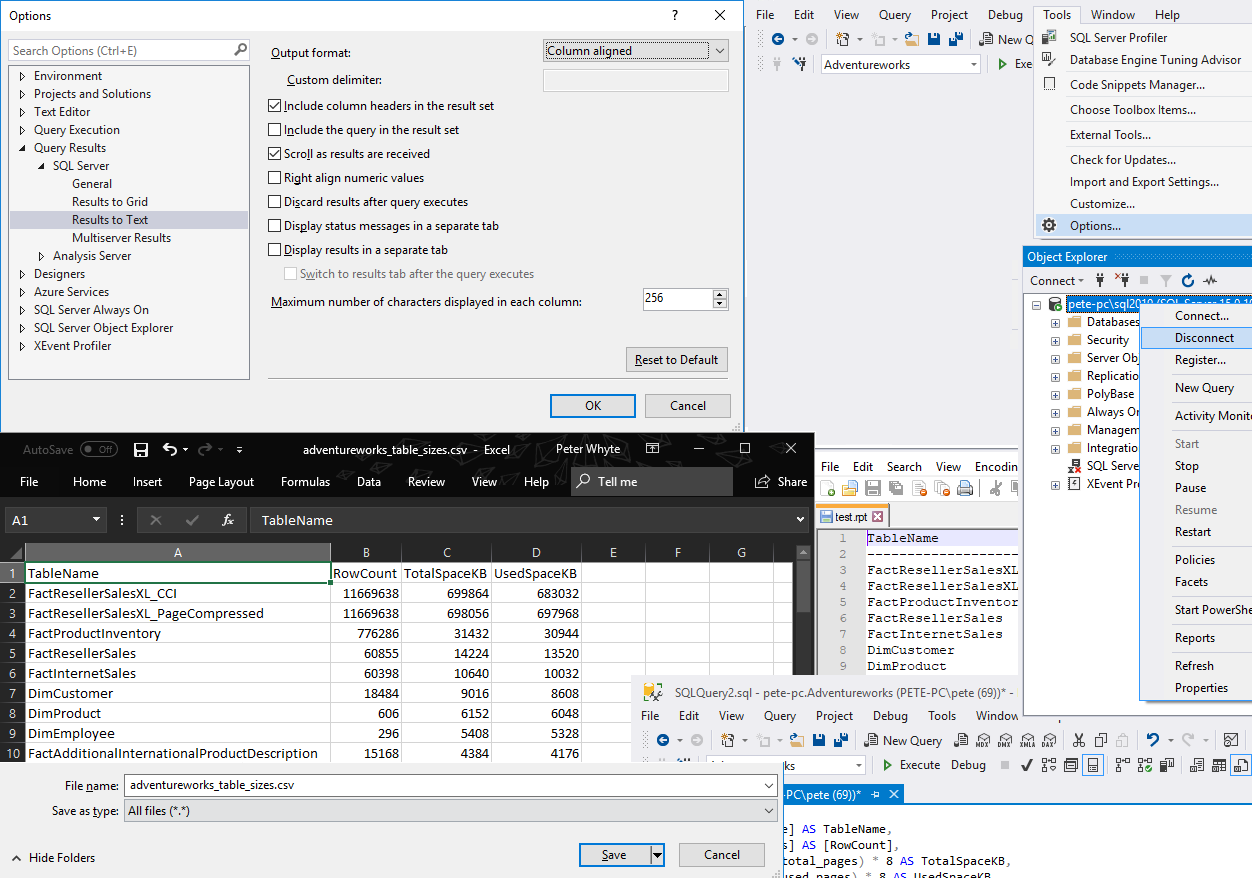
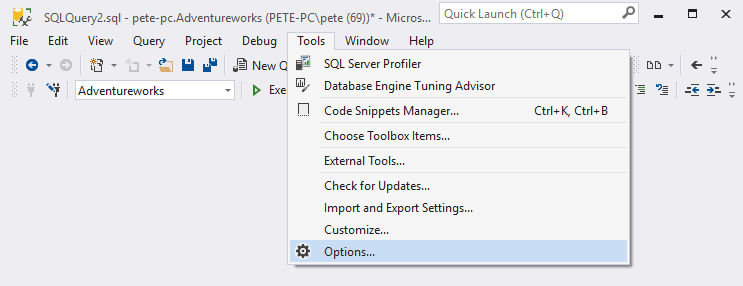
    Within SSMS, go to Tools > Options as shown in the screenshot below.

    SSMS Tools Options

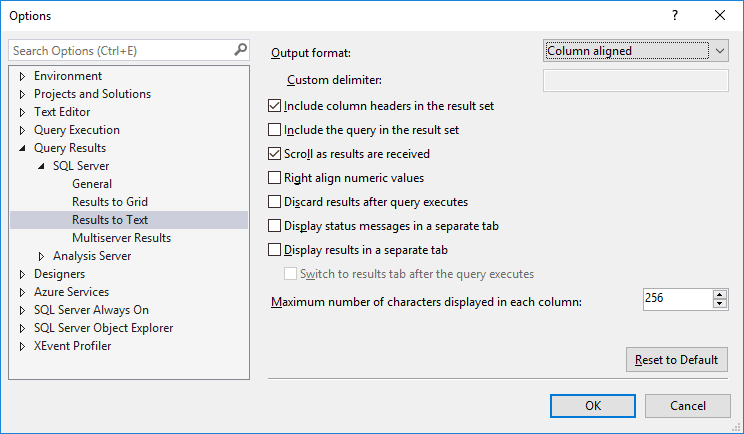
    In the Options window that appears, navigate to Query Results > SQL Server > Results to Text

    SSMS Results to Text Option

    The default option is shown above, Column aligned. Change this to Comma delimited.

    SSMS Delimitor

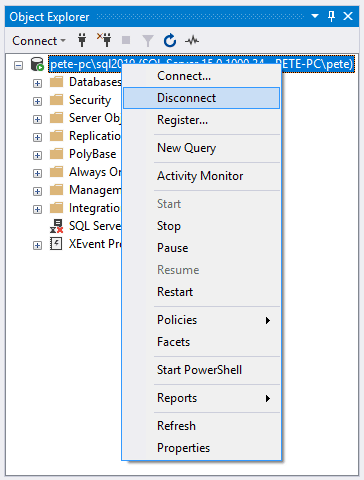
    We now need to disconnect our current session within the SSMS Object Explorer and connect back to the SQL Server instance.

    SSMS Disconnect

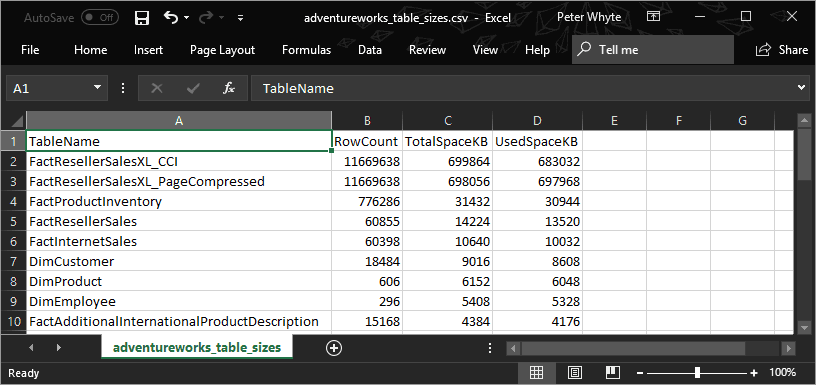
    Now, if we run that query as we did above outputting as text, the output file should be formatted correctly when saved as CSV.

    Export to CSV from SQL Server

    You may have identified an issue with the exported CSV data, and it contains “rows affected” at the end of it. The reason for this is that we need to include SET NOCOUNT within the SQL query when using Results to Text. I talk more about this in another one of my posts – Count Rows in CSV Files > Checking for Data Issues

    I hope this guide has helped you export a SQL query to CSV today. If you would like more SSMS-related tips, feel free to have a look at my SSMS page which is frequently updated.