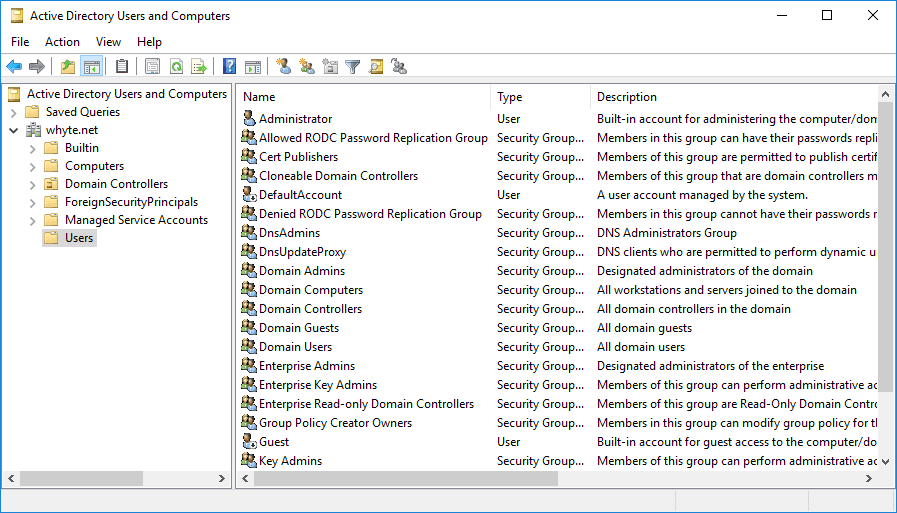
This post contains a demo installation of Active Directory Domain Services on Windows Server 2016. It follows a previous post for a series of test lab configuration posts.
Microsoft docs on installing AD on Windows Server can be found here: Install Active Directory Domain Services
Configuring a Windows Server 2016 on a local Hyper-V can be done by following my previous post: Installing Windows Server 2016 with Hyper-V
The following steps will get your test Windows Server environment set up to run Active Directory:
# Create a Hyper-V Private Network.
# Configure Windows TCP/IP Settings.
# Rename the Windows Server Host.
# Install Active Directory.
# Promote the Server to a Domain Controller.
Once the above has been achieved, you can create a new VM in Hyper-V (or other Hypervisor) and join your Domain, as I’ve done for some tests.
Create a Hyper-V Private Network
1. Right-click the Hyper-V host and select Virtual Switch Manager.
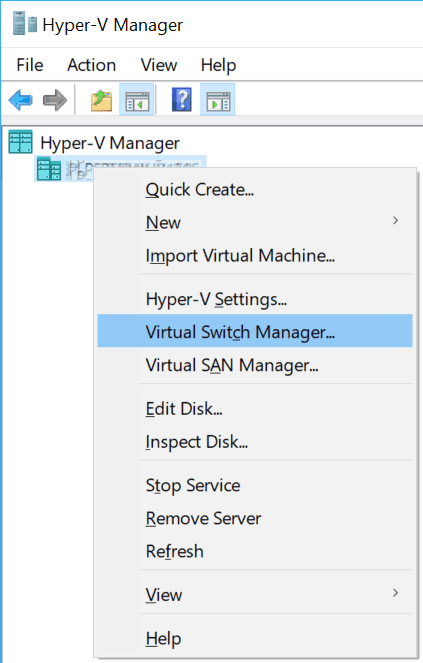
![Hyper V Virtual Switch Manager](https://peter-whyte.com/wp-content/uploads/2019/05/hyperv_vswitch_manager.png)
2. Select Private and Create Virtual Switch.
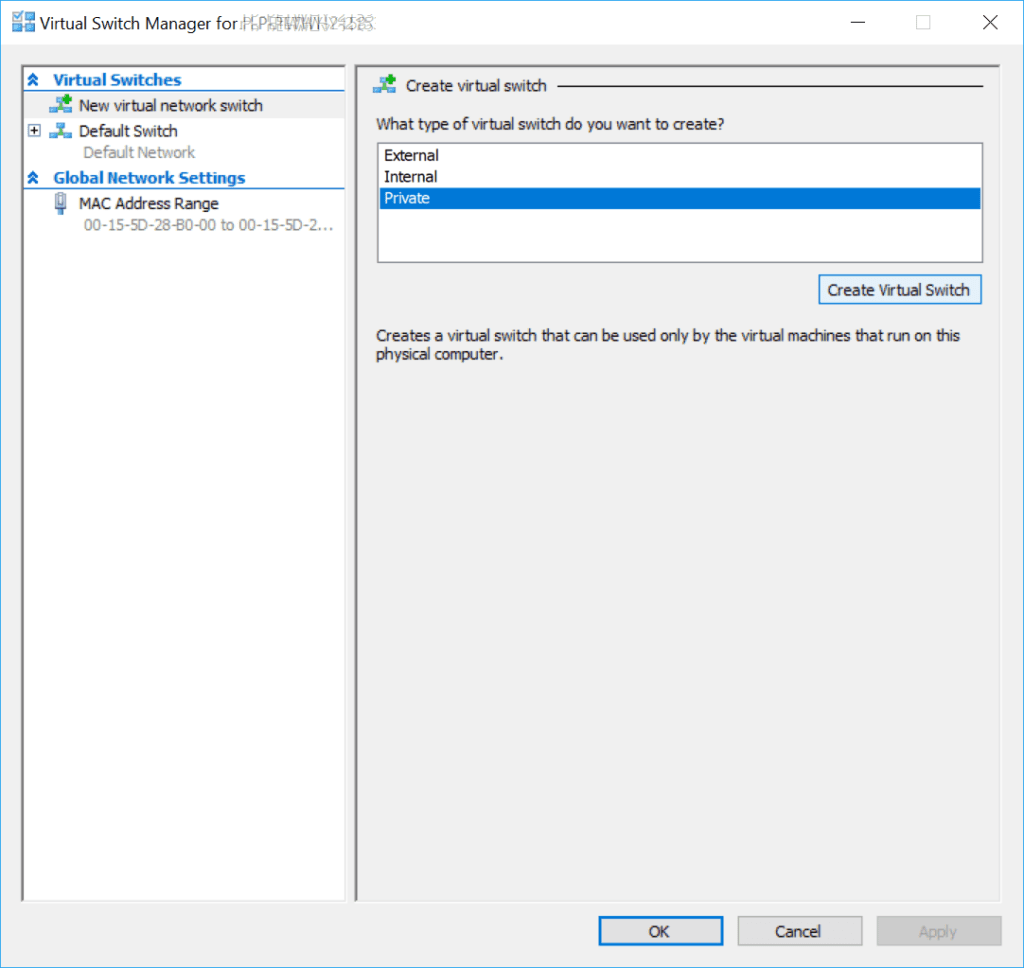
![Hyper-V VSwitch Manager New Private Switch](https://peter-whyte.com/wp-content/uploads/2019/05/hyperv_vswitch_manager_new_private_vswitch-1024x968.png)
3. Enter a name for the network and click okay.
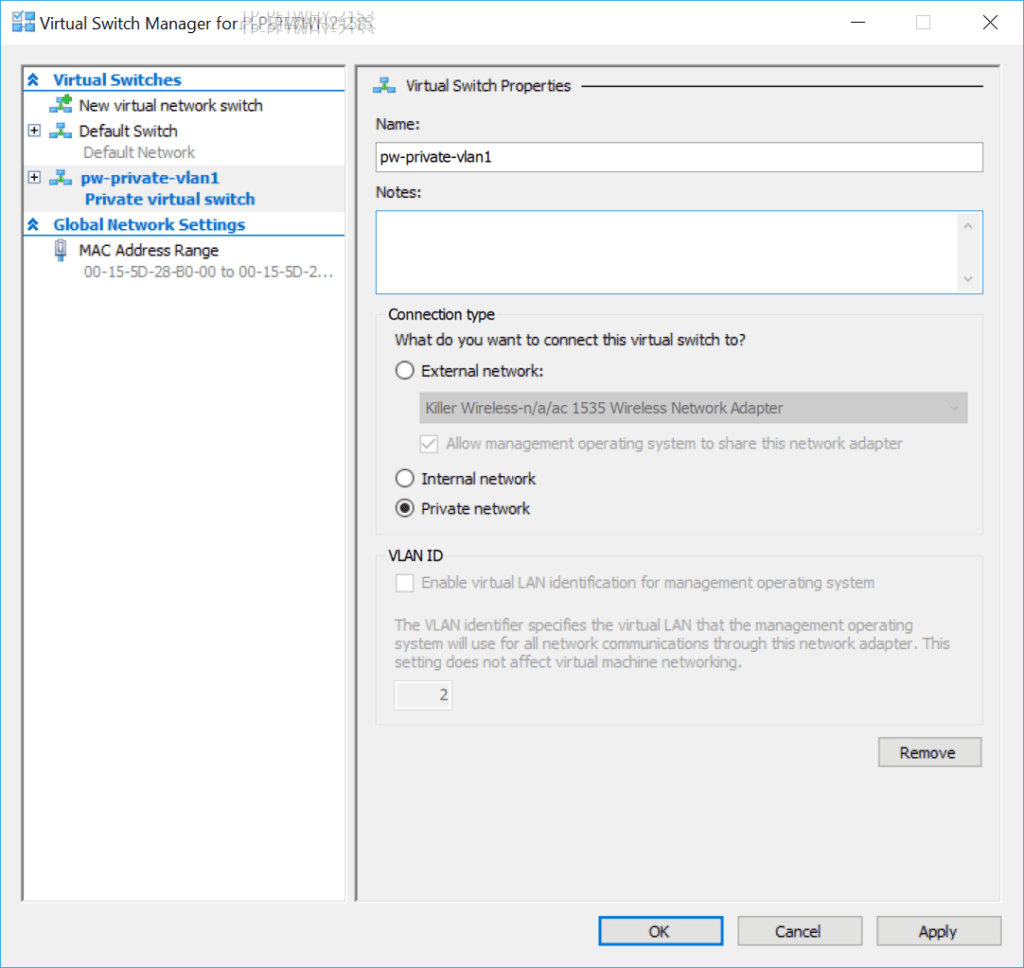
![HyperV vSwitch Manager](https://peter-whyte.com/wp-content/uploads/2019/05/hyperv_vswitch_manager_new_vswitch_properties-1024x968.png)
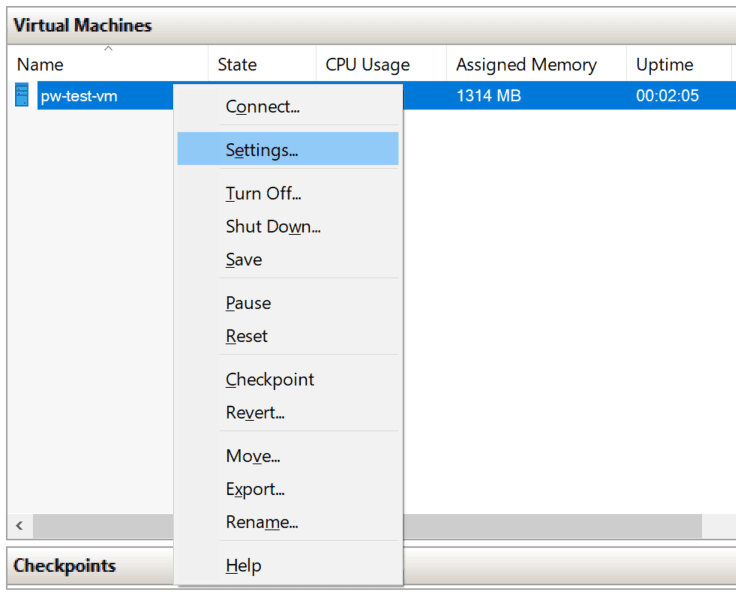
4. Right-click the VM in Hyper-V and click Settings.
![HyperV VM Settings](https://peter-whyte.com/wp-content/uploads/2019/05/hyperv_vm_settings.png)
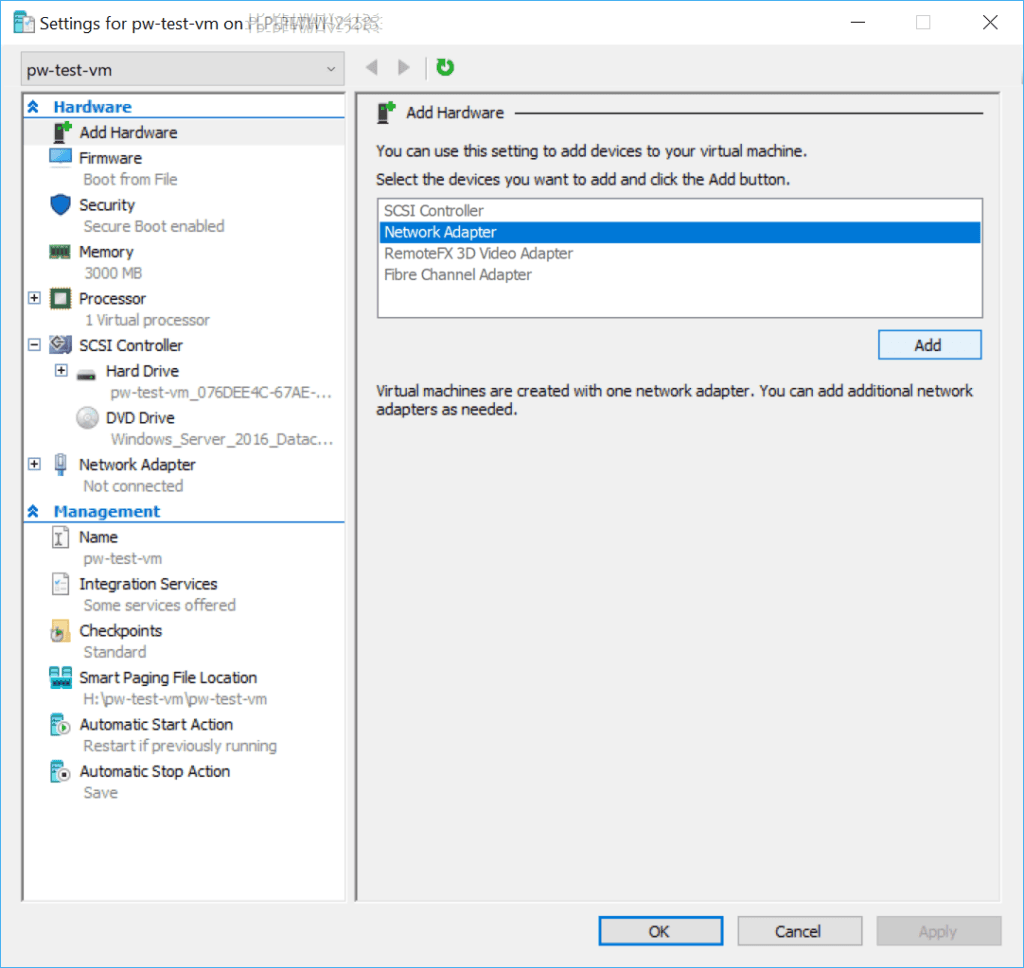
5. Add a new Network Adapter.
![HyperV Add New Network Adapter](https://peter-whyte.com/wp-content/uploads/2019/05/hyperv_add_new_network_adapter-1024x968.png)
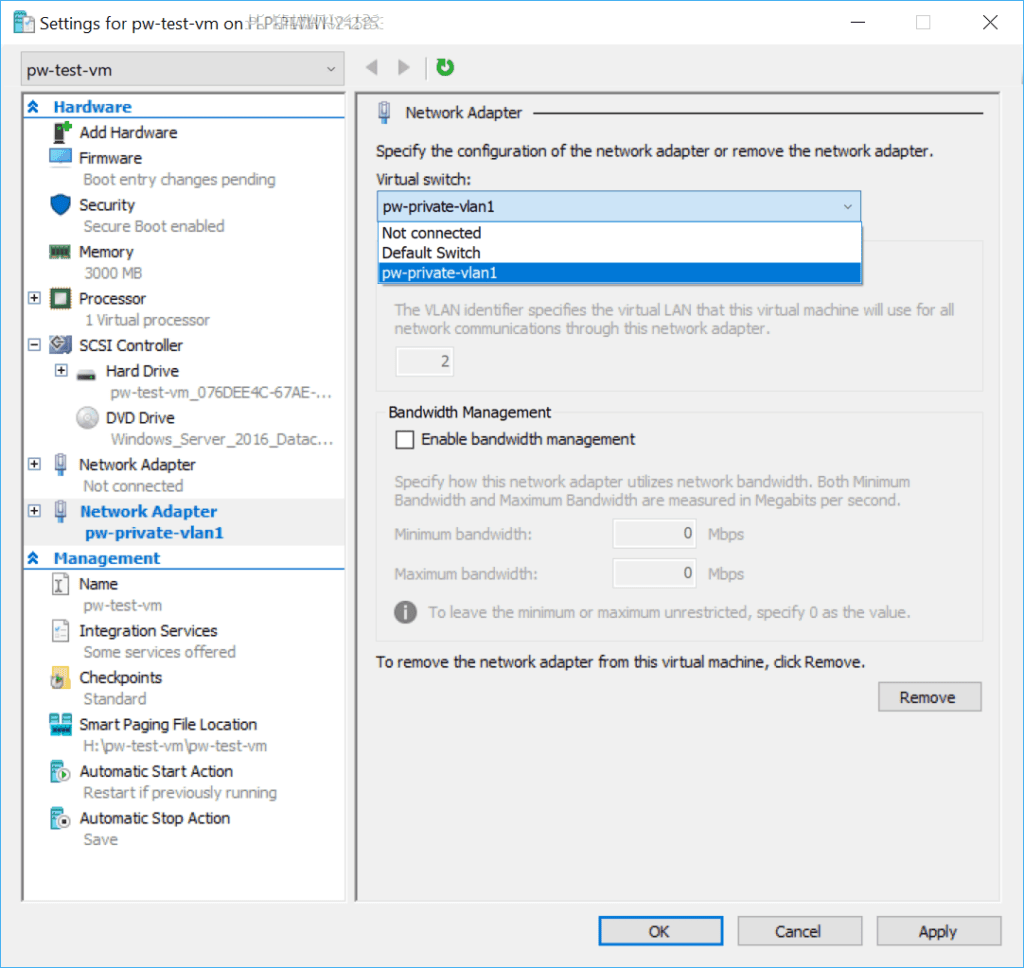
6. Select Private vSwitch as named above and click OK.
![HyperV Add New Network Adapter](https://peter-whyte.com/wp-content/uploads/2019/05/hyperv_add_new_network_adapter_vswitch-1024x968.png)
Configure Windows TCP/IP Settings
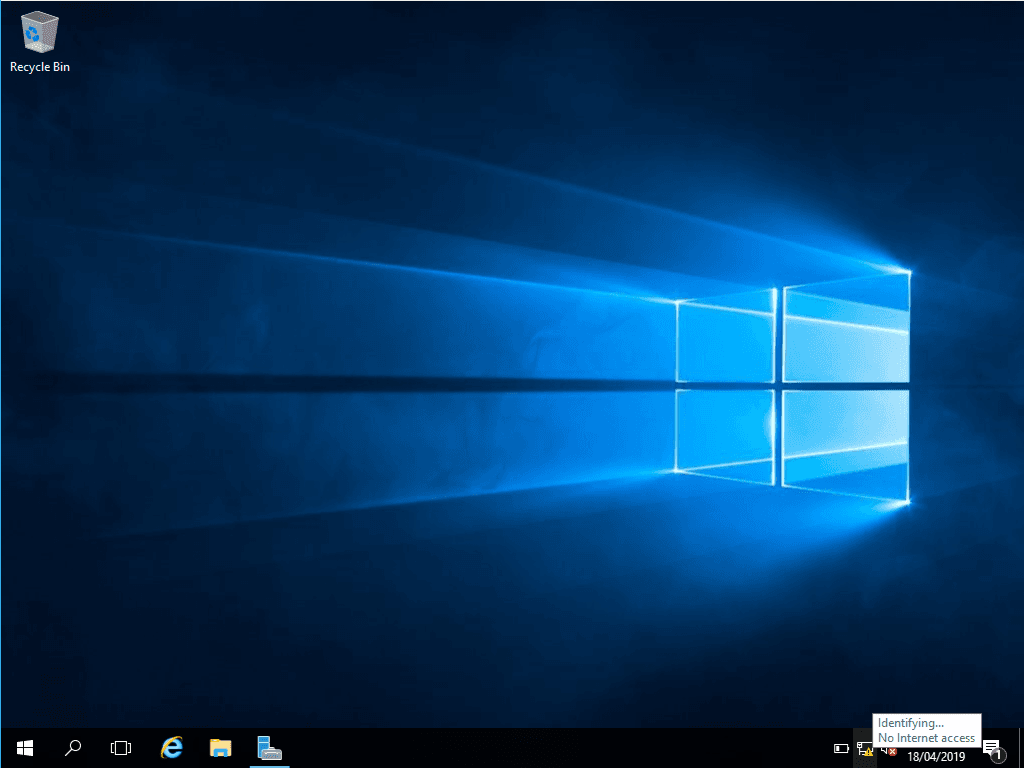
1. When the above has been set-up, Windows Server will show network settings as Identifying…
![Windows Server Identifying Network](https://peter-whyte.com/wp-content/uploads/2019/05/windows_server_identifying_network-1024x768.png)
2. Right-click the network icon and click Open Network and Sharing Center.
![Windows Network and Sharing Center](https://peter-whyte.com/wp-content/uploads/2019/05/windows_server_open_network_and_sharing_center.png)
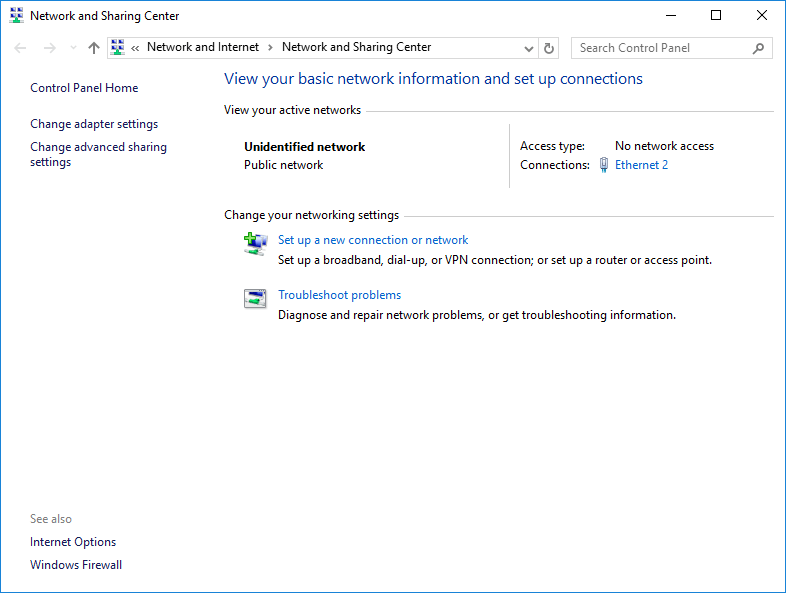
3. Click the highlighted active Ethernet connection.
![Windows Server Network and Sharing Center](https://peter-whyte.com/wp-content/uploads/2019/05/windows_server_network_and_sharing_center.png)
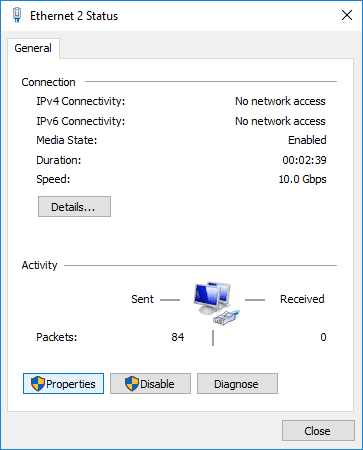
4. Open Properties.
![Windows Ethernet Adapter](https://peter-whyte.com/wp-content/uploads/2019/05/windows_server_ethernet_adapter.png)
5. Open Internet Protocol Version 4 (TCP/IPv4) Properties.
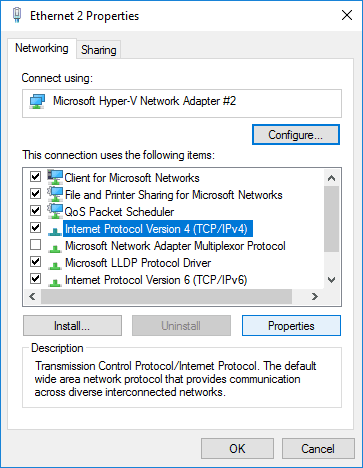
![Ethernet Adapter IPv4 Properties](https://peter-whyte.com/wp-content/uploads/2019/05/windows_server_ethernet_adapter_properties.png)
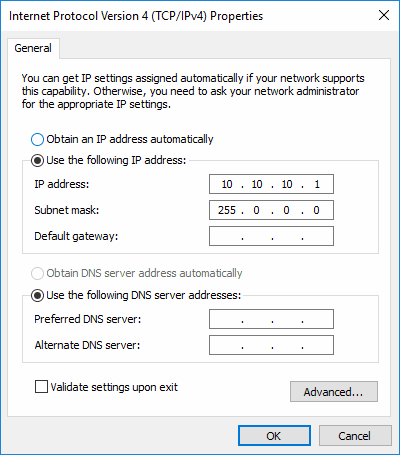
6. Enter IP and subnet addresses.
![Windows Ethernet Adapter IPv4 Address](https://peter-whyte.com/wp-content/uploads/2019/05/windows_server_ethernet_adapter_ipv4_properties.png)
Rename the Windows Server Host
1. Open Server Manager and click the highlighted Computer Name.
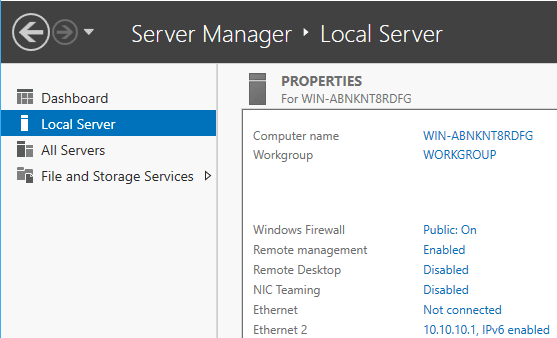
![Windows Server Manager Host Info](https://peter-whyte.com/wp-content/uploads/2019/05/windows_server_manager_hostname.png)
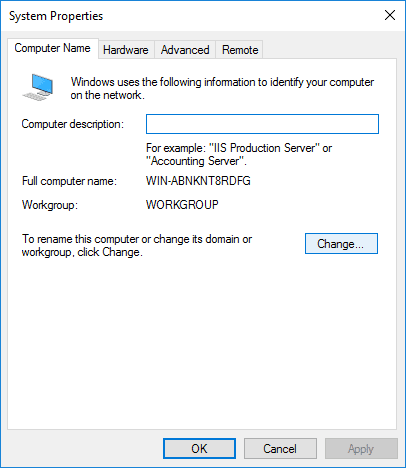
2. Click Change…
![Windows System Properties](https://peter-whyte.com/wp-content/uploads/2019/05/windows_server_system_properties.png)
3. Enter new Computer Name and click OK.
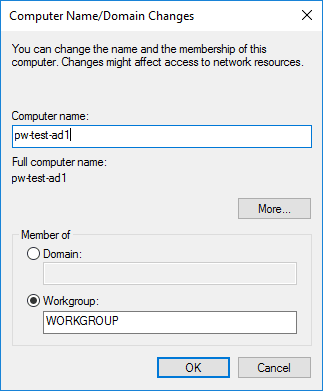
![Windows Server Computer Rename](https://peter-whyte.com/wp-content/uploads/2019/05/windows_server_computer_rename.png)
The host will require a reboot once done.
Installing Active Directory
1. Within Server Manager, click Manage > Add Roles and Features.
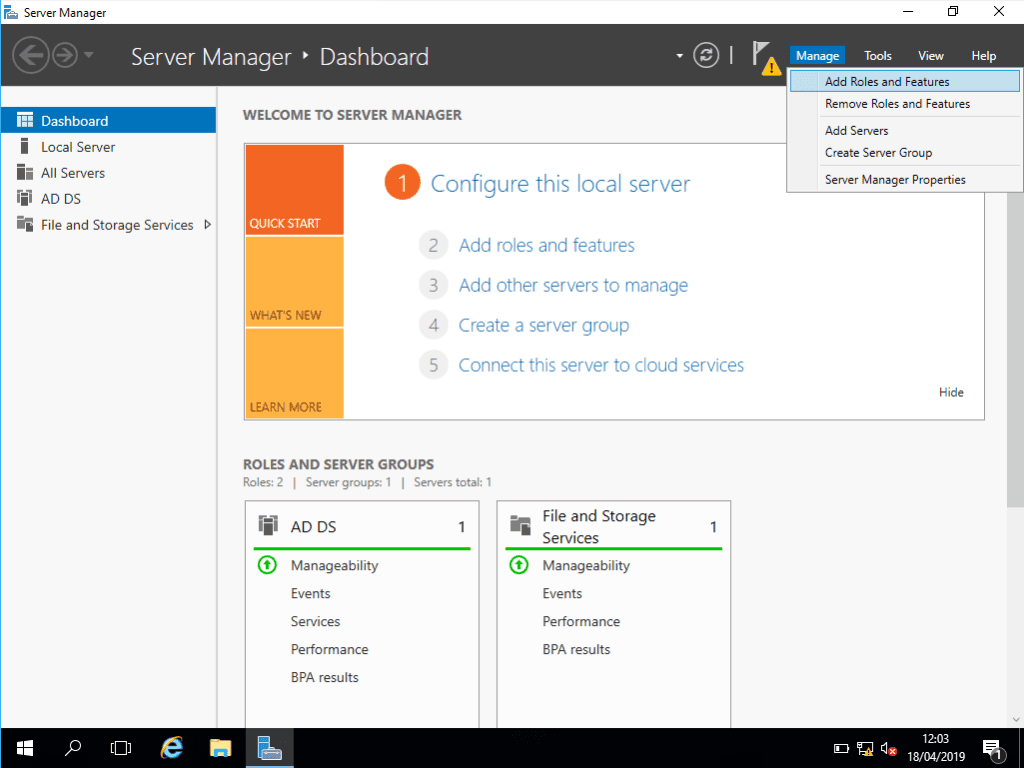
![Windows Server Manager Add Roles and Features](https://peter-whyte.com/wp-content/uploads/2019/05/windows_server_manager_add_roles_and_features-1024x768.png)
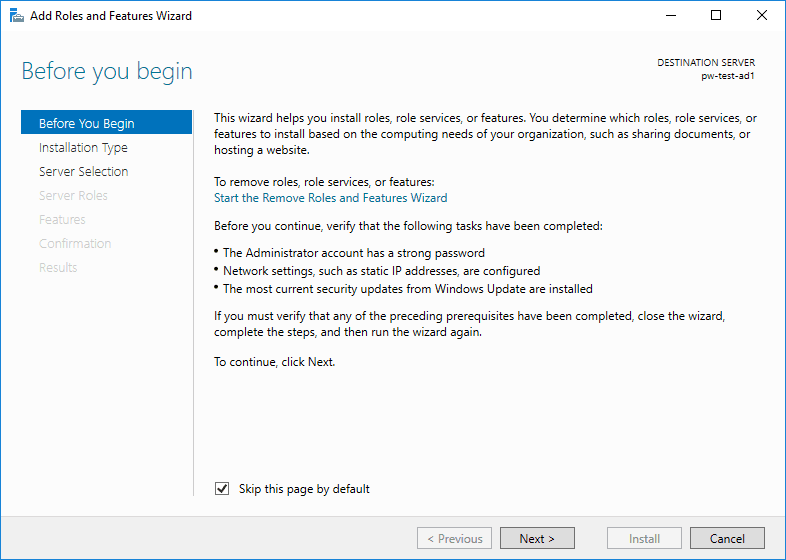
2. Before you begin, read the before you begin.
![Server Manager Add Roles and Features](https://peter-whyte.com/wp-content/uploads/2019/05/windows_server_manager_add_roles_and_features_wizard.png)
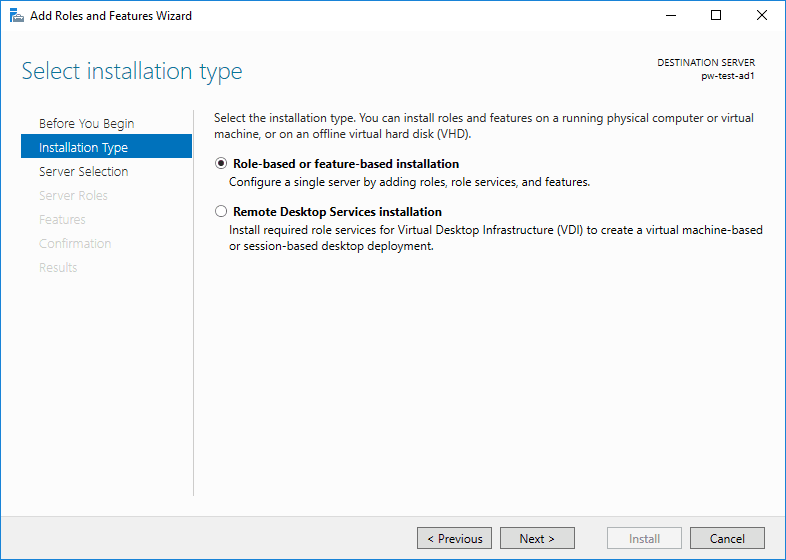
3. Select Role or Feature-based installation.
![Server Manager Add Roles and Features Installation Type](https://peter-whyte.com/wp-content/uploads/2019/05/windows_server_manager_add_roles_and_features_installation_type.png)
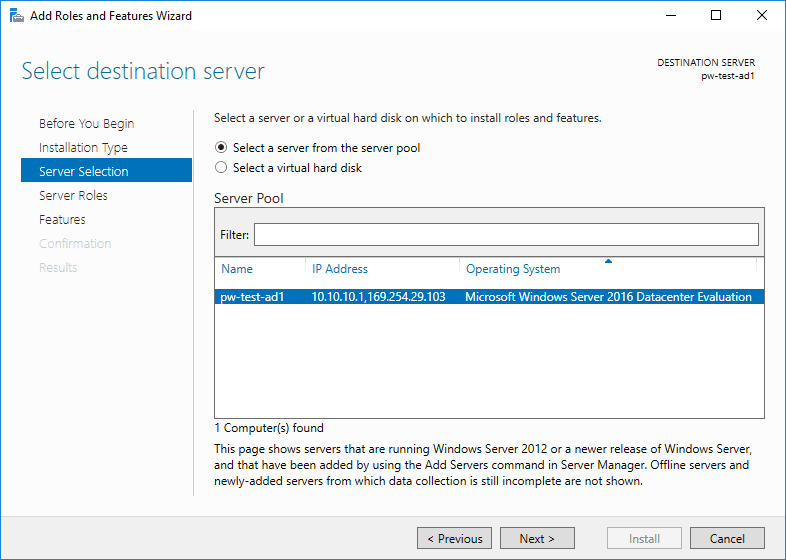
4. Select the destination server.
![Server Manager Add Roles and Features Destination Server](https://peter-whyte.com/wp-content/uploads/2019/05/windows_server_manager_add_roles_and_features_destination_server.png)
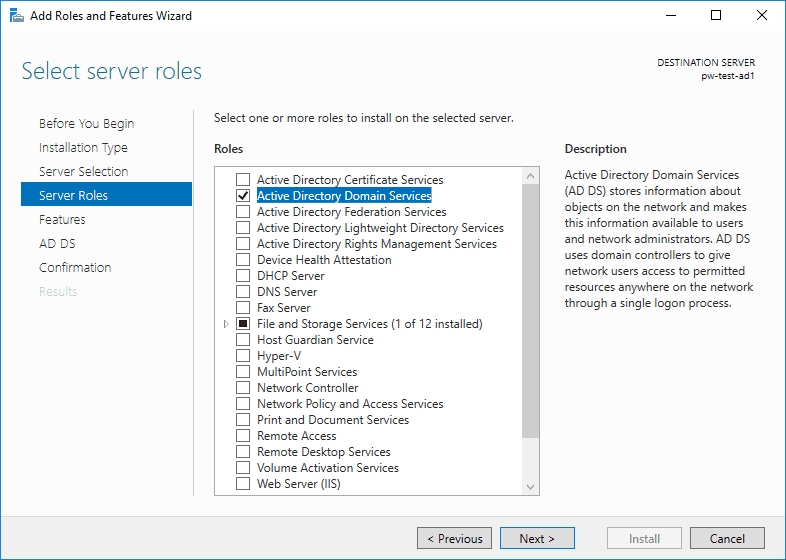
5. Tick the Active Directory Domain Services checkbox.
![Server Manager Add Roles](https://peter-whyte.com/wp-content/uploads/2019/05/windows_server_manager_add_roles.png)
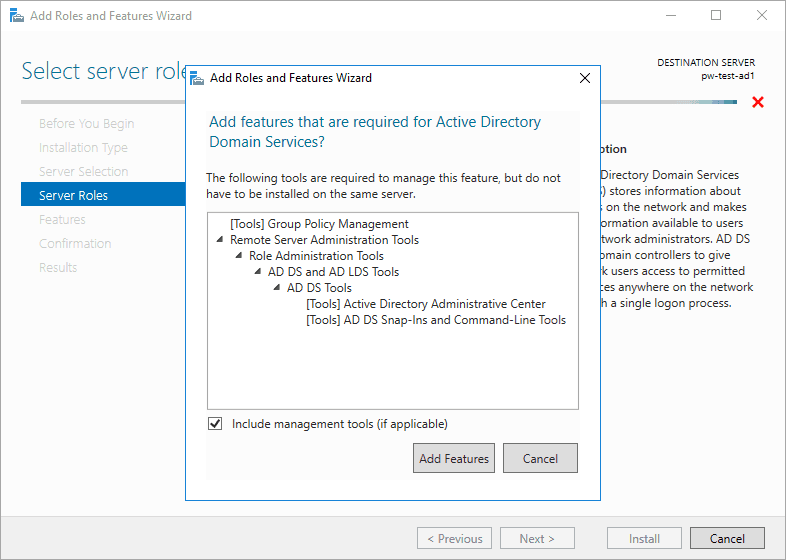
6. The following will appear – click to add the additional tools.
![Server Manager Add Roles Active Directory](https://peter-whyte.com/wp-content/uploads/2019/05/windows_server_manager_add_roles_active_directory.png)
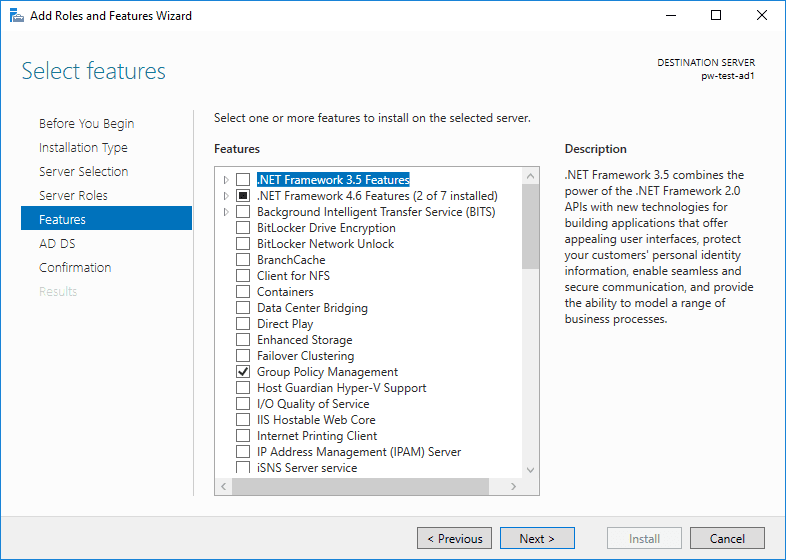
7. No features are being added at this time – click to continue.
![Server Manager Add Features](https://peter-whyte.com/wp-content/uploads/2019/05/windows_server_manager_add_features.png)
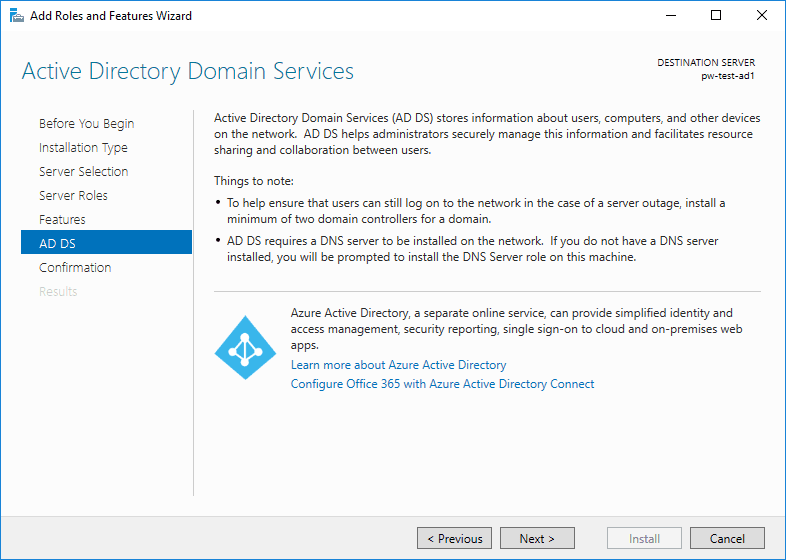
8. ADDS page is worth a read – nothing to change here.
![Server Manager AD DS](https://peter-whyte.com/wp-content/uploads/2019/05/windows_server_manager_ad_ds.png)
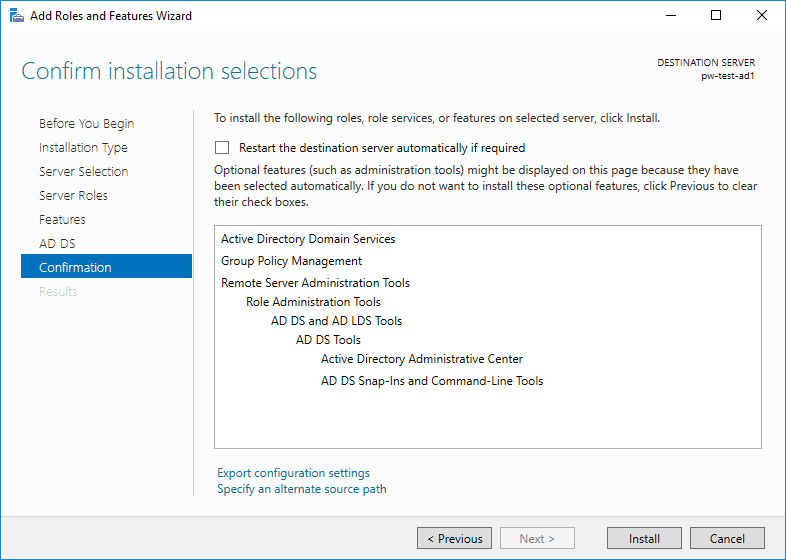
9. Review and click to install.
![Server Manager Roles and Features Installation](https://peter-whyte.com/wp-content/uploads/2019/05/windows_server_manager_add_roles_and_features_confirmation.png)
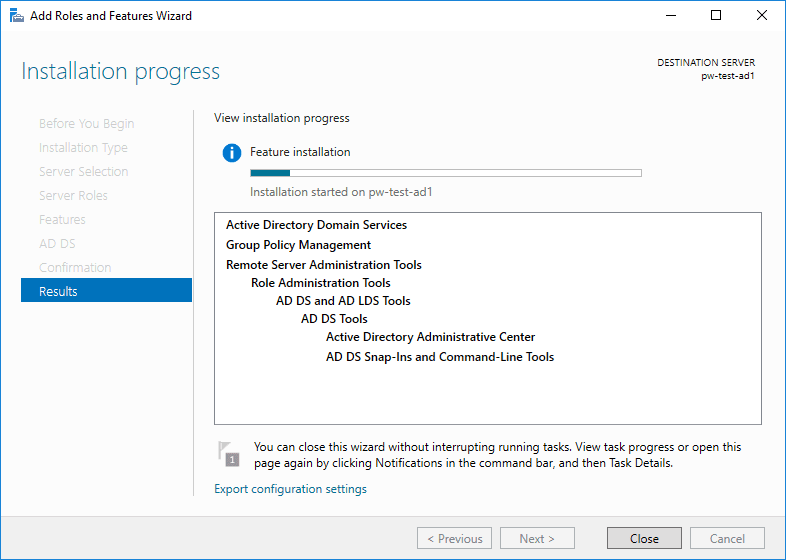
10. Leave it a few minutes and we’re then able to promote this server as a new Domain Controller.
![Server Manager Active Directory Installation](https://peter-whyte.com/wp-content/uploads/2019/05/windows_server_manager_active_directory_installation.png)
Promote the Server to a Domain Controller
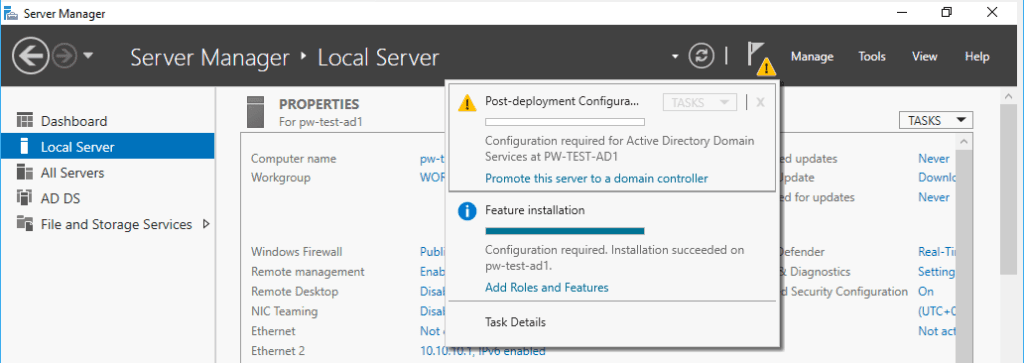
1. Once done with the above, there won’t be a finish point within the wizard. Click the flag on Server Manager to Promote the server to a Domain Controller.
![Active Directory Promote to DC](https://peter-whyte.com/wp-content/uploads/2019/05/active_directory_promote_to_dc-1024x363.png)
2. This is a new test environment, so I need to Add a new forest.
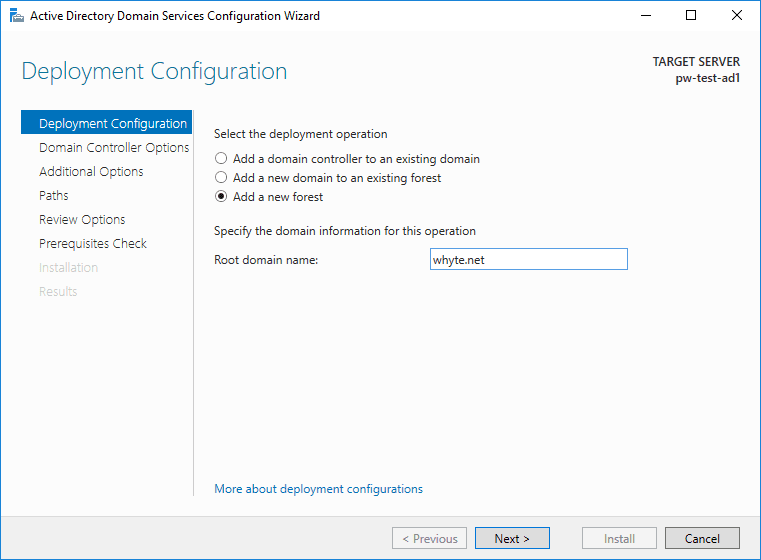
![Active Directory Domain Services Config Wizard](https://peter-whyte.com/wp-content/uploads/2019/05/active_directory_domain_services_configuration_wizard.png)
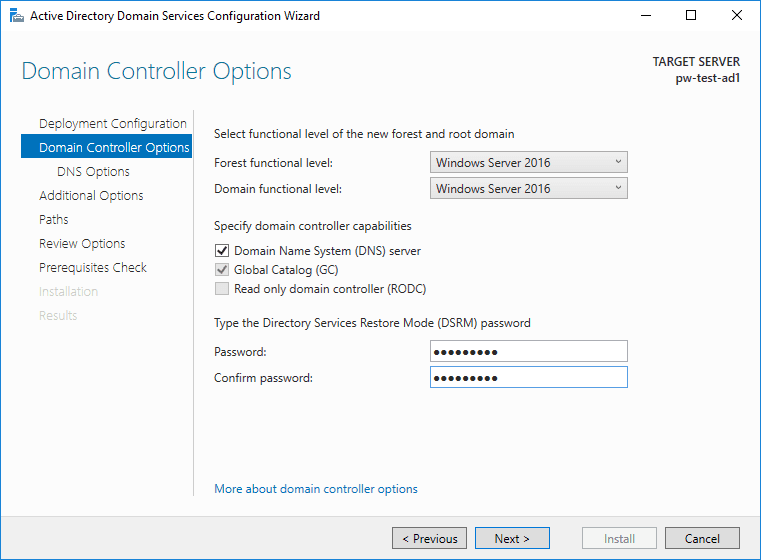
3. A new Forest means Functional Levels can be the latest edition available, Windows Server 2016. This is also the place to enter an important password that is required if recovering a failing AD.
![Active Directory Domain Controller Options on Install](https://peter-whyte.com/wp-content/uploads/2019/05/active_directory_domain_controller_options.png)
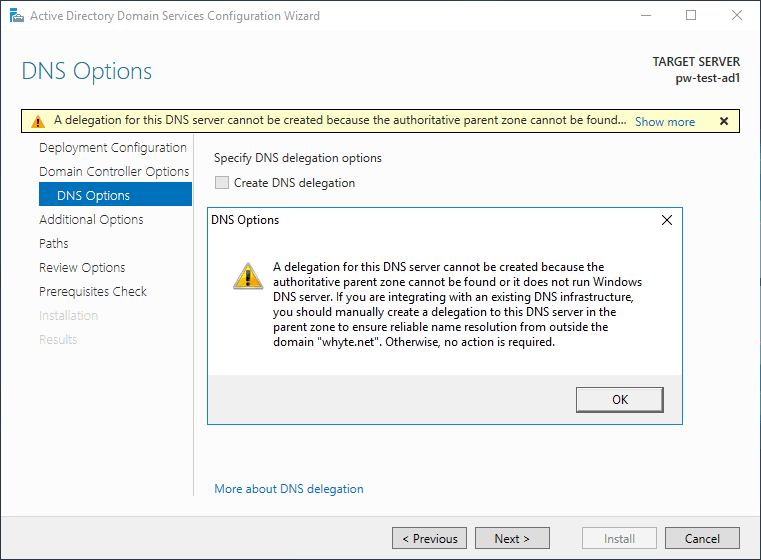
4. The following error is listed within the known issues for installing and removing AD DS. It’s expected if create a new forest as I’m doing.
![Active Directory Domain DNS Options](https://peter-whyte.com/wp-content/uploads/2019/05/active_directory_domain_dns_options.png)
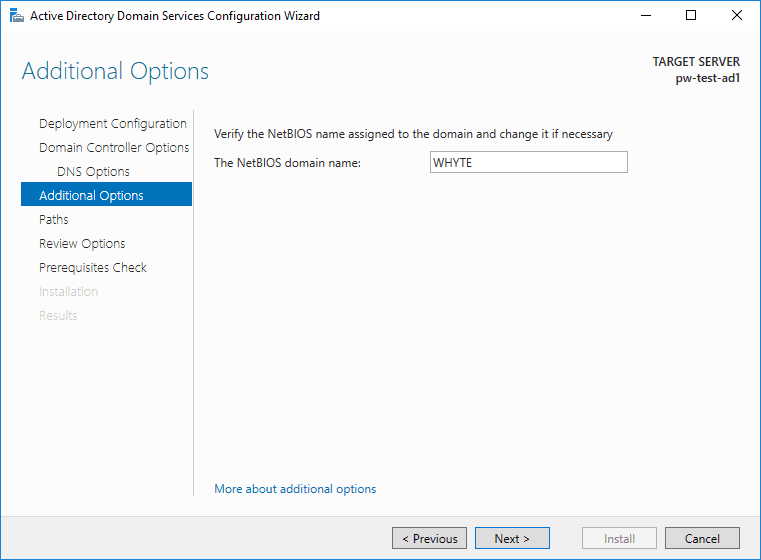
5. Enter a preferred NetBIOS name.
![Active Directory Configuration Additional Options](https://peter-whyte.com/wp-content/uploads/2019/05/active_directory_configuration_additional_options.png)
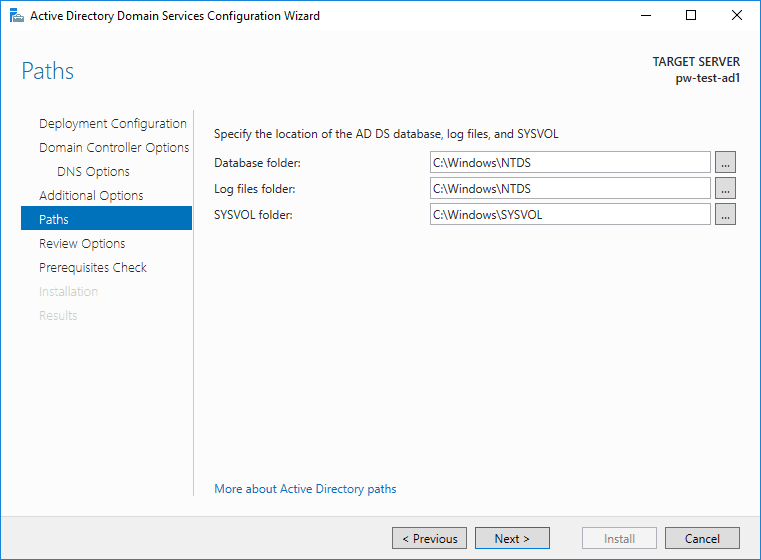
6. Locations can stay as defaults of course.
![Active Directory Installation Paths](https://peter-whyte.com/wp-content/uploads/2019/05/active_directory_installation_paths.png)
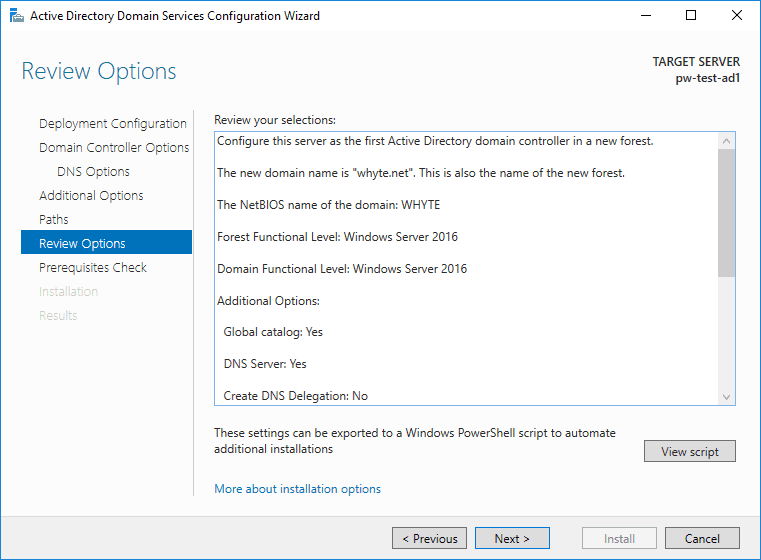
7. Time for us to review wizard selections.
![Active Directory Installation Review](https://peter-whyte.com/wp-content/uploads/2019/05/active_directory_installation_review.png)
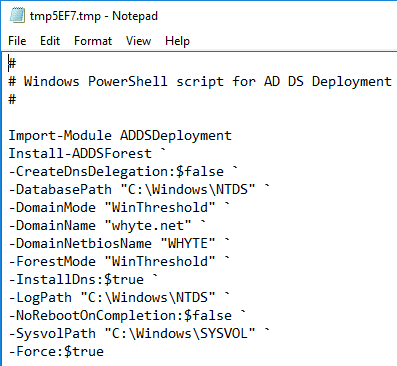
8. As you’ll see in the image above, we can click to view the PowerShell script that is about to run with the wizard selections included.
![Active Directory Installation Script](https://peter-whyte.com/wp-content/uploads/2019/05/active_directory_installation_script.png)
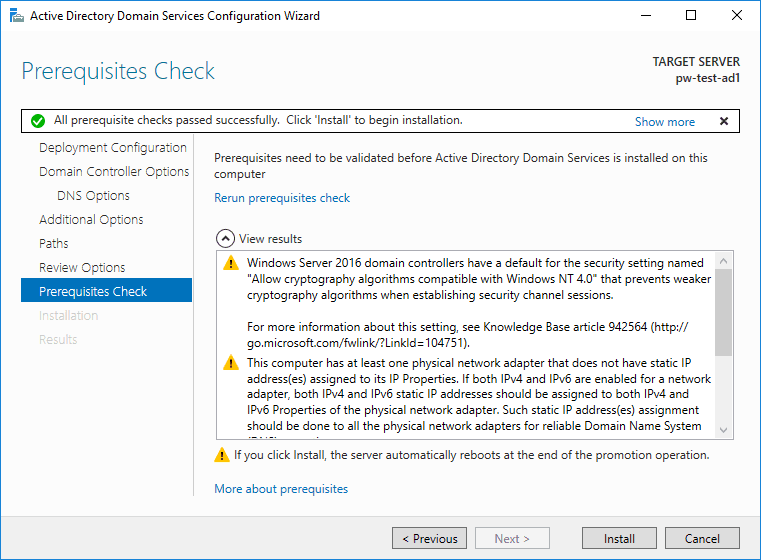
9. A prerequisites check will run as we hit next from above.
![Active Directory Installation Prerequisites](https://peter-whyte.com/wp-content/uploads/2019/05/active_directory_installation_prerequisites_check.png)
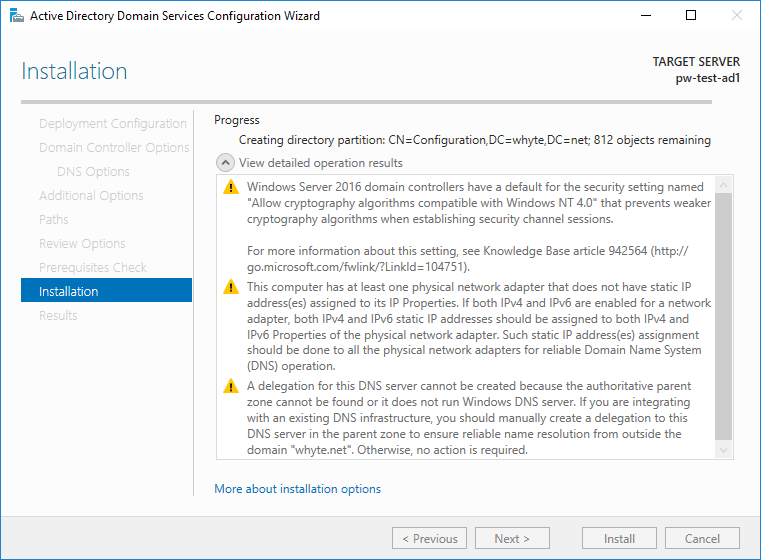
10. Click to install…
![Active Directory Installation Progress](https://peter-whyte.com/wp-content/uploads/2019/05/active_directory_installation_progress.png)
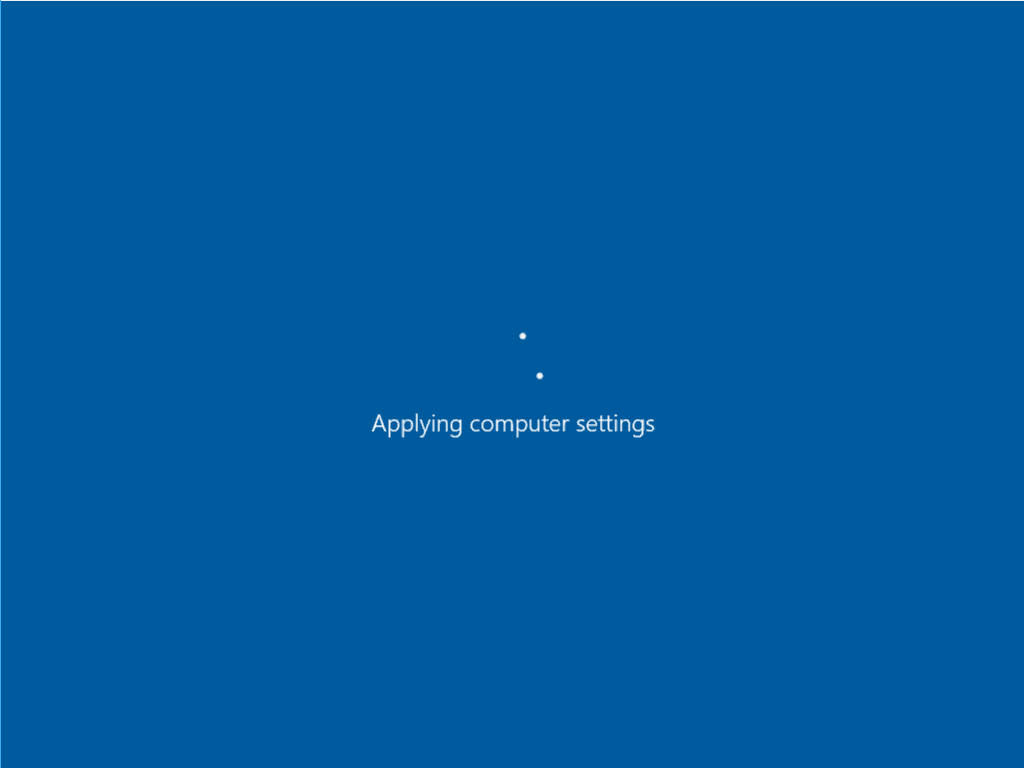
11. An automatic reboot will be initiated at the end.
![Windows Reboot](https://peter-whyte.com/wp-content/uploads/2019/05/active_directory_installation_reboot-1024x768.png)
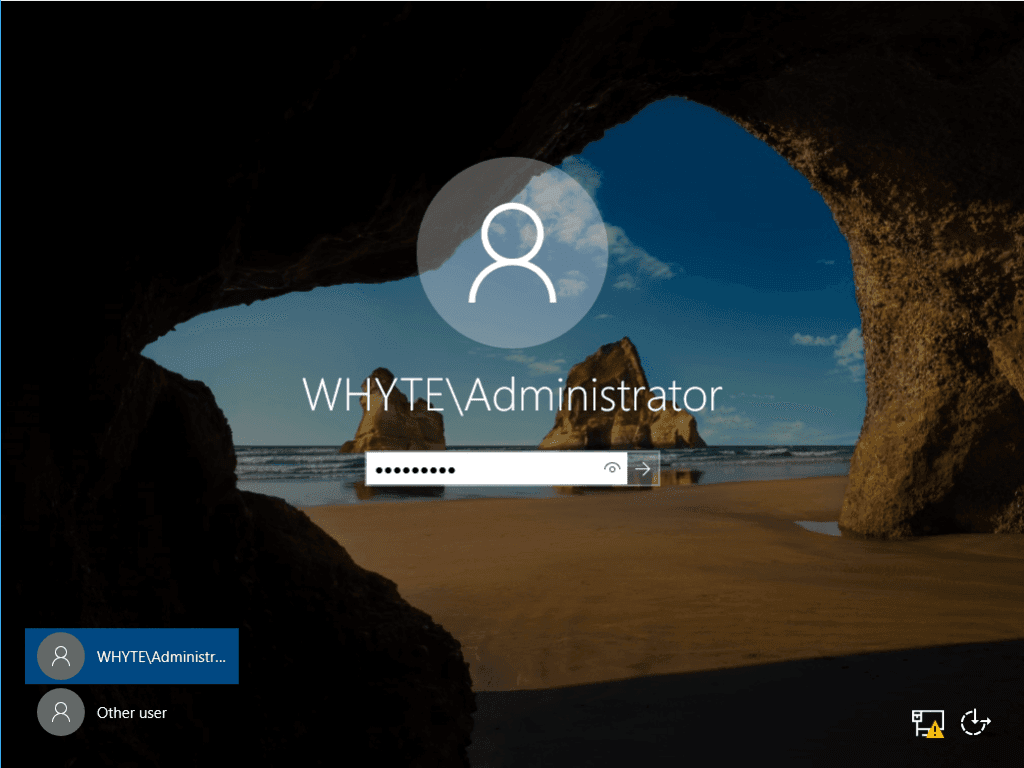
12. When back up and running, we can log in to the new domain.
![Windows Server Domain Login](https://peter-whyte.com/wp-content/uploads/2019/05/windows_server_domain_login-1024x768.png)
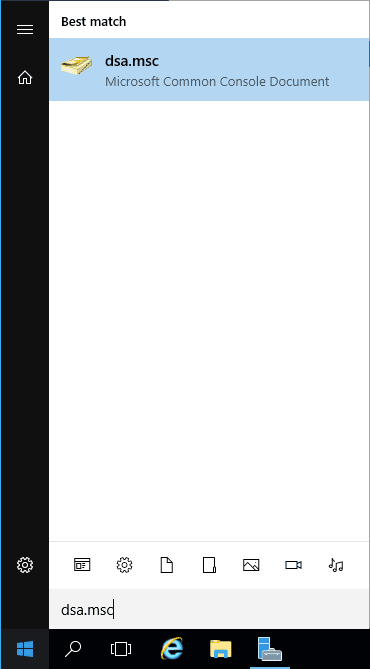
13. And have a look at our Active Directory Users & Computers, just for the fun demo of course.
![dsa.msc](https://peter-whyte.com/wp-content/uploads/2019/05/winows_server_active_directory_post_install.png)
![Active Directory Users and Computers](https://peter-whyte.com/wp-content/uploads/2019/05/fresh_active_directory_users_and_computers.png)
Leave a Reply