-

How To Install Windows Subsystem for Linux (WSL)
Want to run Linux directly on your Windows machine? Windows Subsystem for Linux (WSL) makes it easy! This guide provides a quick demo on how to get WSL enabled with a Linux distribution installed within minutes.
We’ll cover the simplest methods to install WSL by using the
<wsl --install>command, and we can install WSL Linux Distro’s using the Microsoft Store. As well as this, I’ll be showing you the alternative options for setting up WSL on your computer, for example, situations where the Microsoft Store isn’t available, like on corporate networks.For more information on WSL as a whole, have a look at the MS Docs: What is Windows Subsystem for Linux?
https://aka.ms/wslinstallStep 1: Enabling Windows Subsystem for Linux (WSL)
1. Open PowerShell as Administrator.
2. Run the following command to enable WSL:# enable windows subsystem for linux wsl --install # alt method, simple run wsl on its own (this triggers cli output for installing) wsl
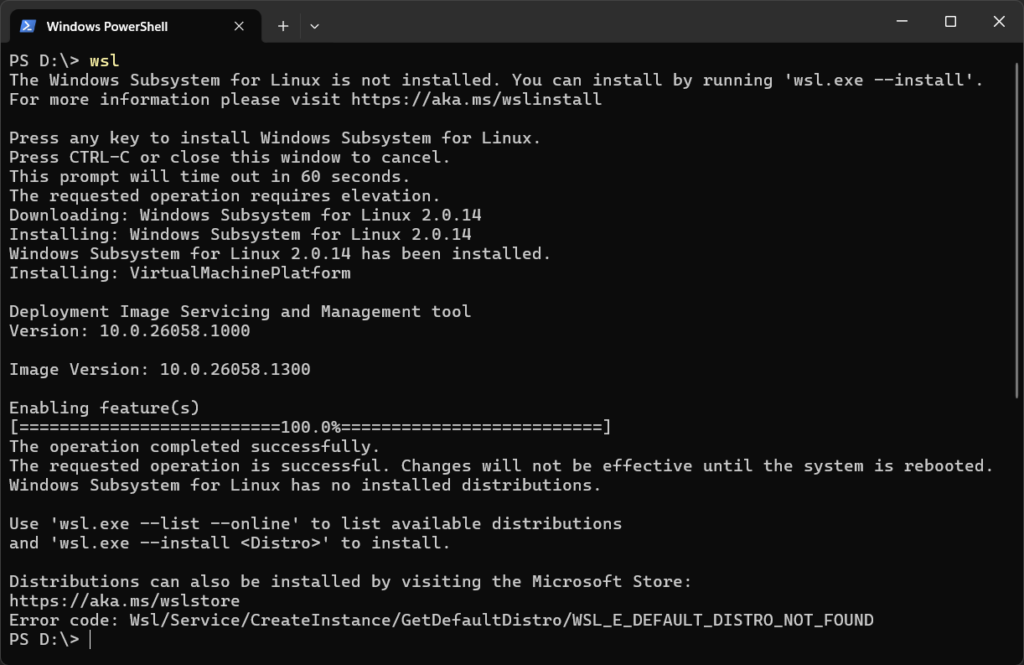
If you are running an older version of Windows/PowerShell, try upgrade, otherwise you can try run the following to enable the WSL feature:
# enable wsl (old method)
Enable-WindowsOptionalFeature -Online -FeatureName Microsoft-Windows-Subsystem-Linux

3. You may need to restart your computer to apply the changes if doing the old method. Next up, we need to install a Linux Distro for our Linux Subsystem.
Step 2: Install a WSL Linux Distribution
You can download WSL Linux distributions from the Microsoft Store. The following distros are available for install:
> Ubuntu 20.04 (LTS / 18.04 LTS)
> openSUSE Leap 15.1
> SUSE Linux Enterprise Server (15 SP1 / 12 SP5)
> Kali Linux
> Debian GNU/Linux
> Fedora Remix for WSL
> Pengwin (+ Enterprise)
> Alpine WSL
> Raft (Free Trial)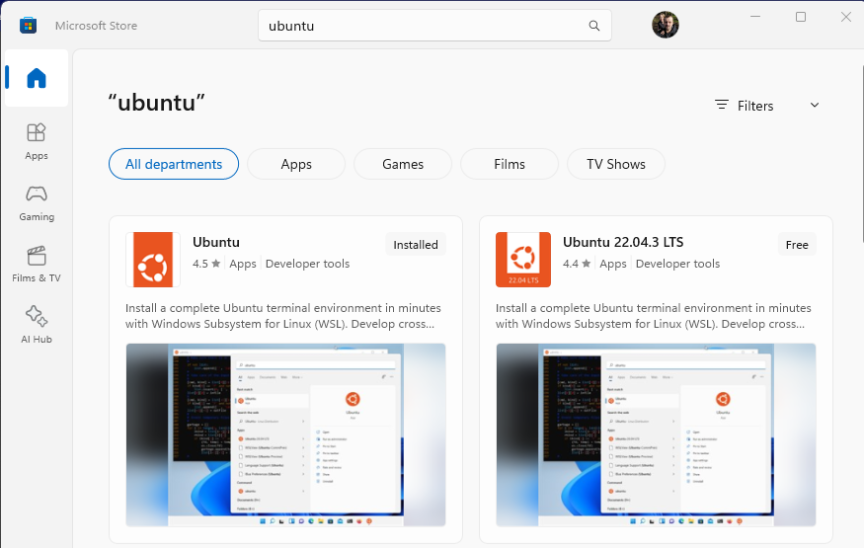
If your system is managed by an organization with Group Policy restrictions, you can manually download distributions from the Microsoft WSL documentation.
Example: To download Ubuntu 18.04 manually using PowerShell, follow these steps:
1. Navigate to your preferred download folder:cd C:\your_download_folder
2. UseInvoke-WebRequestto download Ubuntu 18.04:Invoke-WebRequest -Uri https://aka.ms/wsl-ubuntu-1804 -OutFile Ubuntu1804.appx -UseBasicParsing
Once the.appxfile is downloaded, follow these steps to install Ubuntu 18.04:
3. Rename the.appxfile to.zip:Rename-Item .\Ubuntu1804.appx .\Ubuntu1804.zip
4. Extract the contents of the.zipfile:Expand-Archive .\Ubuntu1804.zip .\Ubuntu1804
5. Run the installer:.\Ubuntu1804\ubuntu1804.exeEntering WSL
Now that we have WSL installed, we can open the installed Linux terminal by running the following command:
# enter wsl from powershell terminal
wsl
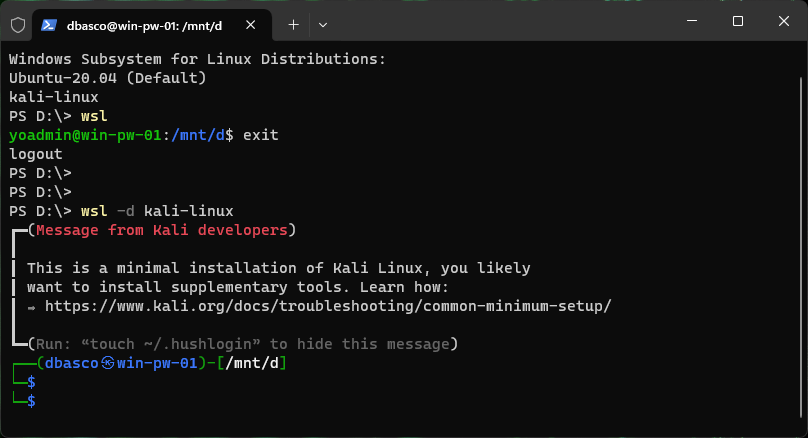
To exit back to PowerShell we can run the
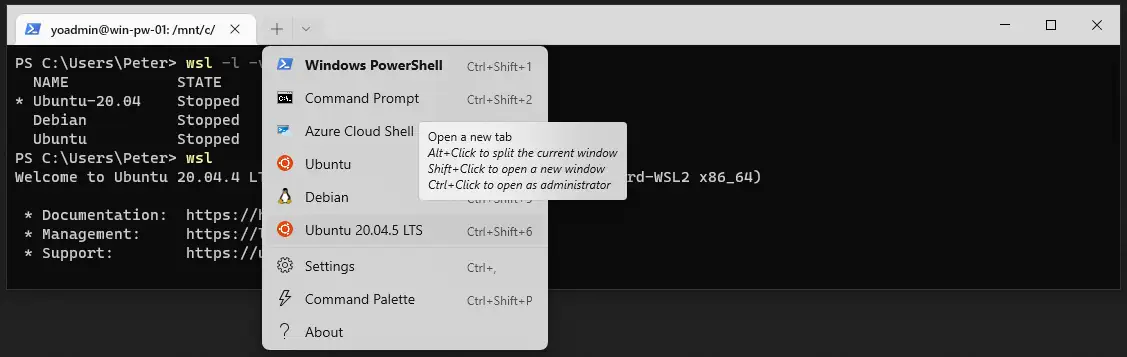
exitcommand.If you are using Windows Terminal, you can open any of your installed WSL distros simply by opening a new tab:
-

Git Log Oneline Command Examples
To check our commit history on a Repository within Git, we use the
git logcommand. When using this command we scroll through the commit log within our Terminal by hitting theEnterkey, and then we need to hitqon our keyboard to exit reading the git log.This post is to demo the
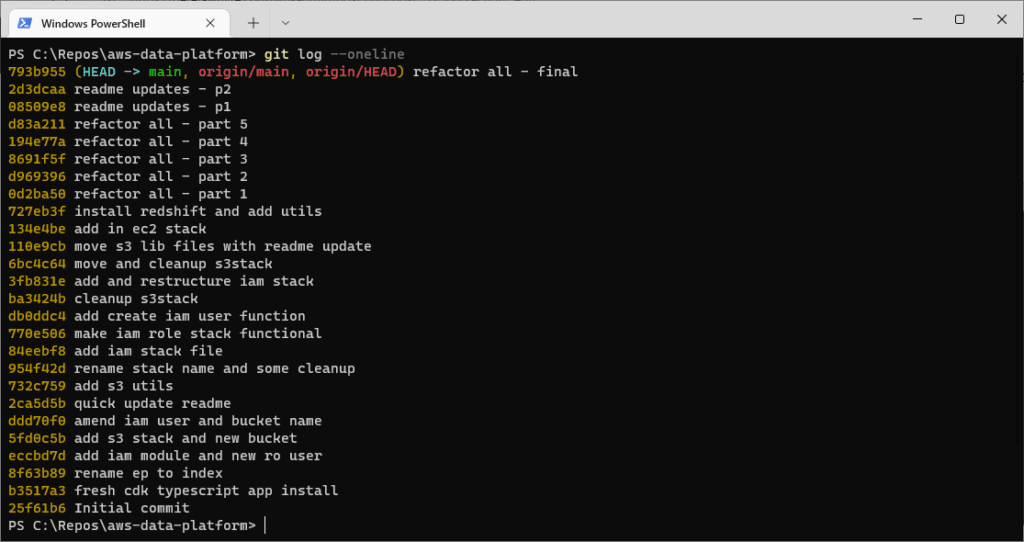
--onlineparameter that can be added to the git log statement. Adding this parameter to the git log command will return a condensed commit log history so its easier for us to read it.Git Log Oneline Examples
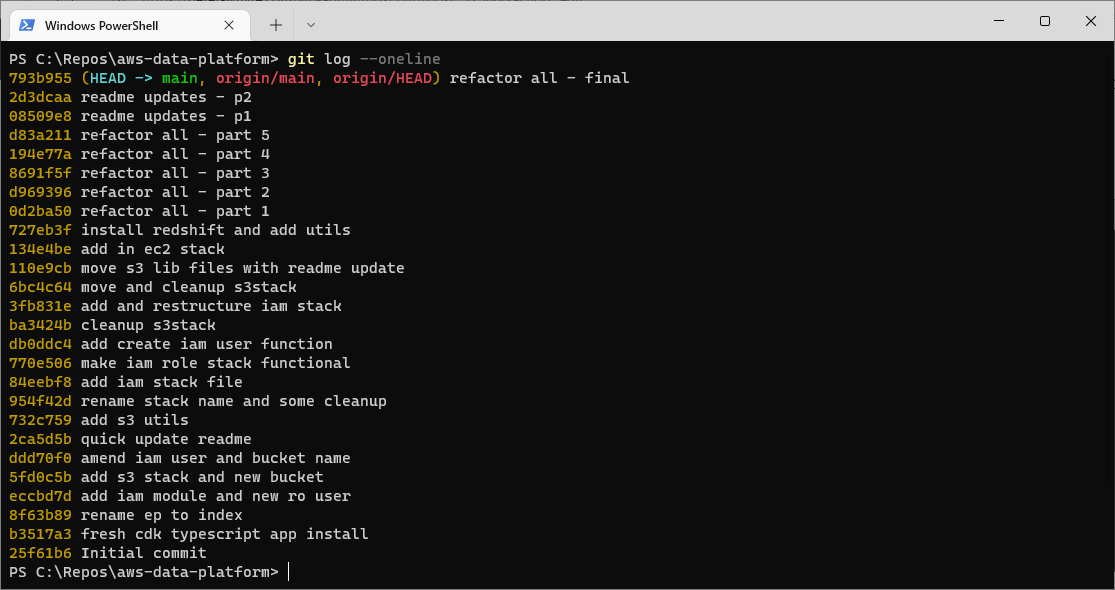
Adding –oneline to the git log command condenses the commit log history output.
# Show git log in one line
git log --oneline
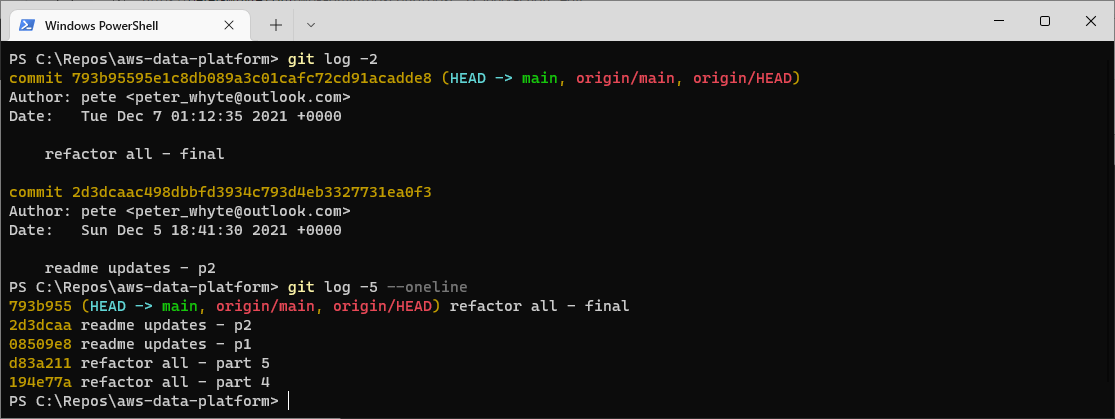
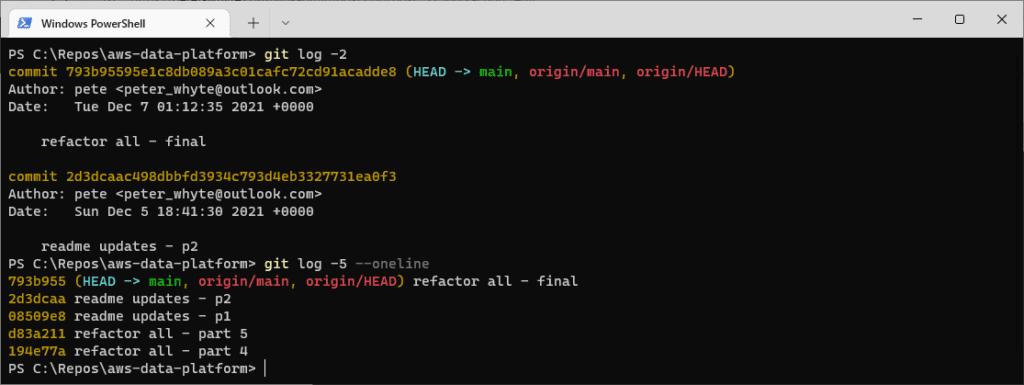
Show a Set Number of Commits
We can pass in a line number parameter for it to return a specific number of commits.
# show most recent 2 commits
git log -2

# show most recent 5 commits on one line
git log -5 --oneline
More Git Tips
For more info on the git log command, check out my other posts:
– Git Log Command Examples
– Git Log Author Command Example
Or click the Git tag below for other git tips! -
What’s New in the SQL Server 2022 Install
SQL Server 2022 was officially unveiled at Microsoft Build 2022, an annual event aimed at software developers passionate about Microsoft technologies. The conference, which focuses on Microsoft Azure updates and other key tools, is a fantastic opportunity for professionals to stay informed, learn, and network. It includes a variety of sessions (ranging from level 100 to 400) across numerous specializations in the software development field.
SQL Server 2019 was the most recent release before this, I also made a post for it which includes its installation process and the new features introduced in the setup wizard (includes the MAXDOP and Max Memory configuration options).
In this post, I’ll share my first impressions and observations while installing SQL Server 2022 (CTP2.0) for testing purposes. Please note, as this is a preview version, it’s not ready for production environments yet.
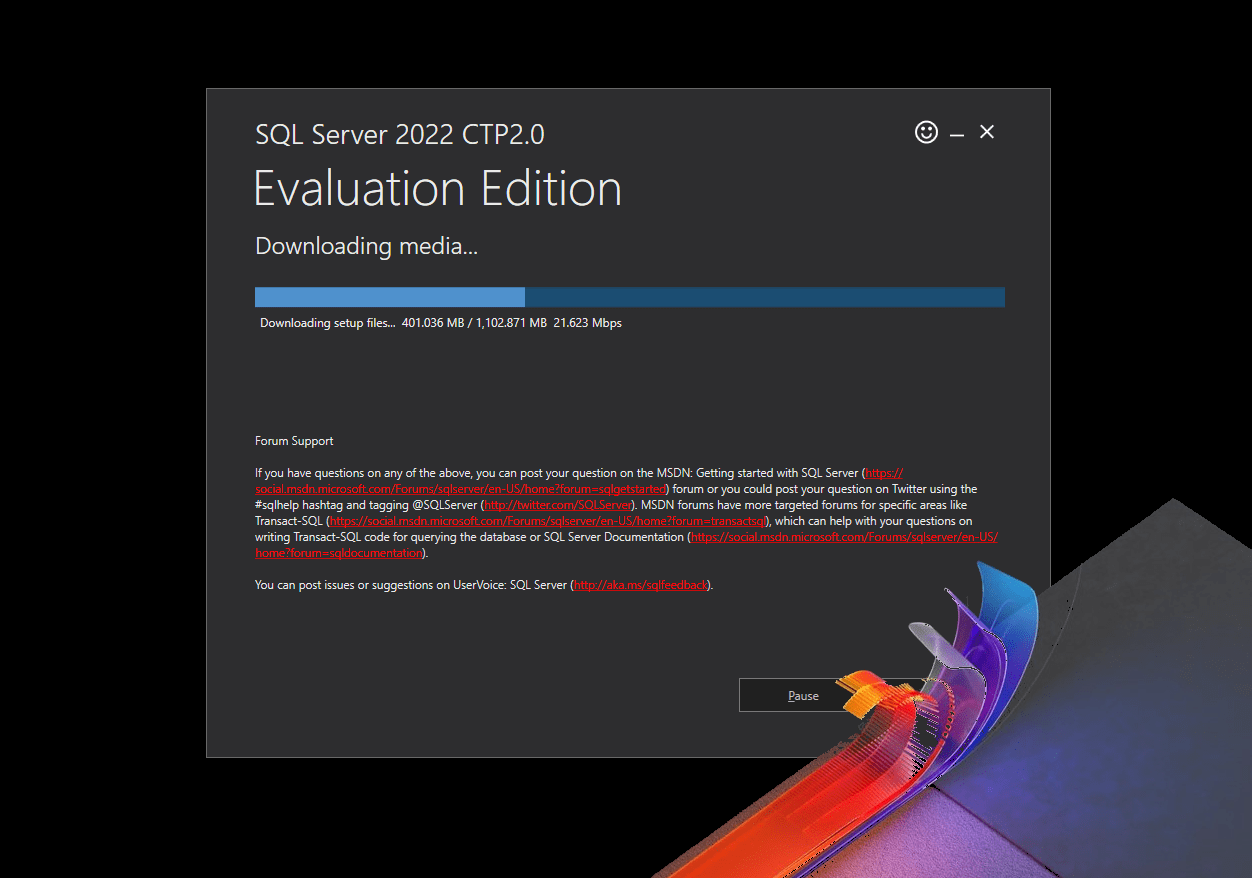
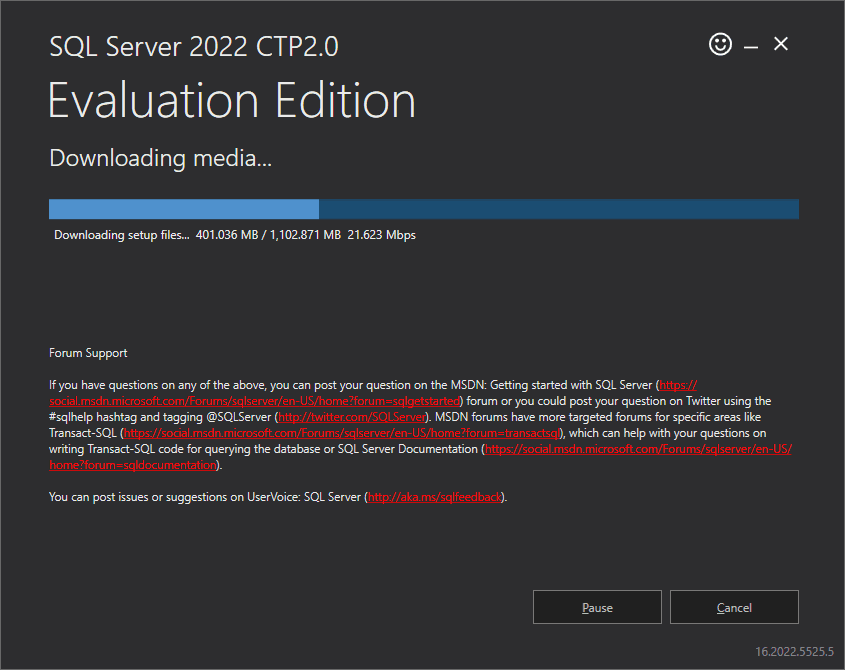
Downloading and Installing SQL Server 2022
The SQL Server 2022 installer is approx 1.1GB in size. To download it from Microsoft, check out this page: SQL Server Downloads
For this demo, I’m installing a fresh local instance of SQL Server 2022 Developer Edition:
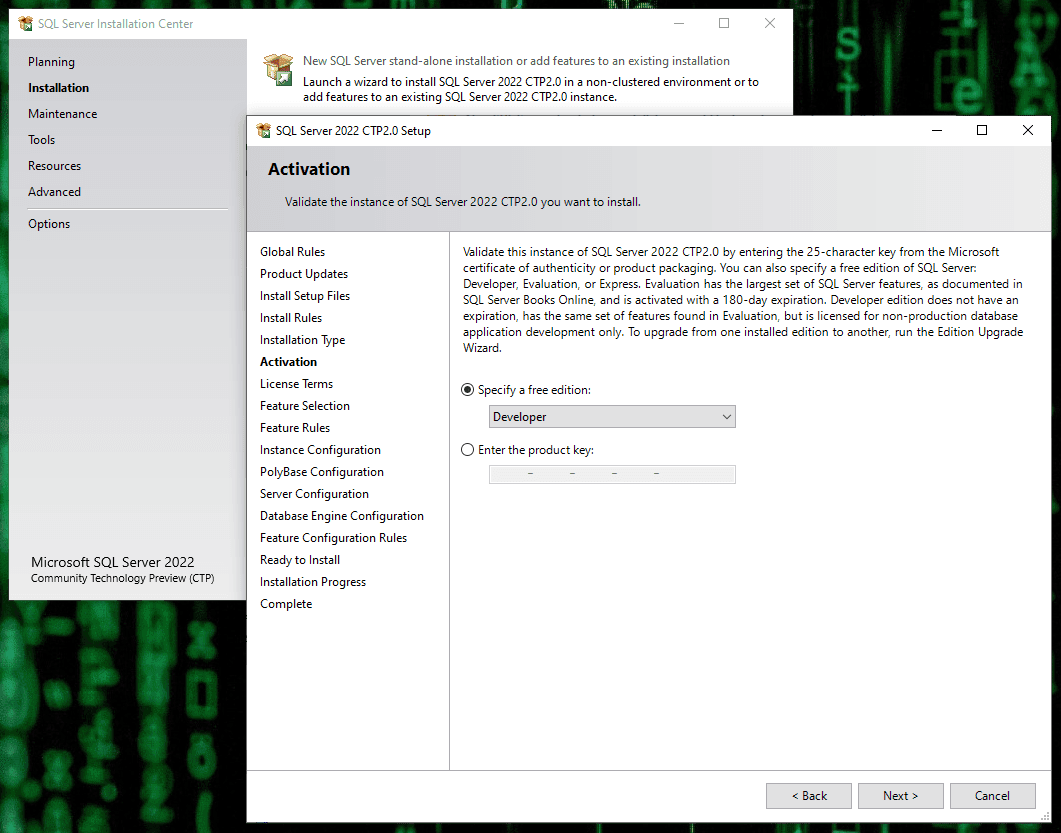
Installation Steps:
1. Agree to License Terms.
2. Choose Update Options. Decide if you want Microsoft Update to also update SQL Server (I recommend enabling this if it’s a test environment).
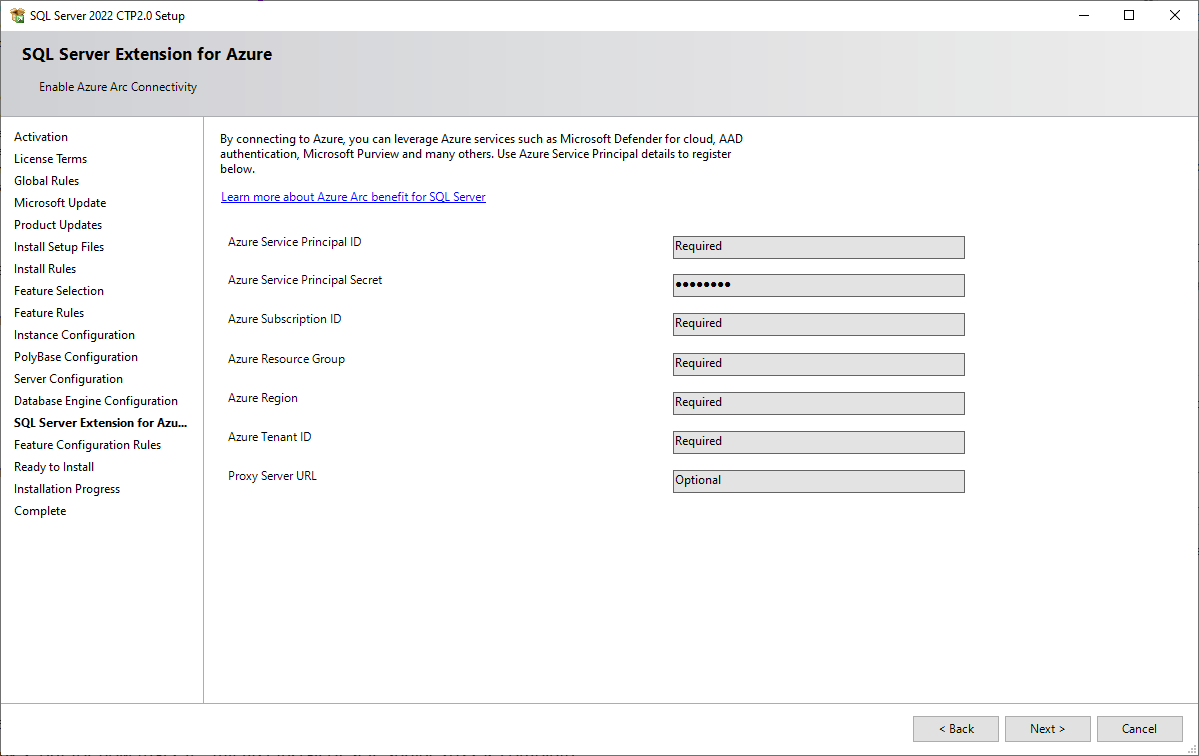
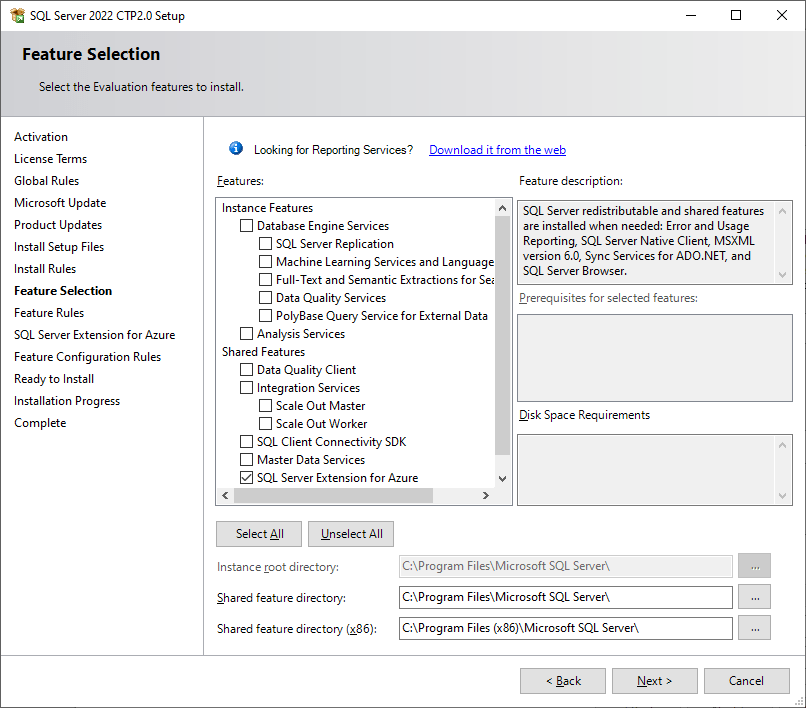
3. Feature Selection. This step is where things get interesting…It appears the new SQL Server Extension for Azure Feature is already marked for installation:
This is the differences from the MSSQL 2019 version in my last post and 2022:
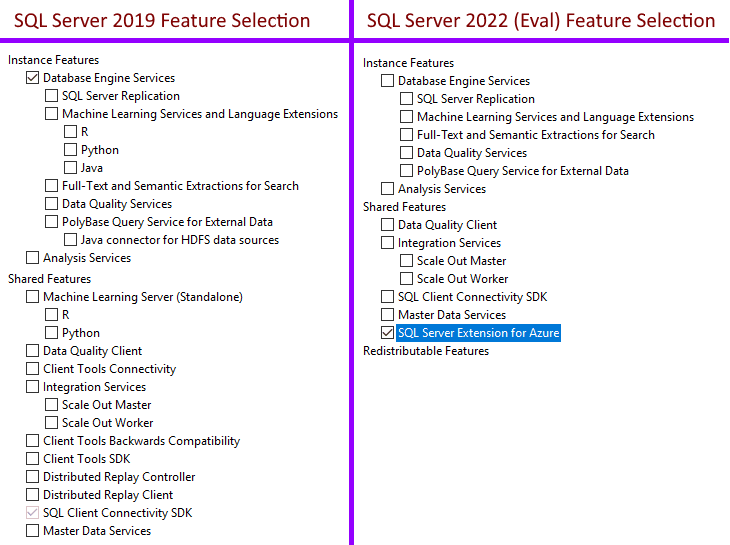
Even though the SQL Server Extension for Azure was checked by default, I only installed the Engine Services, with Replication, PolyBase & Machine Learning Features. All went well.
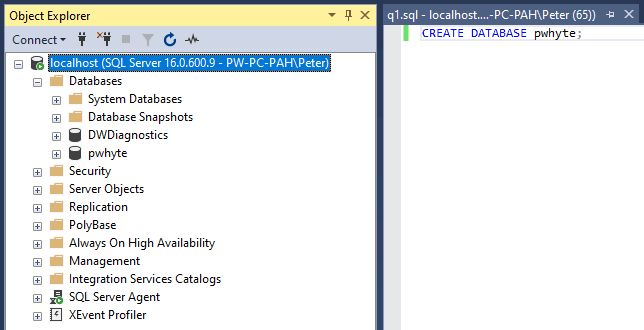
Here’s my first (16.0.x) SQL Server Instance!
More on the Azure Extension Feature Option:
Azure Arc allows you to manage Windows and Linux servers that are hosted outside of Azure. That means MSSQL Instances that are on-prem or in other cloud provider environments will be connected to your Azure environment for management. If you are adding this feature during installation it requires the following information –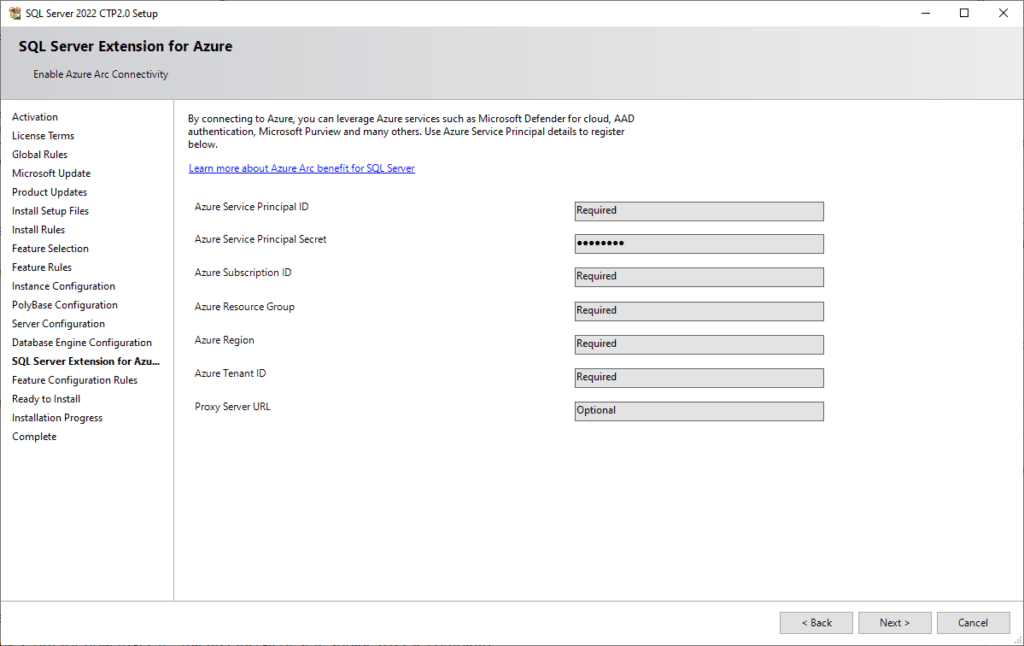
Azure Arc enables the management of both Windows and Linux servers hosted outside of Azure. This means you can now manage your on-premises SQL Server instances or those hosted with other cloud providers from your Azure environment, creating a unified management experience. Once again, I’ll refer to MS Docs for more information, if you’d like to know more about this SQL Server Extension for Azure.
Thanks for reading, hope this random post was a useful, as ever.
-
How To Change From WSL2 to WSL1
This is a post on how to change a Windows Subsystem for Linux (WSL) Distribution from running on Version 2 to Version 1.
Windows Subsystem for Linux (WSL) supports two versions:
> WSL2: The latest version with full Linux kernel support, offering better compatibility and performance.
> WSL1: The original version with faster file access on Windows file systems but lacking full kernel support.Depending on your development needs, you may prefer WSL1 for tasks like faster file operations or using older tools that function better without kernel emulation.
For detailed differences between WSL1 and WSL2, checkout Microsoft’s documentation.
Steps to Switch from WSL2 to WSL1
1. List Installed WSL Distributions
Check the current version for each installed distribution:
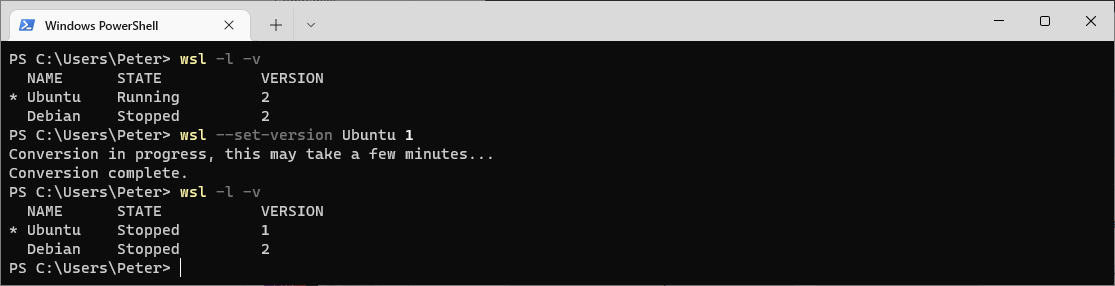
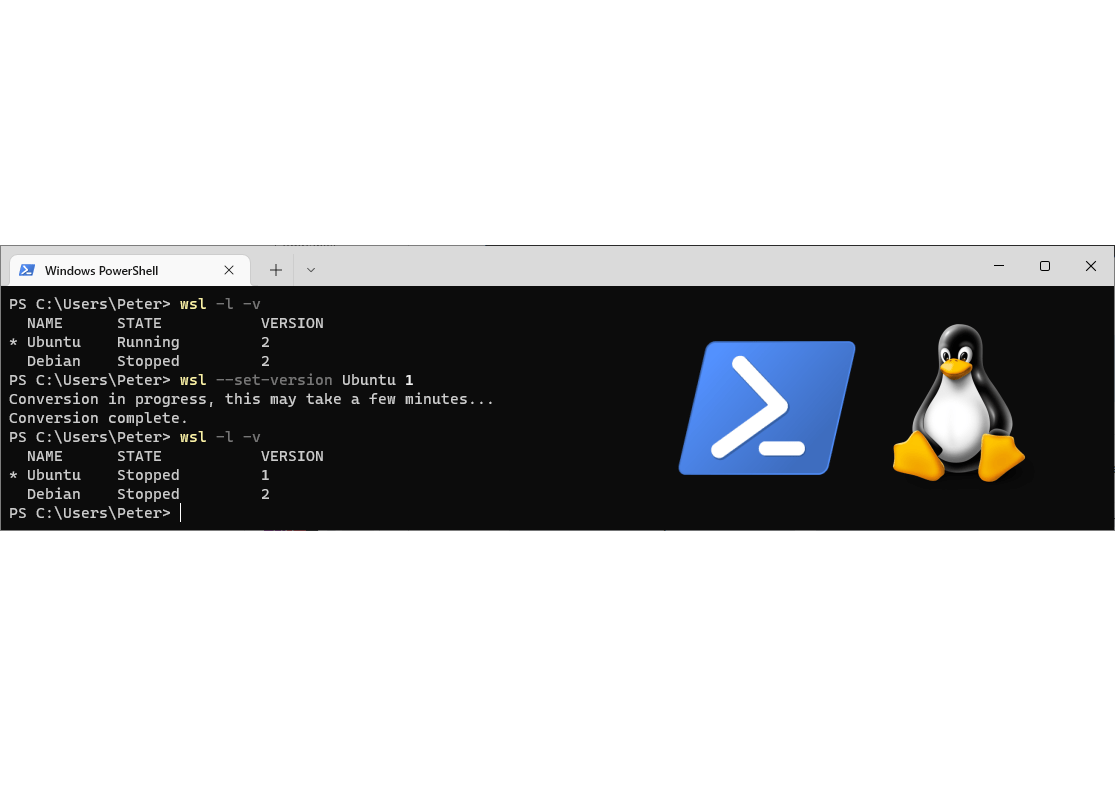
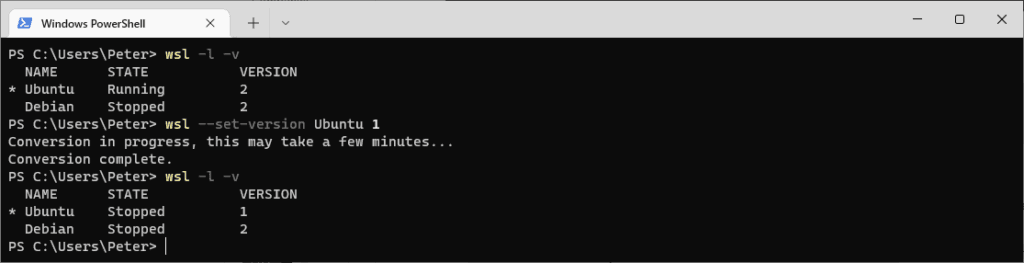
# check wsl distro versions
wsl -l -v
The output will show all available WSL distributions and their corresponding version numbers.
2. Set the Desired Version
Next, use the following command to switch a specific distribution (replace “Ubuntu” with your distribution name):
# change wsl distro using name above to desired version
wsl --set-version Ubuntu 1
3. Verify the Change
Run the list command again to confirm the distribution is now using WSL1:
While WSL2 provides more features, WSL1 might be better in scenarios such as:
– Faster access to files on Windows drives.
– Lower memory usage without full kernel overhead.
– Legacy software compatibility. -
Why Use WHERE 1=2 in SQL
In a previous blog post, I explained why
WHERE 1=1is often used in SQL queries. This time, let’s discussWHERE 1=2— or any condition that results in aFALSEvalue, such asWHERE 1=9. Essentially, the point is to use a condition that is guaranteed to evaluate toFALSE.WHERE 1=1 vs. WHERE 1=2
WHERE 1=1:
This condition is alwaysTRUEand has no impact on the execution time of the query. It’s often used to make query-building easier, particularly when dynamically adding or removing conditions, comments, or commas.WHERE 1=2:
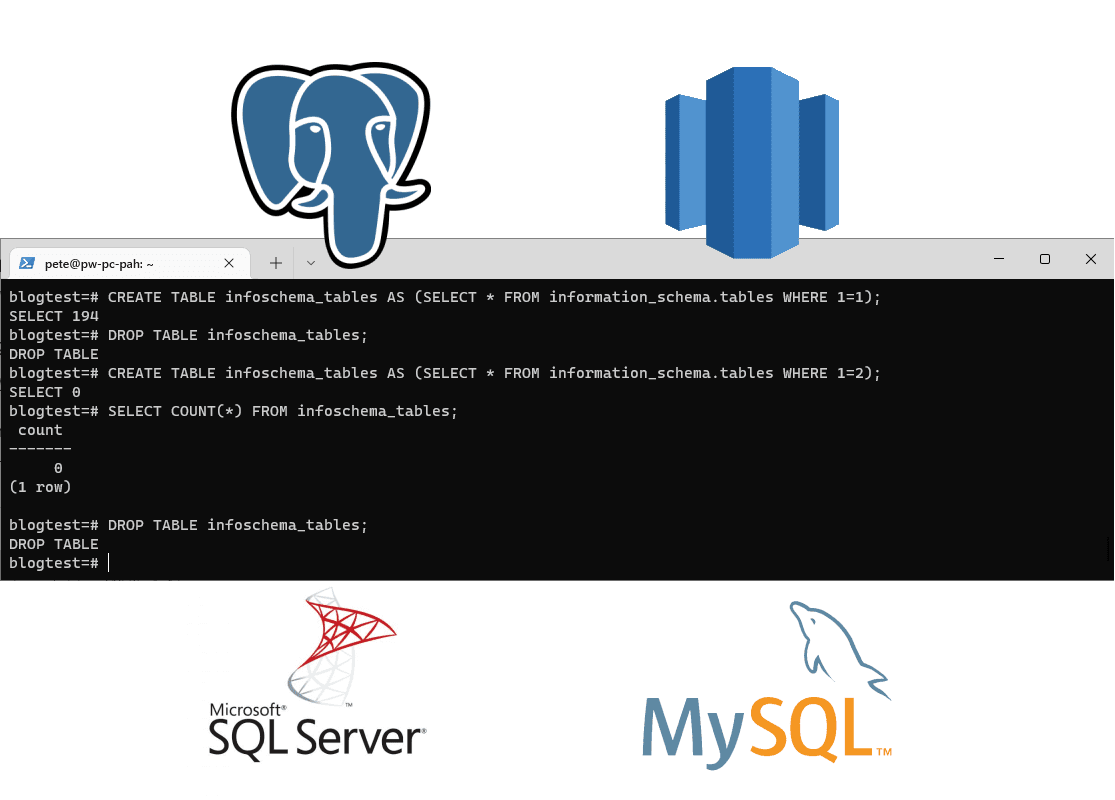
This condition is alwaysFALSE. It’s commonly used when you want to create the structure of a table by copying its schema but without copying the rows. Additionally, it ensures that keys and constraints aren’t copied over.Practical Examples
The following example SQL should help explain this, and the SQL Syntax used below can be run on MySQL, MSSQL, Redshift, Postgres & more.
The syntax will work on other SQL systems, however, the table names used in the SQL below will not be available on all platforms. Please amend SQL table names as necessary.
-- Create a table structure by copying the schema, but not the rows
CREATE TABLE infoschema_tables AS
    (SELECT * FROM REMOVEinformation_schema.tables WHERE 1=1);

-- Count the rows in the newly created table
-- (This step may not be necessary in your specific terminal, as it will show row counts automatically)
SELECT COUNT(*) FROM infoschema_tables;

-- Clean up: Drop the table
DROP TABLE infoschema_tables;

-- Create a table structure by copying the schema without copying the rows
CREATE TABLE infoschema_tables AS
    (SELECT * FROM REMOVEinformation_schema.tables WHERE 1=2);

-- Count the rows in the newly created table (should return 0)
SELECT COUNT(*) FROM infoschema_tables;

-- Clean up: Drop the table
DROP TABLE infoschema_tables;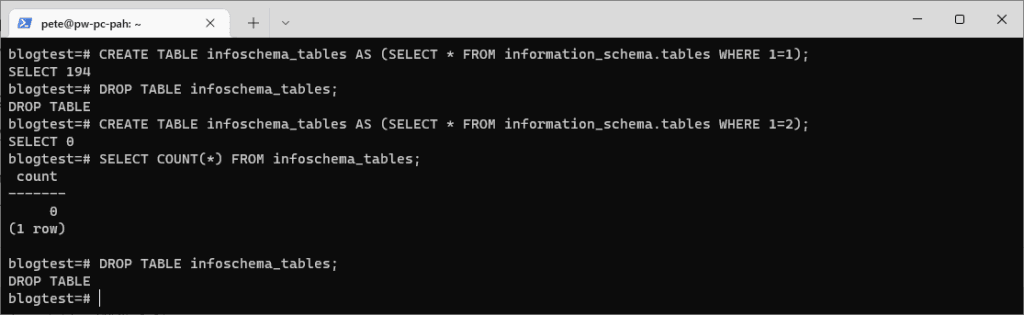
In conclusion,
WHERE 1=2is a useful technique for creating an empty table with the same structure as another, without copying any data, making it ideal for schema migrations or creating backup structures, and this syntax is compatible across various SQL platforms, though table names may vary.