Category: Windows

Windows Administration Blog Archives, by Peter Whyte (Database Administrator).
Includes: Database Admin, Windows Admin, PowerShell, WSL & more…

  • Installing Active Directory on Windows Server 2016

    Installing Active Directory on Windows Server 2016

    This post contains a demo installation of Active Directory Domain Services on Windows Server 2016. It follows a previous post for a series of test lab configuration posts.

    Microsoft docs on installing AD on Windows Server can be found here: Install Active Directory Domain Services

    Configuring a Windows Server 2016 on a local Hyper-V can be done by following my previous post: Installing Windows Server 2016 with Hyper-V

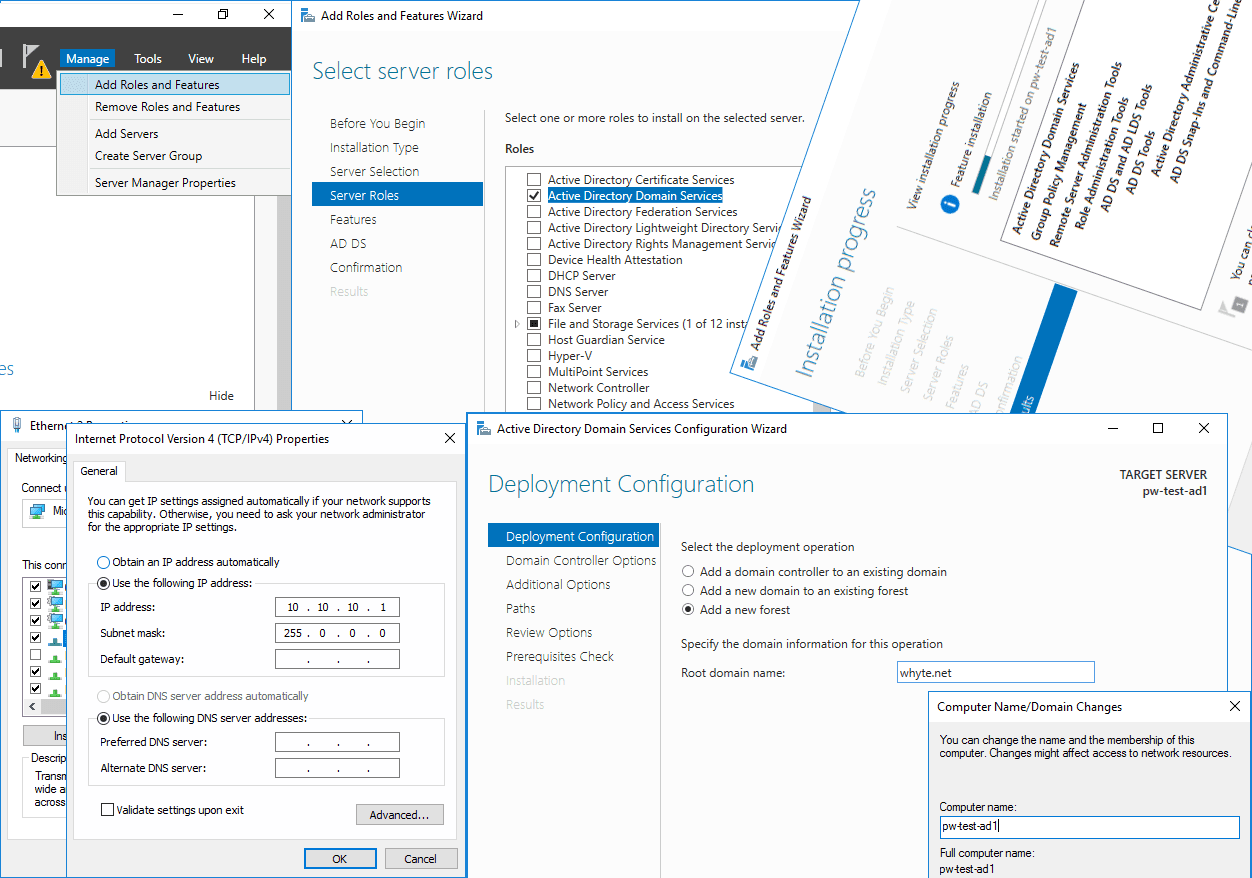
    The following steps will get your test Windows Server environment set up to run Active Directory:
    # Create a Hyper-V Private Network.
    # Configure Windows TCP/IP Settings.
    # Rename the Windows Server Host.
    # Install Active Directory.
    # Promote the Server to a Domain Controller.
    Once the above has been achieved, you can create a new VM in Hyper-V (or other Hypervisor) and join your Domain, as I’ve done for some tests.

    Create a Hyper-V Private Network

    1. Right-click the Hyper-V host and select Virtual Switch Manager.
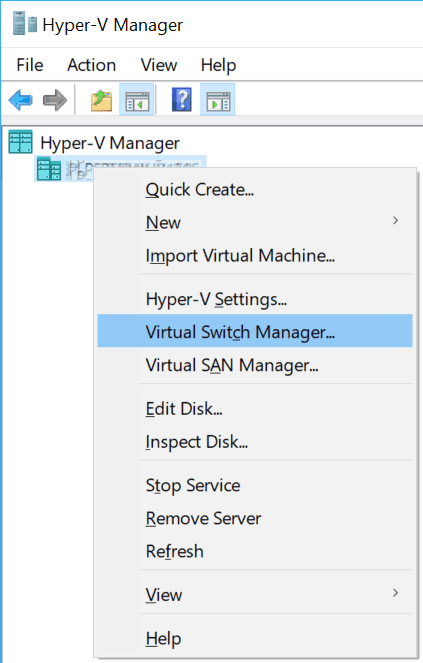
    Hyper V Virtual Switch Manager

    2. Select Private and Create Virtual Switch.
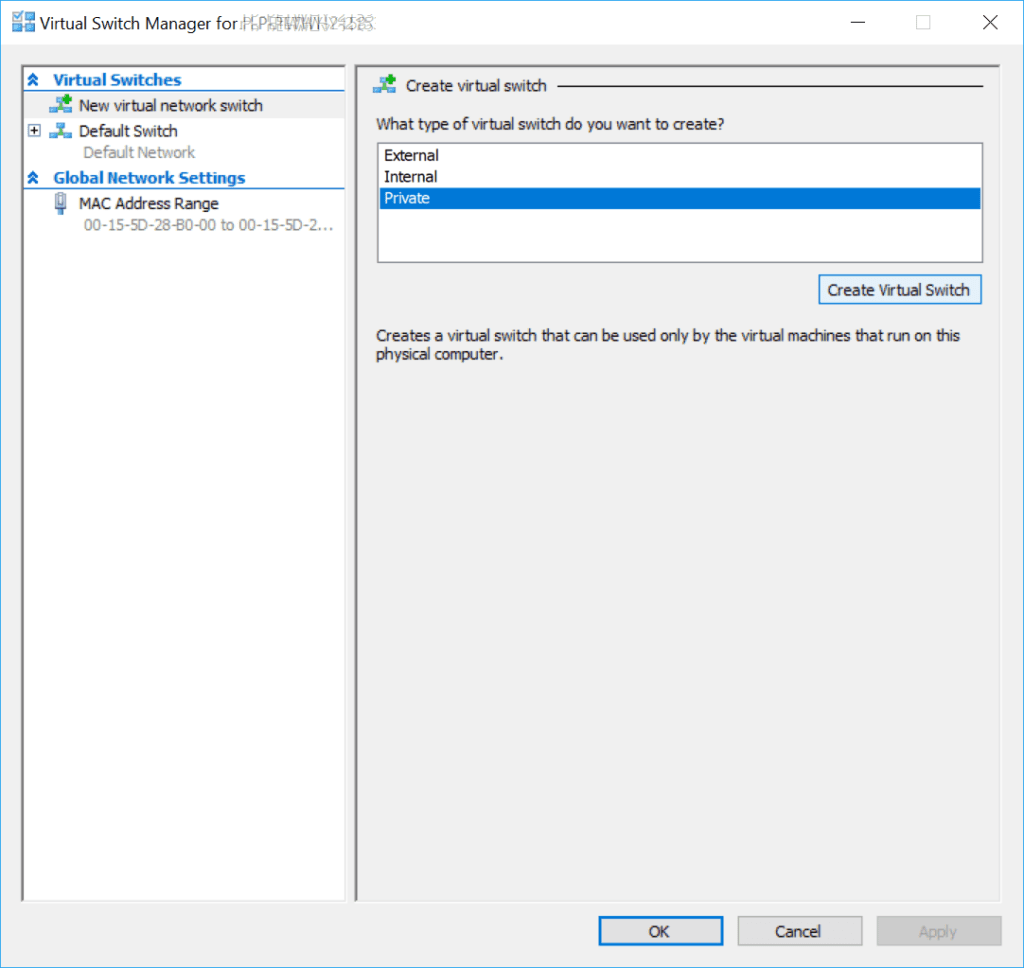
    Hyper-V VSwitch Manager New Private Switch

    3. Enter a name for the network and click okay.
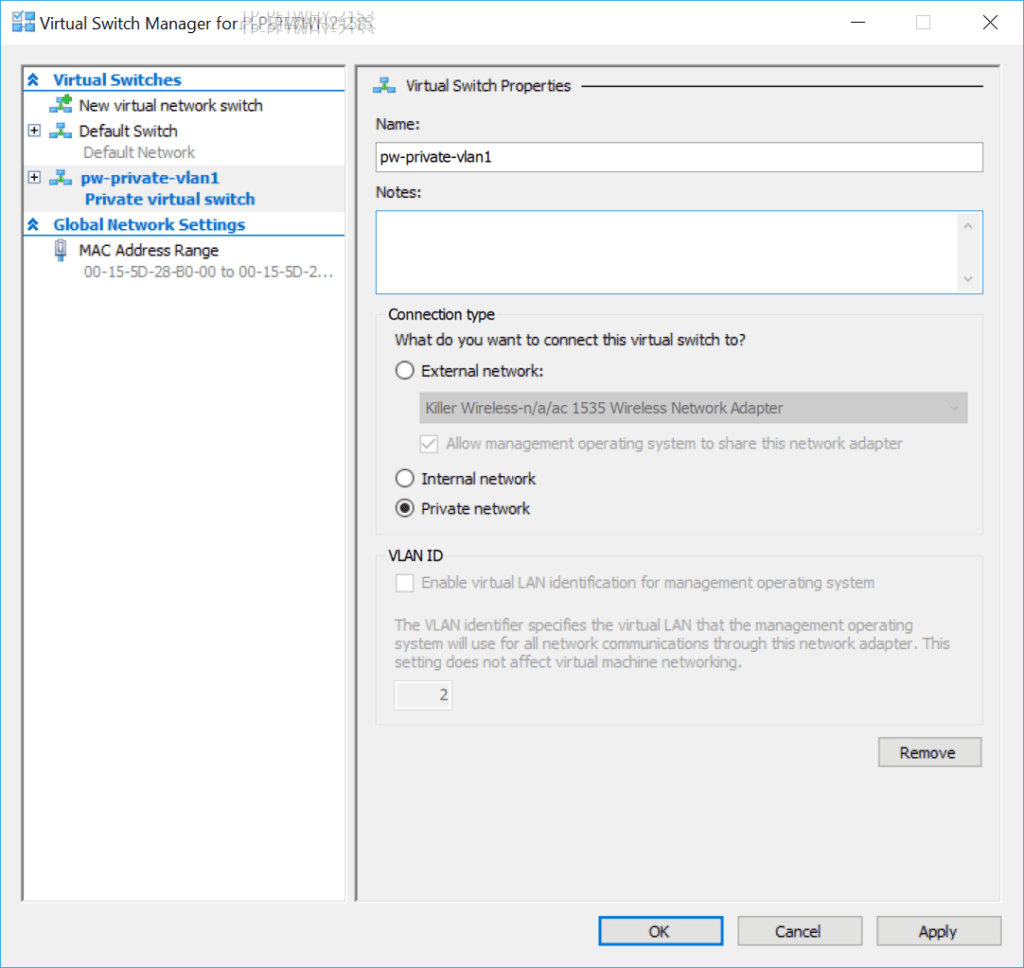
    HyperV vSwitch Manager

    4. Right-click the VM in Hyper-V and click Settings.
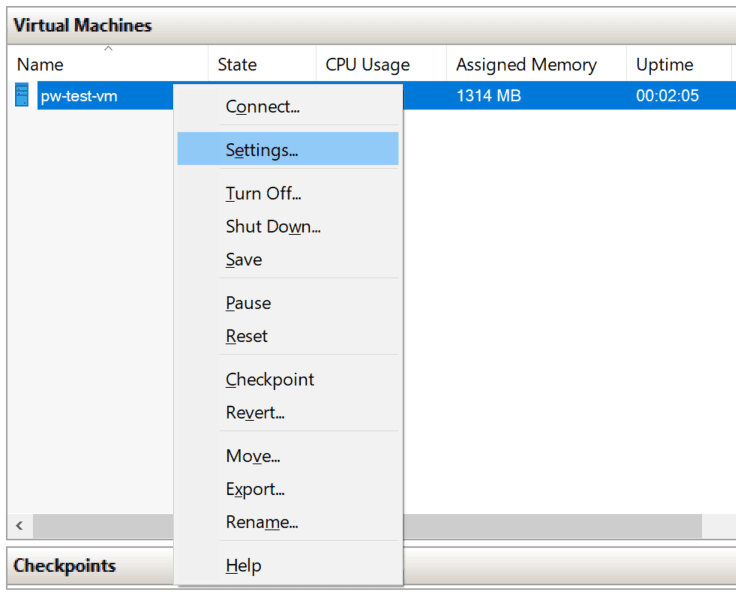
    HyperV VM Settings

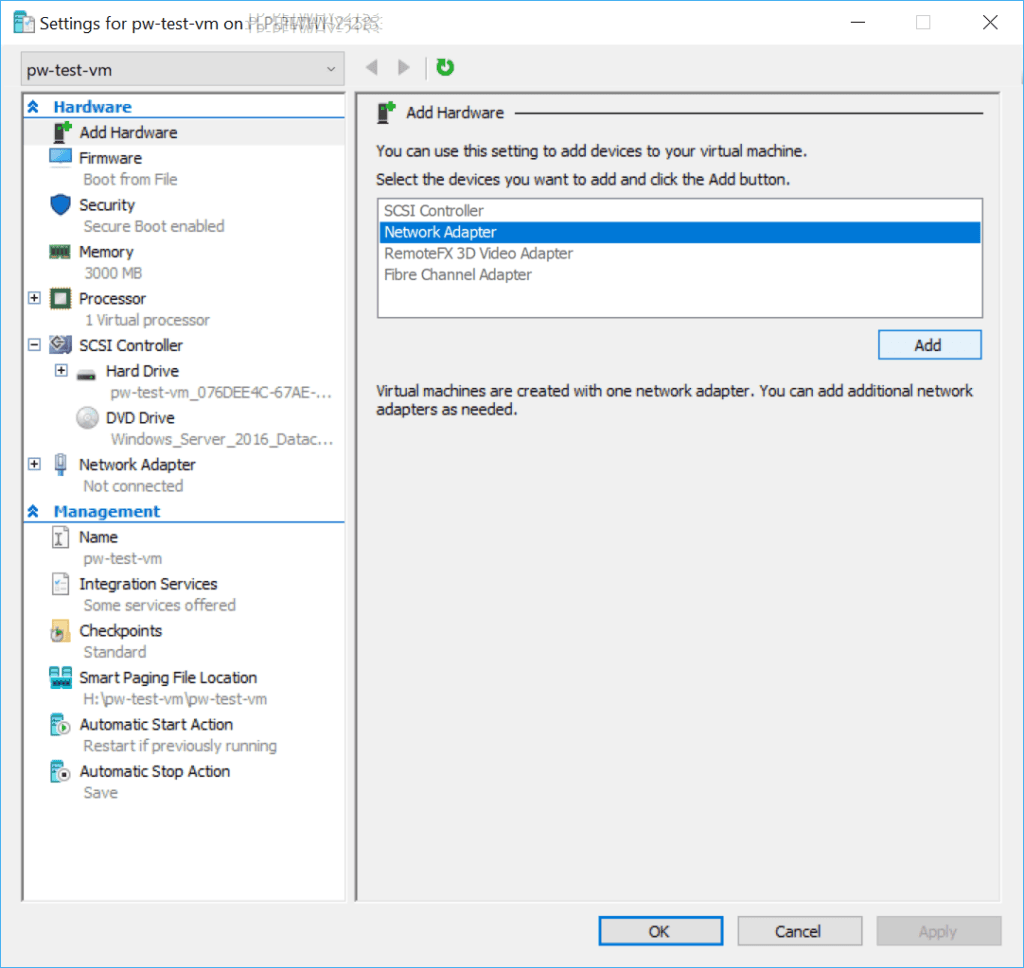
    5. Add a new Network Adapter.

    HyperV Add New Network Adapter

    6. Select Private vSwitch as named above and click OK.
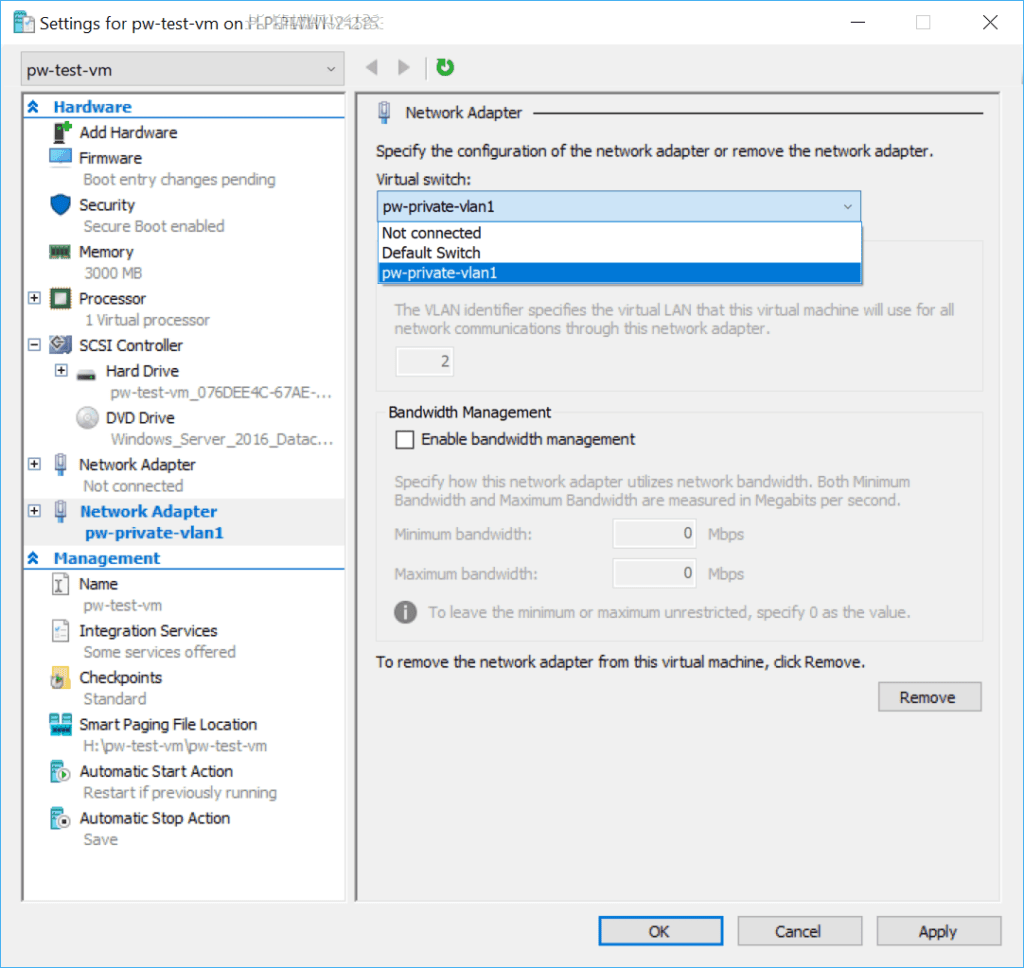
    HyperV Add New Network Adapter

    Configure Windows TCP/IP Settings

    1. When the above has been set-up, Windows Server will show network settings as Identifying…
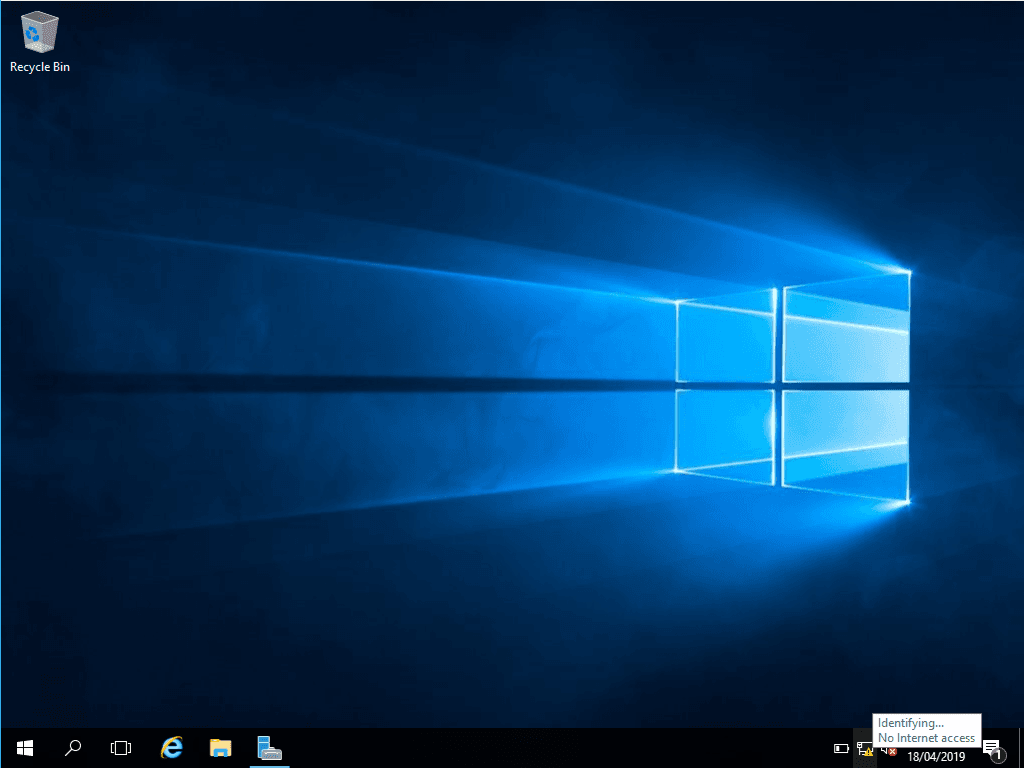
    Windows Server Identifying Network

    2. Right-click the network icon and click Open Network and Sharing Center.

    Windows Network and Sharing Center

    3. Click the highlighted active Ethernet connection.
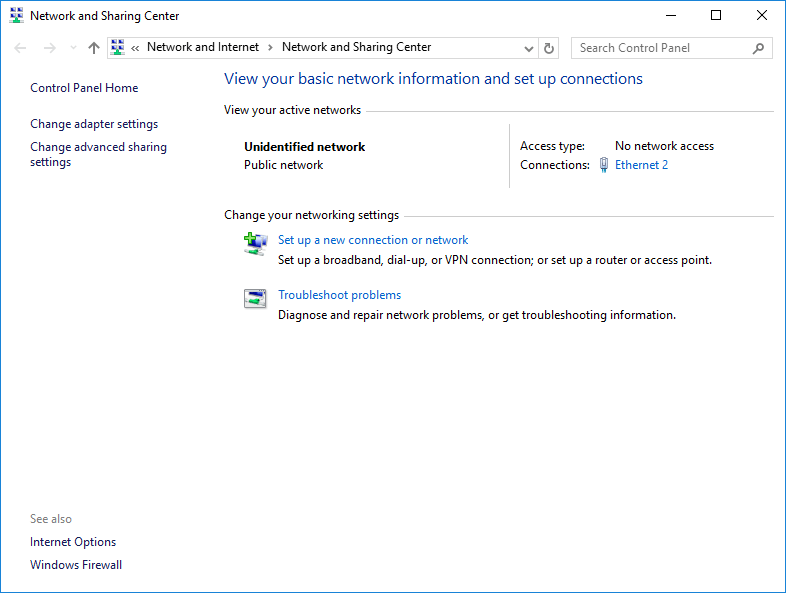
    Windows Server Network and Sharing Center

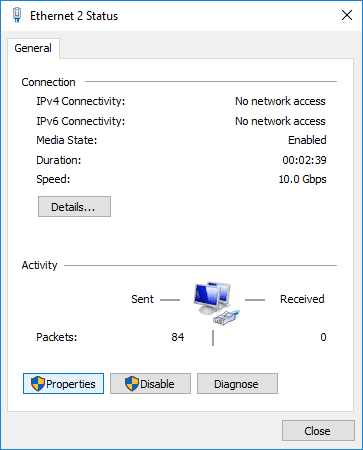
    4. Open Properties.

    Windows Ethernet Adapter

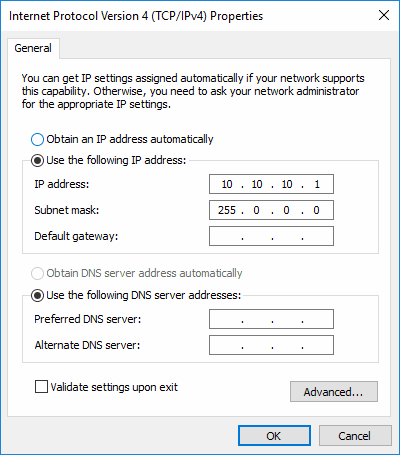
    5. Open Internet Protocol Version 4 (TCP/IPv4) Properties.
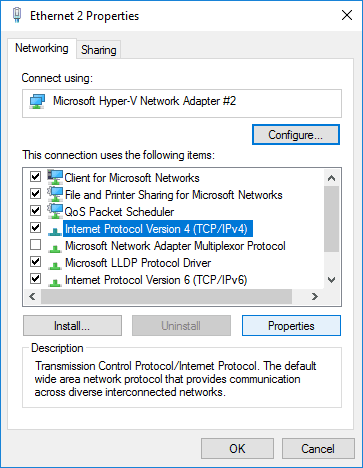
    Ethernet Adapter IPv4 Properties

    6. Enter IP and subnet addresses.

    Windows Ethernet Adapter IPv4 Address

    Rename the Windows Server Host

    1. Open Server Manager and click the highlighted Computer Name.
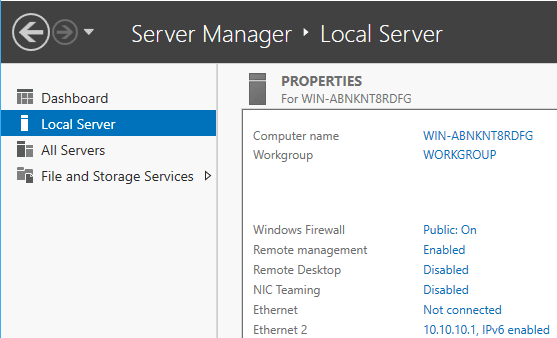
    Windows Server Manager Host Info

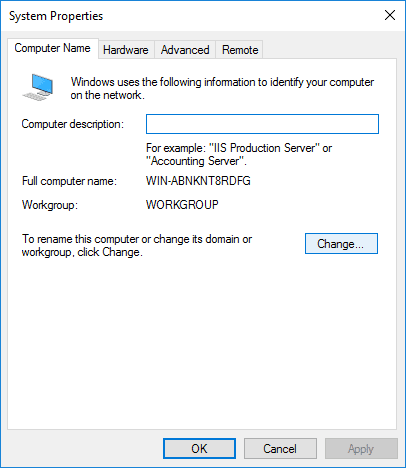
    2. Click Change…

    Windows System Properties

    3. Enter new Computer Name and click OK.
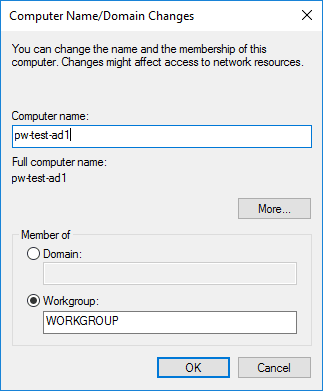
    Windows Server Computer Rename

    The host will require a reboot once done.

    Installing Active Directory

    1. Within Server Manager, click Manage > Add Roles and Features.
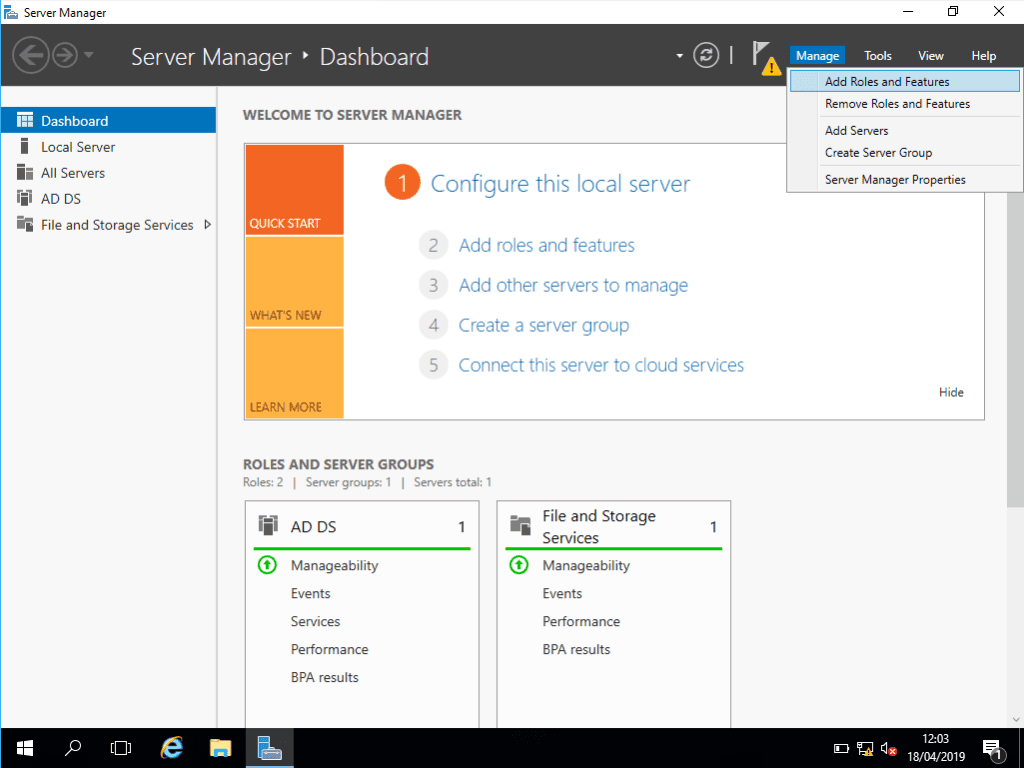
    Windows Server Manager Add Roles and Features

    2. Before you begin, read the before you begin.
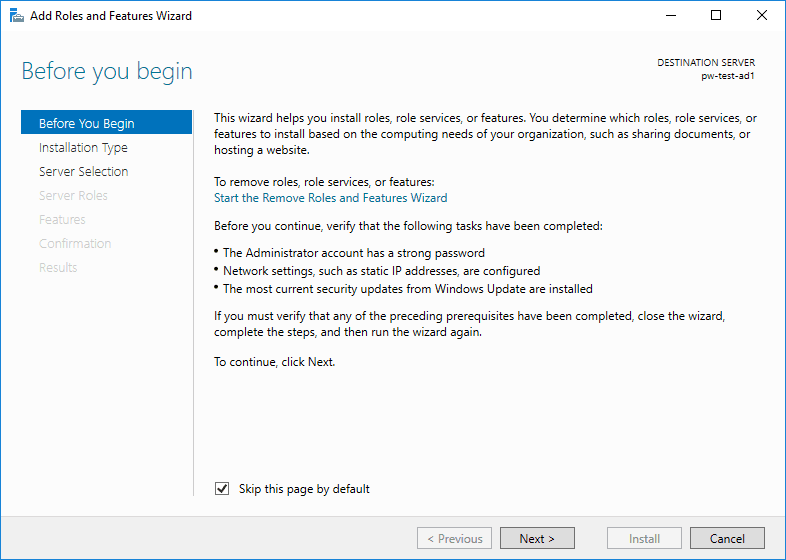
    Server Manager Add Roles and Features

    3. Select Role or Feature-based installation.
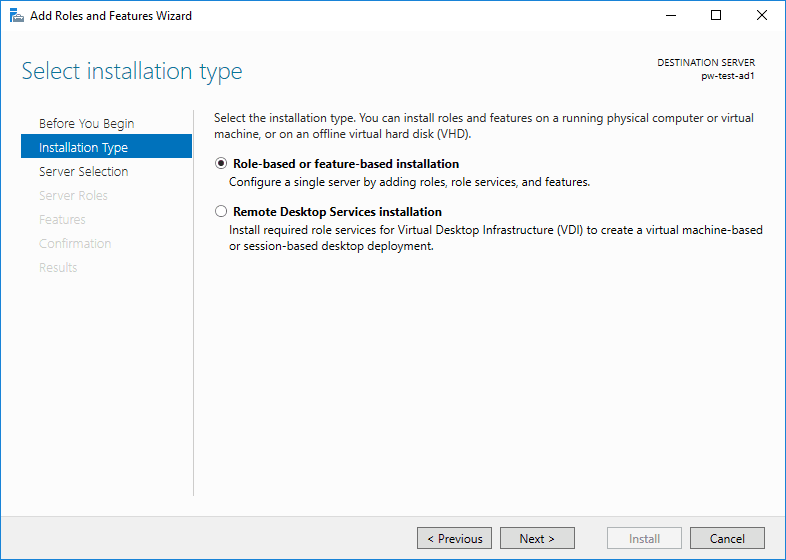
    Server Manager Add Roles and Features Installation Type

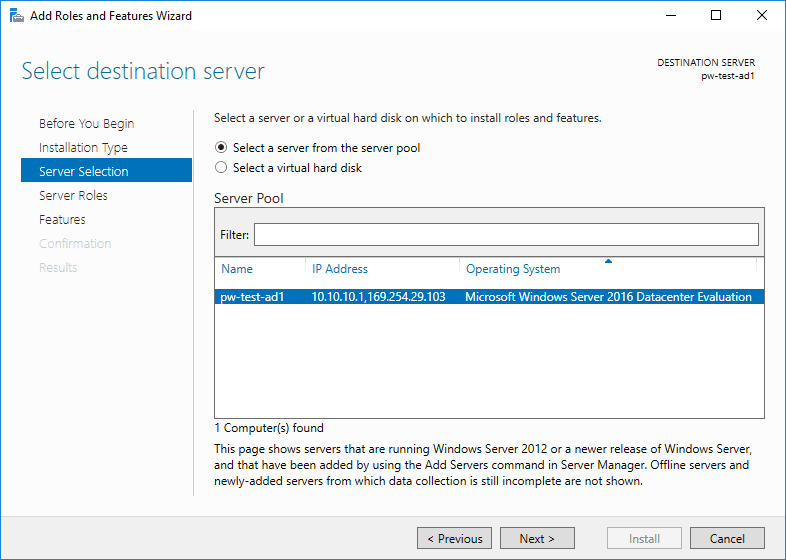
    4. Select the destination server.  

    Server Manager Add Roles and Features Destination Server

    5. Tick the Active Directory Domain Services checkbox.
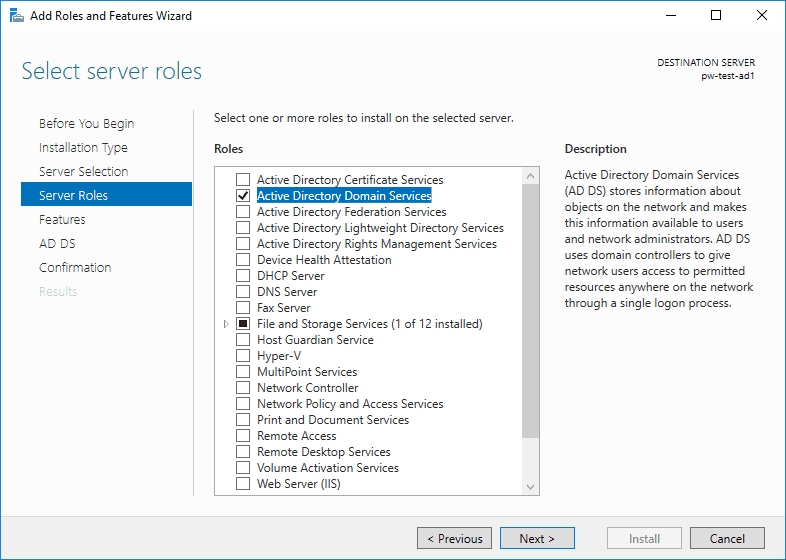
    Server Manager Add Roles

    6. The following will appear – click to add the additional tools.
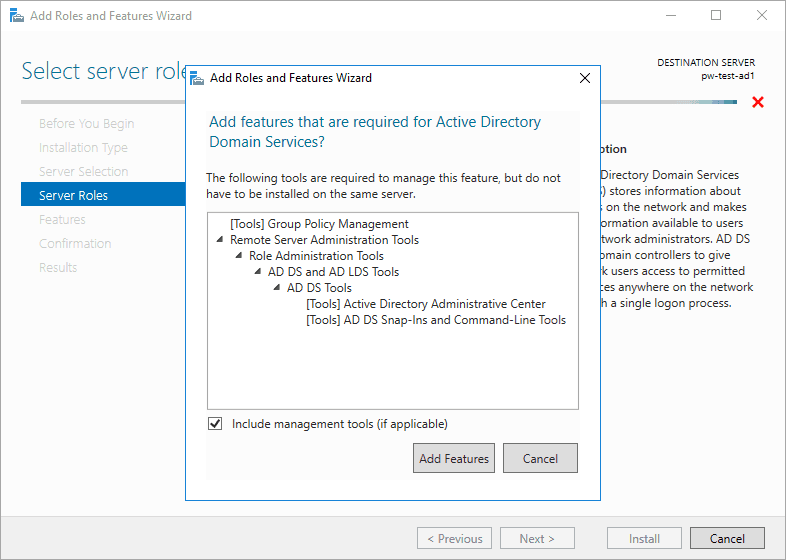
    Server Manager Add Roles Active Directory

    7. No features are being added at this time – click to continue.
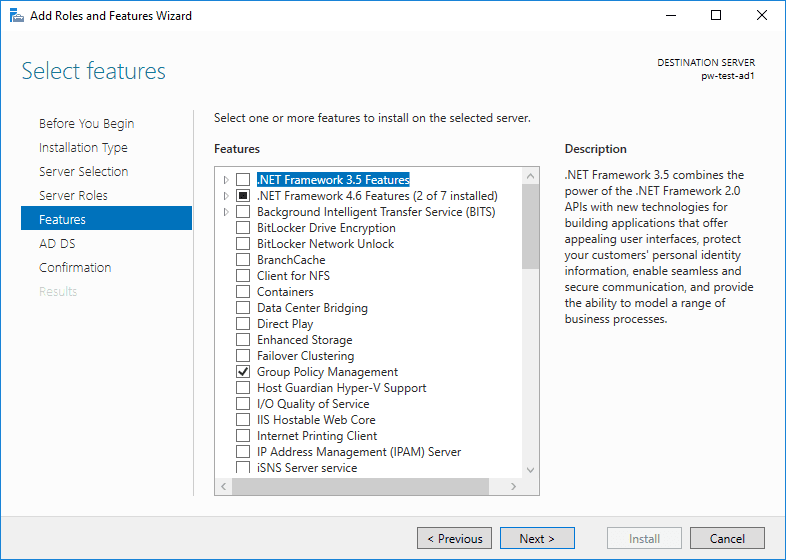
    Server Manager Add Features

    8. ADDS page is worth a read – nothing to change here.
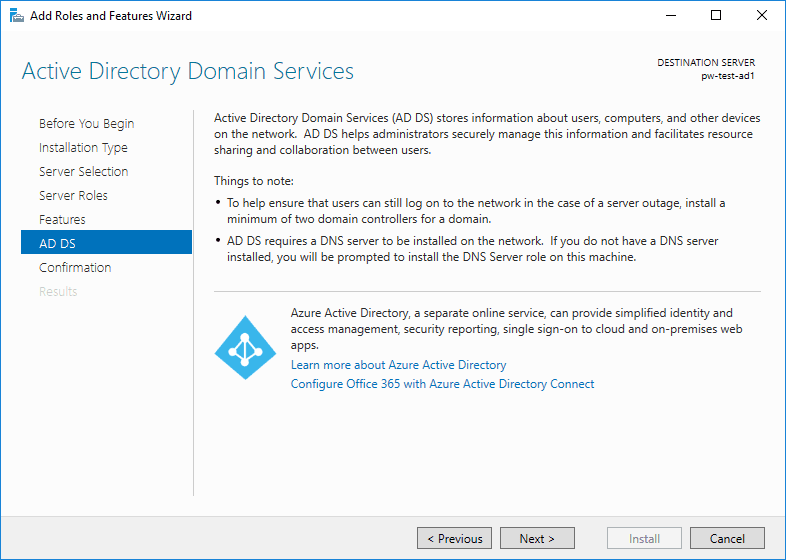
    Server Manager AD DS

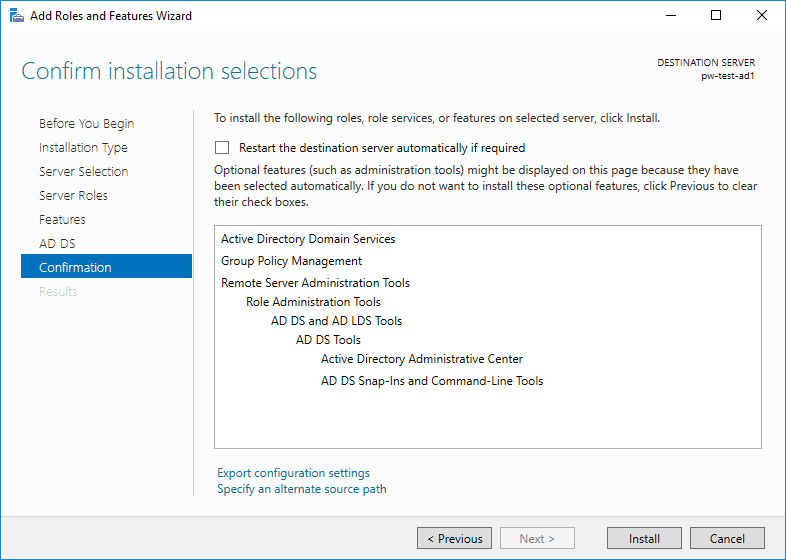
    9. Review and click to install.

    Server Manager Roles and Features Installation

    10. Leave it a few minutes and we’re then able to promote this server as a new Domain Controller.
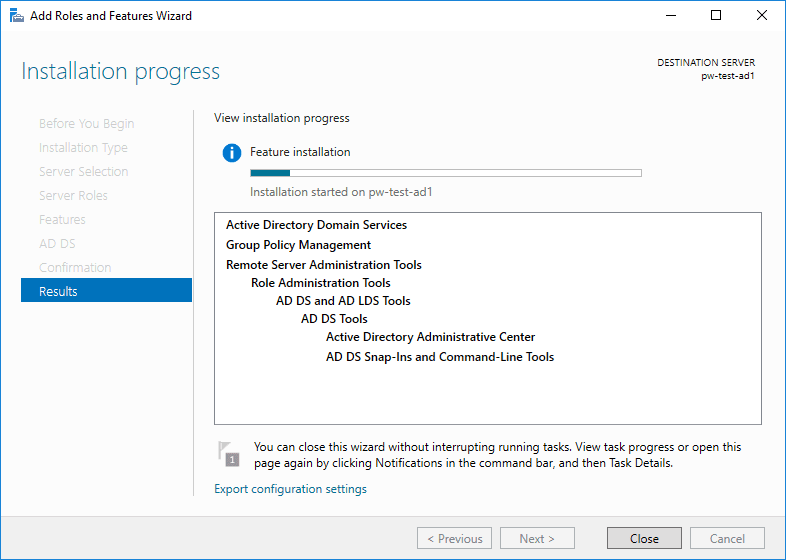
    Server Manager Active Directory Installation

    Promote the Server to a Domain Controller

    1. Once done with the above, there won’t be a finish point within the wizard. Click the flag on Server Manager to Promote the server to a Domain Controller.
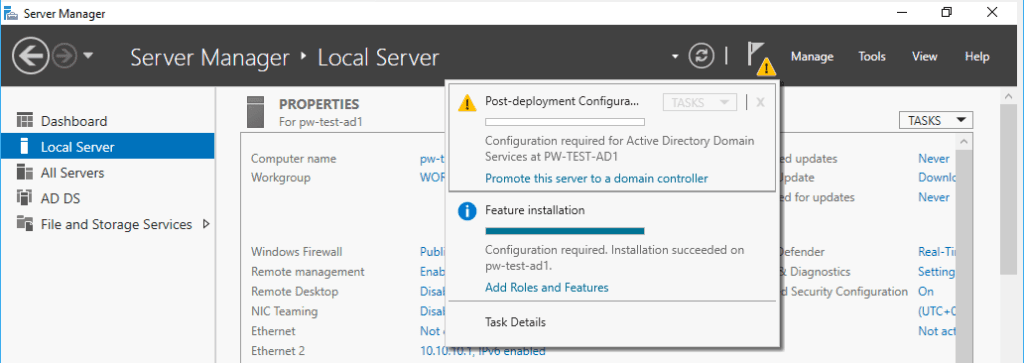
    Active Directory Promote to DC

    2. This is a new test environment, so I need to Add a new forest.
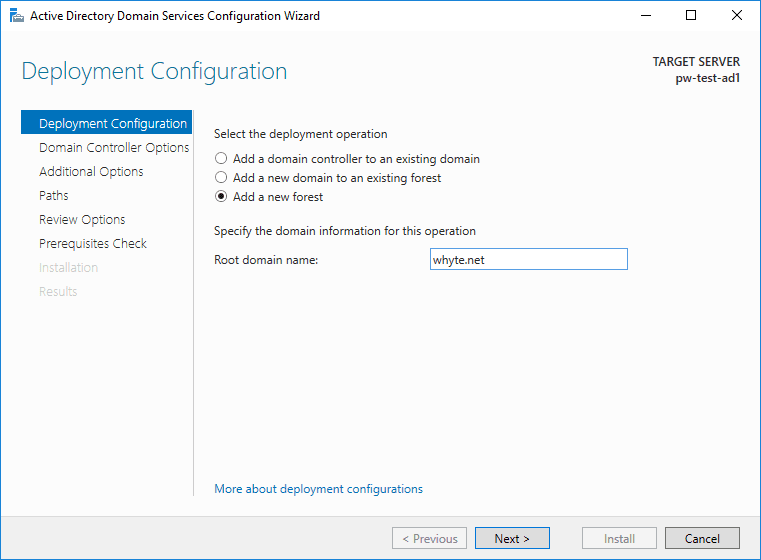
    Active Directory Domain Services Config Wizard

    3. A new Forest means Functional Levels can be the latest edition available, Windows Server 2016. This is also the place to enter an important password that is required if recovering a failing AD.
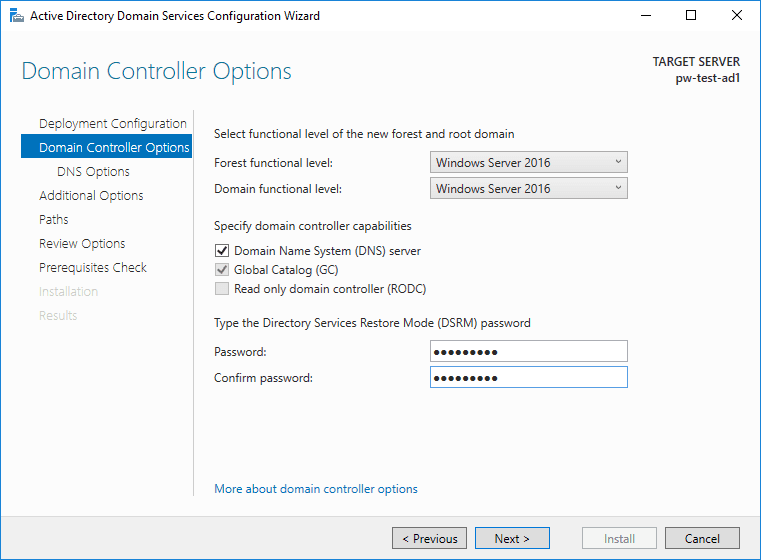
    Active Directory Domain Controller Options on Install

    4. The following error is listed within the known issues for installing and removing AD DS. It’s expected if create a new forest as I’m doing.
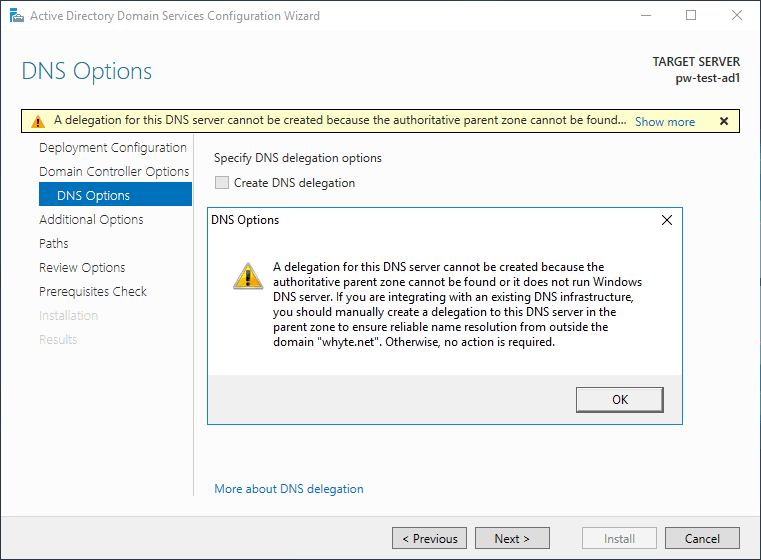
    Active Directory Domain DNS Options

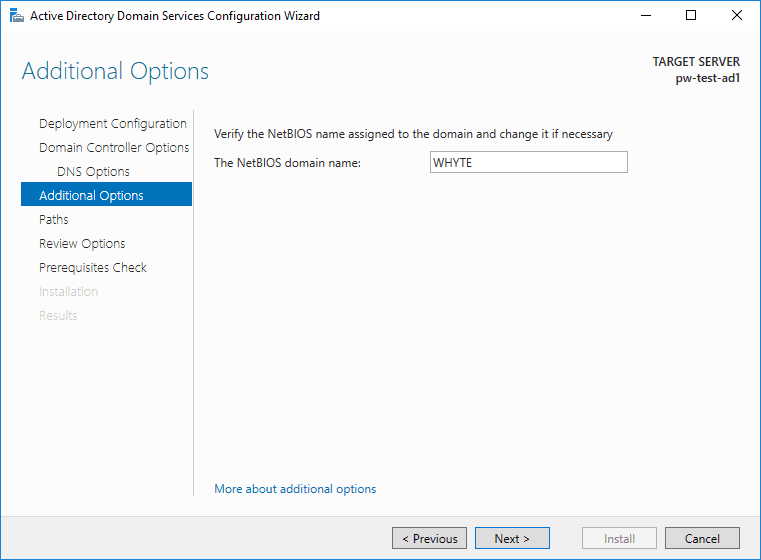
    5. Enter a preferred NetBIOS name.

    Active Directory Configuration Additional Options

    6. Locations can stay as defaults of course.
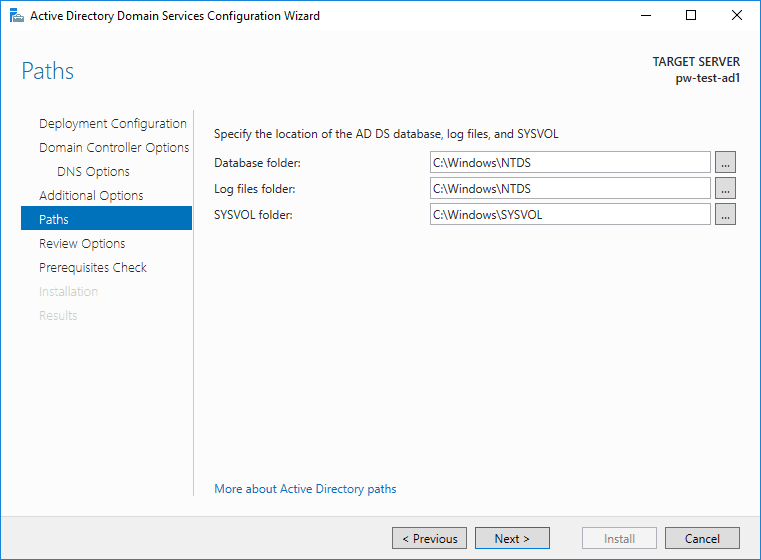
    Active Directory Installation Paths

    7. Time for us to review wizard selections.
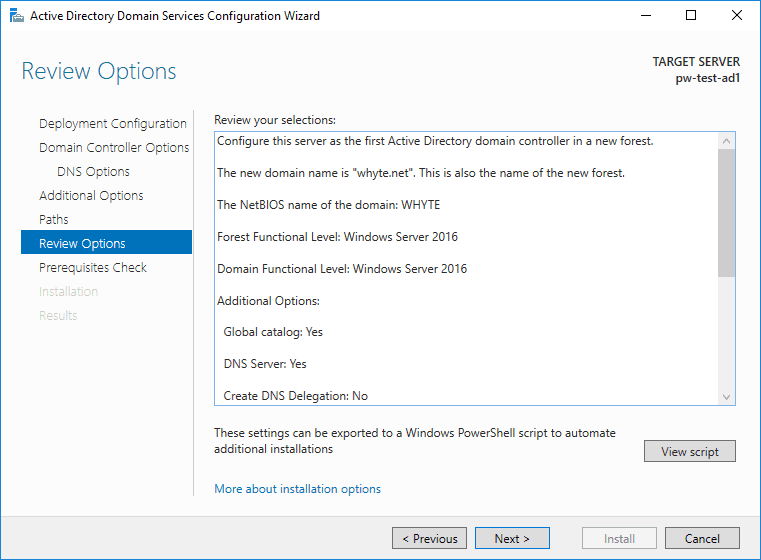
    Active Directory Installation Review

    8. As you’ll see in the image above, we can click to view the PowerShell script that is about to run with the wizard selections included.
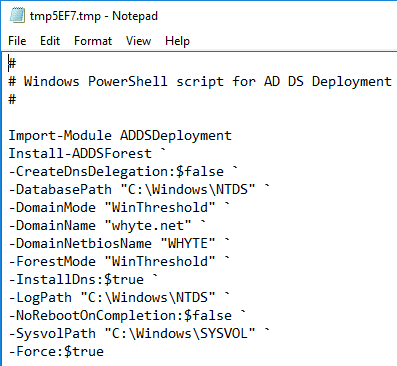
    Active Directory Installation Script

    9. A prerequisites check will run as we hit next from above. 
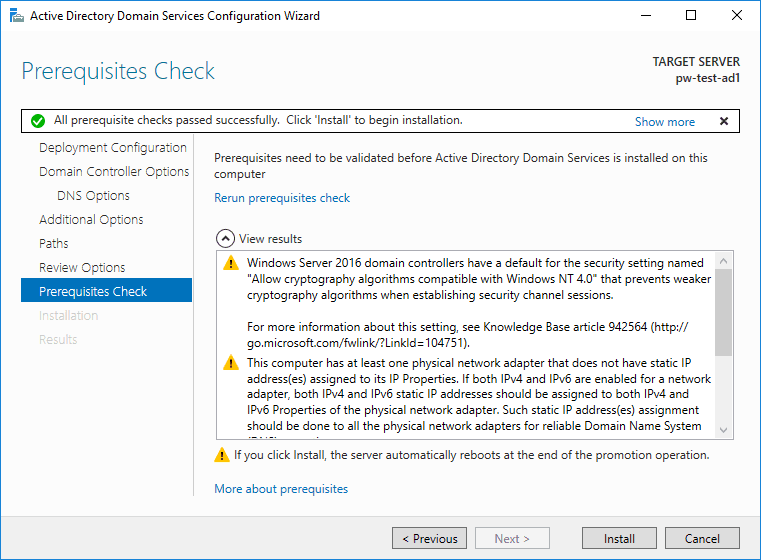
    Active Directory Installation Prerequisites

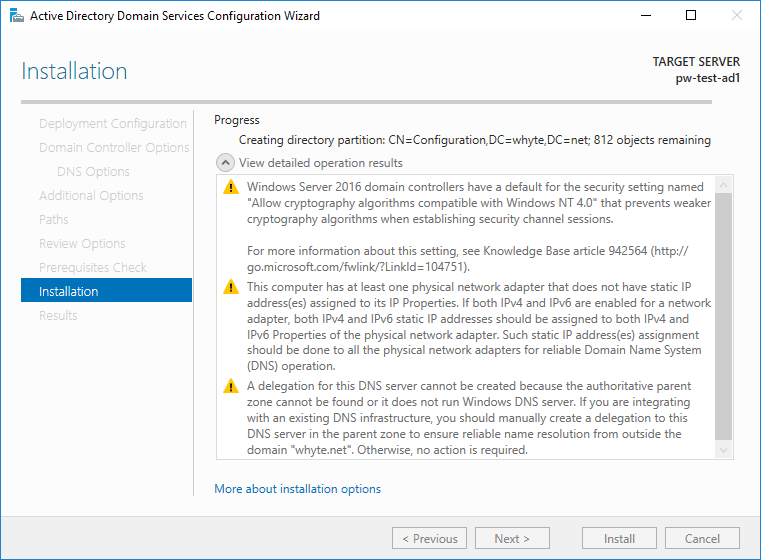
    10. Click to install…

    Active Directory Installation Progress

    11. An automatic reboot will be initiated at the end.
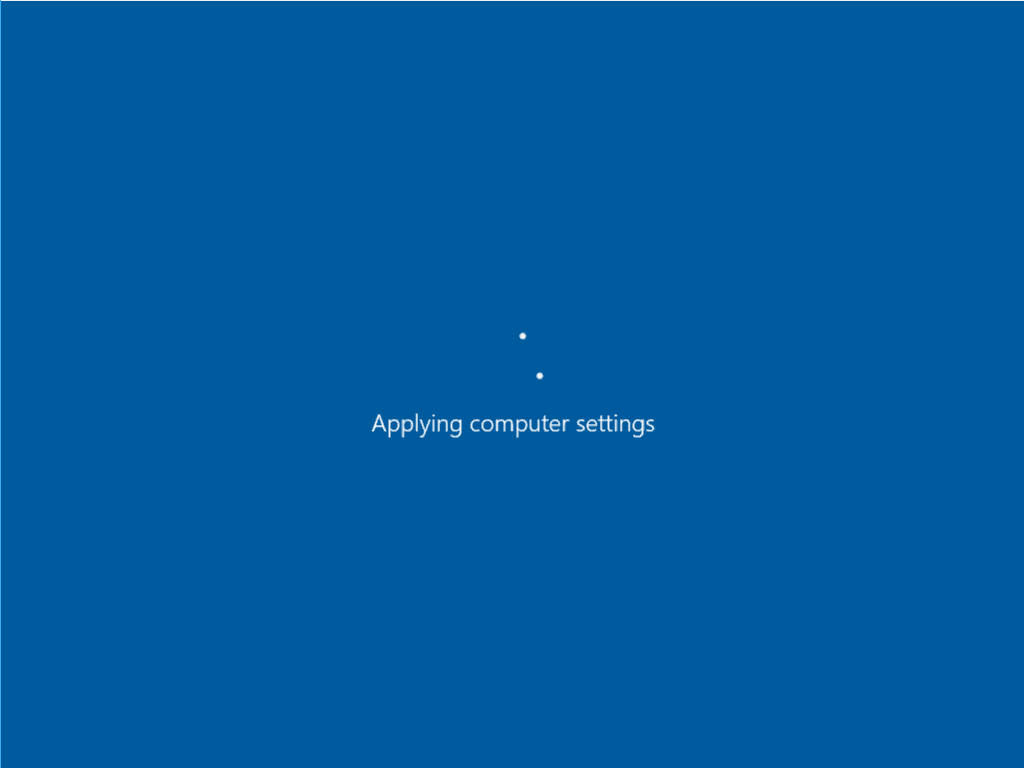
    Windows Reboot

    12. When back up and running, we can log in to the new domain.
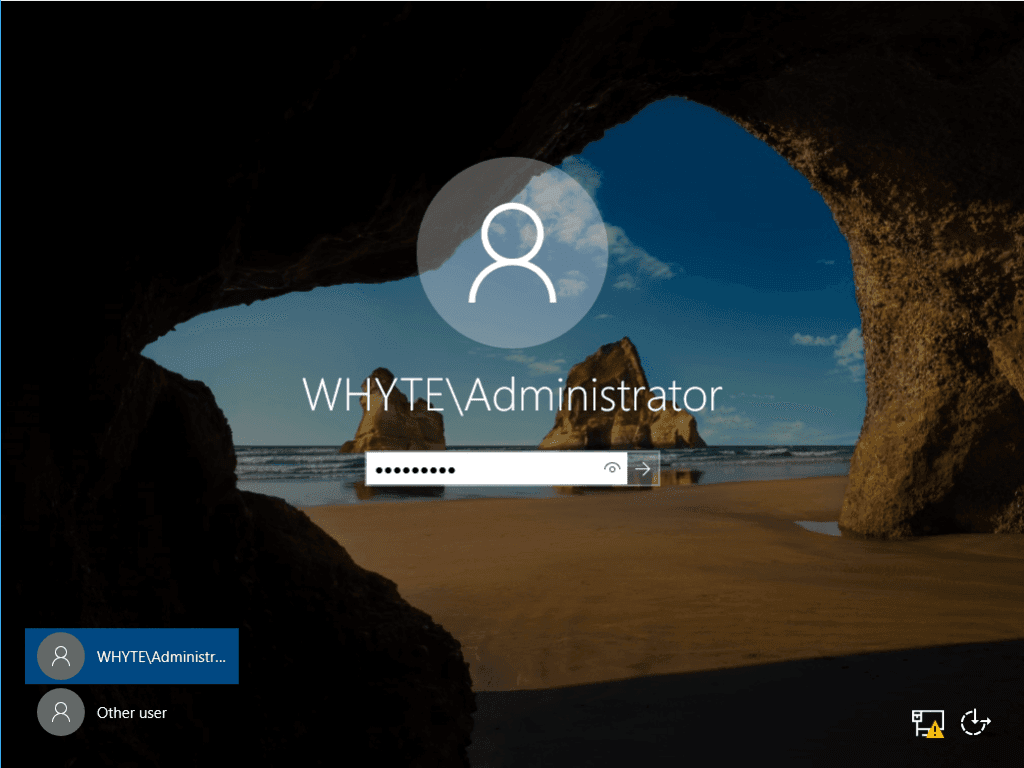
    Windows Server Domain Login

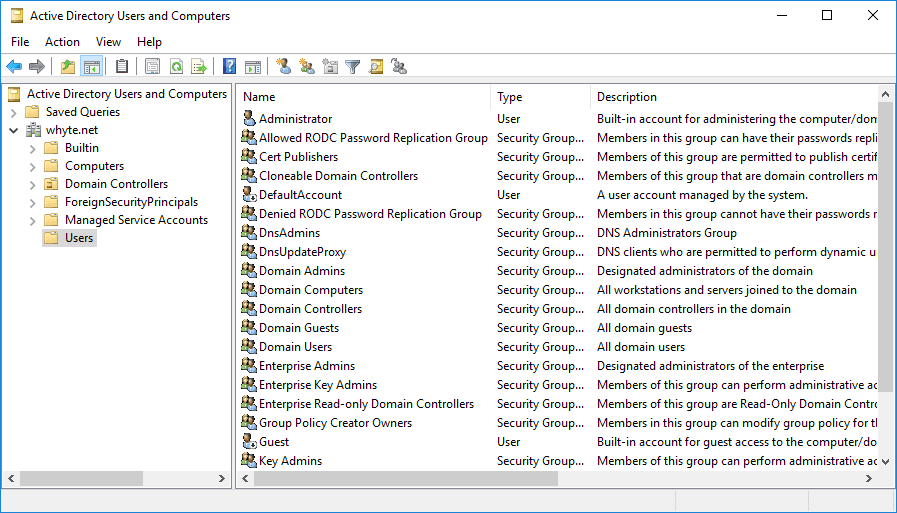
    13. And have a look at our Active Directory Users & Computers, just for the fun demo of course.
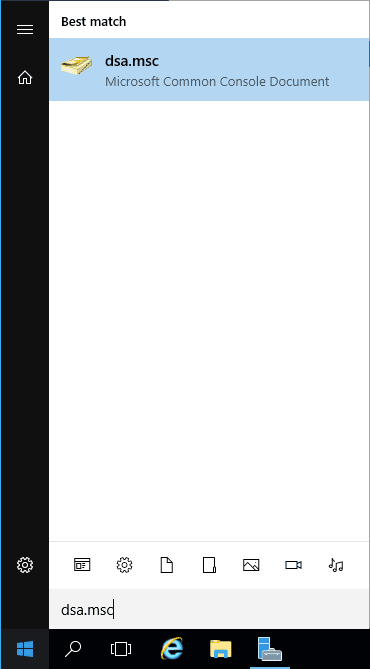
    dsa.msc
    Active Directory Users and Computers
  • Installing Windows Server 2016 with Hyper-V

    Installing Windows Server 2016 with Hyper-V

    This post contains a demo of installing the Windows Server 2016 Operating System on Hyper-V.

    To install the Hyper-V Role on Windows 10, see this guide from Microsoft Docs: Install Hyper-V on Windows 10.

    There are two parts to this one:
    # Create a new Hyper-V Virtual Machine
    # Install Windows Server 2016

    Once you are done with this guide you will be logged into a new Windows Server on Hyper-V. You will then be ready to configure and run tests on your server. The next step for me would be to Install Active Directory (AD) on the server.

    Creating a new Hyper-V Virtual Machine

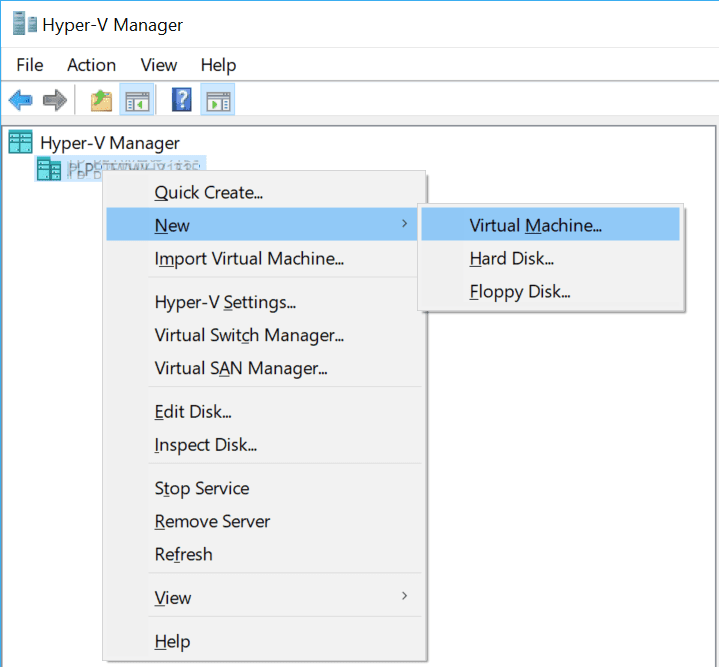
    1. Right-click your Hyper-V Manager host machine, and select New > Virtual Machine…

    Hyper-V New Virtual Machine
    New Virtual Machine HyperV

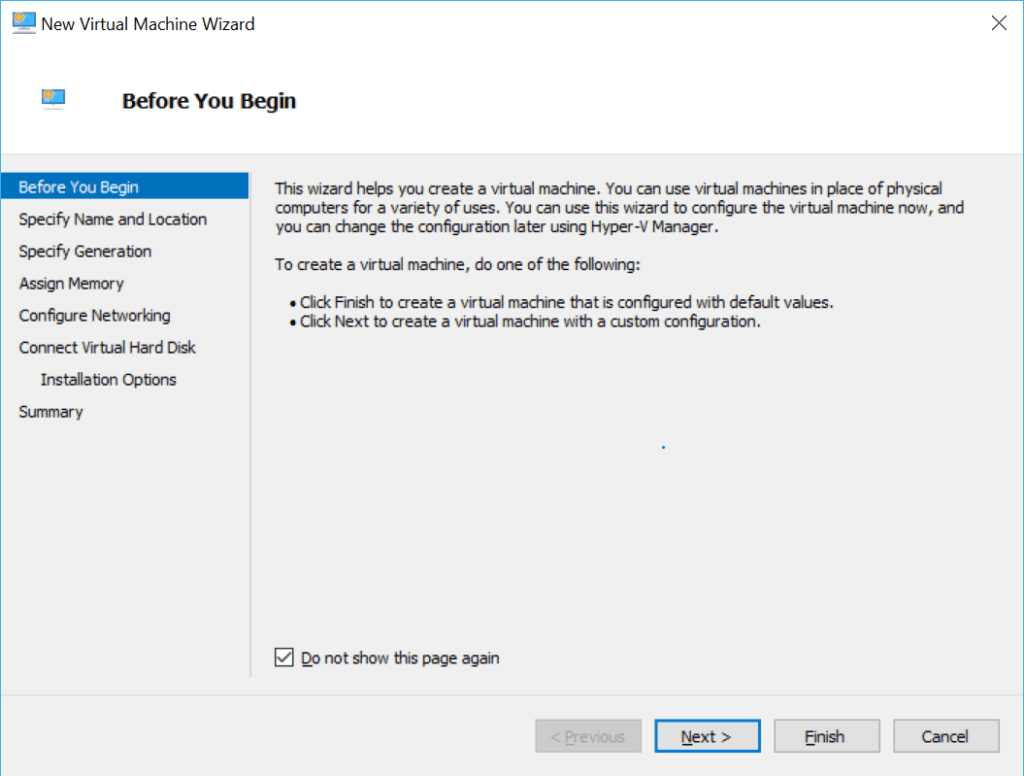
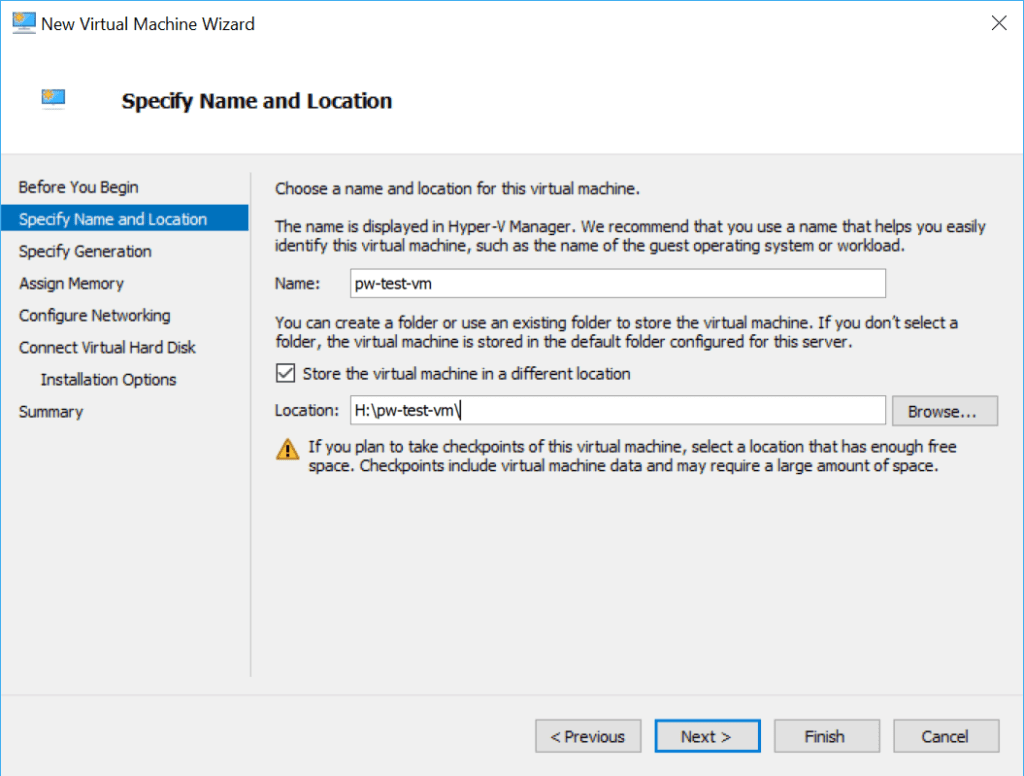
    2. Enter the name of the new VM and the location on disk.

    Hyper-V VM Name and Location

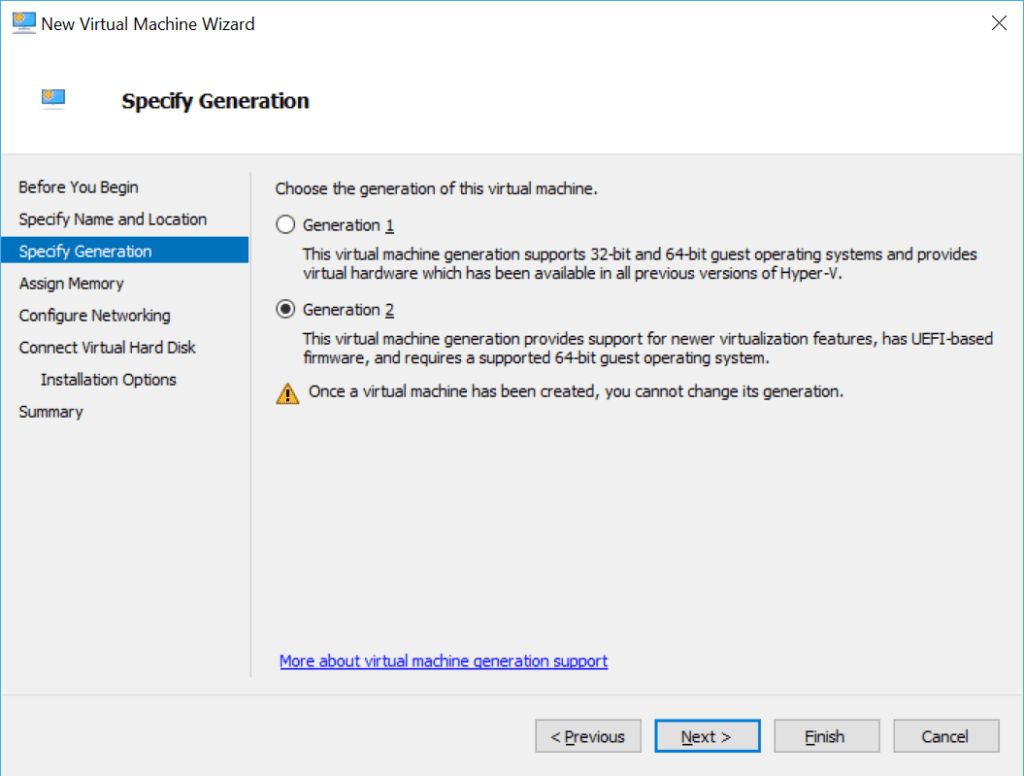
    3. Select Generation of VM.

    Hyper-V Virtual Machine Generation

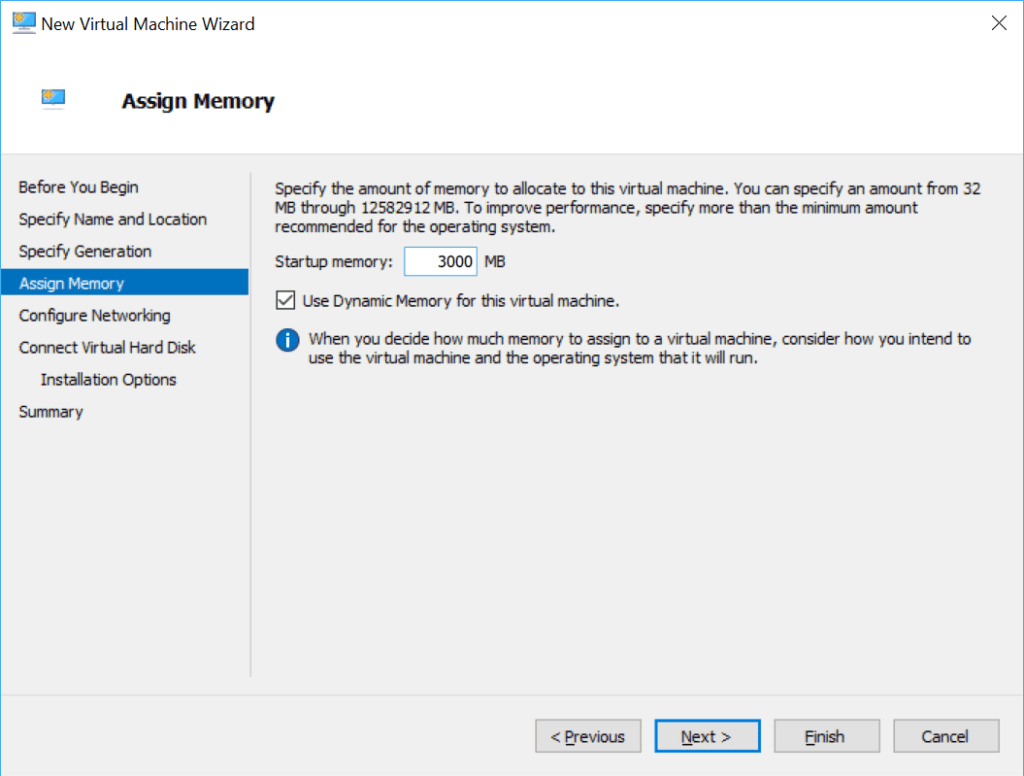
    4. Enter the memory allocation amount.

    Hyper-V Virtual Machine Memory Allocation

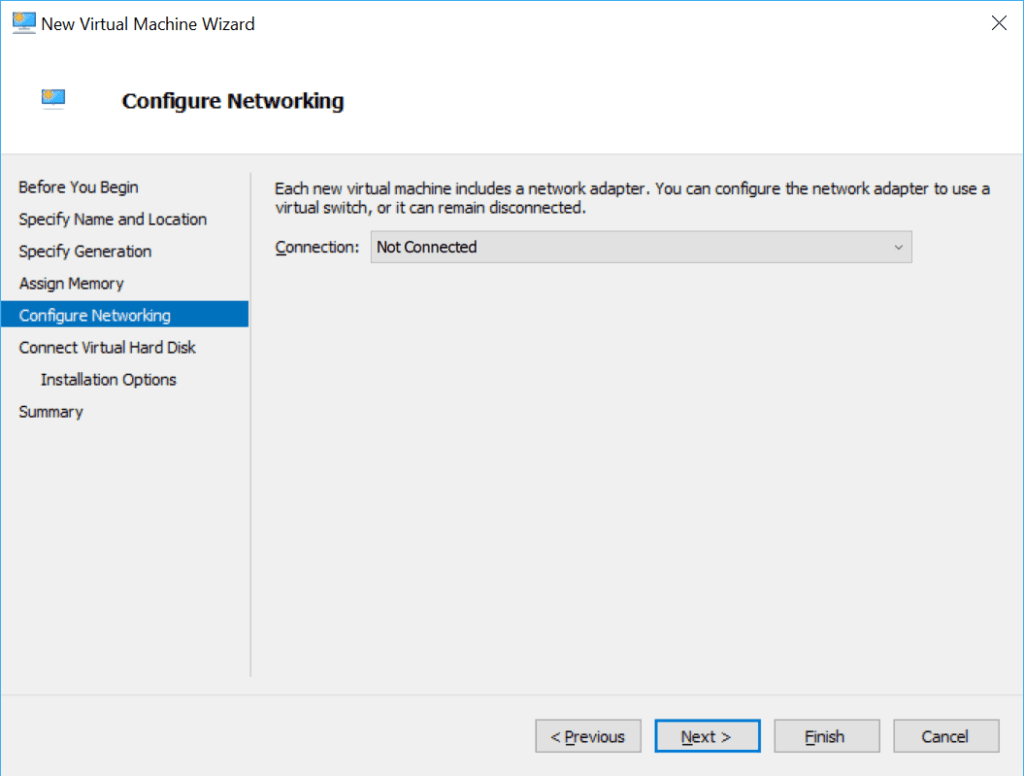
    5. Select a network connection (I’ll set this up later).

    Hyper-V Virtual Machine Network

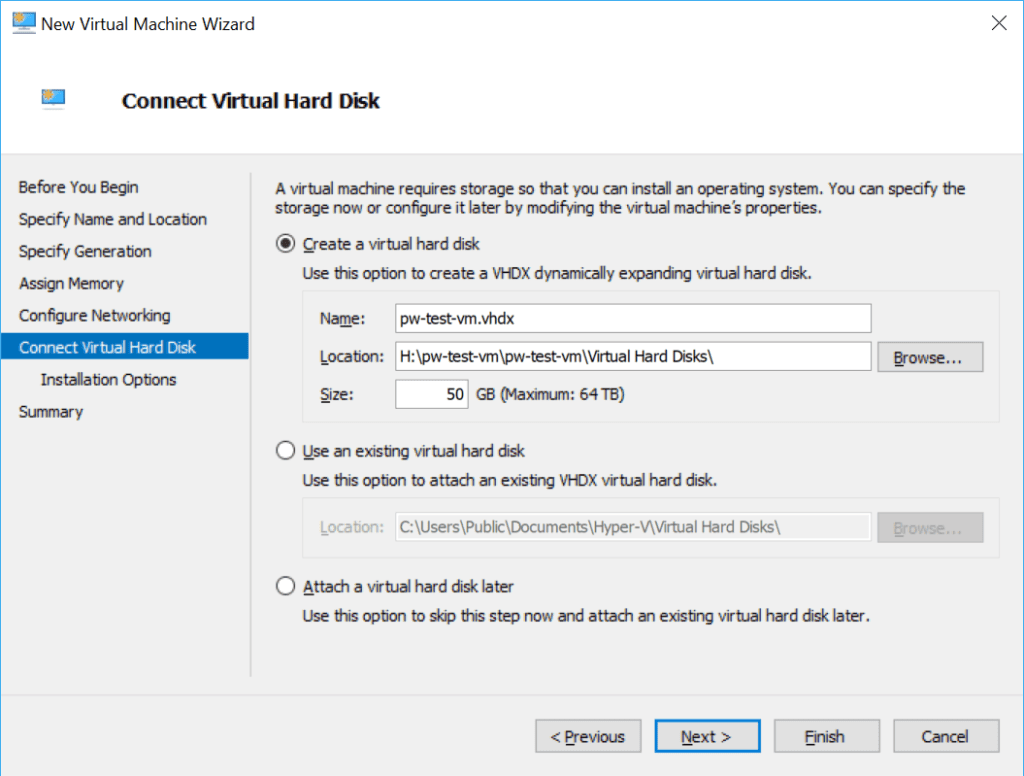
    6. Enter the dynamic virtual hard disk limit, and for this tutorial, I’m leaving the vHD location as default (driven from the previous selection).

    Hyper-V Virtual Machine Hard Disk

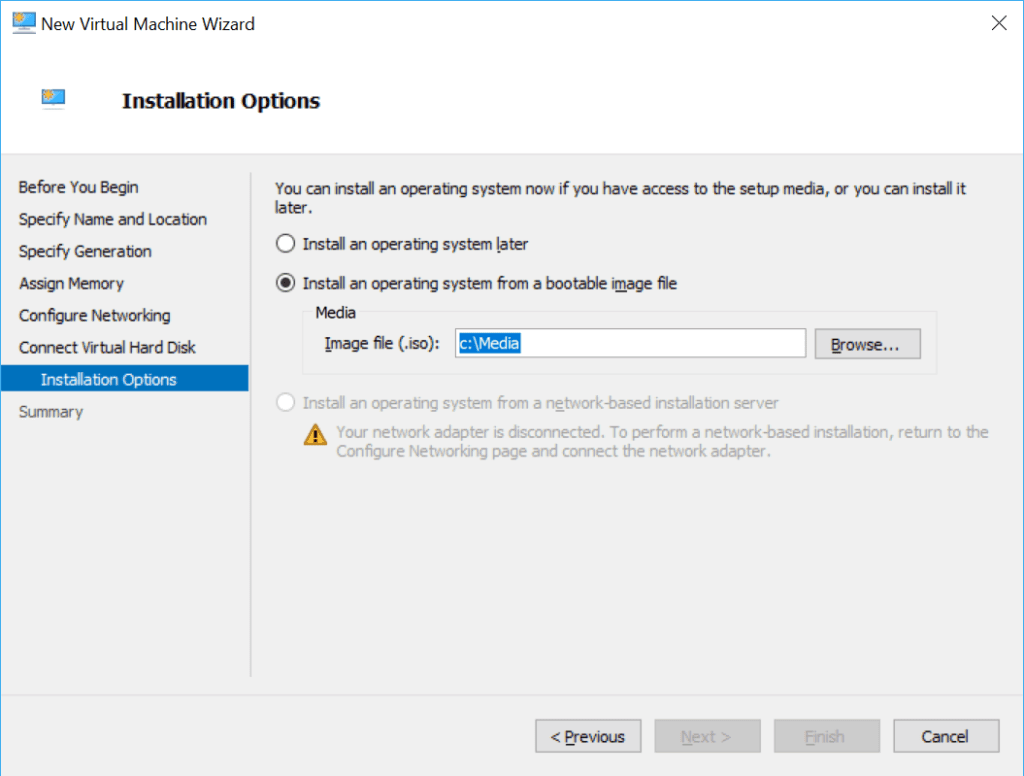
    7. Select an Operating System ISO file.

    Hyper-V Virtual Machine ISO

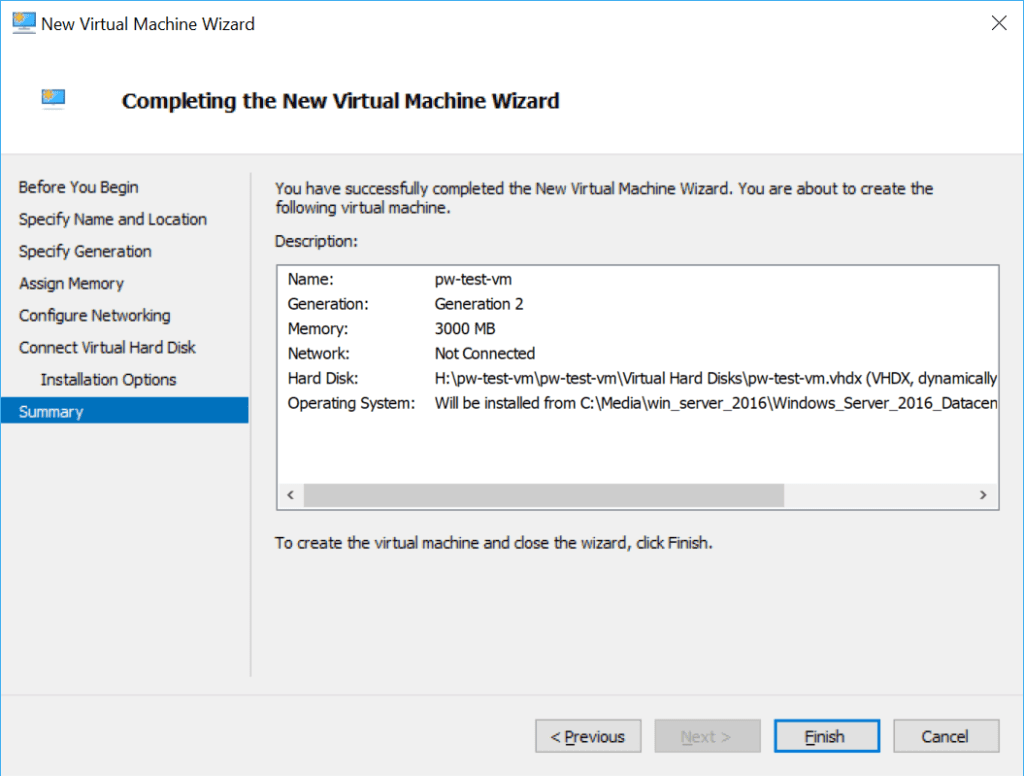
    8. Review configuration and hit finish.

    Hyper-V New Virtual Machine Summary

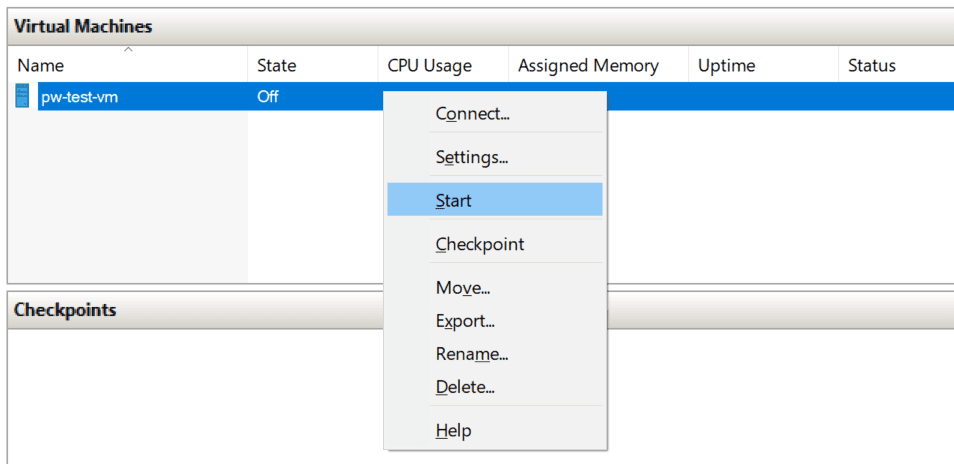
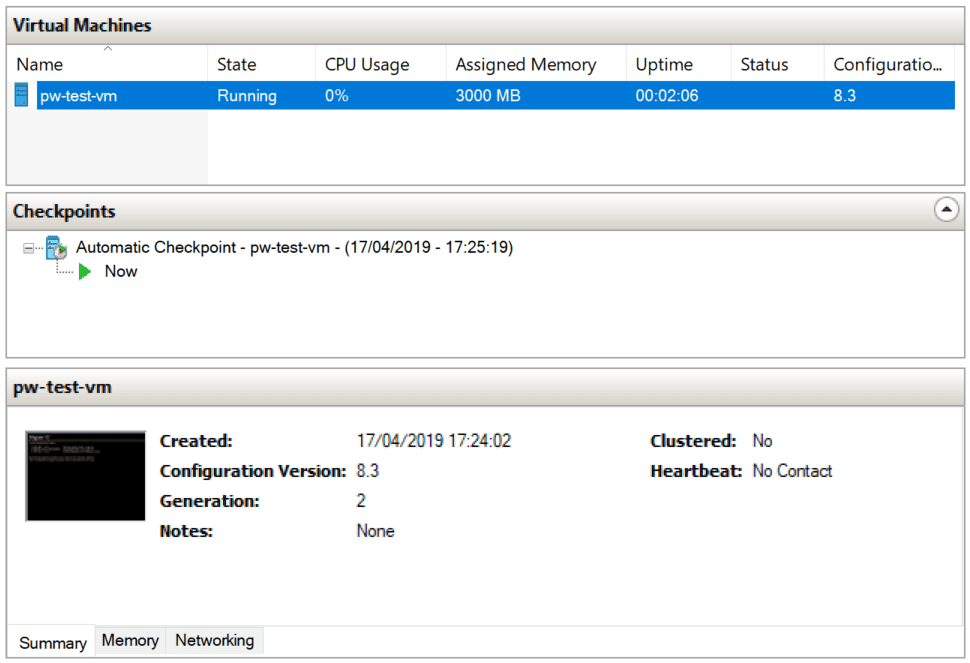
    9. Power up the new VM!

    Hyper-V Virtual Machines
    Hyper-V Virtual Machine List

    Installing Windows Server 2016

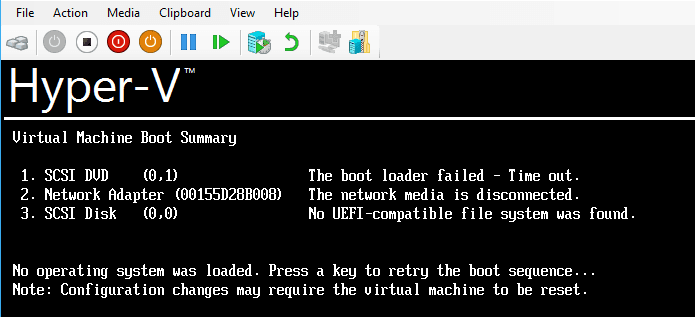
    1. Connect to the new VM (ensuring step 7 above was followed).

    Hyper-V VM without OS

    2. Hit any key.

    Hyper-V boot from CD

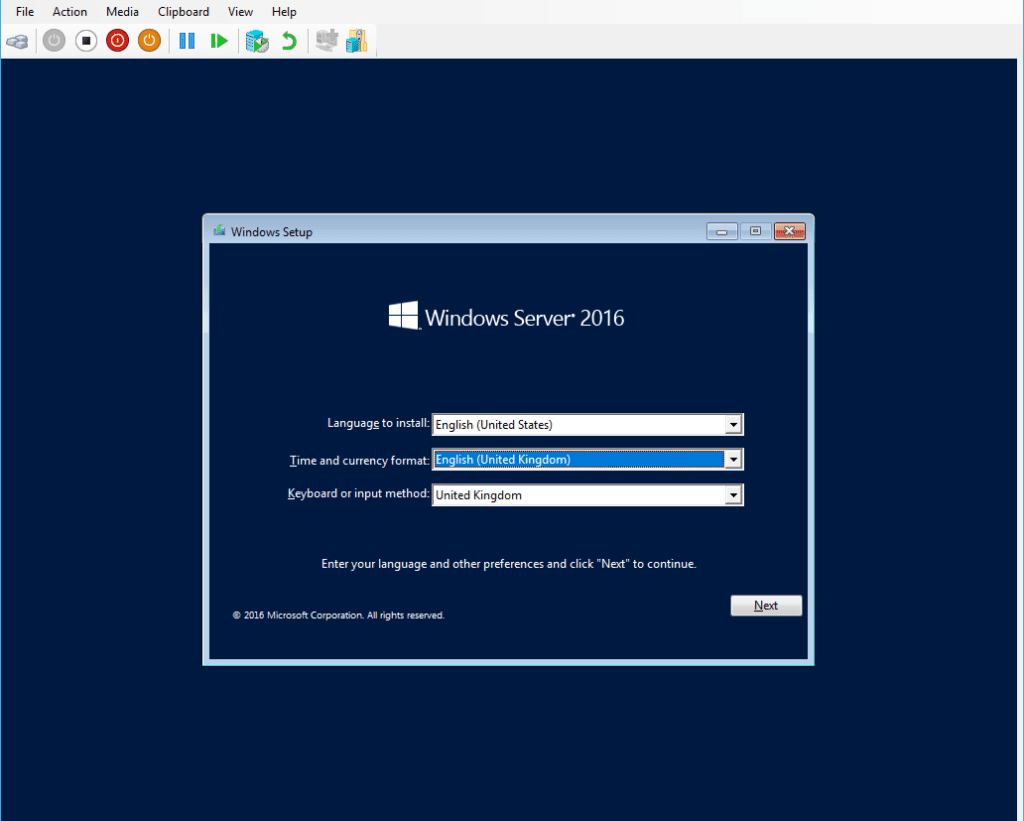
    3. After 30 seconds or so of loading, select your location.

    Windows Server 2016 Installation Language

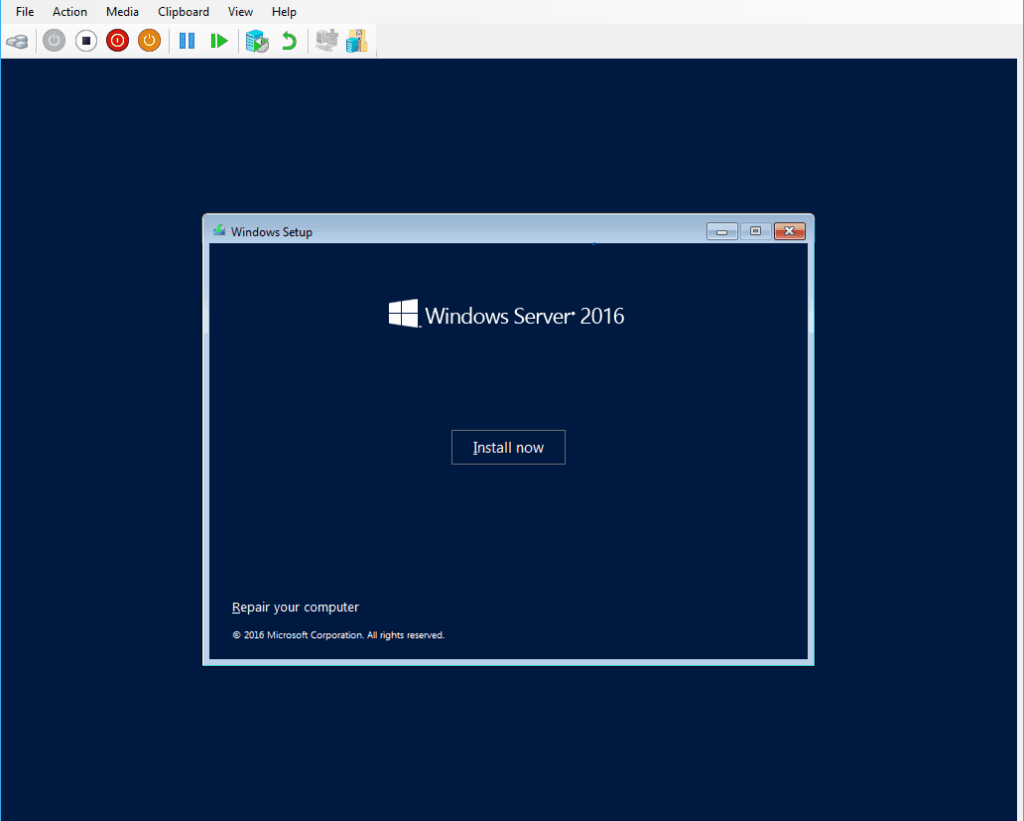
    4. Click to start the Windows Server installation.

    Windows Server 2016 Installation

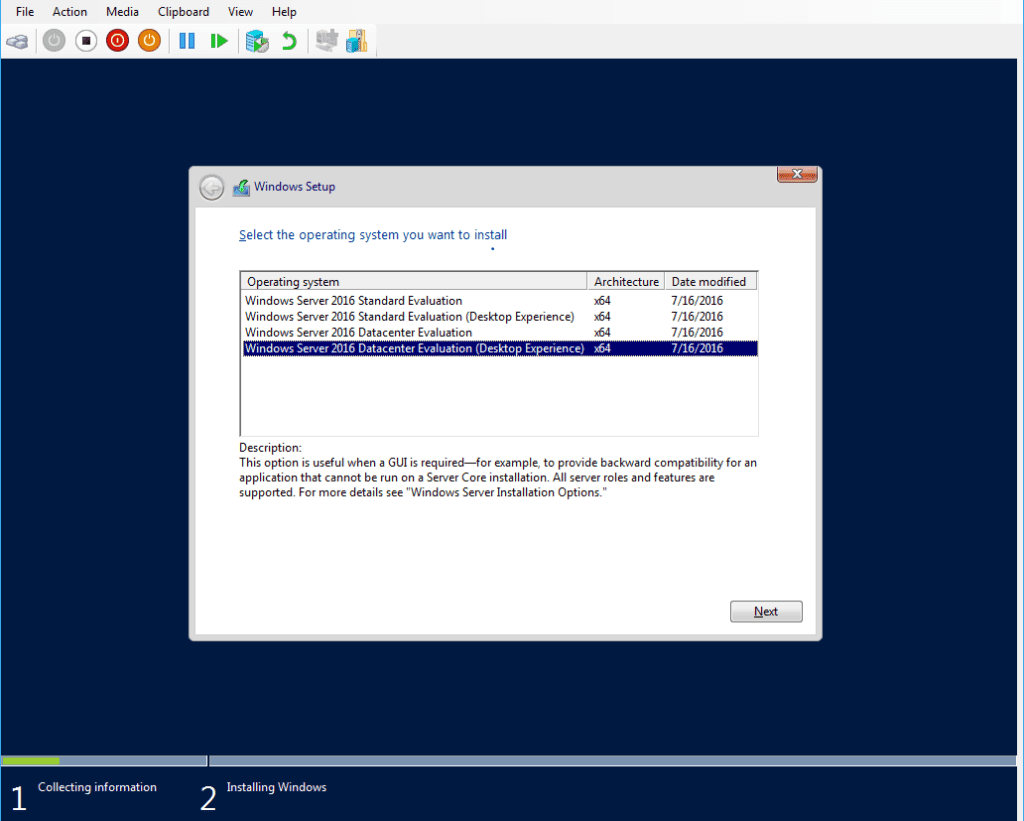
    5. GUI this time around, and Datacenter Edition for the test environment.

    Windows Server 2016 Datacenter Installation

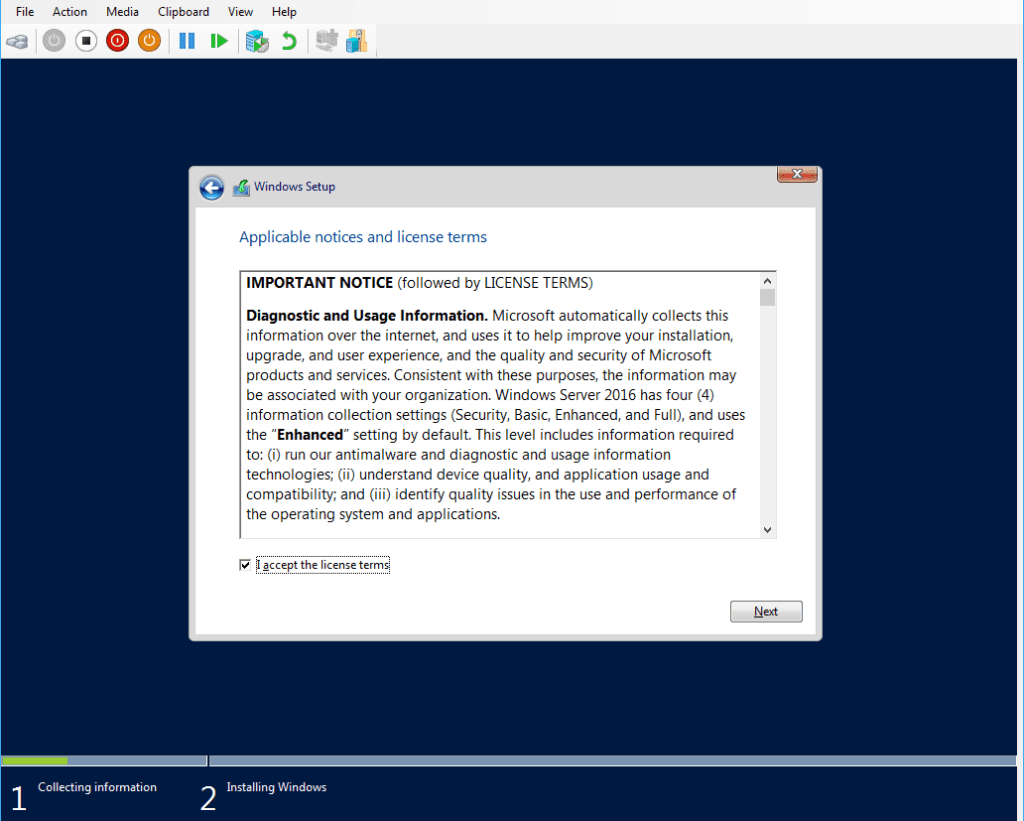
    6. Accept the usual.

    Windows Server 2016 License Agreement

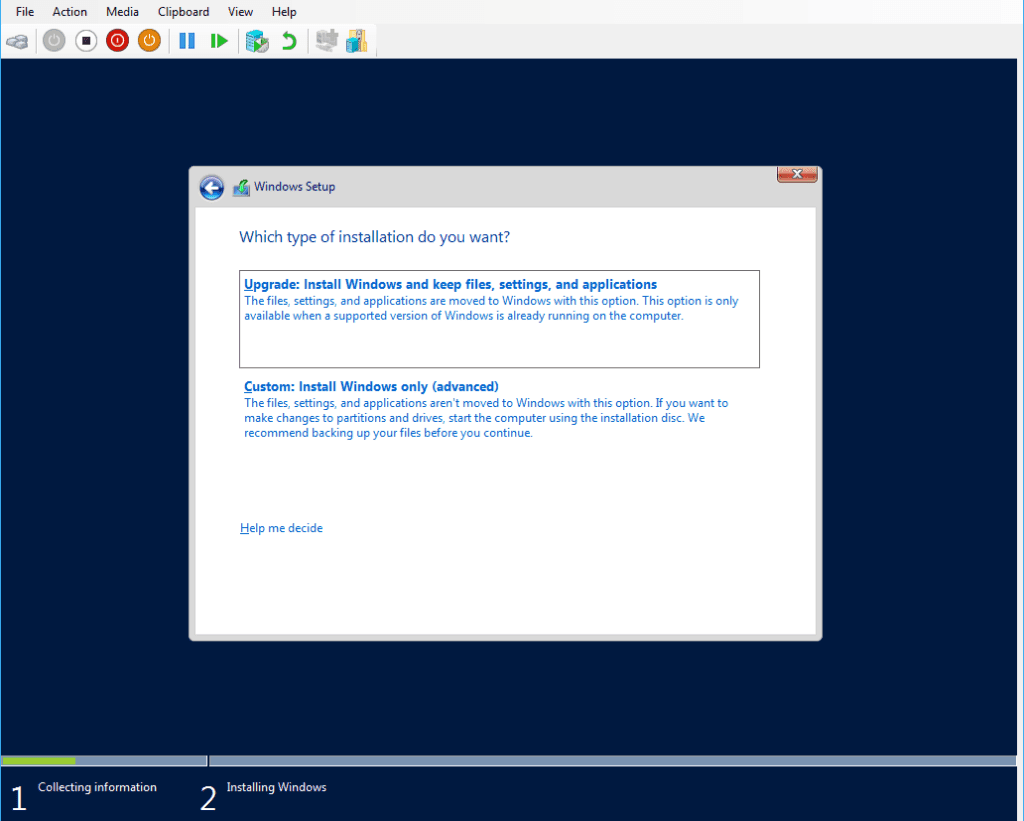
    7. Check advanced options.

    Windows Server 2016 Installation Type

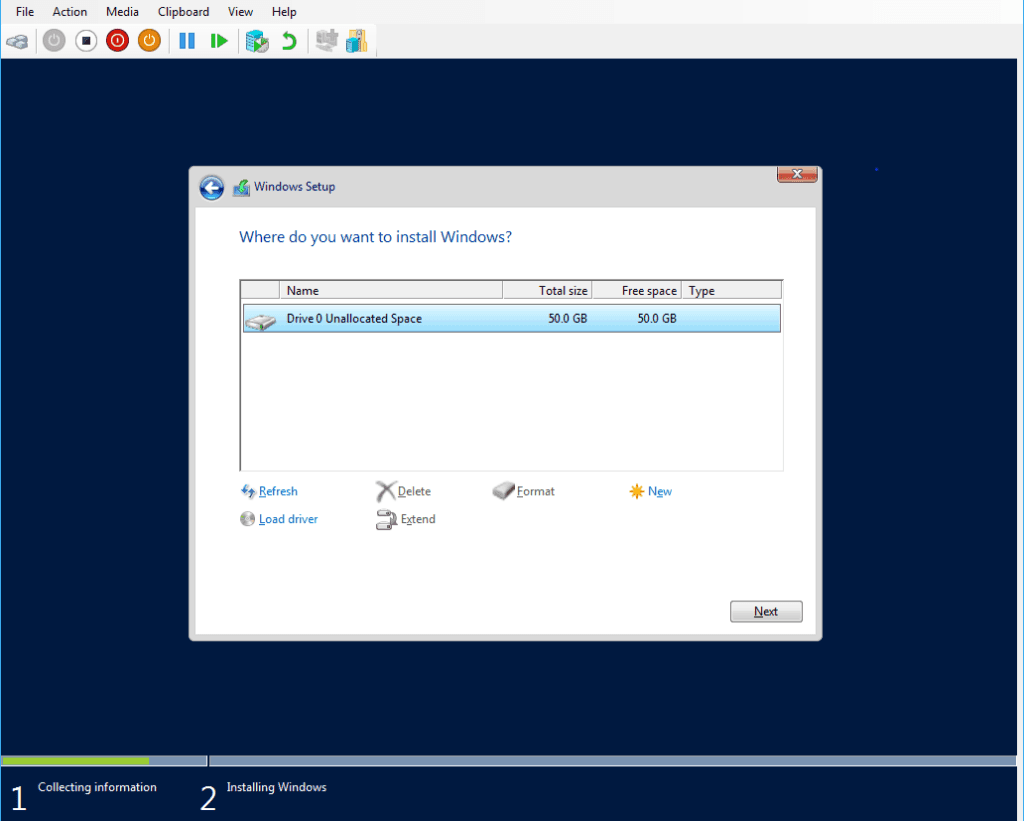
    8. Install on the 50GB vHD.

    Windows Server 2016 Installation Location

    9. Hit next, and away it goes…

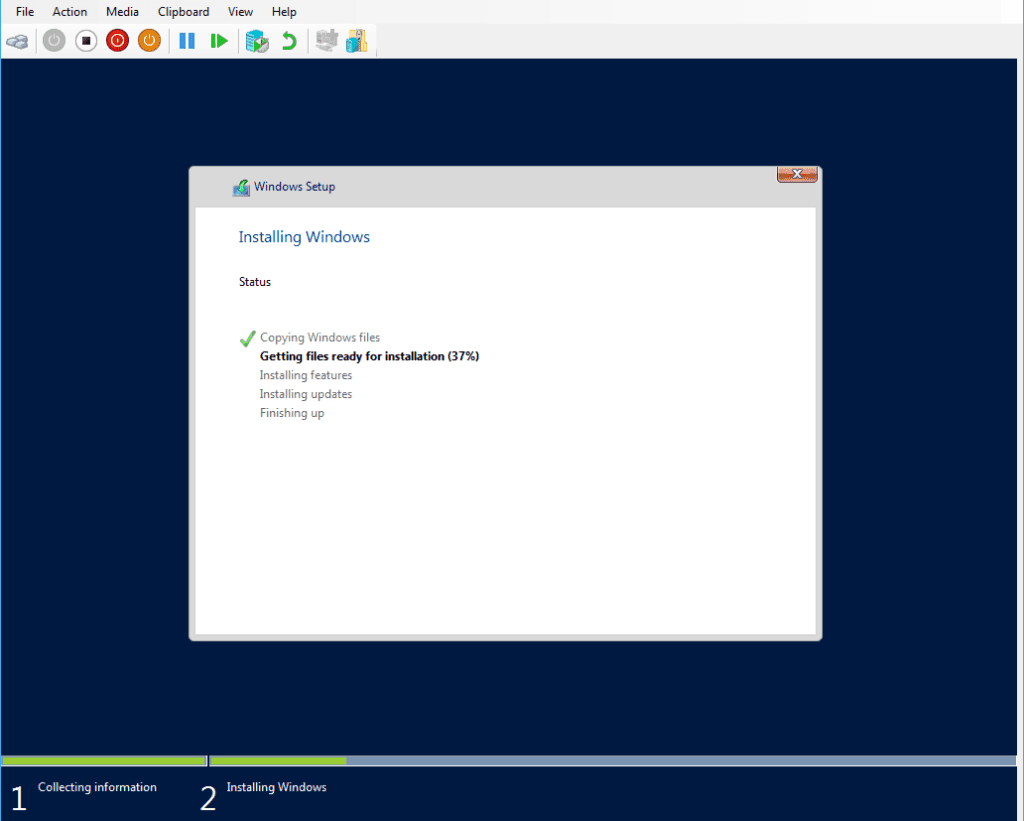
    Windows Server 2016 Install

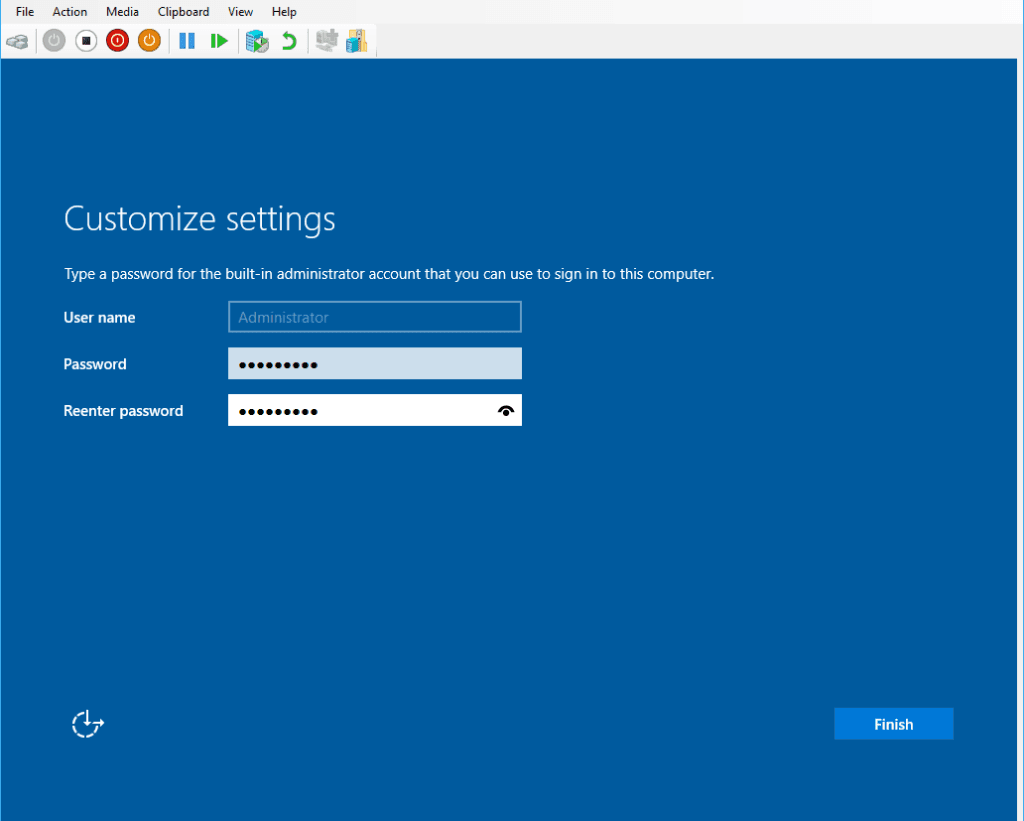
    10. The installation will finish up and restart once it’s done. Before the Windows Server login screen is shown, the built-in administrator password needs to be set.

    Windows Server 2016 Admin Password

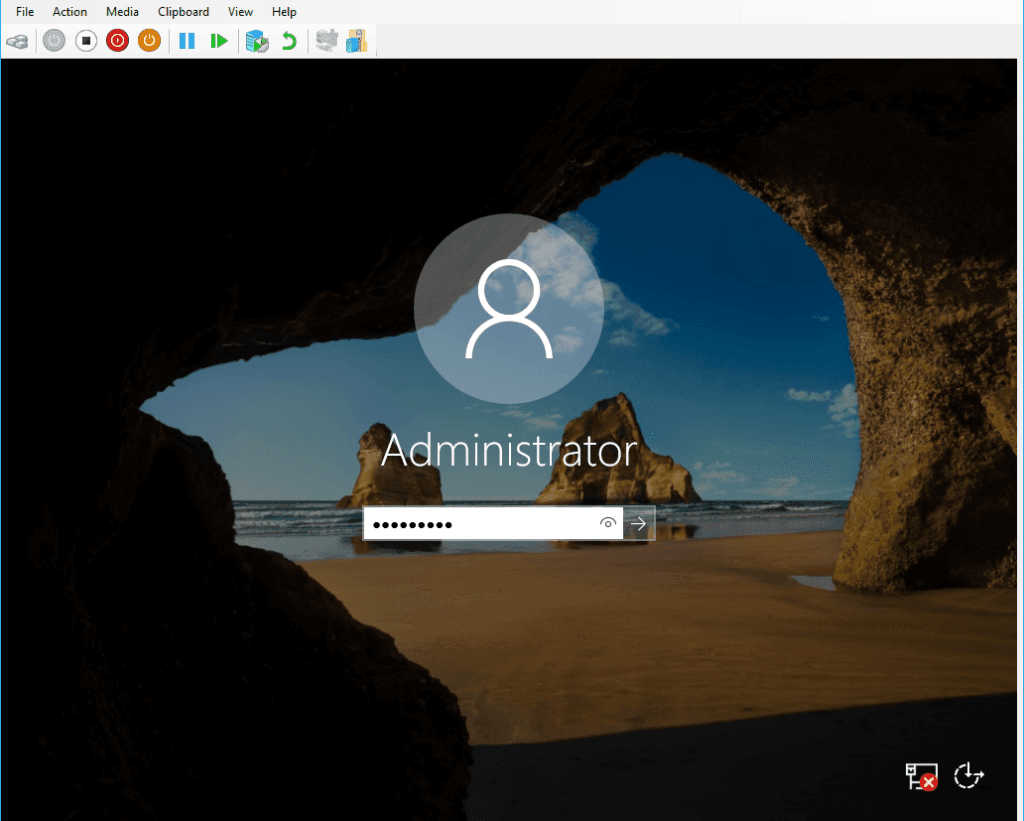
    11. Login with the above password.

    Windows Server 2016 Administrator Login

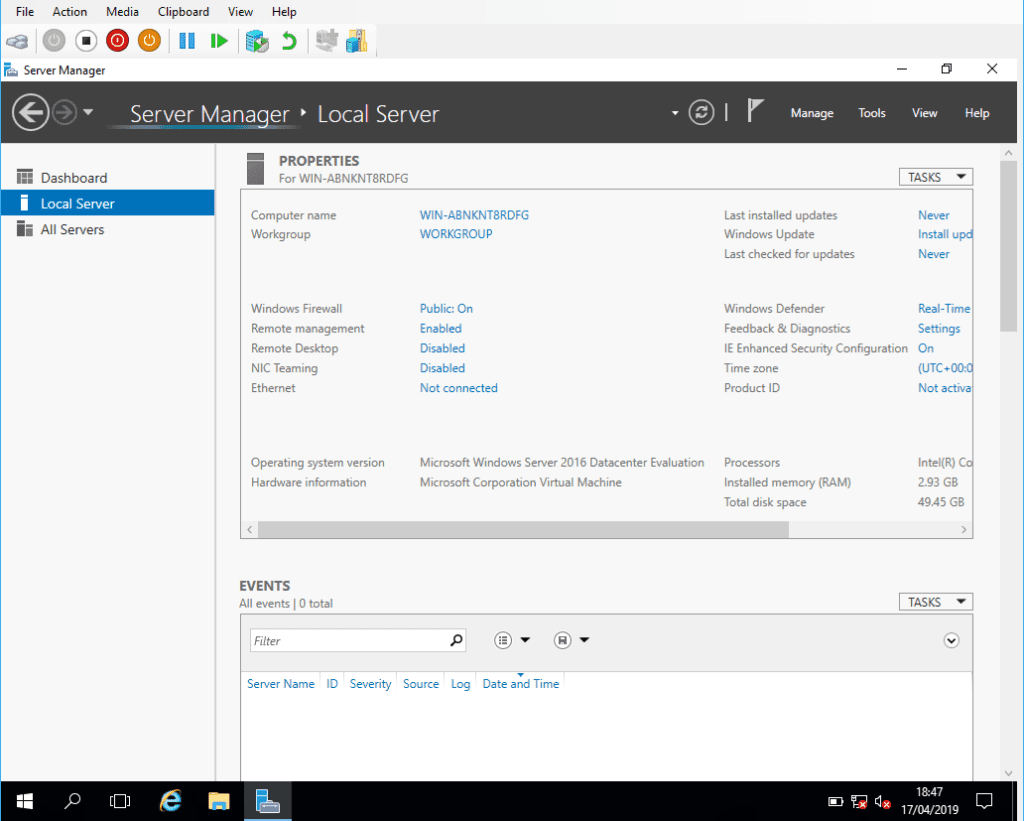
    12. Hurray, it’s Windows 2016 everybody!

    Windows Server 2016 Server Manager
  • “Windows could not start the SQL Server”

    “Windows could not start the SQL Server”

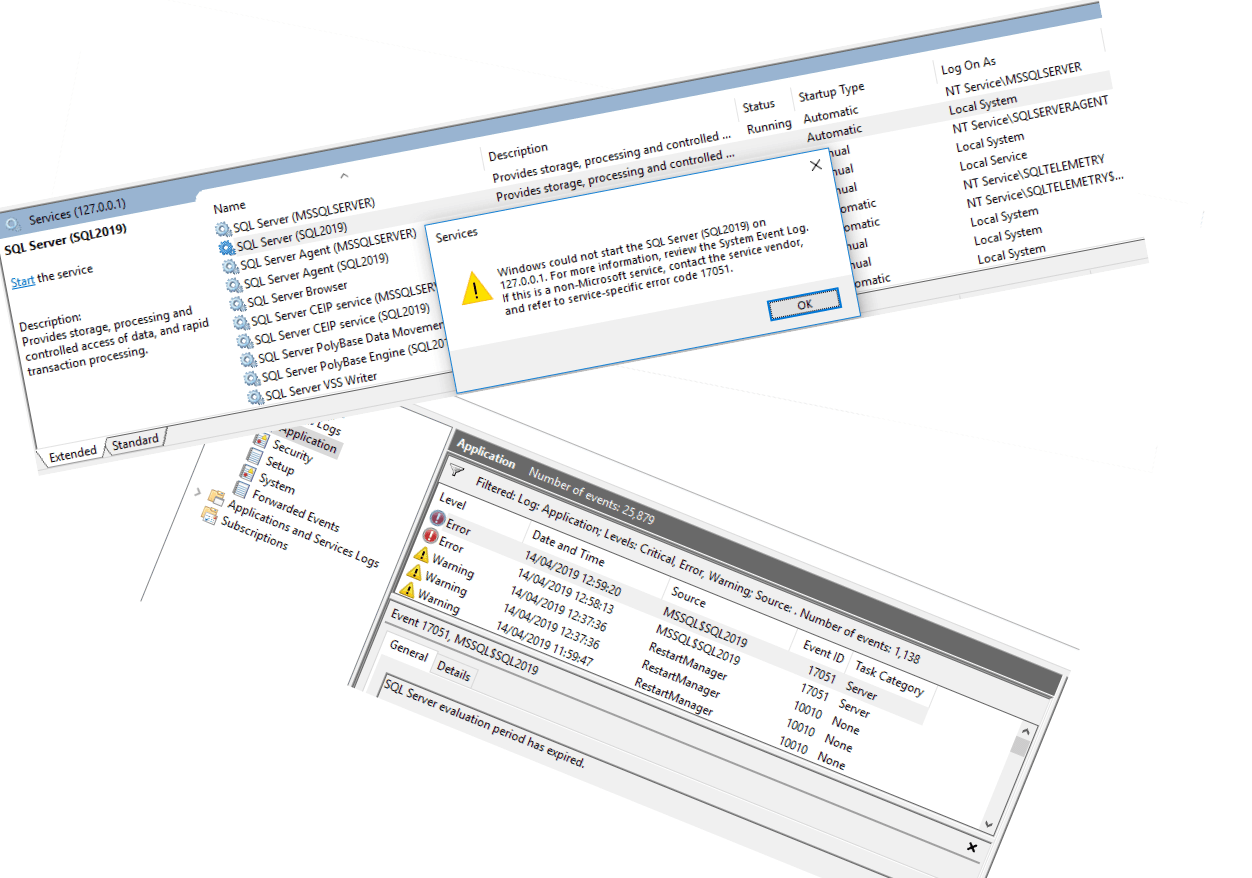
    The “Windows could not start the SQL Server on 127.0.0.1” is a generic error message when the SQL Server service cannot start-up.

    Windows could not start the SQL Server

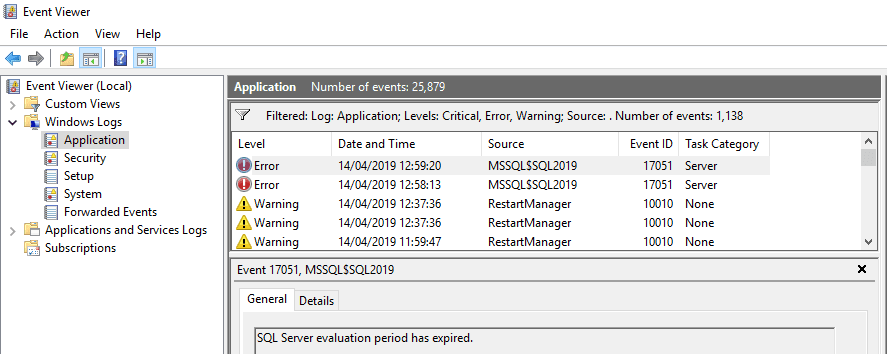
    Windows Event Viewer will give you the actual error, and from there you can troubleshoot the reason for failure.

    Windows Event Viewer Application Errors

    SQL Server 2019 evaluation period expired in this case. My mistake for not selecting the Developer Edition!


  • “Content from the website listed below is being blocked.” Windows Server

    “Content from the website listed below is being blocked.” Windows Server

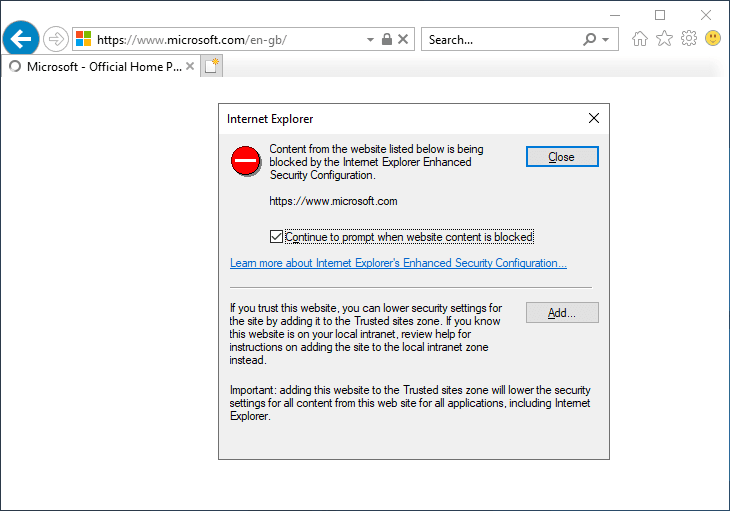
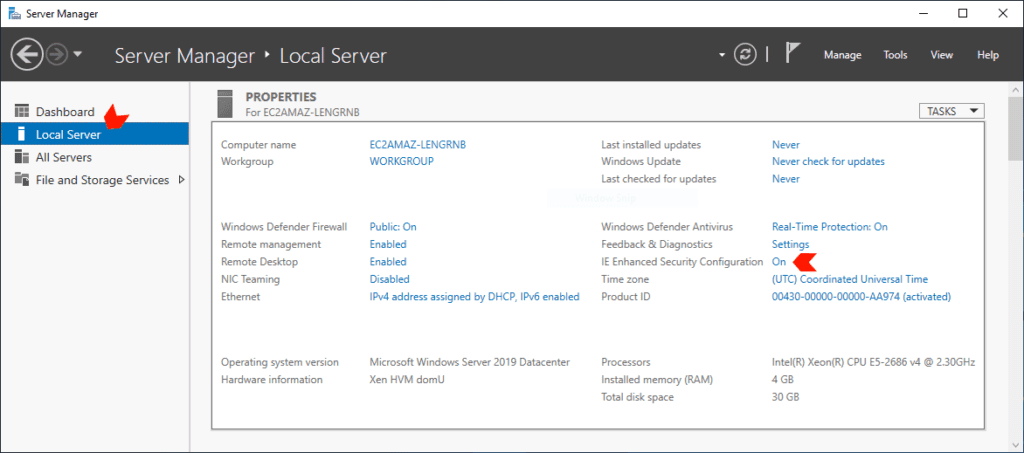
    The Internet Explorer Enhanced Security Configuration is a feature that helps protect your computer from malicious websites and other online threats. When you open Internet Explorer on a Windows Server, you’ll likely be prompted with this message:

    Content from the website listed below is being blocked by the Internet Explorer Enhanced Security Configuration

    Content from website listed below blocked

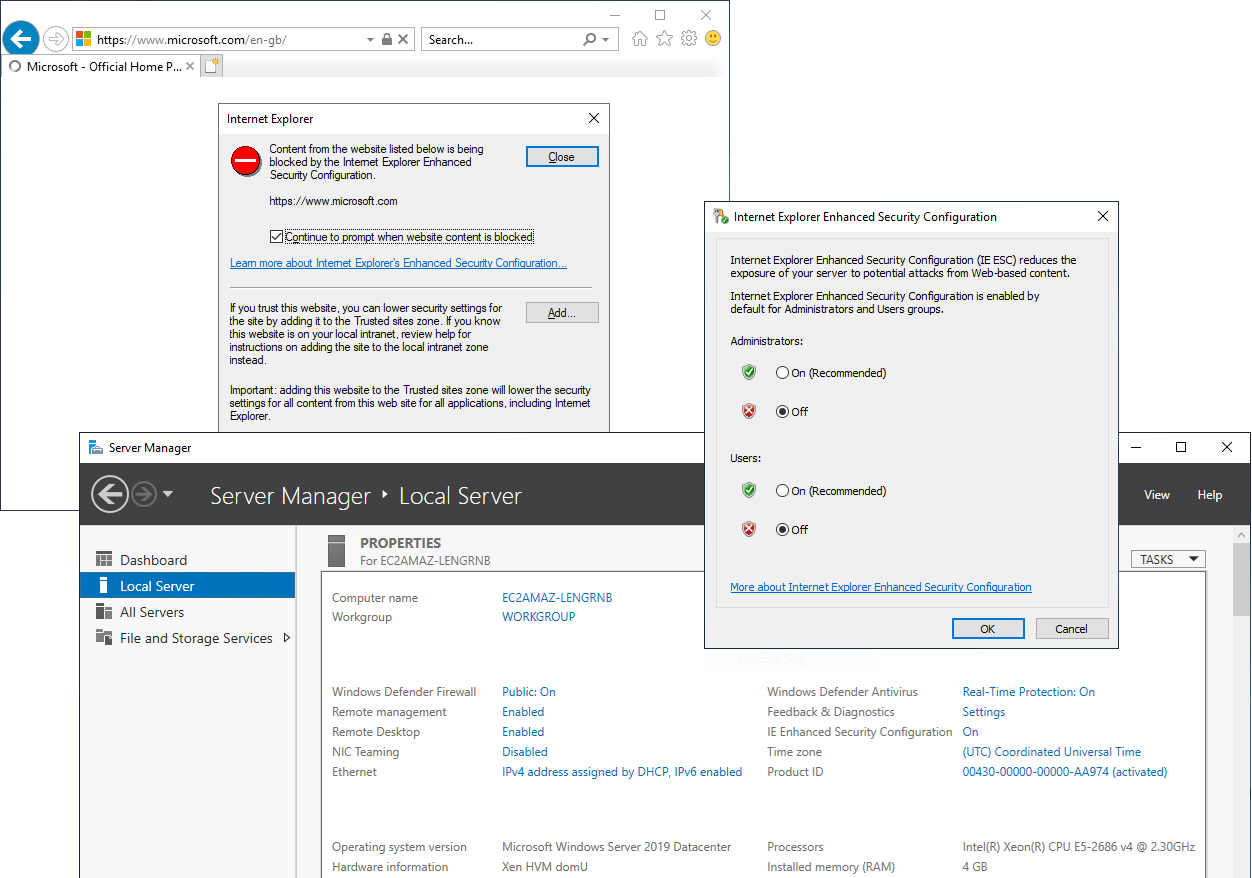
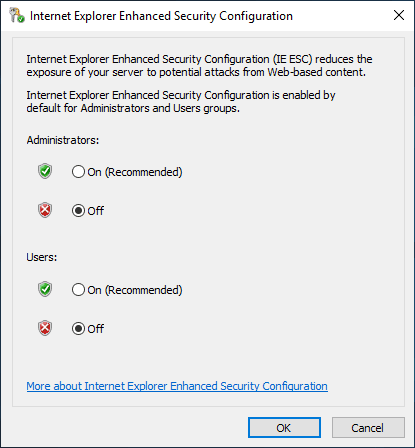
    Adding each website to trusted sites can be a frustrating process, so on new test VMs I quickly turn off IE Enhanced Security Configuration within Server Manager:

    IE Enhanced Security Configuration
    Internet Explorer Enhanced Security Configuration

    This isn’t something you should change on a production server without thought but it is maybe a good thing to include on a VM template for a test environment.

    We can also disable Internet Explorer Enhanced Security Configuration via the Internet Explorer browser app via the following these steps:

    – Open Internet Explorer and click on the “Tools” menu.
    – Select “Internet Options” from the menu.
    – In the “Internet Options” window, select the “Security” tab.
    – Under the “Security” tab, click on the “Internet” zone and then click on the “Custom Level” button.
    – In the “Security Settings” window, scroll down to the “Miscellaneous” section and look for the “Allow websites to open windows without address or status bars” setting.
    – Select the “Enable” option for this setting and then click on the “OK” button to save the changes.

  • Show Available Disk Space in SQL Server

    Show Available Disk Space in SQL Server

    This blog post is to share a script that you can run in SQL Server (versions 2008 R2 and above) which shows the available disk space for all local volumes on a SQL Server host. I’m also including a quick note on how to get this information with remote PowerShell.

    Running out of disk space is one of the most common issues that happens on unmonitored database servers. If you do not monitor your disk space usage of a SQL Server, then things will randomly come to a halt one day. Your drives are full and your SQL Server will not accept any more updates until you get more space.

    Everything performance related in SQL Server depends on your unique workloads, queries, application, platform & environment. Database files need to grow and database log files need to hold as much as it needs (depending on Recovery Models). Whether it’s a very slow ever-increasing table that bites you, or it might be a user query that bloats log files, when an unmonitored SQL Server is having issues checking available disk space on the host is one of the first steps you should take when you connect & bein diagnosing.

    As mentioned at the top of this post, this blog post is a how-to on getting your available disk space a SQL Server host, using a TSQL script and PowerShell:
    # Get Disk Space Info in SQL Server
    # Get Disk Space Info PowerShell

    Get Disk Space Info in SQL Server

    The TSQL script below queries sys.master_files and sys.dm_os_volume_stats SQL Server internal system metadata views.

    and will return the disk space and available space within each volume attached to the SQL host.

    -- get available disk space sql server
    SELECT DISTINCT
        vs.volume_mount_point,
        vs.file_system_type,
        vs.logical_volume_name,
        CONVERT(DECIMAL(18,2),vs.total_bytes/1073741824.0) AS [Total Size (GB)],
        CONVERT(DECIMAL(18,2), vs.available_bytes/1073741824.0) AS [Available Size (GB)],
        CONVERT(DECIMAL(18,2), vs.available_bytes * 1. / vs.total_bytes * 100.) AS [Space Free %]
    FROM sys.master_files AS f WITH (NOLOCK)
    CROSS APPLY sys.dm_os_volume_stats(f.database_id, f.[file_id]) AS vs
    ORDER BY vs.volume_mount_point OPTION (RECOMPILE);
    SQL Server Disk Space Query Result
    SQL disk space query output

    Now get this info sent to your email via Database Mail if the availability of the SQL Server means anything to you. If it’s business-critical that no new data stops being inserted into an online database, then you’d already have a decent 3rd party monitoring tool in place.

    Get Disk Space PowerShell

    Get-Volume is the command to show local volume information for your server. If running on a remote server, use Enter-PSSession to connect to the target server first (requires Local Admin permissions).

    Get Volume PowerShell