This is a post on how to create a Linked Server to a PostgreSQL database.
In my previous post, I created a Linked Server to another SQL Server instance. This time, it’s a link to a Postgres database. I recommend checking out my other post for pre-requisite information including testing connectivity to the remote database server.
Follow these steps to create a Linked Server to a Postgres server:
1. Create Linked Server Login on Postgres.
2. Install the Postgres ODBC Driver.
3. Configure ODBC Data Source Settings.
4. Create Linked Server to a Postgres Database.
1. Create Linked Server Login on Postgres
We first need to create a login for the Linked Server on Postgres:
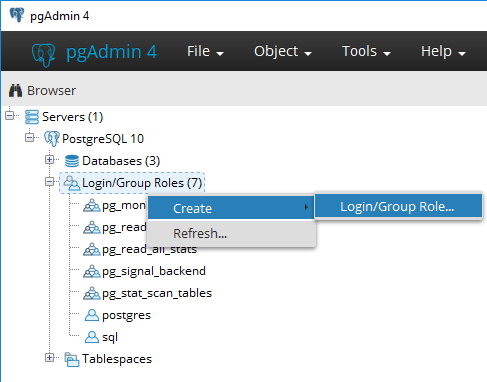
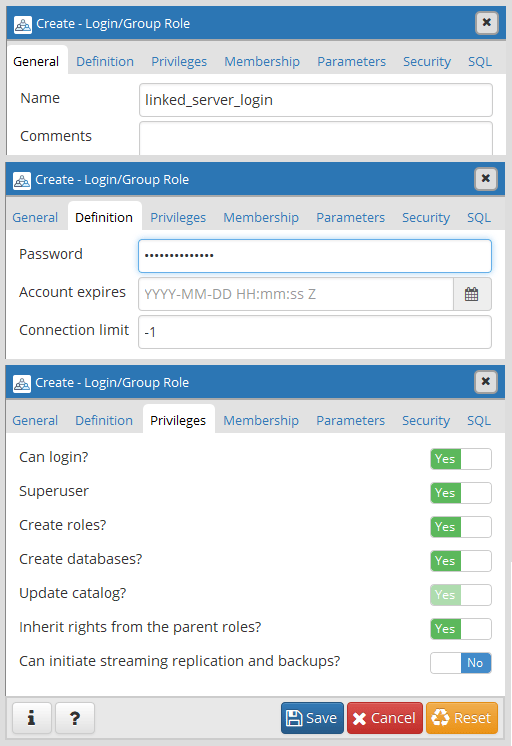
For this example I’m making the user in Postgres a Superuser. This is not ideal, we should be configuring it with the least permissions it requires. This is just a demo though.
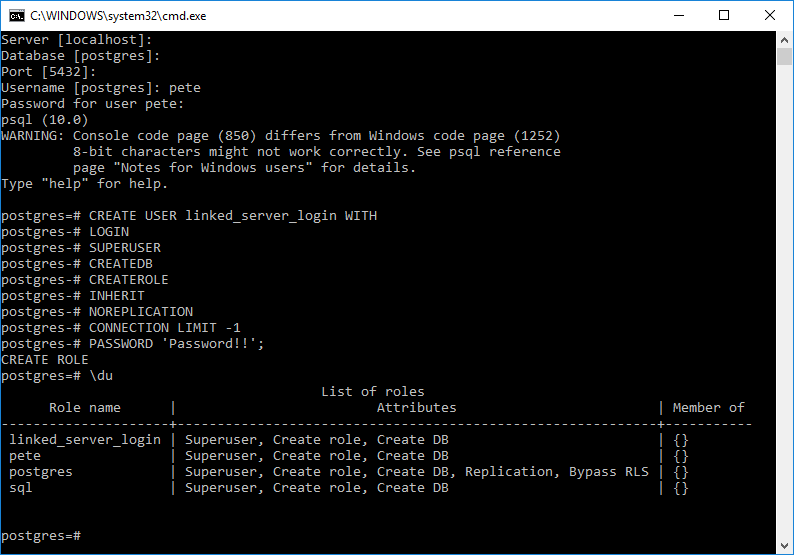
For demo purposes, I’m also showing how this would be done using a terminal:
2. Install Postgres ODBC Driver
The ODBC driver must be installed on both ends. This step is a reminder to ensure you have this installed.
You can use Stack Builder to install it, or download the Postgres ODBC driver package on its own:
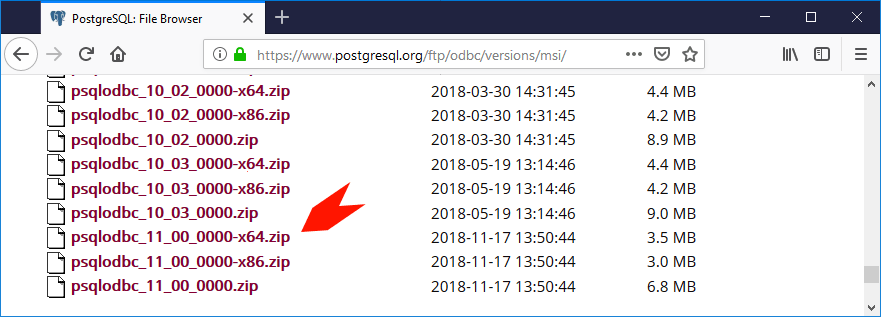
We need to install this:
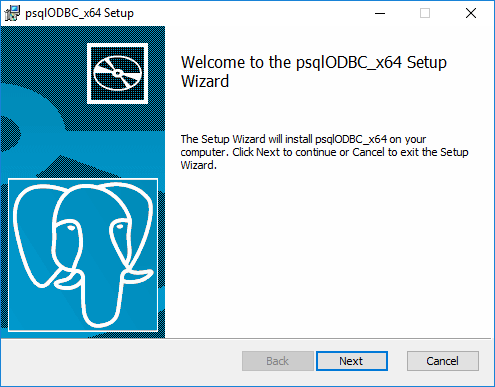
Accept License stuff.
Specify directory & we don’t need the documentation.
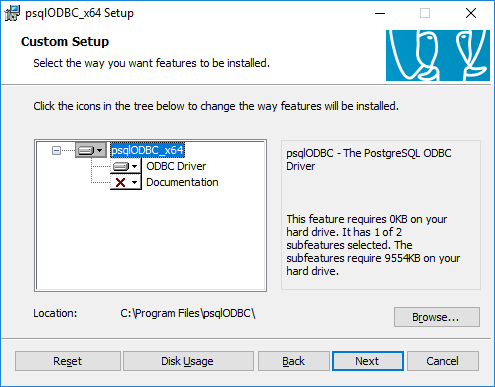
It’s a straight-forward install:
3. Configure ODBC Data Source Settings
On our SQL Server, we need to configure the ODBC driver for the Postgres database.
To do this, open ODBC Data Sources as Administrator:
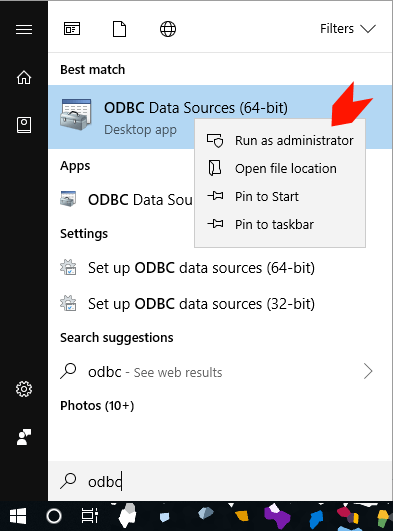
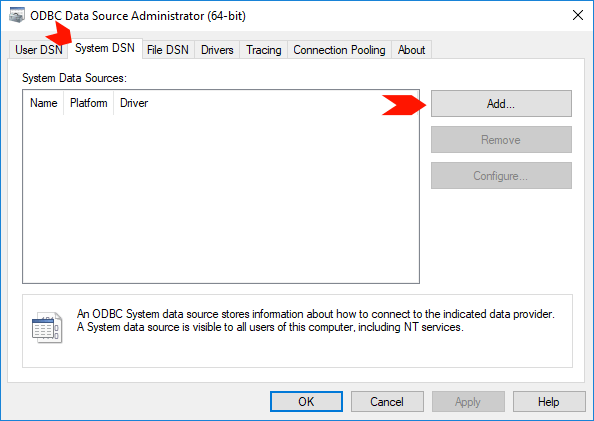
Click the System DSN tab and click Add.
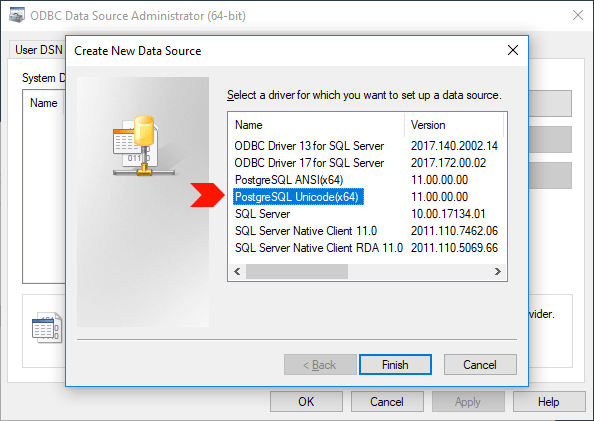
Select the PostgreSQL Unicode driver:
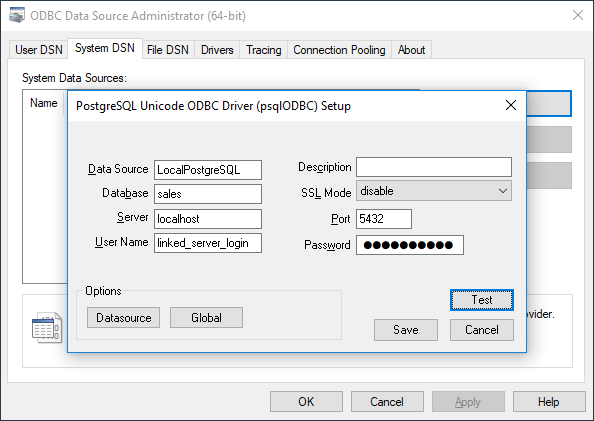
Enter all details required, In this example I created a ‘sales’ database which I’m connecting to:
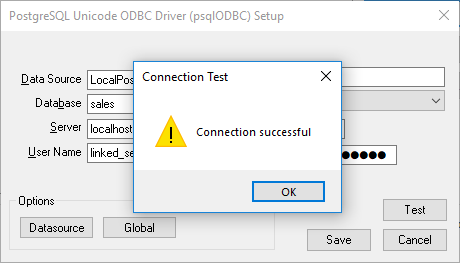
Finally, we should test the connection to verify all is good:
4. Create Linked Server to a Postgres Database
To create a Linked Server to Postgres:
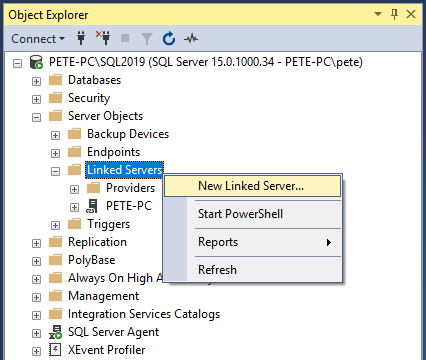
1. Expand Server Objects, right-click Linked Servers and select New Linked Server.
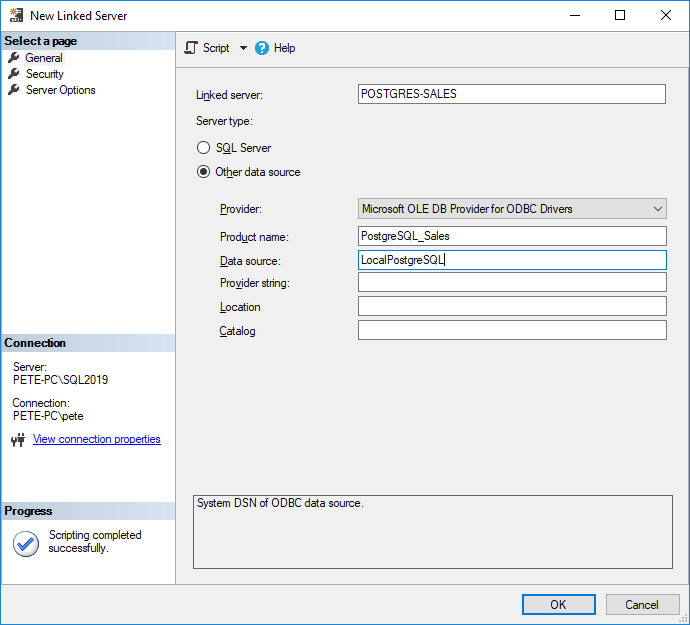
2. The New Linked Server Wizard will prompt.
Configure your settings, choose a provider for ODBC, entering the correct Data Source Name which you entered within the ODBC driver settings above in this post.
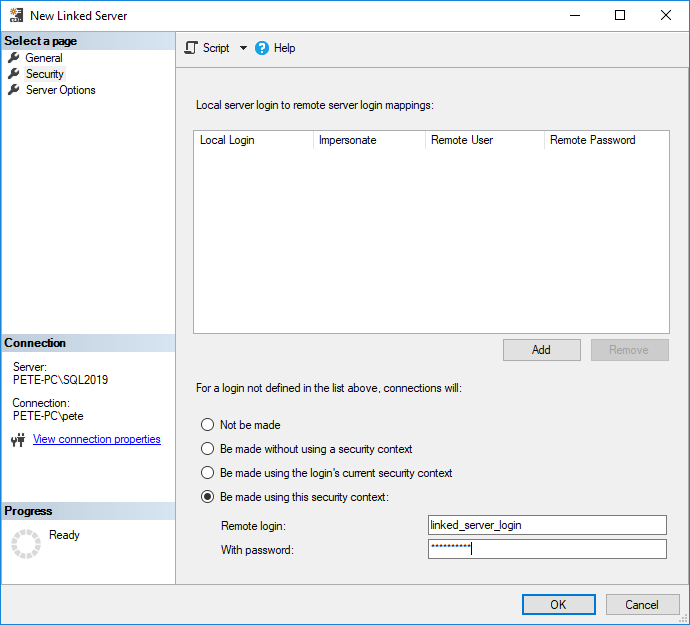
3. Enter the Postgres Login Details as created above within this post in the Security tab.
4. We can skip the Server Options tab and hit OK.
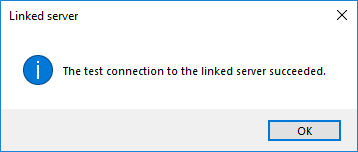
5. Next, we should test the Linked Server connection.
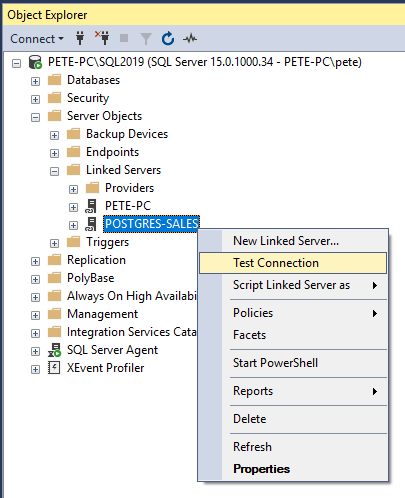
It should show this:
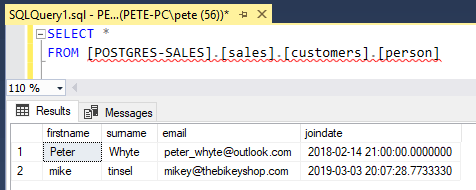
We can now verify the Linked Server is working as it should by running the following query:
-- linked server query example
select *
from [linked-server-name].[database-name].[schema-name].[table-name];
I hope this was a good and useful post for you. Feel free to check out the links you see around here for more random useful info from a random database guy!
Leave a Reply