
Installing MySQL on a Windows computer is a straightforward process, however selecting the right options is key for a smooth setup.
This is a simple how to for installing MySQL Community Server and MySQL Workbench on Windows. I recommend you walk through this yourself if learning MySQL and the configurations involved with administration. A lot of the configuration can be changed post install too.
Installing MySQL on Windows
Step 1: Download and Launch the MySQL Installer
Download the latest MySQL Community Server from the official MySQL website.
Run the downloaded MySQL Installer (.exe) file.

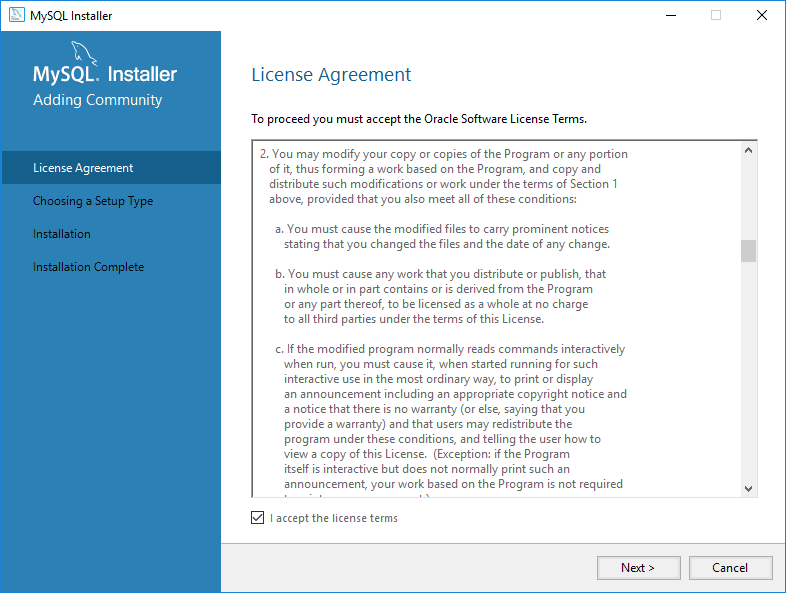
Accept the License Agreement and click Next.
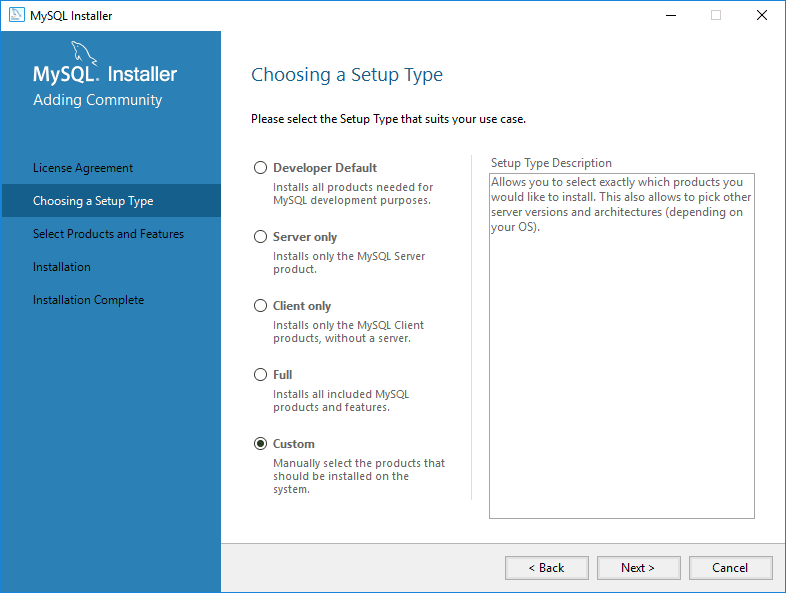
Step 2: Choose Setup Type
Recommended: Select Custom Install to install only the components you need.
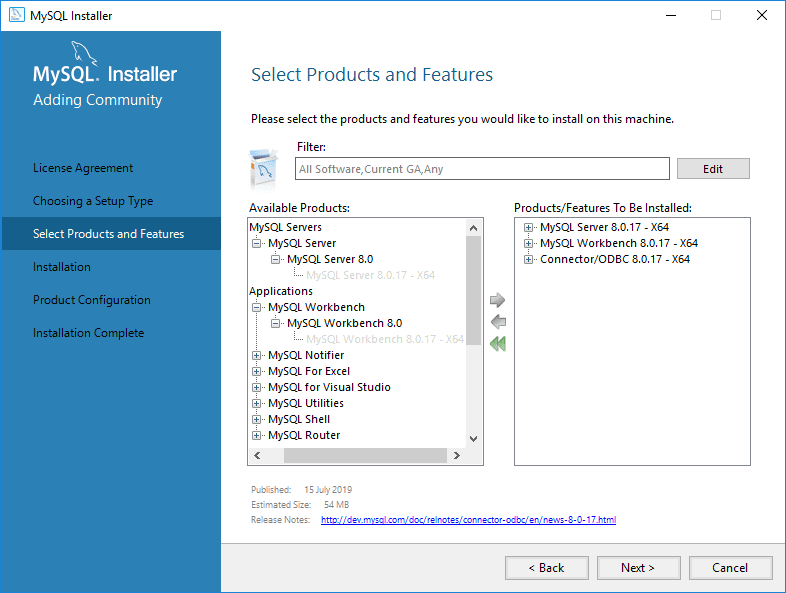
Step 3: Select Features to Install
Choose the following:
– MySQL Server
– MySQL Workbench
– MySQL ODBC Driver (optional for applications needing ODBC connectivity)
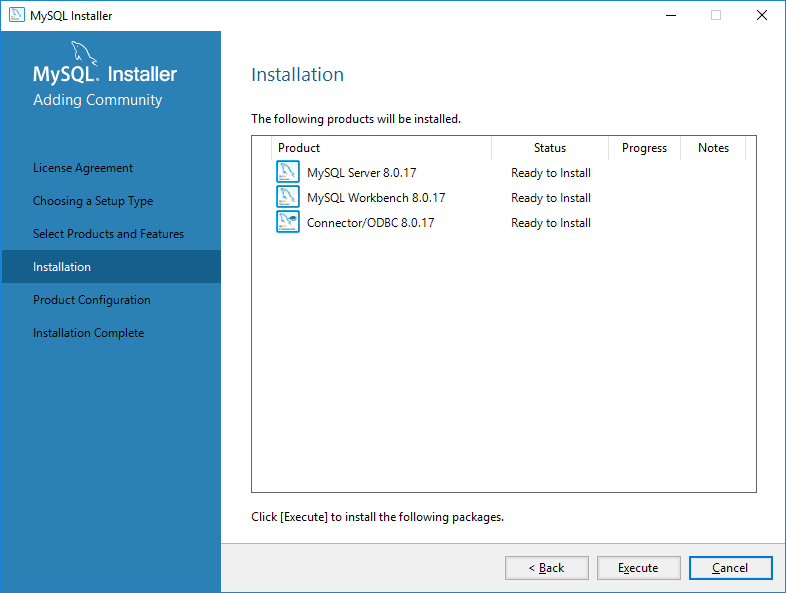
Step 4: Install Required Dependencies
If prompted, install Microsoft Visual C++ Redistributable.
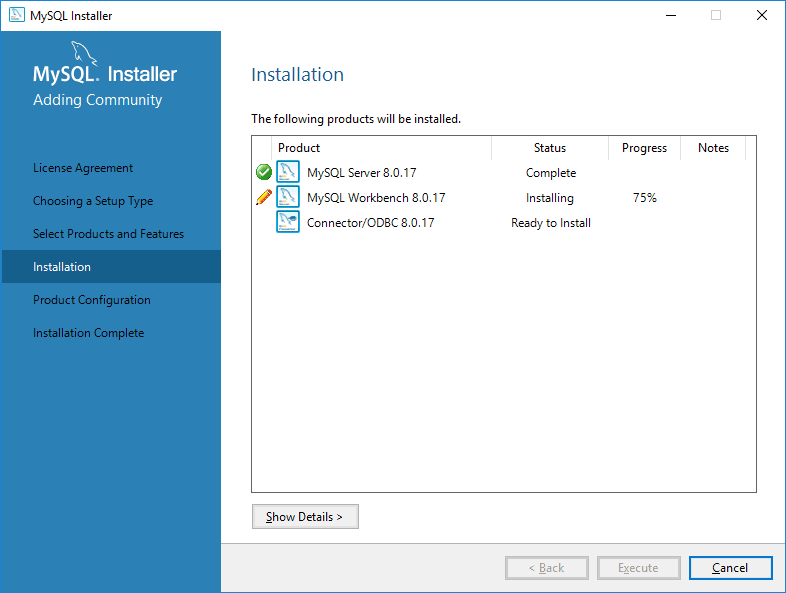
Click Exectute to install all features selected.
Step 5: Configure MySQL Server
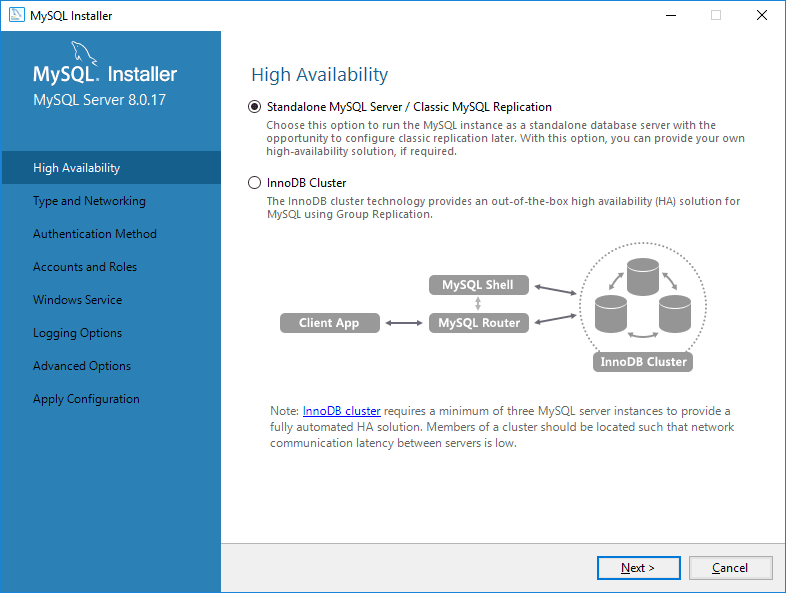
High Availability: Choose Standalone MySQL Server.
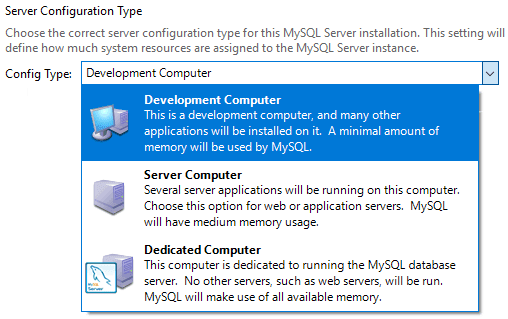
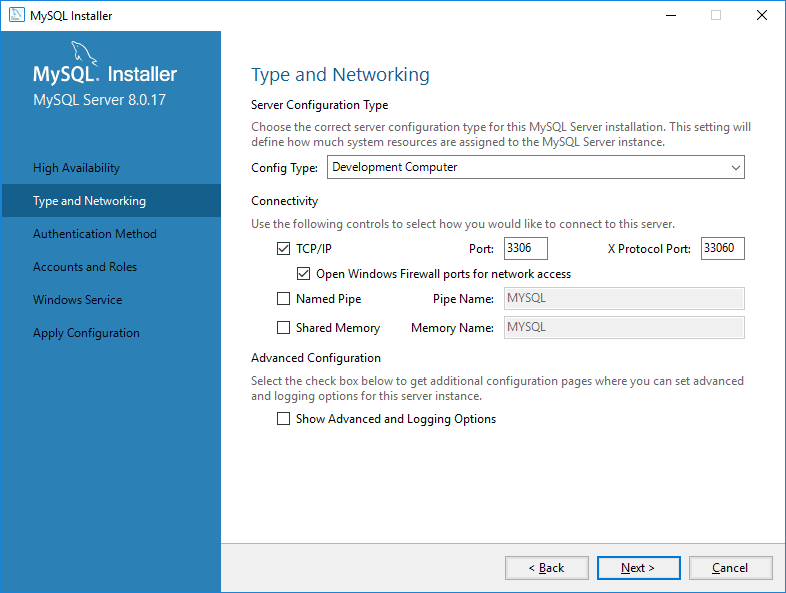
Select Development Computer as Config Type.
Keep default Port 3306.
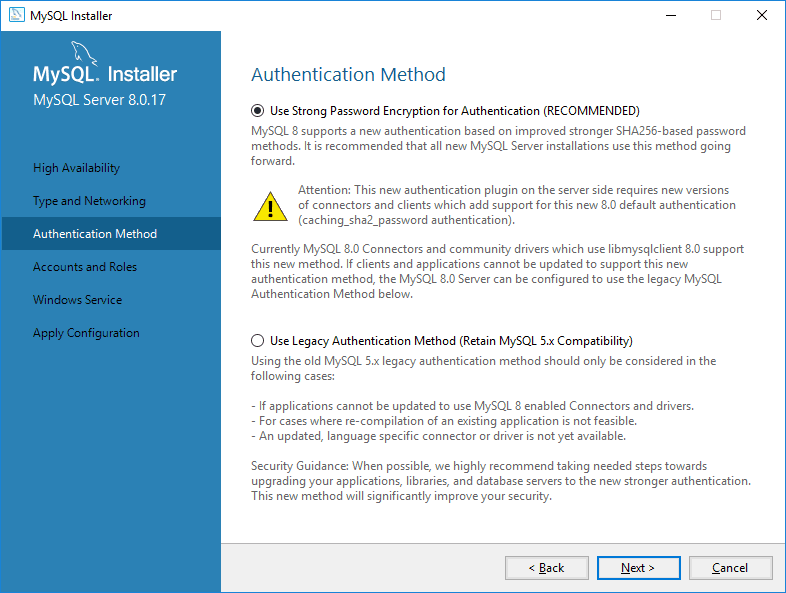
Choose Strong Password Encryption (recommended for security).
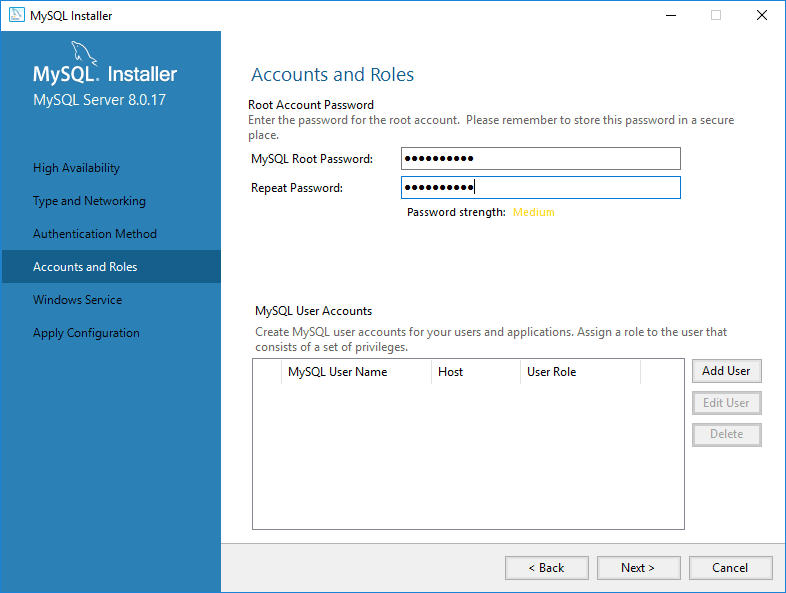
Set the Root Password: Enter a secure password for the MySQL root user.
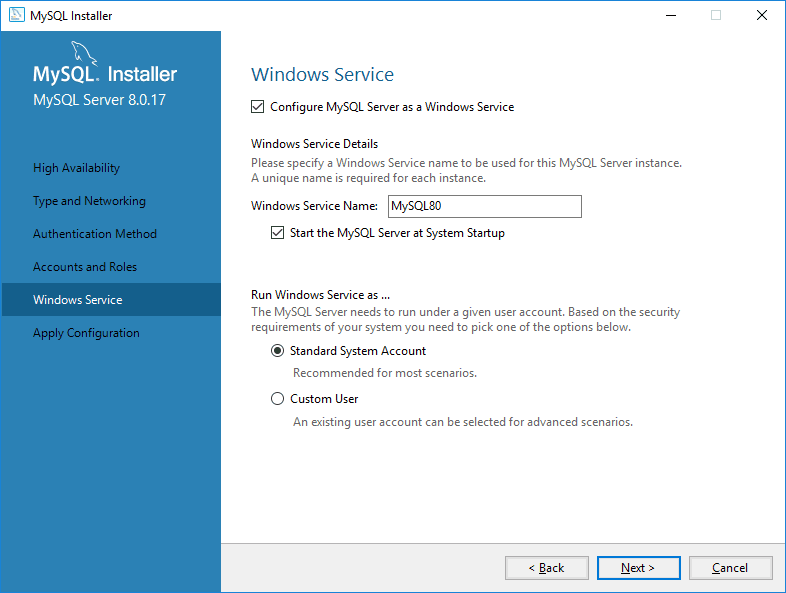
Run as Windows Service: Select the default account or use a custom user.
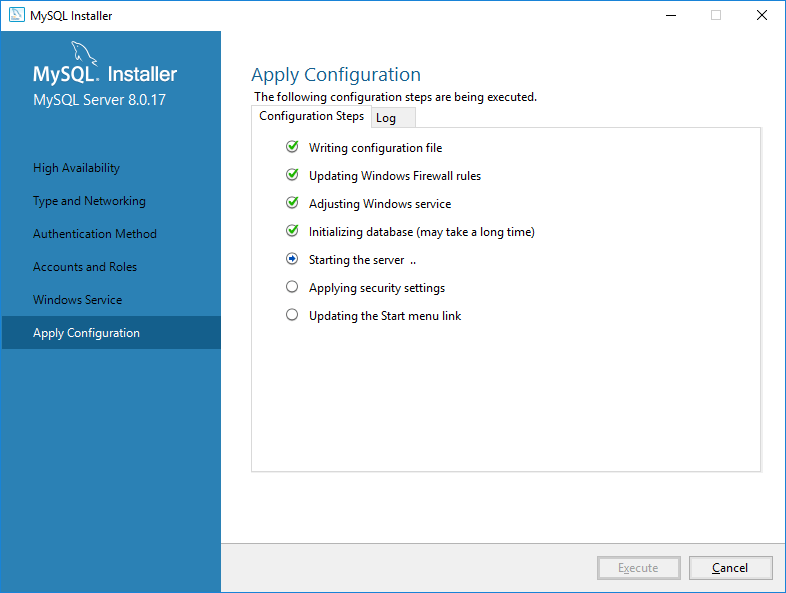
Click Next and then Execute to apply configurations.
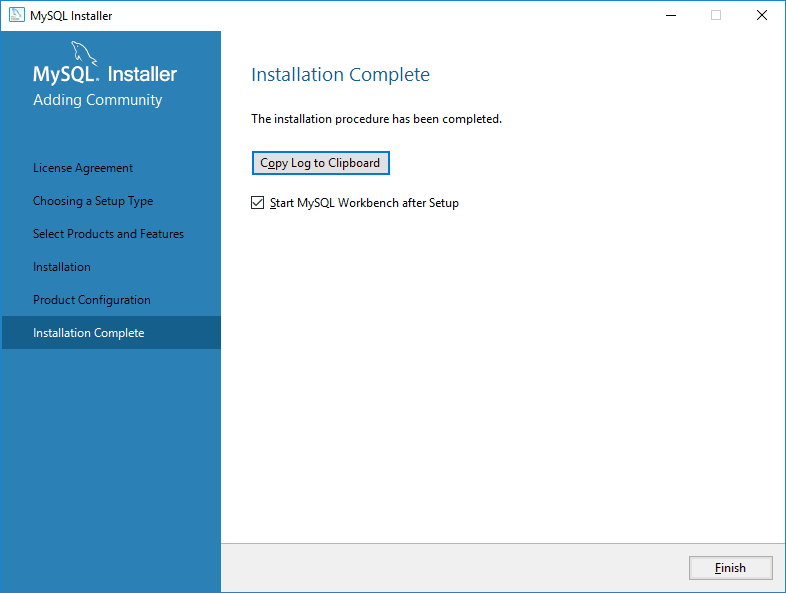
Step 6: Verify Installation
Review the installation log to confirm success.
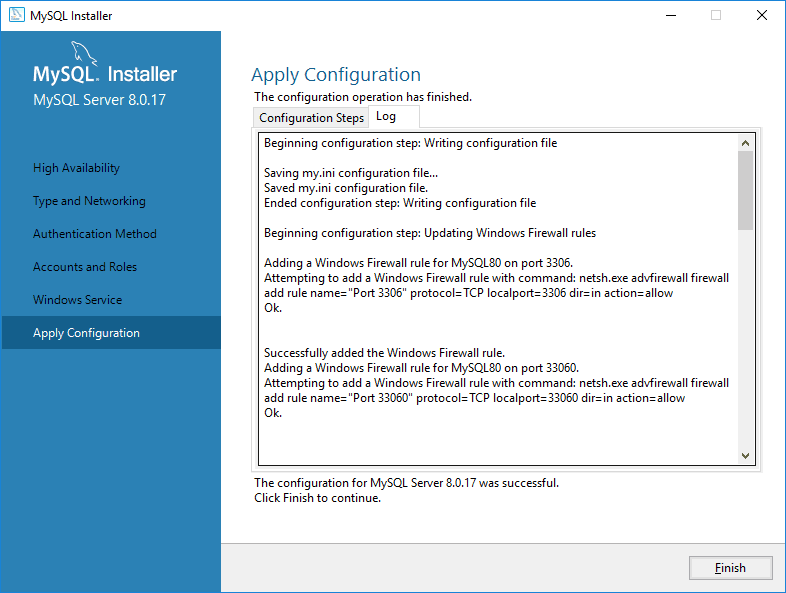
Click Finish to complete the process.
Setting Up MySQL Workbench
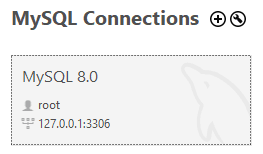
Open MySQL Workbench and click + to add a new connection.
Enter a name for your connection (e.g., “Local MySQL 8.0”).
Leave connection settings as default (Host: 127.0.0.1, Port: 3306), at least if you are doing a local MySQL install like I am doing here.

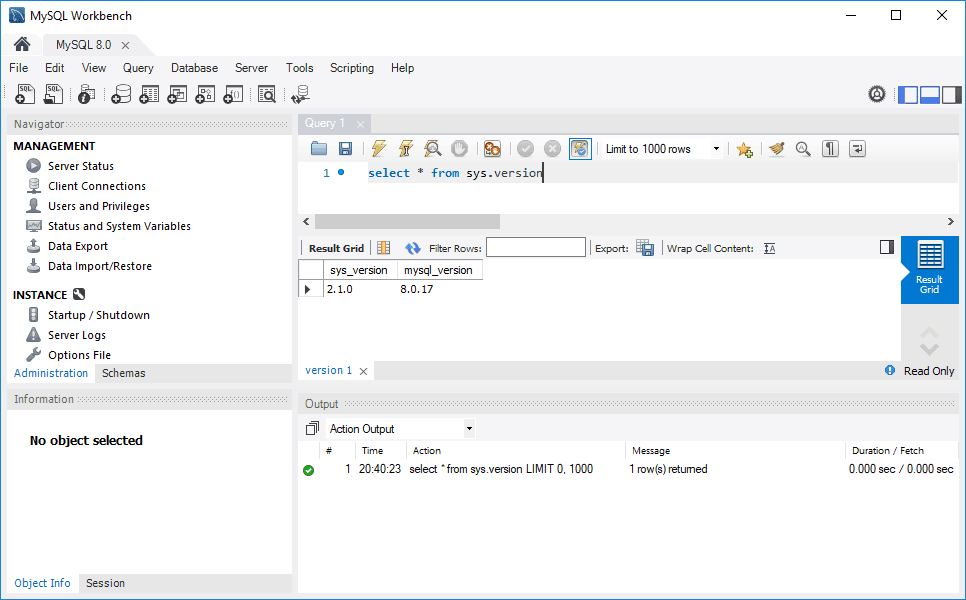
Click Test Connection and enter your root password.
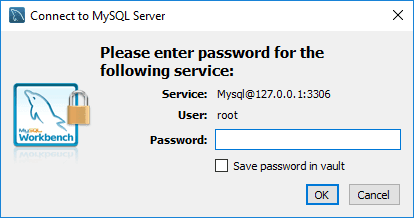
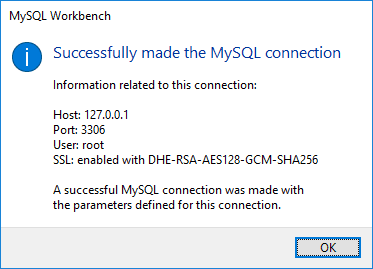
Once successful, click OK to save the connection.
Open the new connection and run SELECT * from sys.version to confirm installation.
Best Practices After Installation
Create New Users: Avoid using the root account for day-to-day tasks.
Enable Backups: Use MySQL Dump or automated backup solutions.
Secure MySQL: Run mysql_secure_installation to enhance security settings.
Leave a Reply