
Automating PowerShell scripts is a much needed task for Windows Administrators. The Task Scheduler provides a reliable way to execute scripts on a predefined schedule, eliminating the need for manual intervention. This guide covers both the command and GUI methods for how to run PowerShell scripts from Task Scheduler.
Whether you are automating system maintenance, log collection, or other administrative tasks, using Windows Task Scheduler will serve you well. As a SQL Server DBA, I would usually have my PowerShell & SQL scripts running on a schedule using the SQL Agent. However, as I’ve mentioned in my other post, we need to use other methods like the Task Scheduler for achieving automation when on the SQL Server Express Edition.
Topics Covered:
> Create a Scheduled Task using PowerShell
> Create a Scheduled Task for a PowerShell Script (GUI Option)
> More Tips for Automating PowerShell Scripts
Create Scheduled Task using PowerShell
1. Create Your PowerShell Script
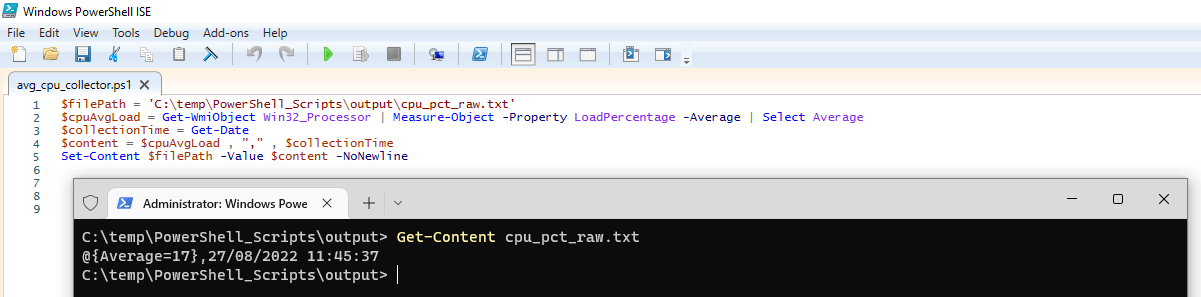
Write the PowerShell script you want to schedule. For this example, the script logs the system’s average CPU usage with a timestamp into a text file. Save your script, e.g., avg_cpu_collector.ps1, in C:\temp\PowerShell_Scripts.
2. Create the Scheduled Task
Use the following PowerShell code to create a scheduled task that runs your script daily at 8:05 AM:
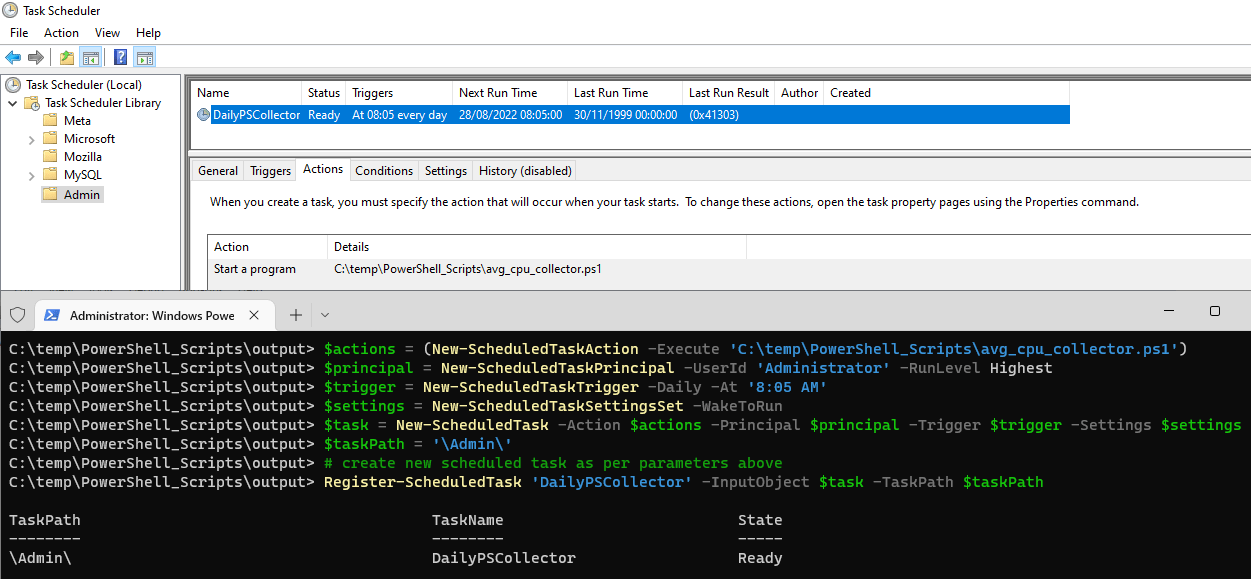
$actions = (New-ScheduledTaskAction -Execute 'C:\temp\PowerShell_Scripts\avg_cpu_collector.ps1')
$principal = New-ScheduledTaskPrincipal -UserId 'Administrator' -RunLevel Highest
$trigger = New-ScheduledTaskTrigger -Daily -At '8:05 AM'
$settings = New-ScheduledTaskSettingsSet -WakeToRun
$task = New-ScheduledTask -Action $actions -Principal $principal -Trigger $trigger -Settings $settings
$taskPath = '\Admin\'
# create new scheduled task as per parameters above
Register-ScheduledTask 'DailyPSCollector' -InputObject $task -TaskPath $taskPath
3. Verify the Task
Open Task Scheduler to confirm the task was created under the specified path (\Admin\).
Create a Scheduled Task for a PowerShell Script (GUI)
1. Open Task Scheduler
Open the Task Scheduler application from the Start Menu.
2. Create a New Task
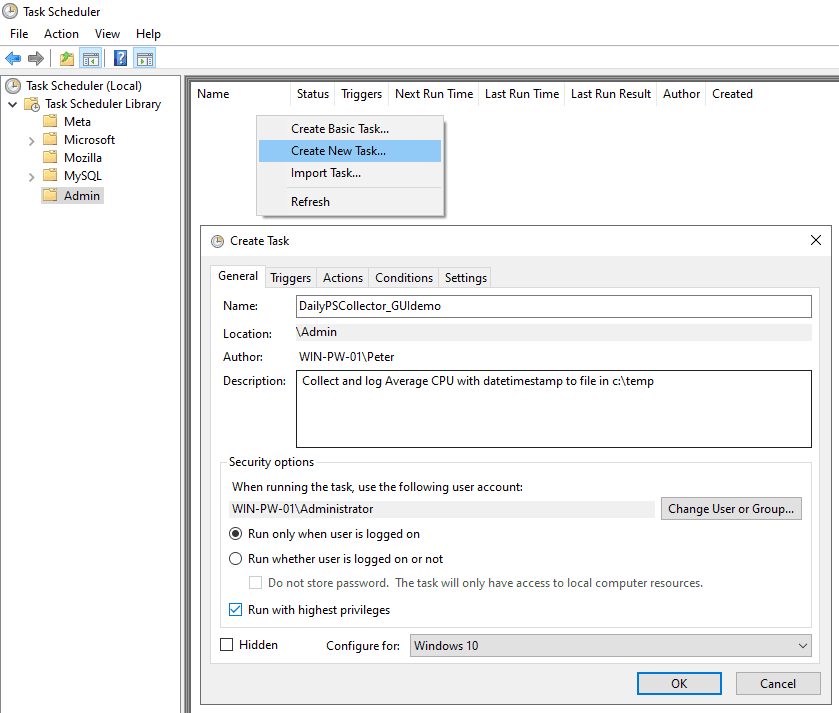
> Right-click in the empty area and select Create Task.
> In the General tab, enter a name (e.g., DailyPSCollector).
3. Set the Trigger
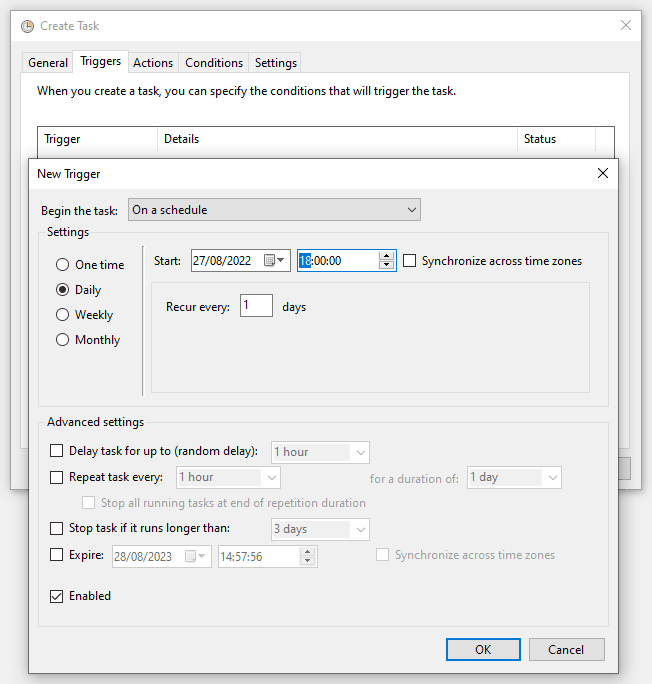
> Choose Daily and set the time to 8:05 AM (or your preferred schedule).
> Go to the Triggers tab and click New.
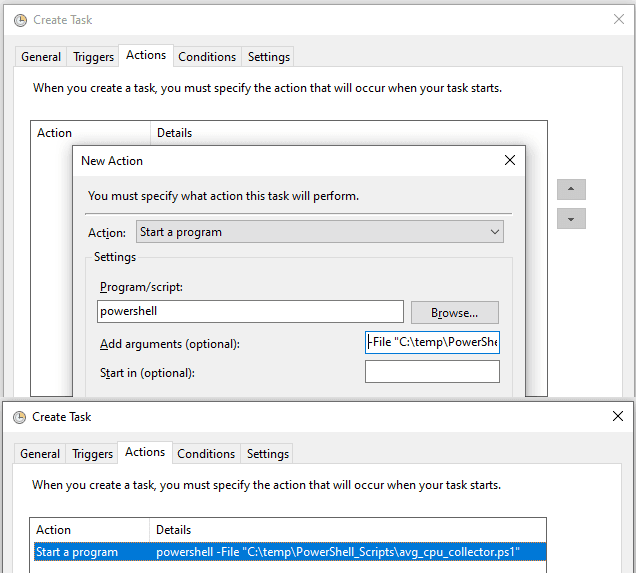
4. Define the Action
> Action: Start a program
> Program/script: powershell
> Arguments: -File “C:\temp\PowerShell_Scripts\avg_cpu_collector.ps1”
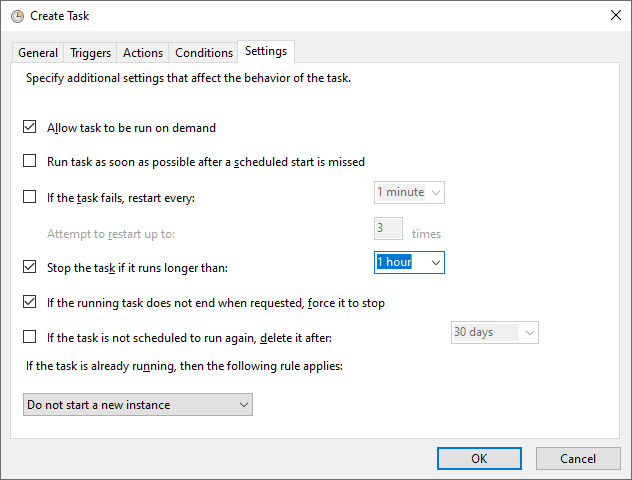
5. Review the Settings
> Click OK to save.
> Check the Settings tab for additional options like allowing the task to run on demand.
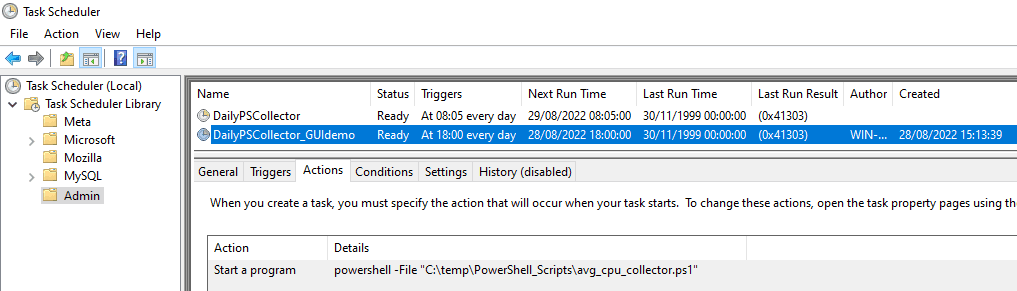
6. Verify Your Task
You’ll now see the task listed in the Task Scheduler main window.
More Tips for Automating PowerShell Scripts
> Use Proper Permissions: Run your scheduled tasks with a user account that has the necessary permissions.
> Test Your Script First: Before scheduling, run your PowerShell script manually to ensure it works as expected.
> Consider Logging: Add logging to your script to track its execution and troubleshoot any issues.
> Backup Your Tasks: Use PowerShell to export your scheduled tasks for backup or migration.
Leave a Reply