-
Domain Join Sanity Checks
In order to join a Windows Server to a domain, you may need to request that the network team open certain firewall rules. The network requirements for this process can be complex and may vary depending on your specific environment.
After joining a domain, especially in a new environment, it is important to perform some checks to ensure everything is working correctly. These checks may include using GPResult and GPUpdate to update and verify Computer and User Policies, using Nltest to perform network administrative tasks such as querying domain controllers and trust relationships, and reviewing the Windows Event Viewer for any issues.
This post shows examples of performing such checks post joining a Domain for a Windows Server:
> GPResult / GPUpdate
> Nltest
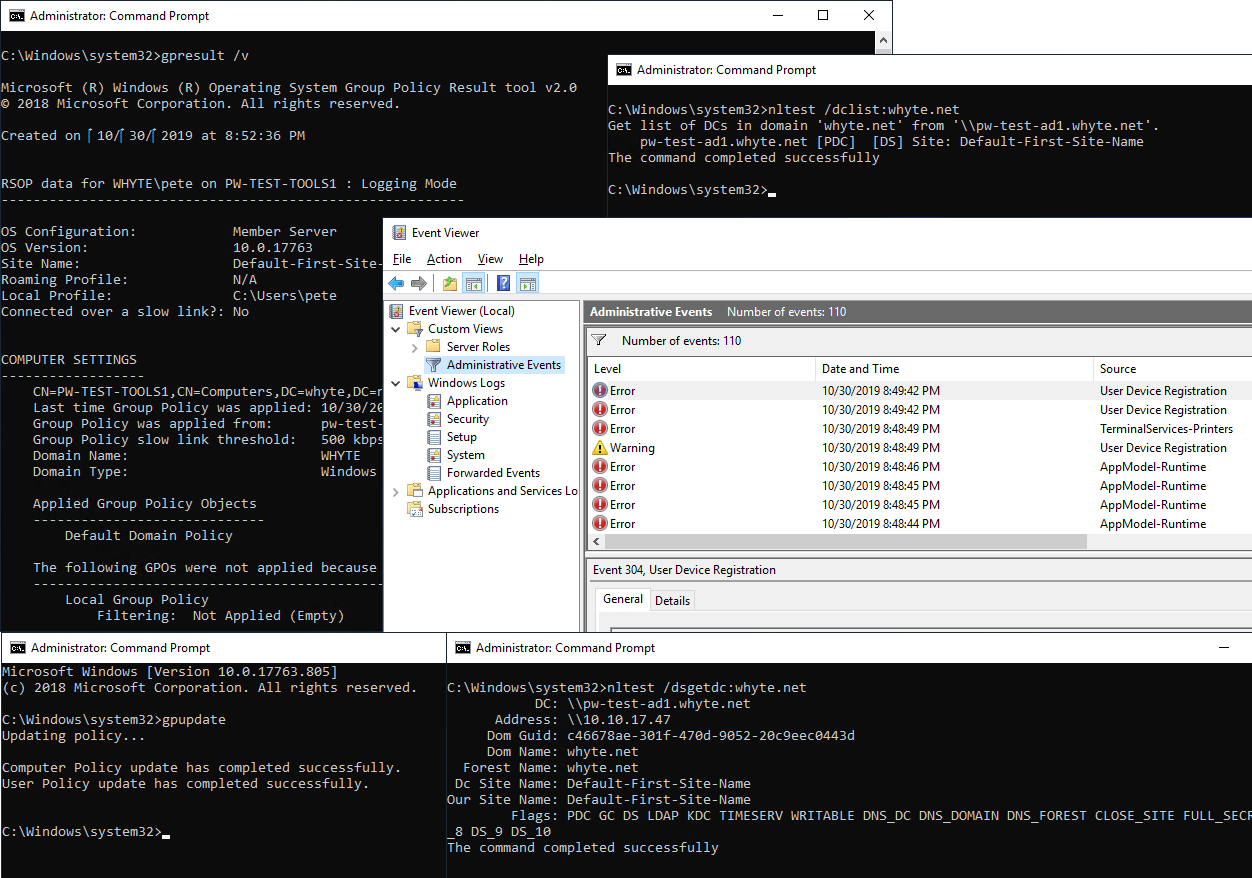
> Windows Event ViewerGPUpdate / GPResult
After joining a Windows Server to a domain, you can use the gpupdate command to check if the domain join is healthy. This command updates Computer and User Policies on the server, and can help to ensure that the server is properly configured and communicating with the domain controller.
Here is an example of running
gpupdate: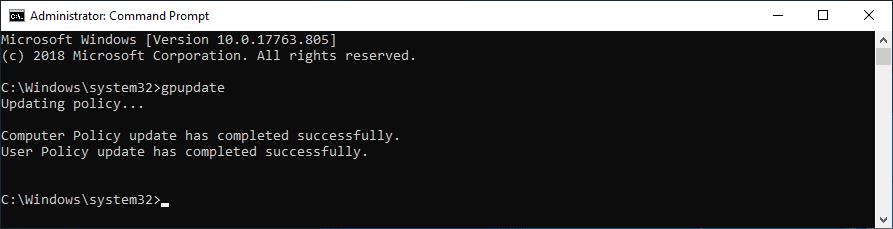
We can also have a look at applied Computer policies using the
/vparameter when runninggpresult.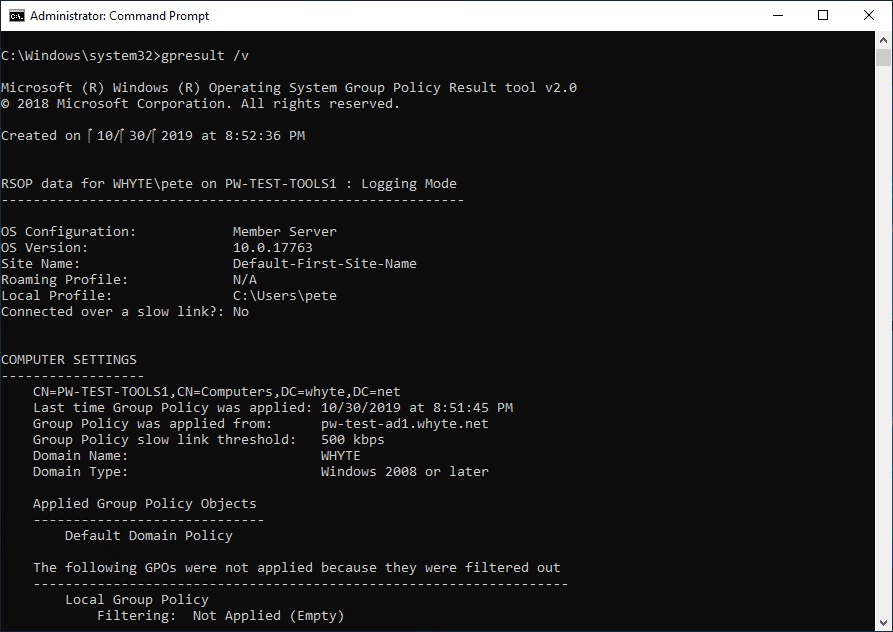
Nltest
Nltest.exe is a command-line tool that allows you to perform network administrative tasks, including querying and testing the status of domain controllers and trust relationships. Some examples of the tasks that you can perform with Nltest include:
nltest /dclist:<domain>lists all the domain controllers in the domain.
nltest /dsgetdc:<domain>queries DNS and returns a list of domain controllers (with IPs).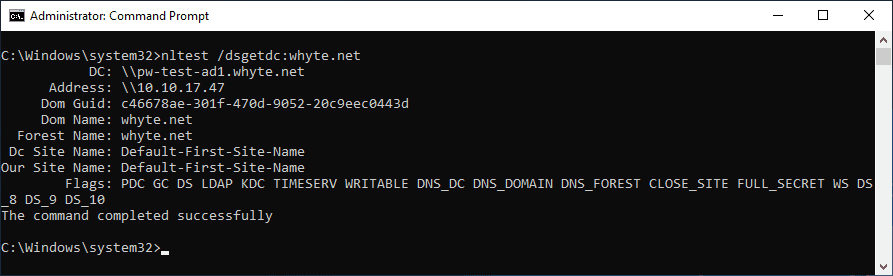
nltest /dsgetsitereturns the site name of the domain controller.
nltest /sc_query:<domain>reports the state of the secure channel for when it was last used.
Windows Event Viewer
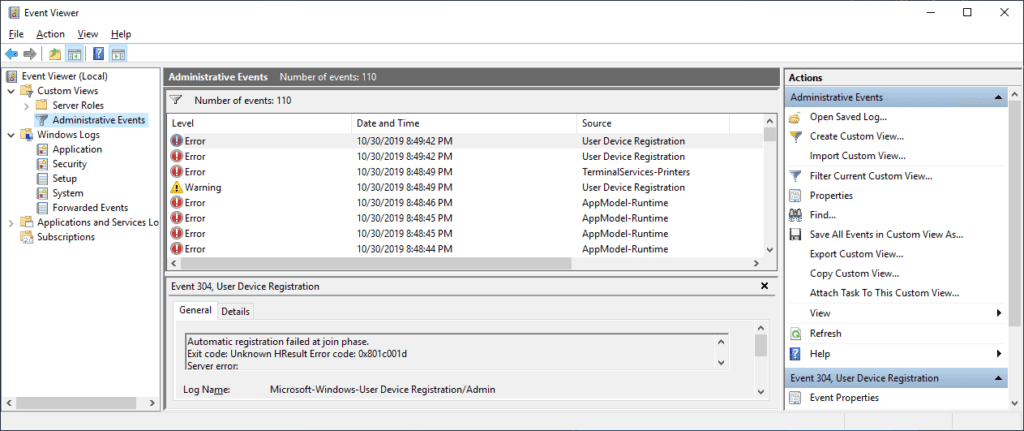
The Windows Event Viewer is a useful tool for viewing and managing events that are recorded by Windows operating systems. While not all events recorded in the Event Viewer require investigation, it is important to pay attention to errors and critical events, especially during the domain join process.
-
How to Create MySQL Databases & Tables
Setting up MySQL databases and tables is a foundational skill for database administrators and developers. Whether you’re using Windows, Linux, or a cloud environment, this guide is aimed to help you create databases and tables in MySQL.
Topics covered:
> Create a MySQL Database
> The USE DATABASE Command
> Closing MySQL Queries with Semicolons
> How to Exit from MySQL CLICreate a MySQL Database
To create a new database in MySQL, you use the
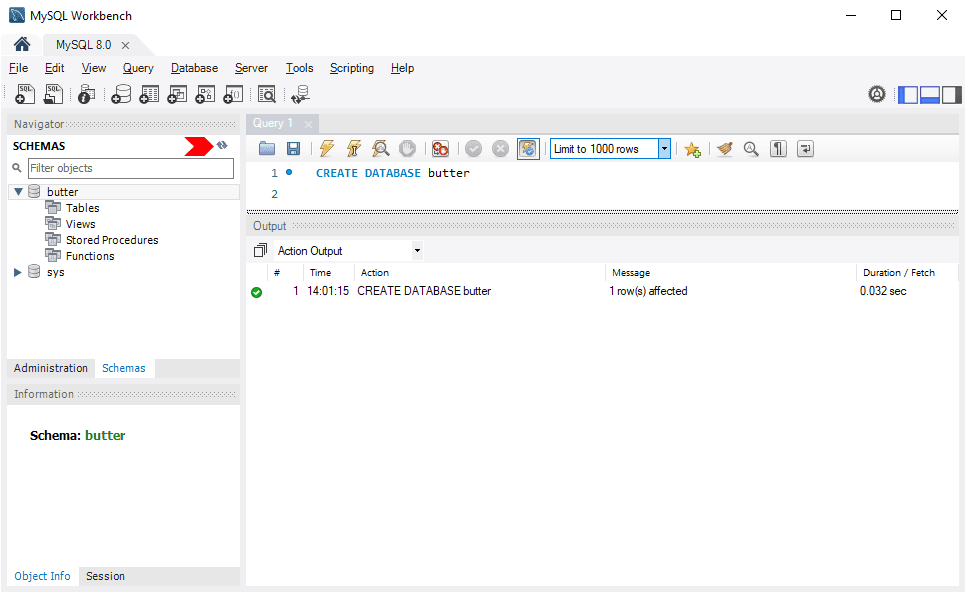
CREATE DATABASESQL statement. In MySQL, the terms “database” and “schema” are often used interchangeably.Example Using MySQL Workbench:
1. Open MySQL Workbench.
2. Run the following command to create a database:CREATE DATABASE example_database;
3. Refresh the Schemas panel in the navigator to view the new database.
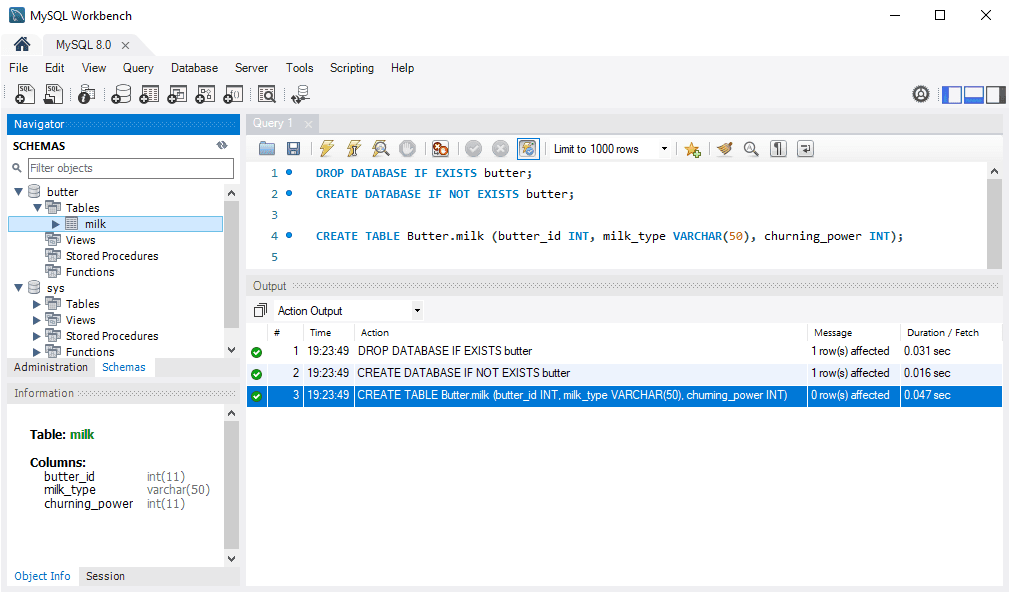
Note: On Linux systems, database names are case-sensitive, unlike Windows systems. To maintain consistency, stick to a consistent naming convention such as
finance_databaserather than mixing cases likeFinance_Database.Below, I’m creating a database on a local MySQL install (Windows 10) and creating a table with a capital letter on the schema/database name.
Example using MySQL Command-Line Client:
mysql -u root -p
CREATE DATABASE example_database;
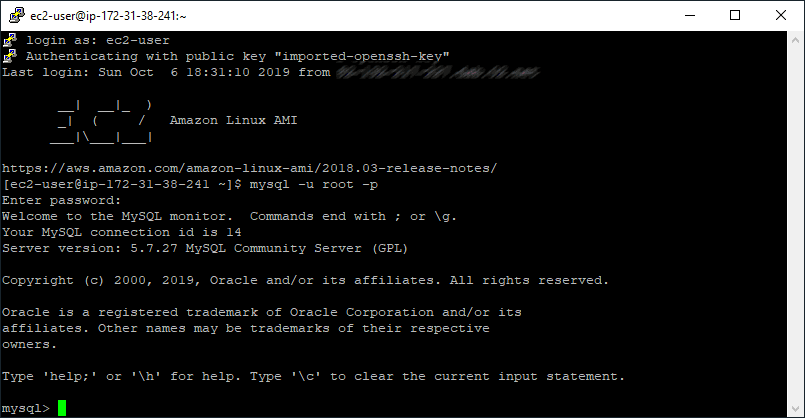
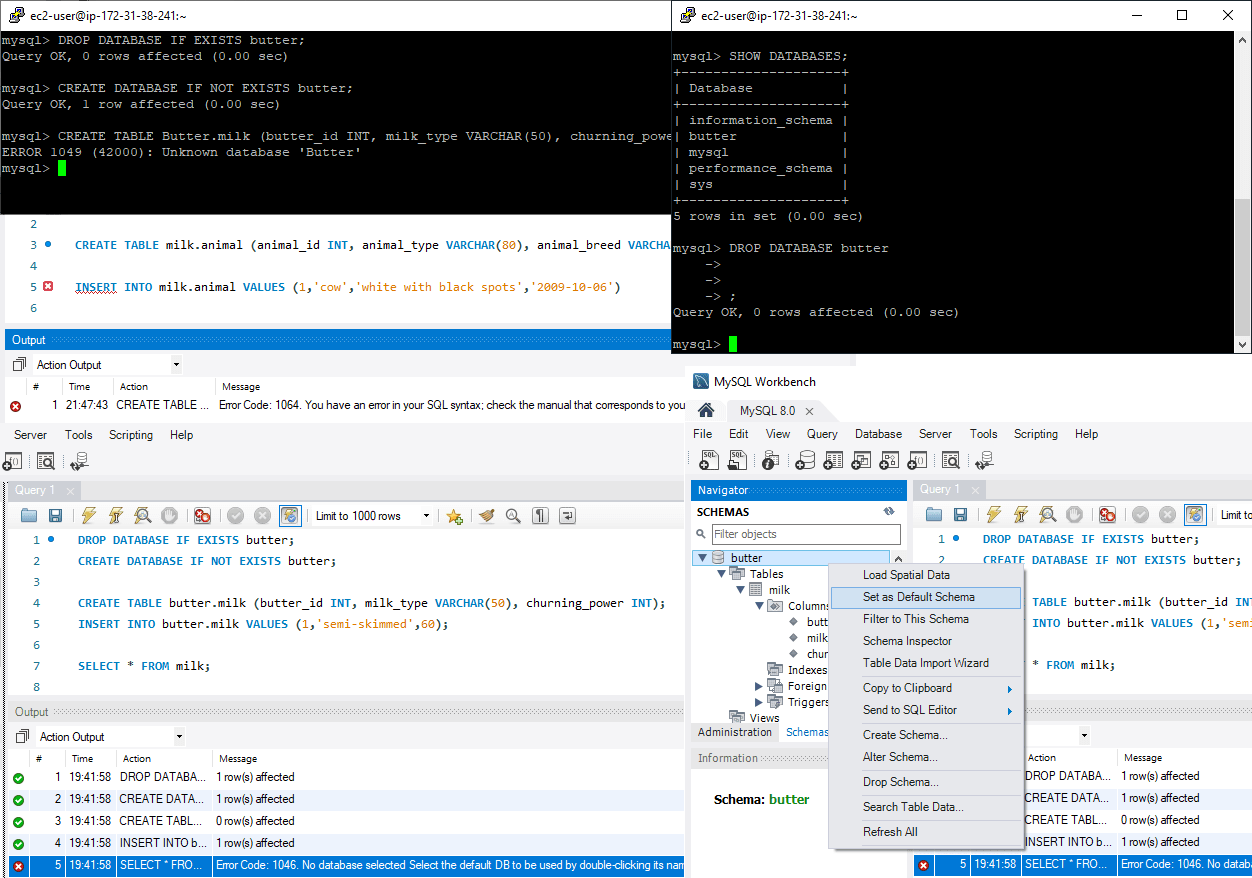
The above shows logging in with the ec2-user to an Amazon Linux EC2 instance. Next, I’m going to create another new table using a capital letter on the database name:
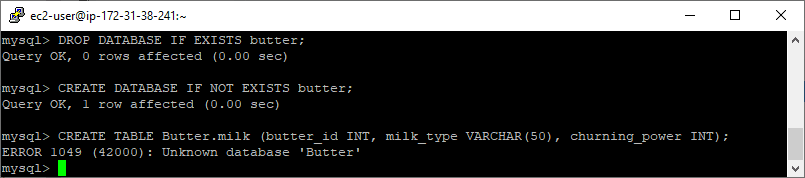
ERROR 1049 (42000) : Unknown database 'Butter'Great to show this error example, which is happening because we’re not using lower-case for the database name.
2. The
USE DATABASECommandThe
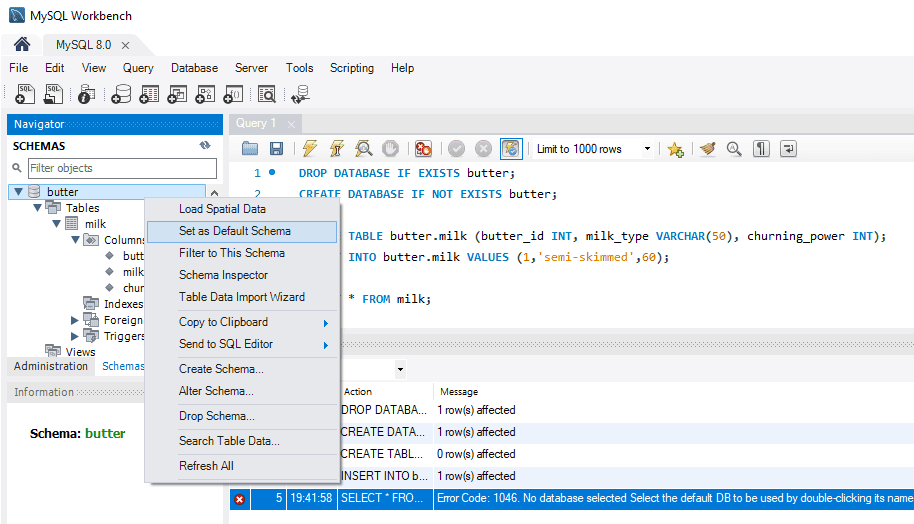
USEcommand sets the default database for subsequent operations.Example: Imagine we have already created a
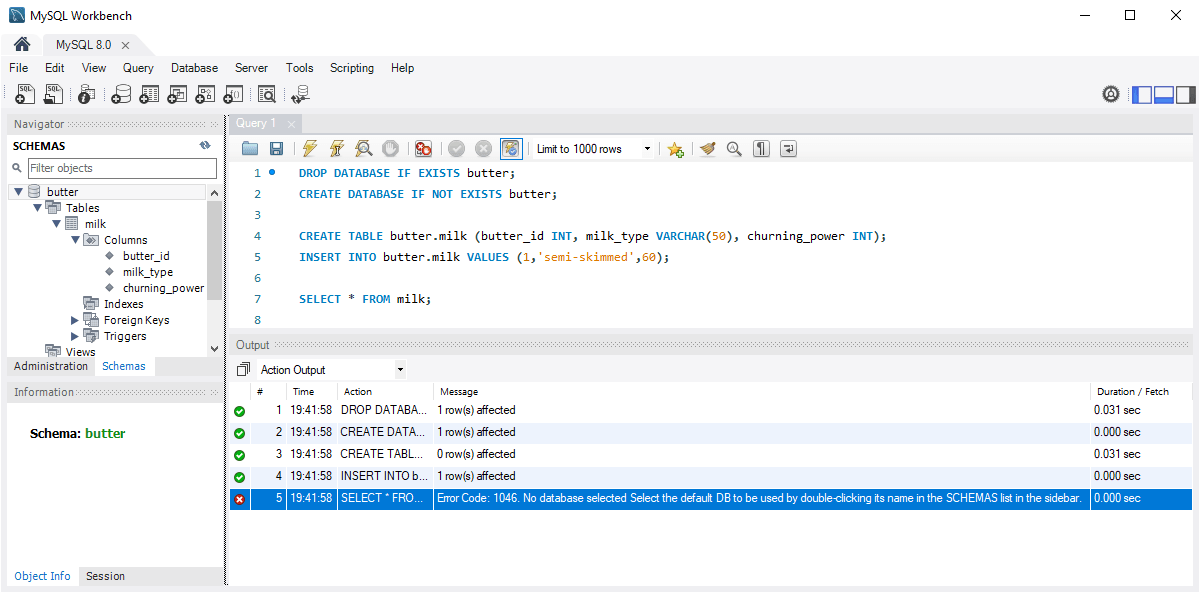
butterdatabase and need to create a table within it. If you forget to specify the schema when running queries, MySQL may return the following error:
Error Code: 1046: No database selectedResolve this by setting the default schema either by double-clicking its name in the Schemas list or using the
USEstatement:-- use database example USE butter;
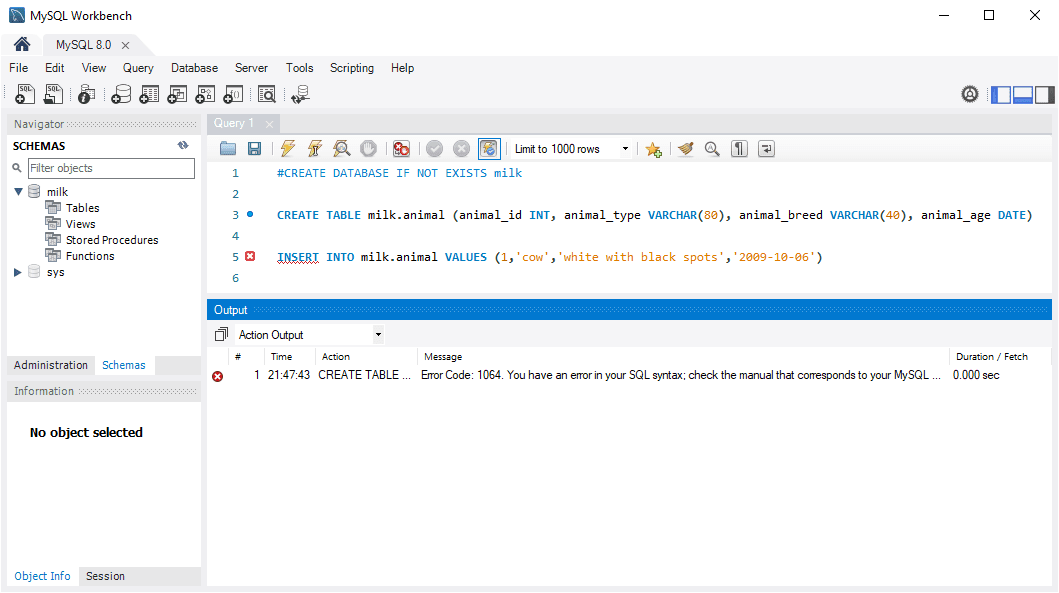
3. Closing MySQL Queries with Semicolons
In MySQL, semicolons (
;) indicate the end of a statement. Without a semicolon, the query will not execute.Example:
The screenshot below shows a Linux client connected to MySQL. The first SQL command includes a semicolon and returns a list of databases. The second command does not include a semi-colon: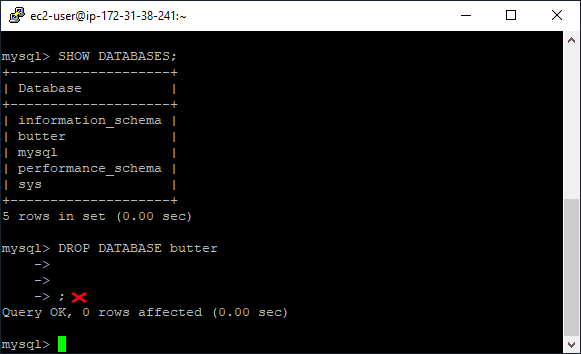
Adding a semicolon ensures the table is created and the row is inserted without errors.
Here’s an example the GUI way, in MySQL Workbench:

Note: If executing queries line-by-line, semicolons may not be required.
4. Exiting MySQL CLI
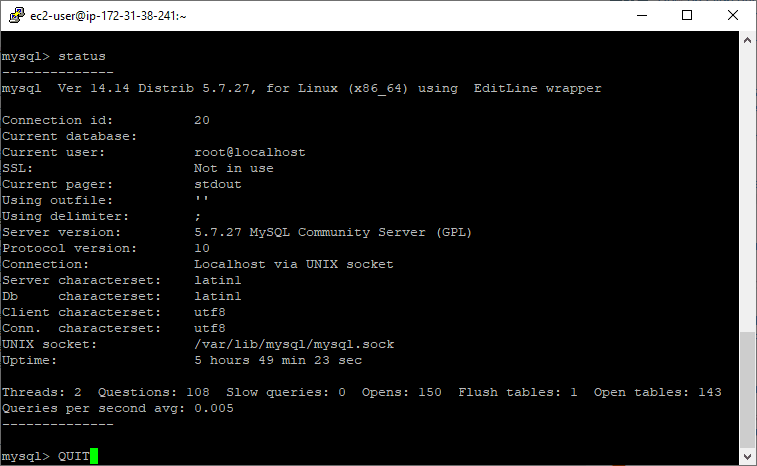
As a final tip for this blog post, I’m showing you how to bug out of the MySQL terminal window.
To exit MySQL CLI run the following:
QUIT;
-
How to Remove Old Windows Upgrade Files
When your machine is upgraded to a newer version of Windows, it leaves behind the
C:\Windows.olddirectory. This folder contains backups of the previous Windows version and can take up significant disk space.Important Note:
TheWindows.oldfolder allows you to roll back to the previous Windows version. If you delete it, you lose this rollback option. Ensure you no longer need to revert before proceeding, especially in a workplace environment.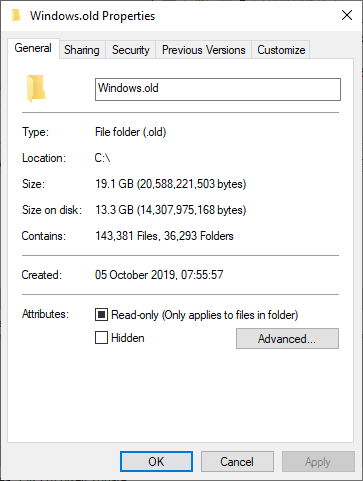
Steps to Delete Windows.old Files
To safely remove the
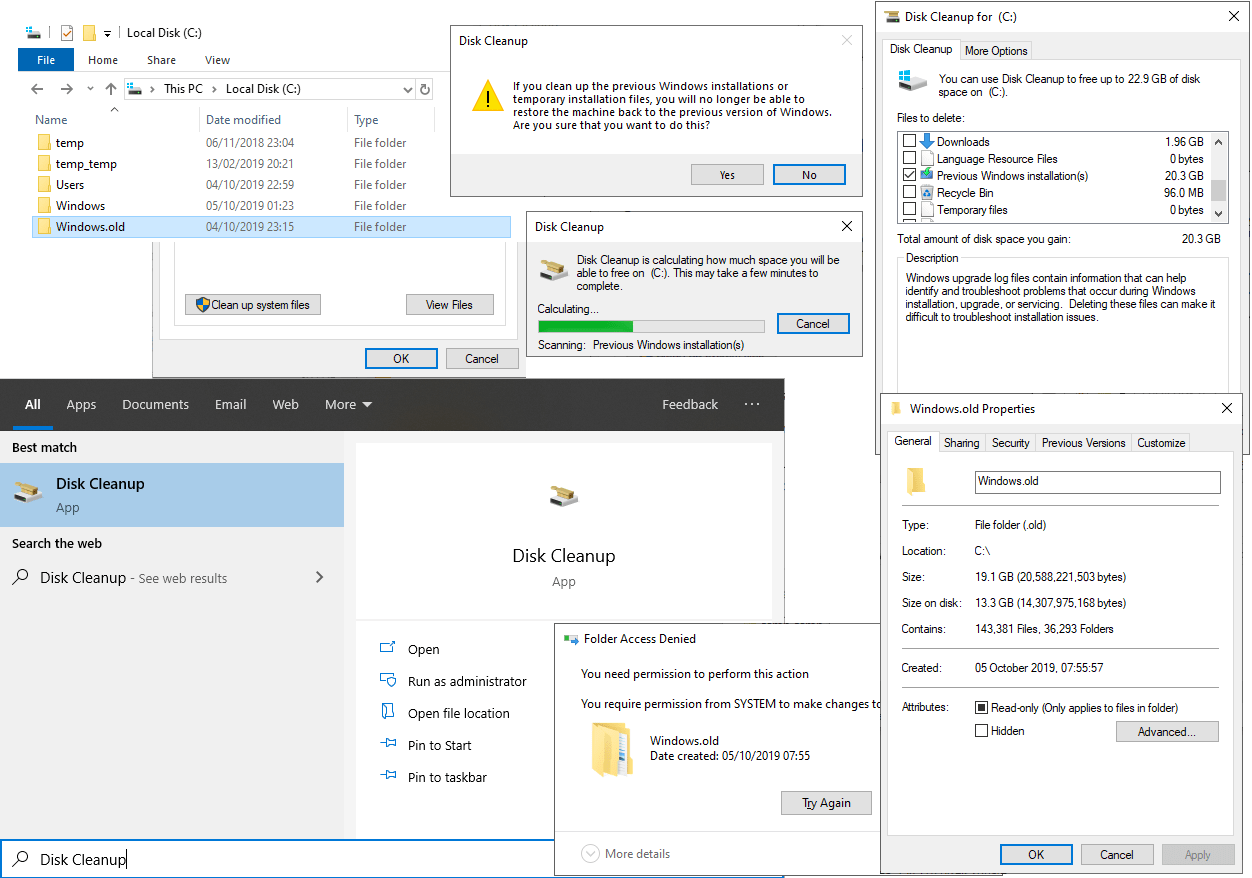
Windows.oldfolder, follow these steps:1. Open Disk Cleanup
Type Disk Cleanup in the Start Menu and open it.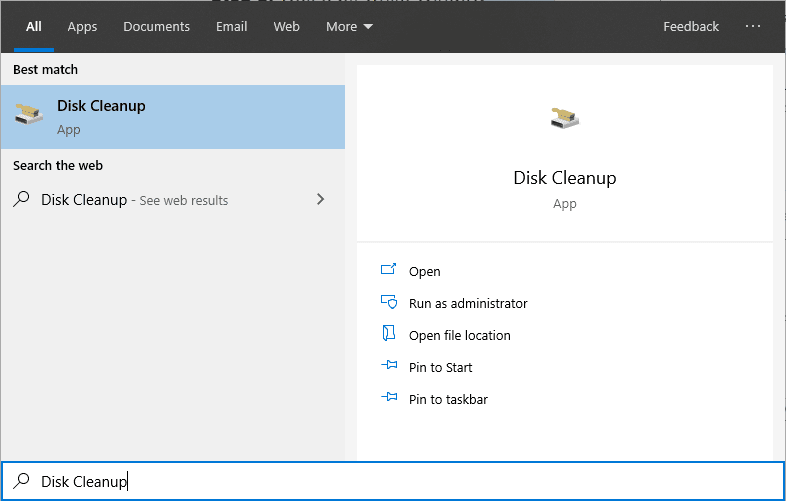
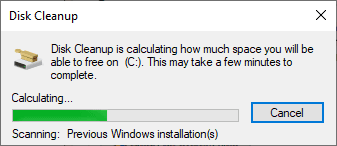
2. Select System Files
Click Clean up system files. This step might take a few moments.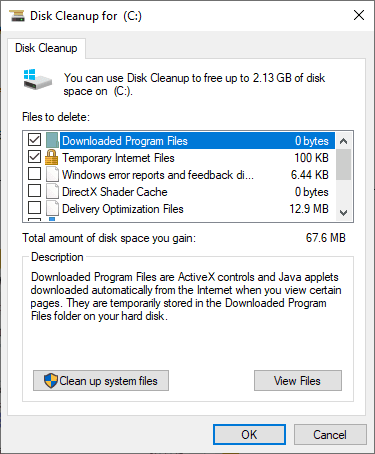
3. Choose Previous Windows Installation
Check the box for Previous Windows installation(s) in the list.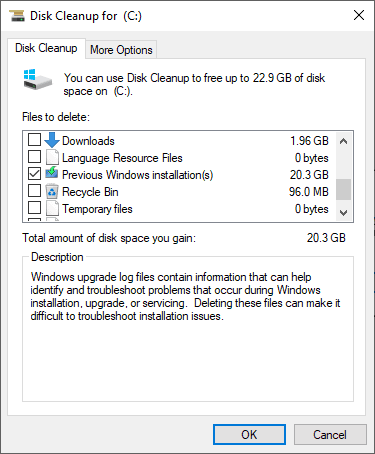
4. Confirm Deletion
Click OK, then confirm by selecting Delete Files on the prompt.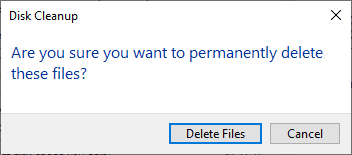
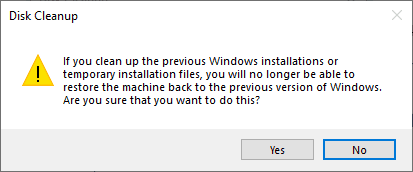
As mentioned above, by deleting this we will no longer be able to restore the machine back to the previous version of Windows.
5. Wait for Cleanup
The cleanup process may take several minutes. Once completed, theWindows.oldfolder will be removed, freeing up disk space.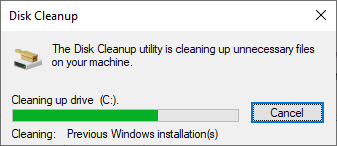
When it finishes, we can check the C:\ drive to verify leftover Windows installation files were removed.

Hope this guide was useful for you!
-
How to Install MySQL on a Windows Computer
Installing MySQL on a Windows computer is a straightforward process, however selecting the right options is key for a smooth setup.
This is a simple how to for installing MySQL Community Server and MySQL Workbench on Windows. I recommend you walk through this yourself if learning MySQL and the configurations involved with administration. A lot of the configuration can be changed post install too.
Installing MySQL on Windows
Step 1: Download and Launch the MySQL Installer
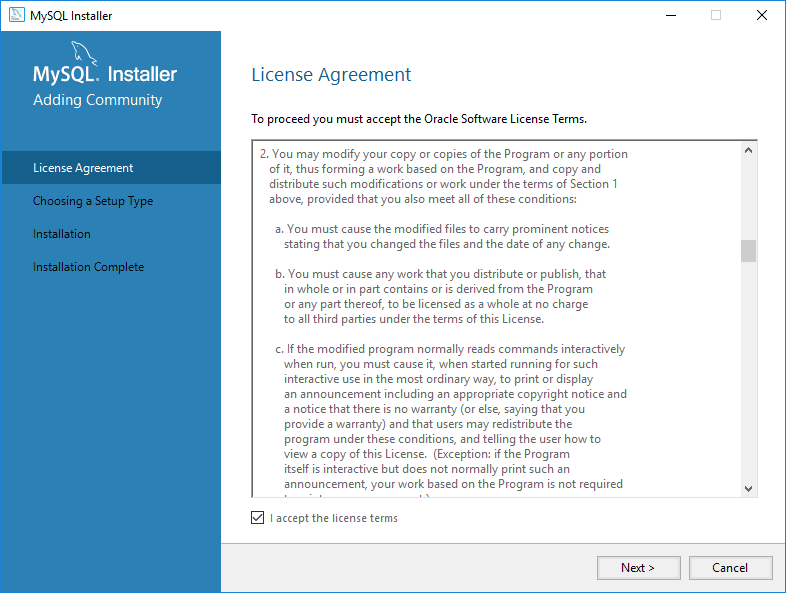
Download the latest MySQL Community Server from the official MySQL website.
Run the downloaded MySQL Installer (.exe) file.

Accept the License Agreement and click Next.
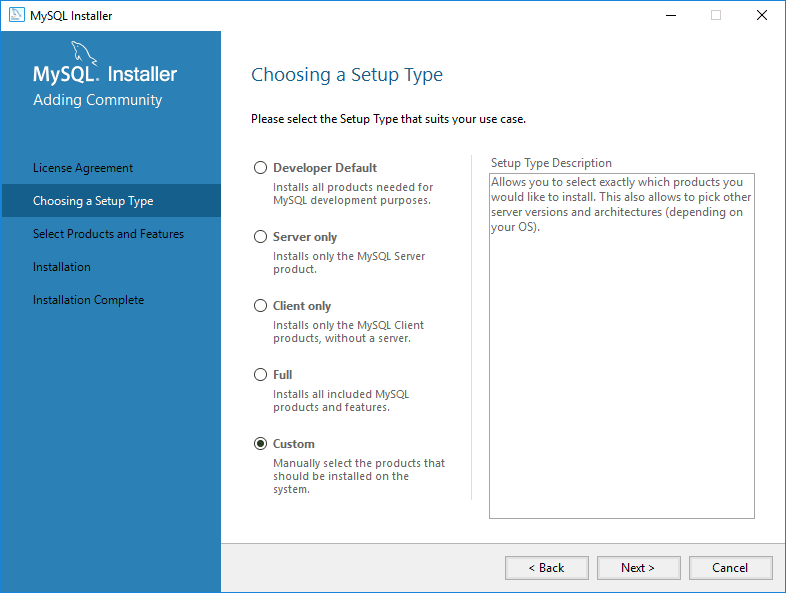
Step 2: Choose Setup Type
Recommended: Select Custom Install to install only the components you need.
Step 3: Select Features to Install
Choose the following:
– MySQL Server
– MySQL Workbench
– MySQL ODBC Driver (optional for applications needing ODBC connectivity)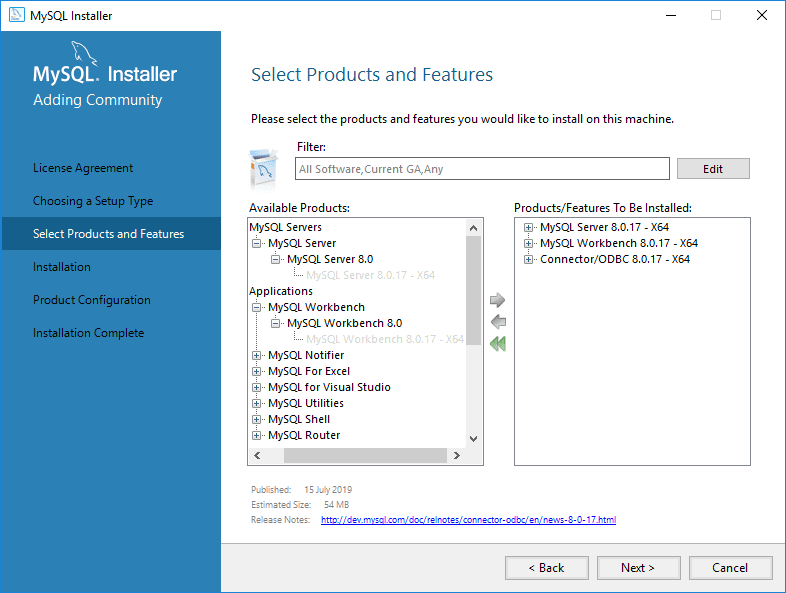
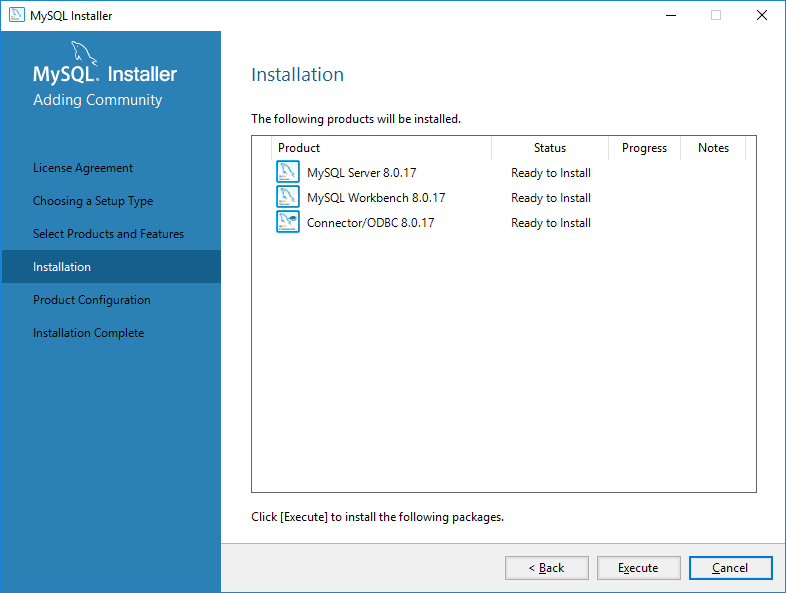
Step 4: Install Required Dependencies
If prompted, install Microsoft Visual C++ Redistributable.
Click Exectute to install all features selected.
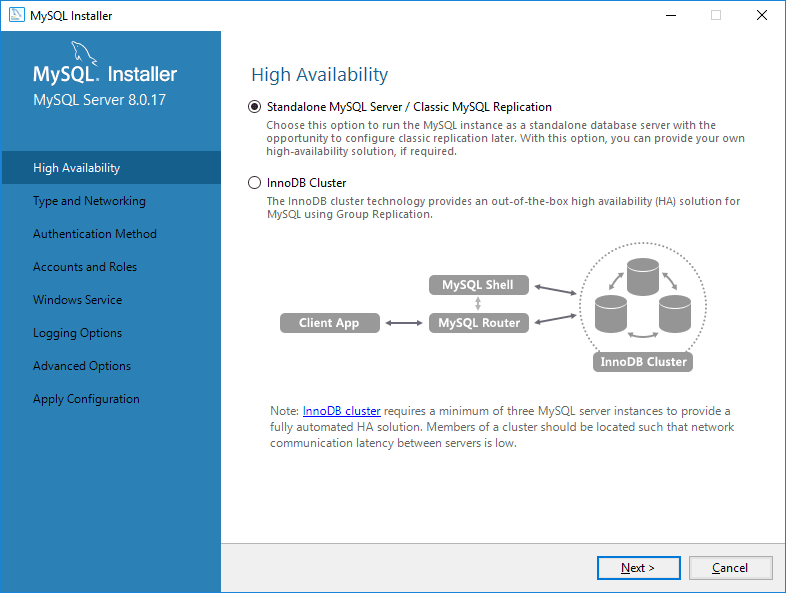
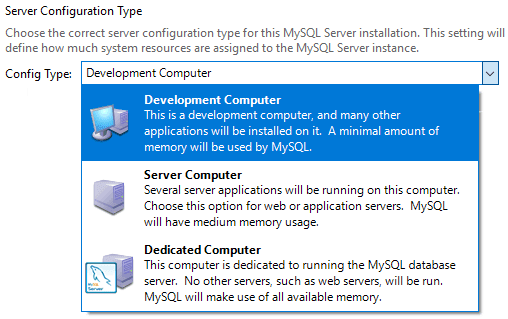
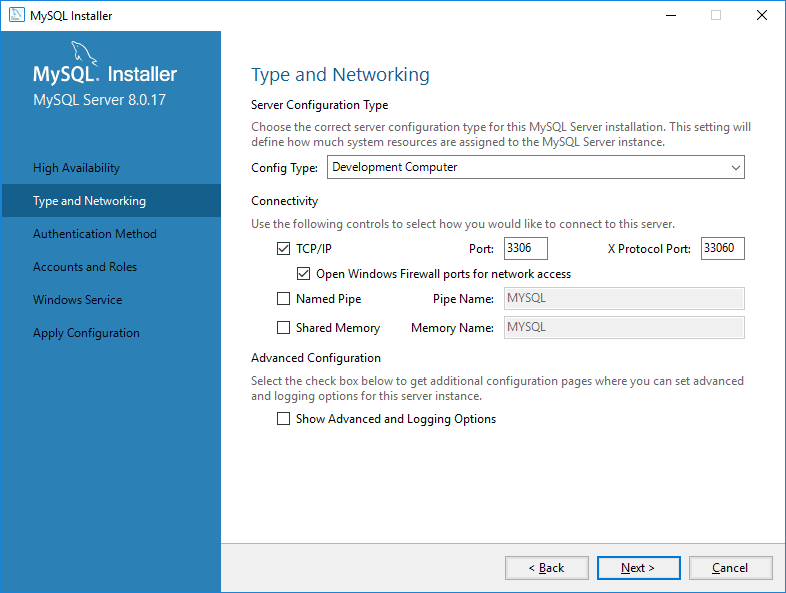
Step 5: Configure MySQL Server
High Availability: Choose Standalone MySQL Server.
Select Development Computer as Config Type.
Keep default Port 3306.
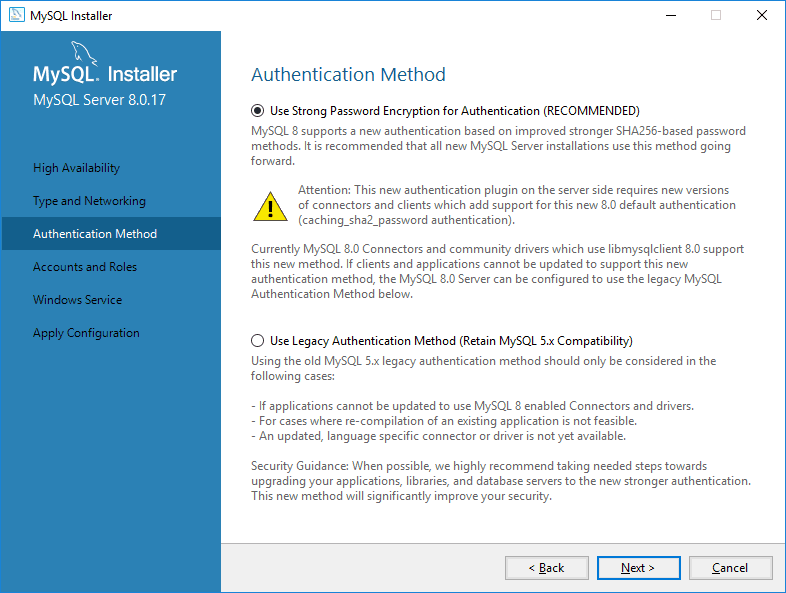
Choose Strong Password Encryption (recommended for security).
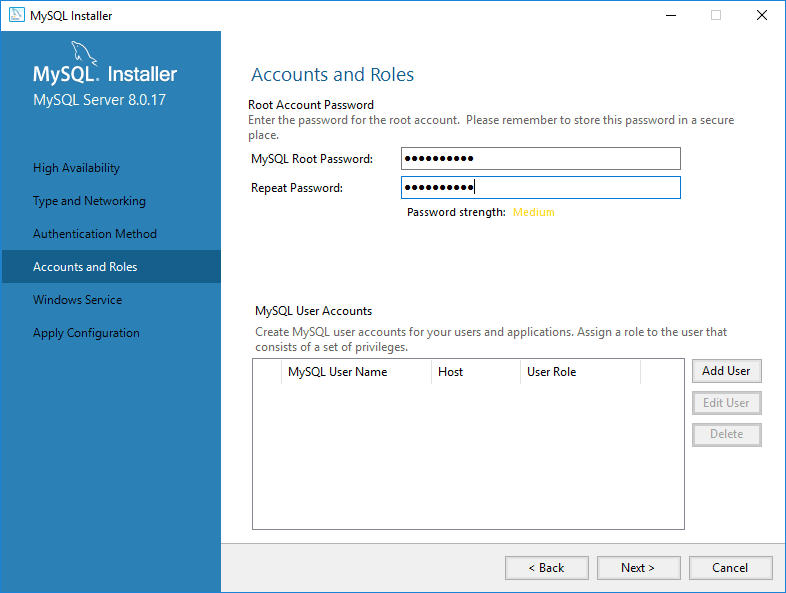
Set the Root Password: Enter a secure password for the MySQL root user.
Run as Windows Service: Select the default account or use a custom user.
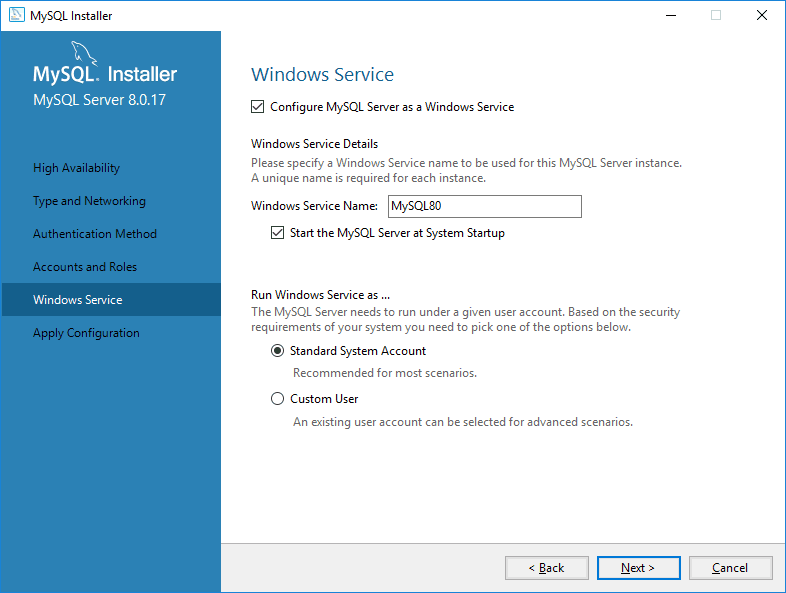
Click Next and then Execute to apply configurations.
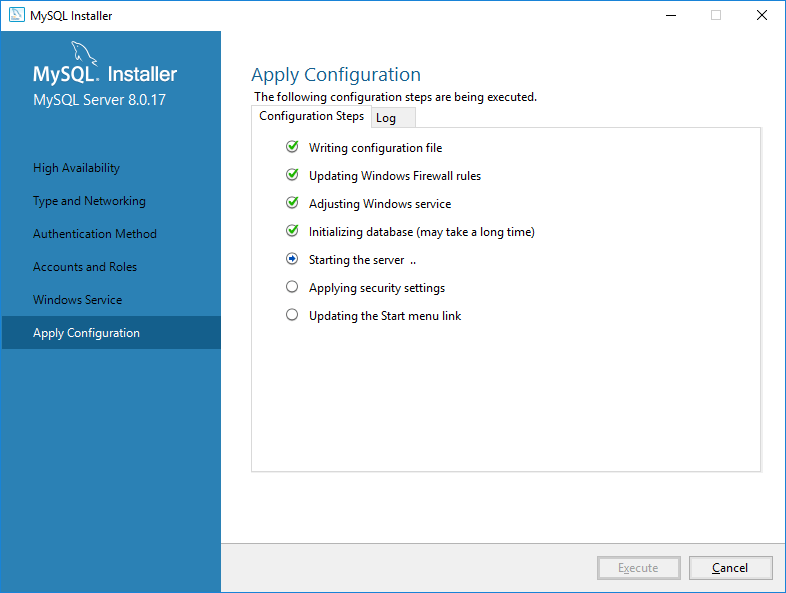
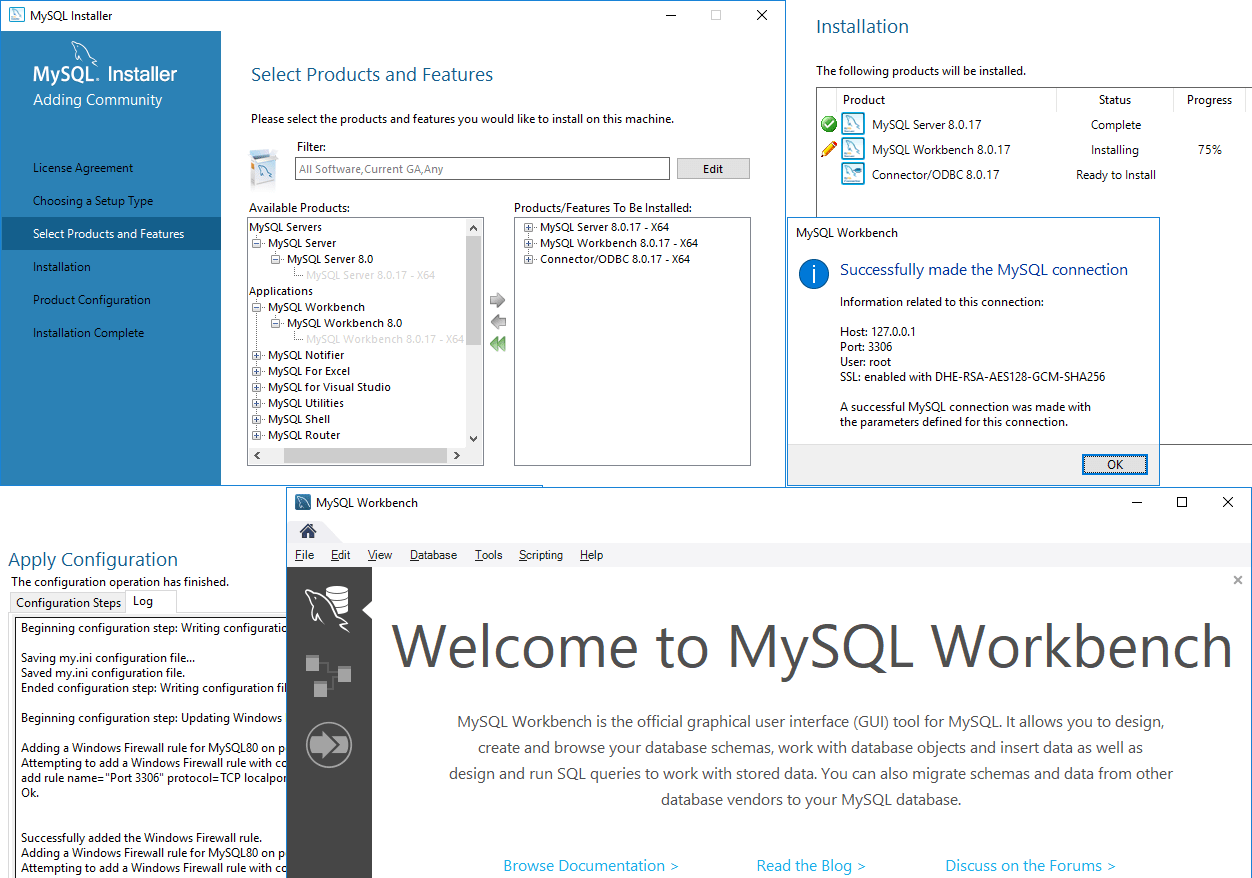
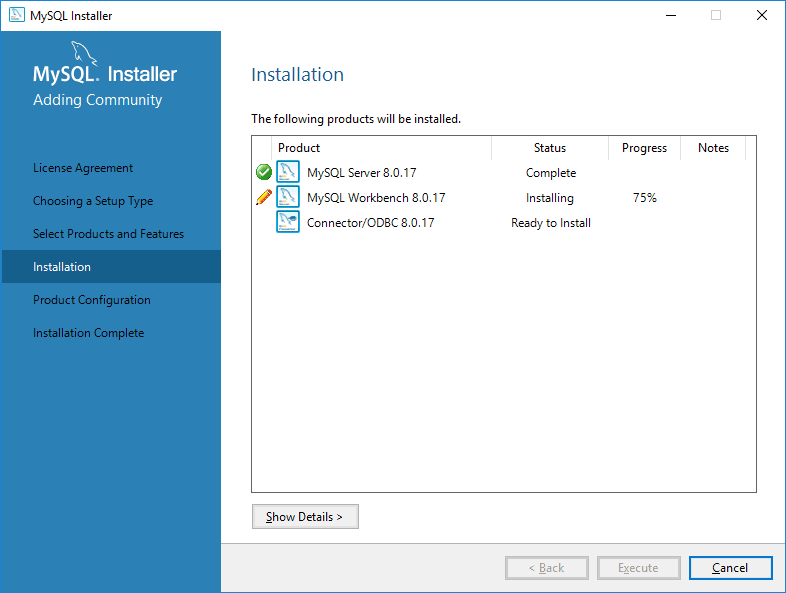
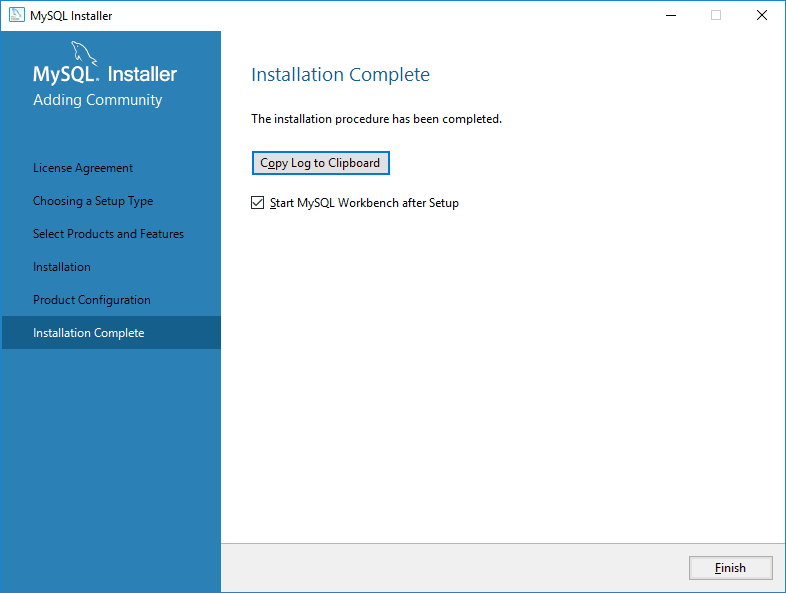
Step 6: Verify Installation
Review the installation log to confirm success.
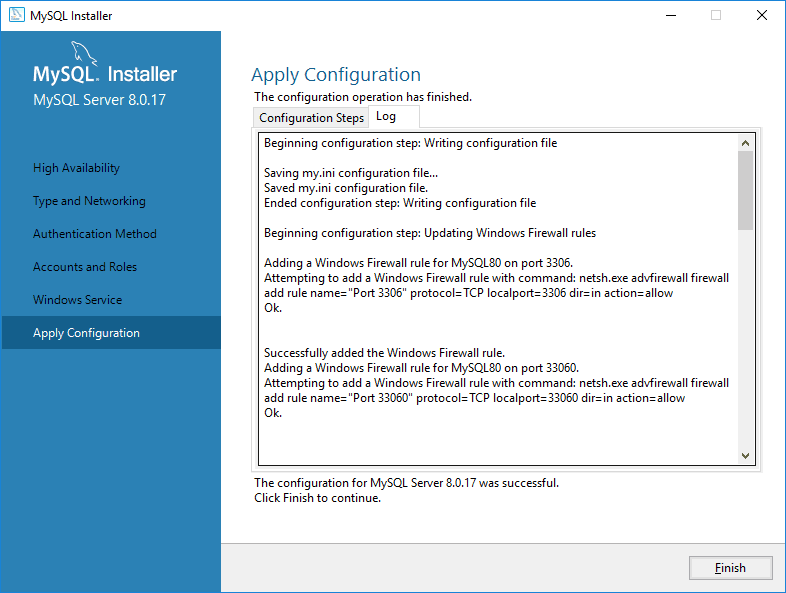
Click Finish to complete the process.
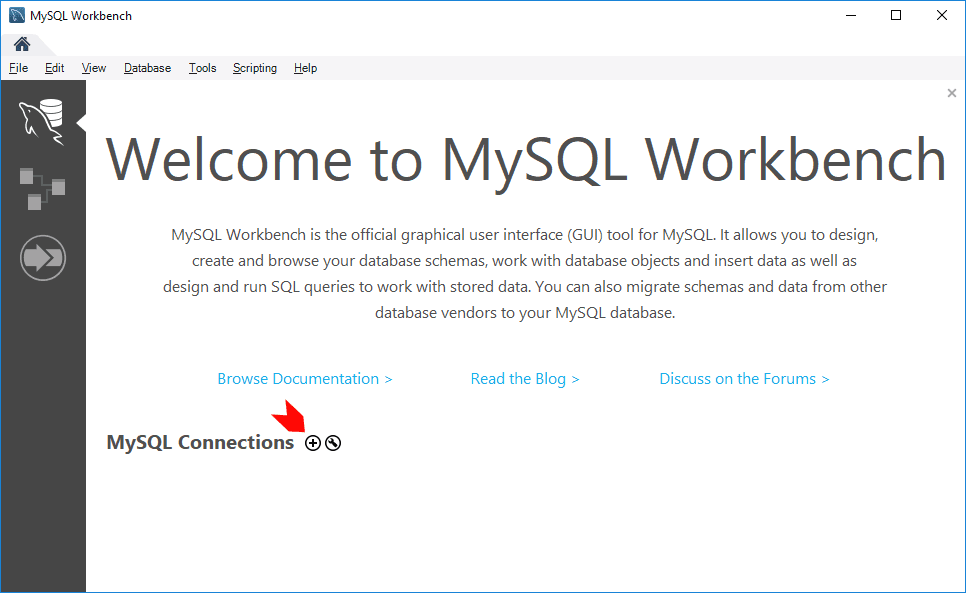
Setting Up MySQL Workbench
Open MySQL Workbench and click + to add a new connection.
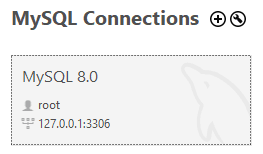
Enter a name for your connection (e.g., “Local MySQL 8.0”).
Leave connection settings as default (Host: 127.0.0.1, Port: 3306), at least if you are doing a local MySQL install like I am doing here.

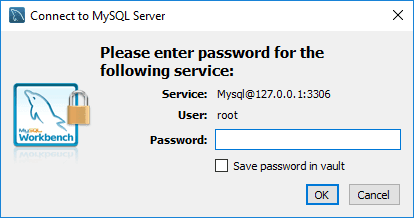
Click Test Connection and enter your root password.
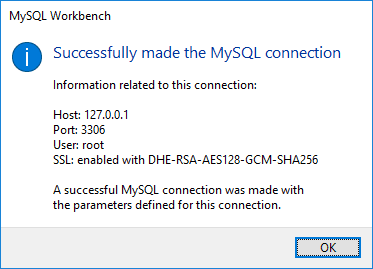
Once successful, click OK to save the connection.
Open the new connection and run
SELECT * from sys.versionto confirm installation.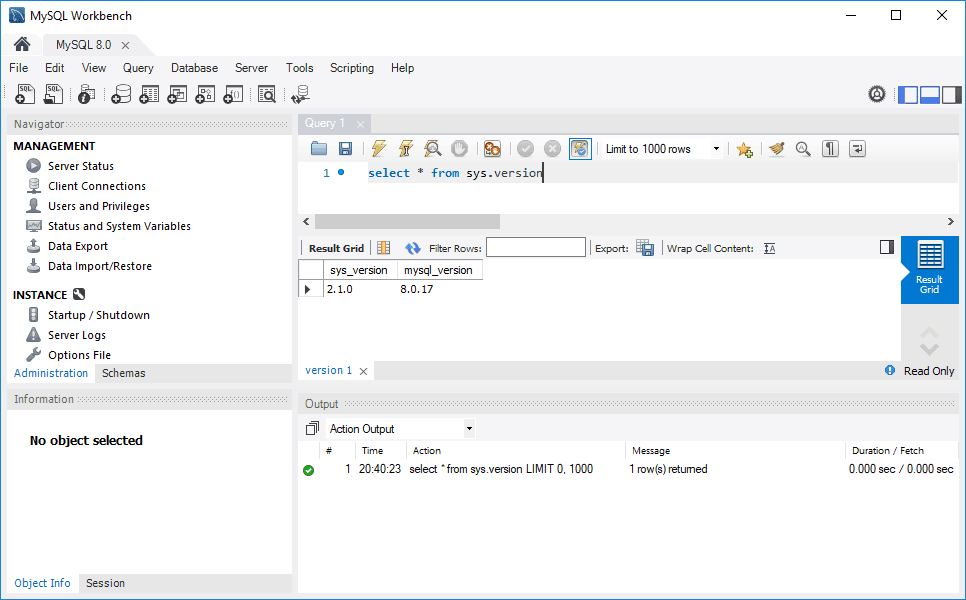
Best Practices After Installation
Create New Users: Avoid using the root account for day-to-day tasks.
Enable Backups: Use MySQL Dump or automated backup solutions.
Secure MySQL: Run
mysql_secure_installationto enhance security settings. -
How to Run Scheduled Tasks with SQL Server Express
SQL Server Express lacks SQL Server Agent, which means scheduling tasks like index maintenance, backups, and other recurring operations requires an alternative approach. The best way to achieve this is by using Windows Task Scheduler with
sqlcmdand a batch script.In this guide, we will walk through the process of setting up and executing scheduled tasks for SQL Server Express using Windows Task Scheduler.
Topics Covered:
– Pre-requisites: InstallSQLCMD
– Create aSQLCMDScript for Scheduling
– Create Scheduled Task forSQLCMDScript
Pre-requisites: Install SQLCMD
Before proceeding, ensure that
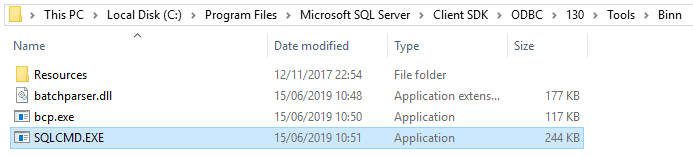
sqlcmdis installed – you can download it from here: sqlcmd Utility (Downloads).Sqlcmd and BCP clients are included with SQL Server Management Studio (SSMS), so if you have that installed on your computer you should be able to find it within the following directory:
C:\Program Files\Microsoft SQL Server\Client SDK\ODBC\<version>\Tools\Bin
Checkout this Microsoft link for more information on file paths for specific SQL apps.
Create a SQLCMD Script for Scheduling
I’m going to create a new
sqlcmdScript that will perform index maintenance for all the databases on the SQL Server.sqlcmd -Q "EXEC master.sys.sp_MSforeachdb 'USE [?]; EXEC sp_updatestats'; EXEC dbo.IndexOptimize @Databases = 'ALL_DATABASES', @FragmentationLow = NULL, @FragmentationMedium = 'INDEX_REBUILD_OFFLINE', @FragmentationHigh = 'INDEX_REBUILD_OFFLINE', @FragmentationLevel1 = 30, @FragmentationLevel2 = 50, @pagecountlevel = 1000" -o "c:\logs\index_maintenance.txt"
Next, I’m saving command in Notepad and save the file with a
.batextension, for example,index_maintenance.bat.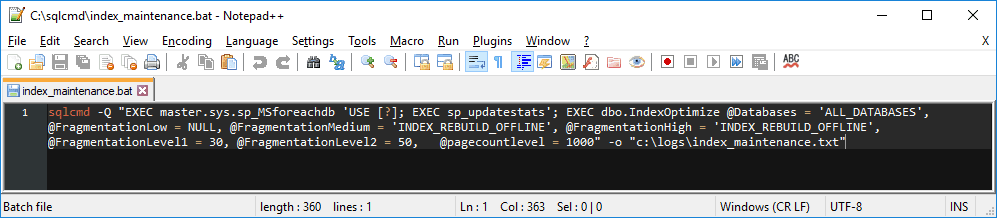
example .bat file for sqlcmd (notepad++) 
example .bat file for sqlcmd (windows explorer) I’m going to create a new folder for the output log file too:

Before scheduling the script, we should run it manually to ensure it executes correctly:

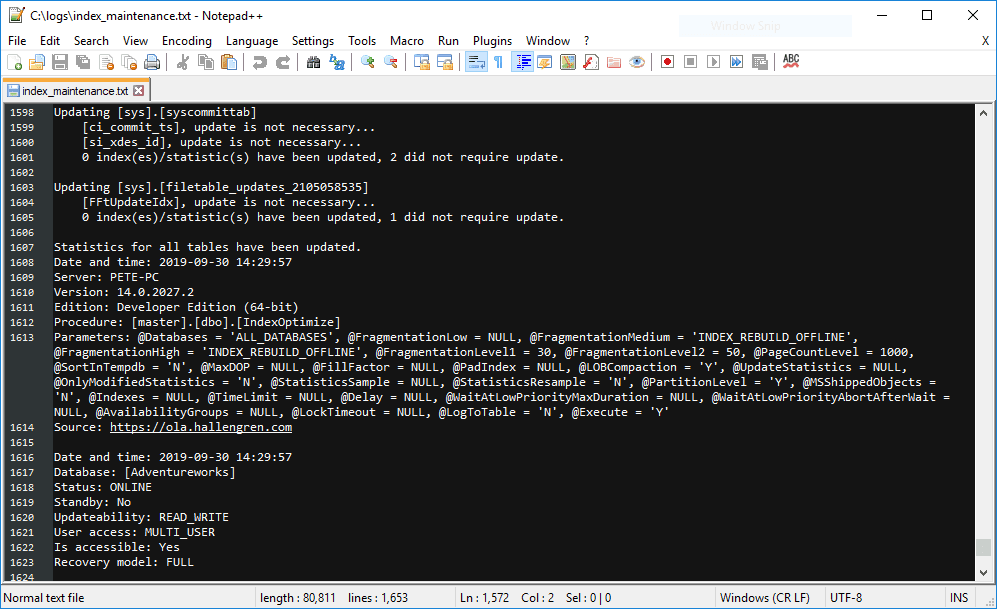
If this is successful, the output will be saved in
C:\logs\index_maintenance.txt.
Create a Scheduled Task for SQLCMD Script
Now that the script is ready and tested, we can automate it using Windows Task Scheduler.
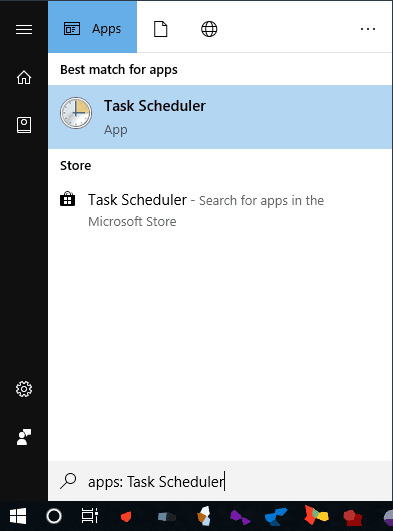
Step 1: Open Windows Task Scheduler
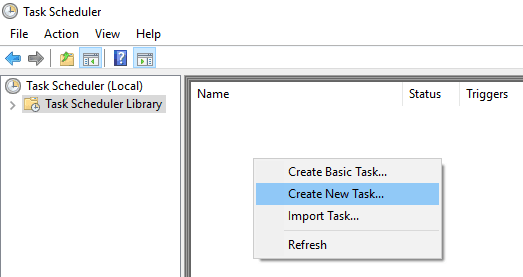
Step 2: Create New Scheduled Task
>> General Tab
– Provide a meaningful name, e.g., SQL Index Maintenance.
– Set the user account for execution (ensure it has “Log on as a batch job” permissions).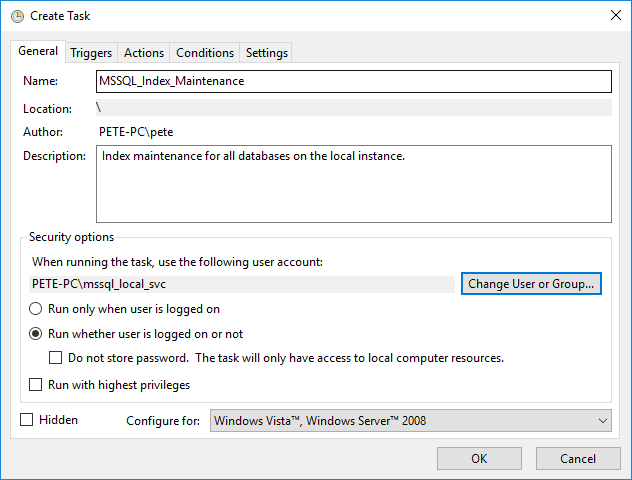
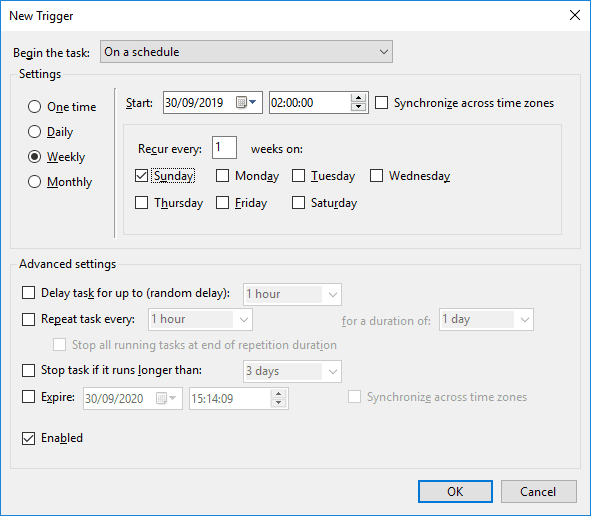
>> Triggers Tab
– Set the schedule (e.g., Weekly at 2 AM on Sundays).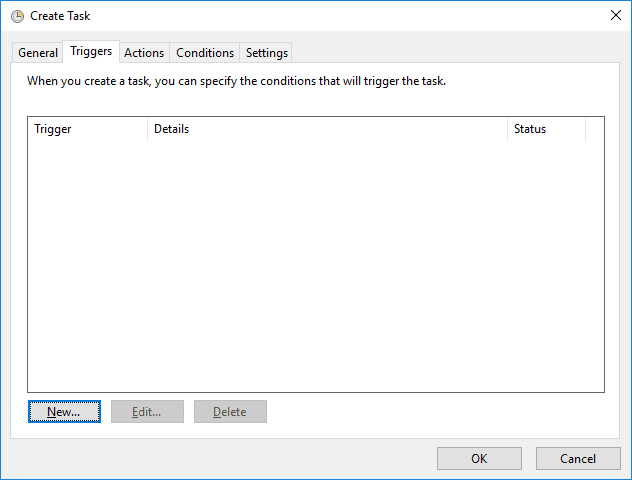
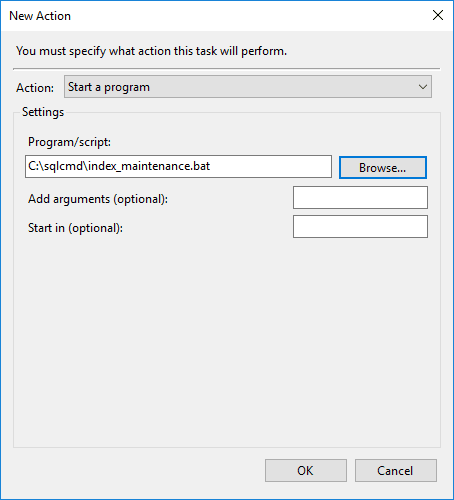
>> Actions Tab:
– Choose Start a Program.
– Browse to and select the.batfile created earlier.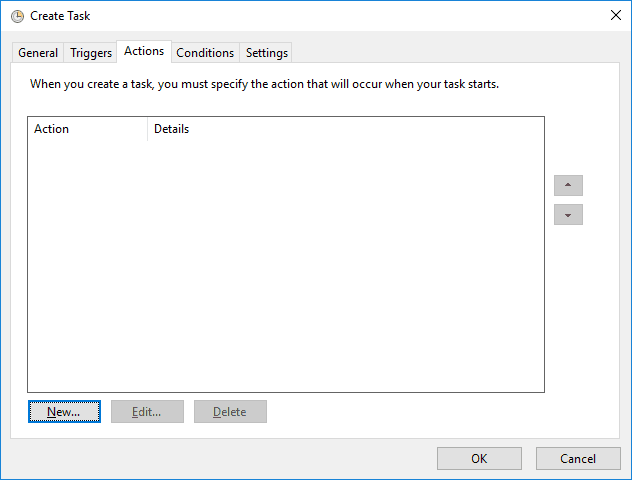
>> Settings Tab:
– Configure additional options such as retry attempts and stopping the task if it runs too long.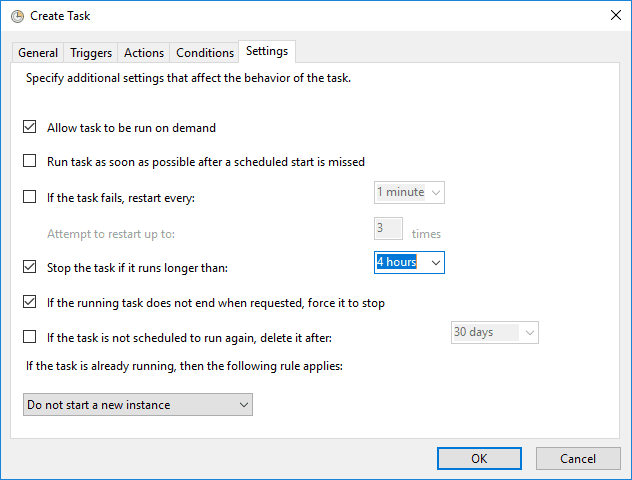
Step 3: Test and Verify the Task
Manually run the scheduled task by right-clicking and selecting Run. Verify execution by reviewing the Task Scheduler History, and check script output locations for further verification.
Manual Task Execution:
When you run a task manually, you’ll be prompted to enter a username and password if the task is set to use an AD service account.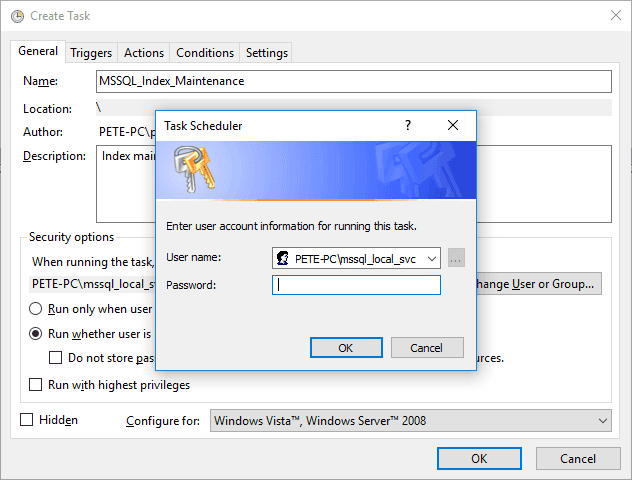
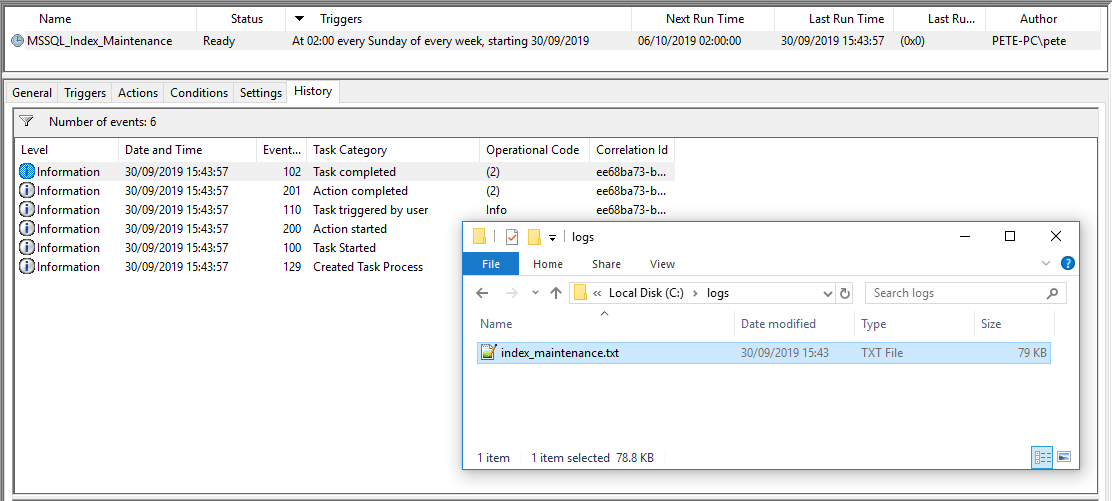
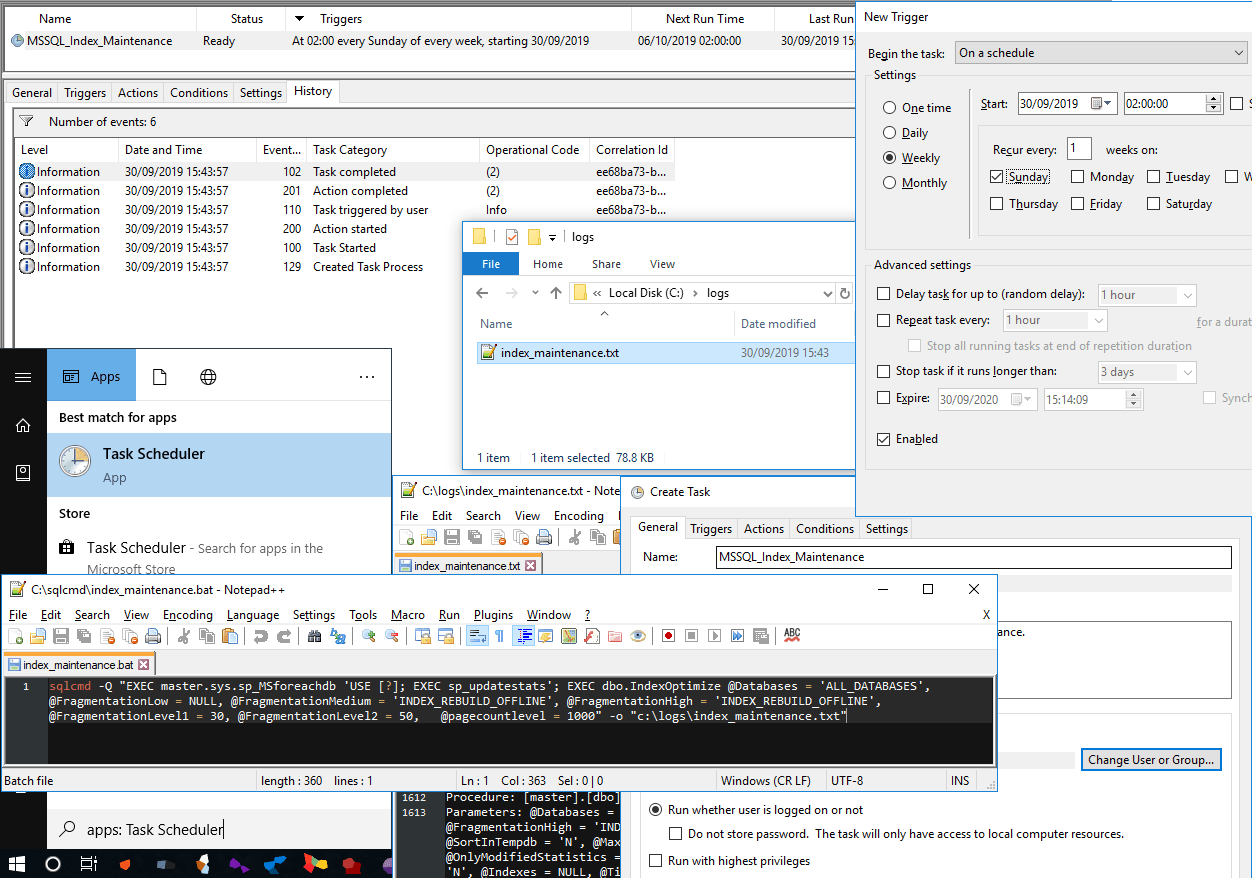
Scheduled Task Execution History:
Post running the new Scheduled Task manually, I can see it ran successfully within the history:
I hope you have now successfully set up a scheduled task for SQL Server Express using Windows Task Scheduler! This guide I’ve shown ensures essential maintenance tasks run automatically without SQL Server Agent.