-
sqlcmd Examples (SQL Server)
The
sqlcmdutility allows you to execute Transact-SQL commands directly from the command line using ODBC, enabling SQL Server batch execution without the need for a GUI. This post containssqlcmdexamples to help you understand it more.sqlcmdis essential for running SQL queries, automating tasks, and managing SQL Server directly from the command line, offering speed and simplicity, especially in environments without a GUI.Prerequisites
Windows Users:
If you have SQL Server Management Studio (SSMS) installed,sqlcmd.exeis likely already available.Linux/macOS/Docker Users:
Downloadsqlcmd(andbcp) from the official Microsoft Documentation.Version Notes
version 13.1 or higher is required for features like Always Encrypted (
-g) and Azure Active Directory Authentication (-G).The Microsoft ODBC Driver for SQL Server 17.6.1 or higher is needed for AAD and Kerberos authentication on macOS/Linux.
1. Finding or Downloading
sqlcmd.exeIf SSMS is installed on your computer,
sqlcmdis also installed too. We can find the application file in the following directory:C:\Program Files\Microsoft SQL Server\Client SDK\ODBC\<version>\Tools\Binn\
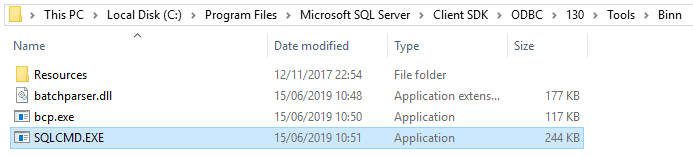
Replace your SQL version number with what’s installed your end. For example, 130 shown in the above screenshot is SQL Server 2016, if 2017 it’ll be 140.
You can open this .exe file or type/run
sqlcmdwithin your terminal:
If connecting to a named instance of SQL Server we need to add the following parameter:
-S <server-name\instance-name>For more information, and if you are having issues connecting with sqlcmd you should look at the MS Docs.
2. Basic
sqlcmdQuery ExamplesOnce
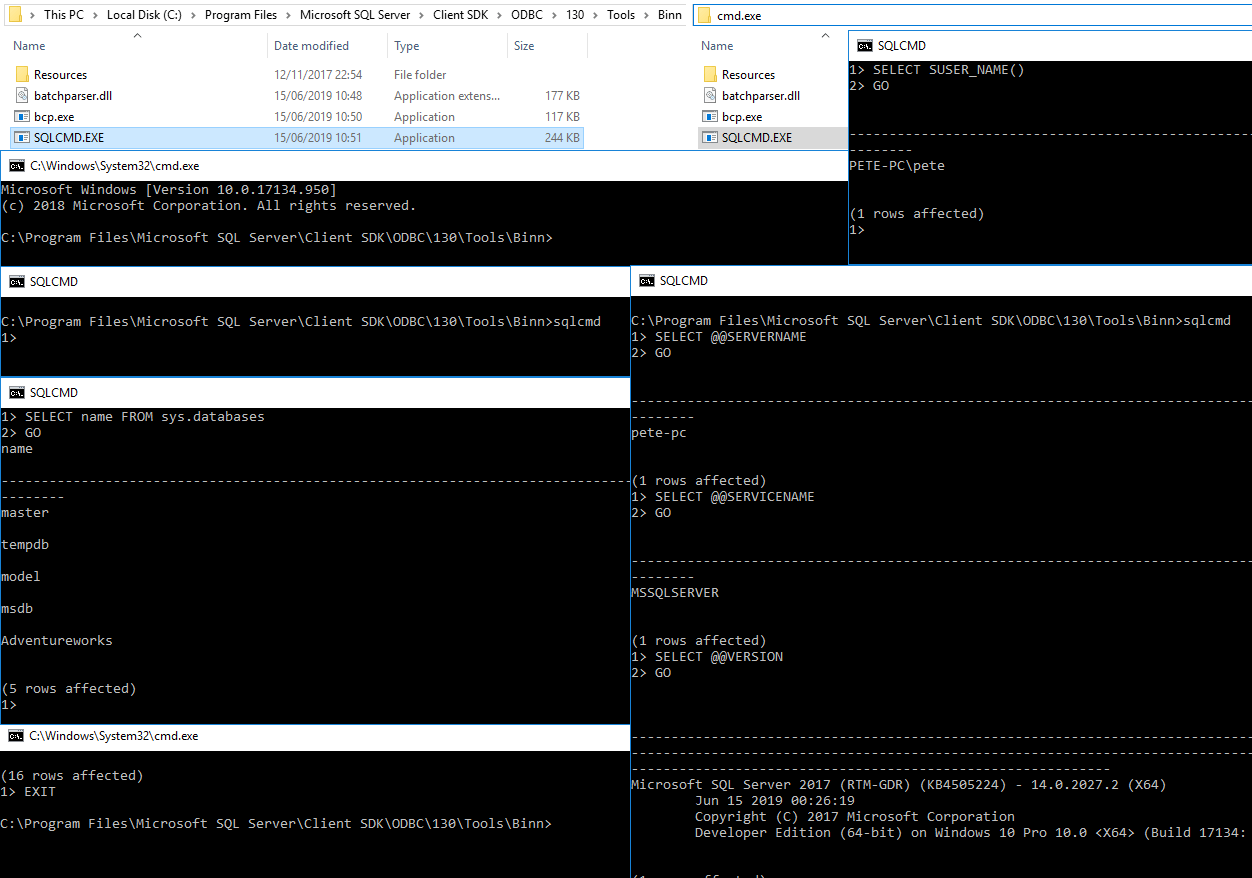
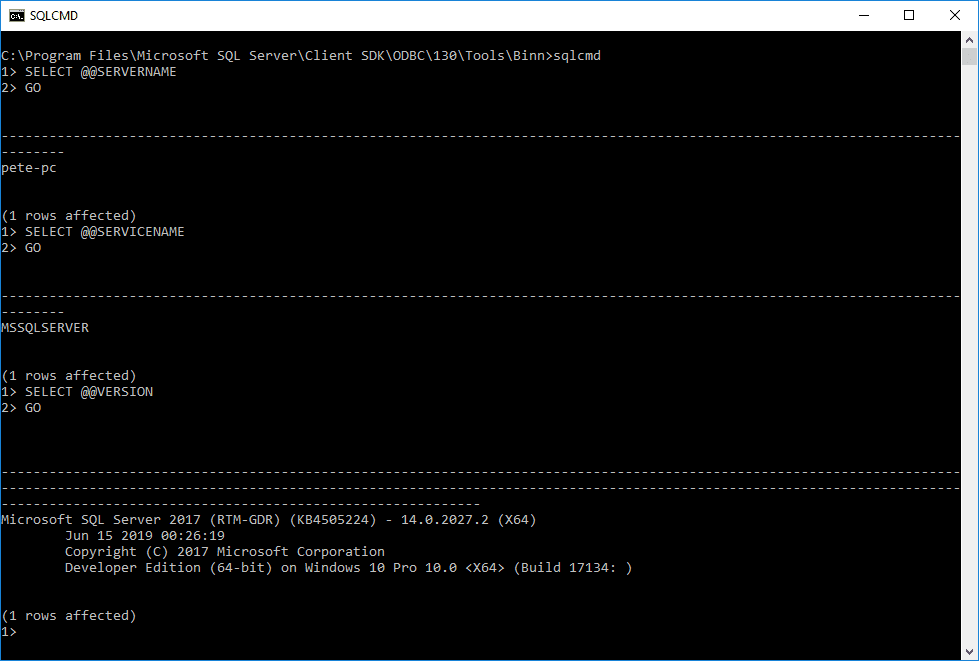
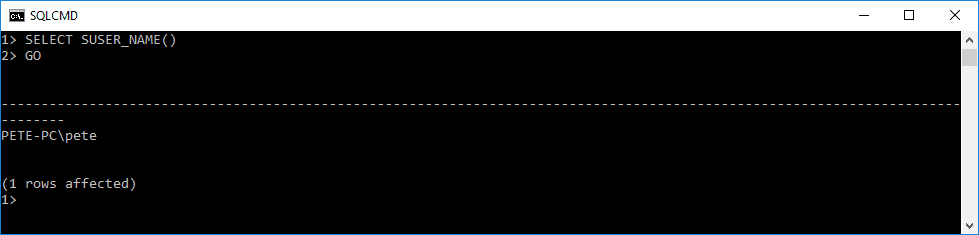
sqlcmdis accessible, you can connect to a SQL Server instance.I’m going to get connected and check the logged-in user in this example:
-- Connect to the SQL Server instance
sqlcmd -S <server-name> -U <username> -P <password>

-- Get the SQL Server instance name
SELECT @@SERVICENAME;
GO

-- Check the logged-in SQL Server user
SELECT SUSER_NAME();
GO
Once connected, I can now list all databases on the SQL Server using the following query:
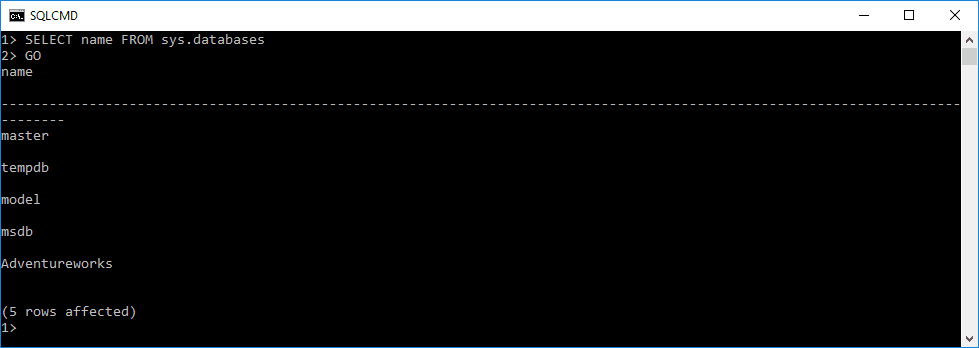
These queries help identify the SQL Server instance, confirm database access, and navigate to a specific database for additional tasks:
To exit
sqlcmd, typeEXITand it enter.
Hope all this was useful!
-
How to Rename Schema’s in SQL Server
Changing the schema of a table in SQL Server can be a rare task for database administrators but a more common requirement for database developers. This guide walks through how to move a table from one schema to another using the
ALTER SCHEMAstatement.During my time as a SQL Database Administrator, assisting with a task like this is a rare event, so it’s great to note some information down.
If you are making this change to a Production SQL Server, you should plan and communicate the change. to ensure all SQL queries that use tables included in this change are updated with the new schema name.
Steps to Change a Table’s Schema
1. Create a New Schema in SQL Server.
Before transferring a table, you may need to create a new schema. I’m running the following SQL command to create a schema named
financein theAdventureWorksdatabase:-- Create a new schema in MS SQL Server CREATE SCHEMA [finance] AUTHORIZATION dbo;
In most cases, setting
dboas the owner is sufficient. However, experienced developers may prefer an alternative schema owner based on specific project requirements.
2. Transfer Table to the New Schema
To move a table to a different schema, use the
ALTER SCHEMAstatement. Here’s how to transfer theDimCurrencytable from thedboschema to thefinanceschema:-- Change schema of table in SQL Server ALTER SCHEMA finance TRANSFER [dbo].[DimCurrency]
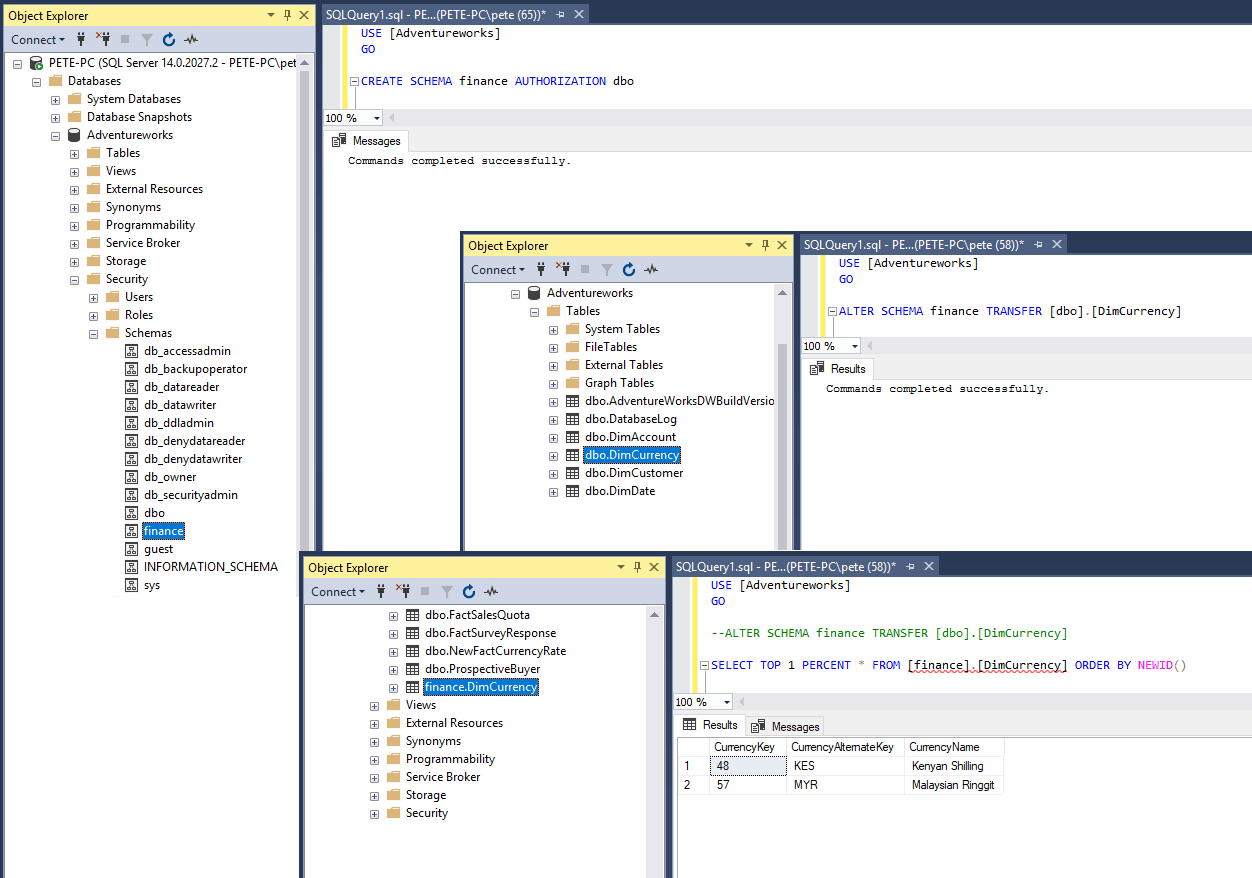
The schema name in the left-most part of the SQL command is the schema we are transferring to, which is the
financeschema in this demo: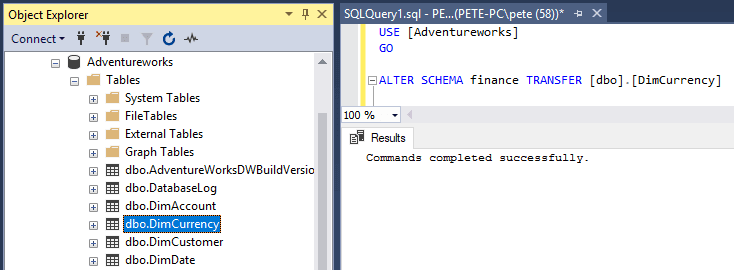
3. Verify the Change
After executing the statement, refresh the tables list in SQL Server Management Studio (SSMS) Object Explorer. The table should now appear under the new schema as
finance.DimCurrency: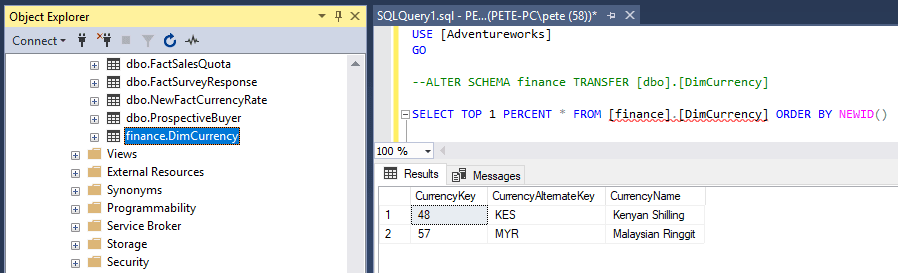
Note: If SSMS shows red squiggly lines under the table name, refresh IntelliSense by pressing
CTRL + SHIFT + Rto update the query window.Important Considerations
> Update Queries:
Ensure all SQL queries referencing the moved table are updated with the new schema name.
> Consult Microsoft Documentation:
For guidance on limitations and restrictions when modifying schemas, refer to the official Microsoft Documentation on transferring ownership of a table.
> Large Tables:
When transferring large tables, consider the impact on performance and plan for potential downtime or maintenance windows to minimize disruption.I hope this guide has helped you out, feel free to check out more of the links you see around here for tips from an experienced SQL Server DBA!
-
Adding & Removing SQL Features via Command
This post will guide you on how to add and remove features from SQL Server via the command line. The process includes checking installed features, installing a new feature (such as replication), and uninstalling a feature when no longer needed.
The following areas will be covered within this post:
1. Checking Features Installed on a SQL Server
2. 2. Installing a SQL Server Feature (Replication)
3. 3. Uninstalling a SQL Server Feature (Replication)
1. Checking Features Installed on a SQL Server
Before installing or removing features, it’s essential to know which features are already installed on your SQL Server instance.
Prerequisite: Mounted SQL Server ISO
We should ensure that the SQL Server installation media is available and mounted before continuing. This will allow you to run the discovery process necessary for feature management.Running the Discovery Command
To check the installed features, run the following command to perform a “Discovery” of the SQL Server instance.
This command will initiate the discovery process, which will briefly scan your system and provide details about the features installed on your SQL Server instance.Setup.exe /q /ACTION=RunDiscovery

Viewing the Discovery Results
Once the discovery process completes, you can view the results in theSummary.txtfile. The file will typically be located in theC:\Program Files\Microsoft SQL Server\<version>\Setup Bootstrap\Logdirectory.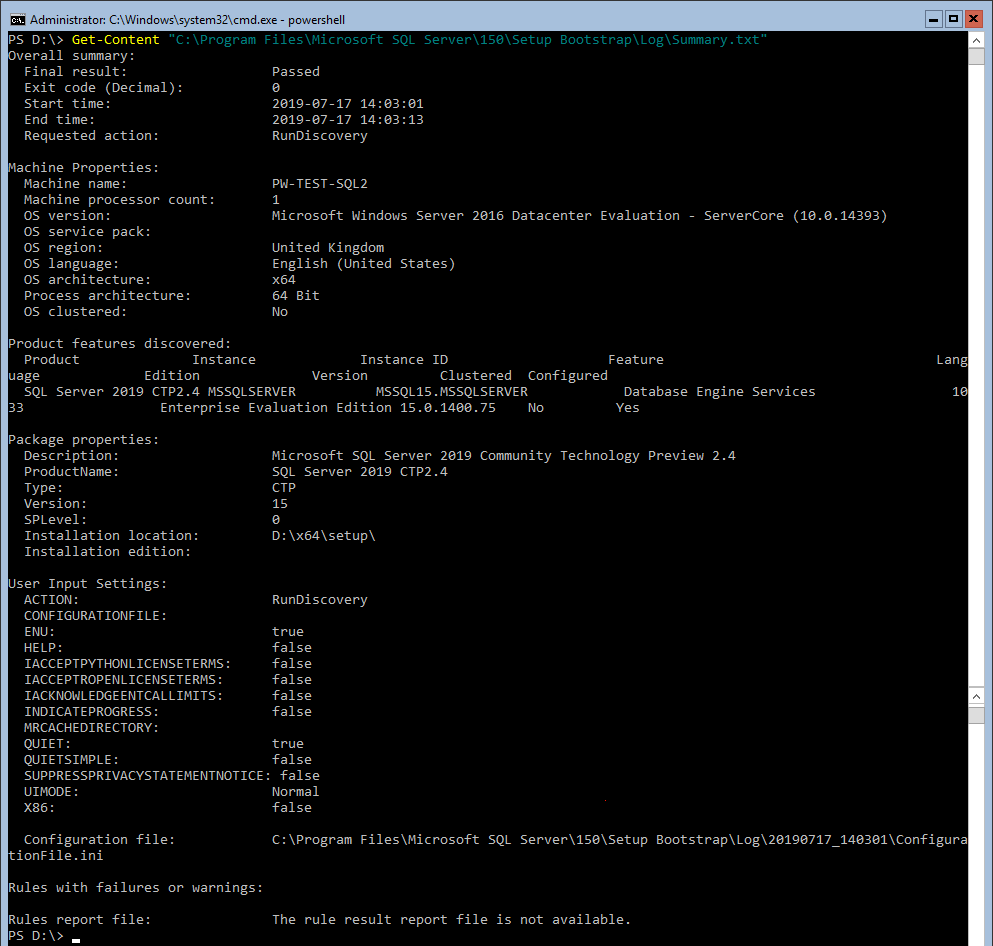
2. Installing a SQL Server Feature (Replication)
Now that you know how to check for existing features, let’s move on to adding a new feature. In this example, we will install the Replication feature.
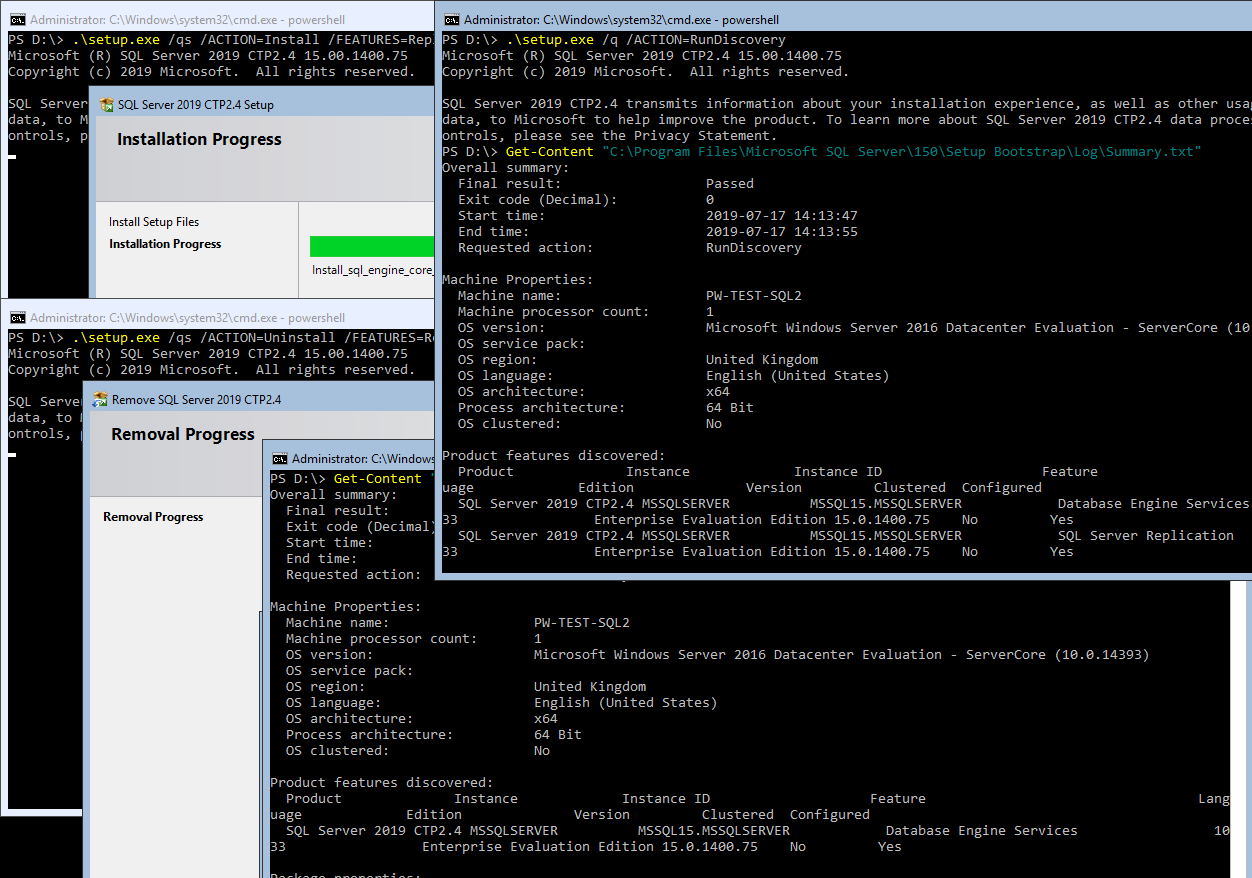
Installing the Replication Feature
To install the Replication feature via the command line, use the following syntax:.\Setup.exe /qs /ACTION=Install /FEATURES=Replication /INSTANCENAME=MSSQLSERVER /IACCEPTSQLSERVERLICENSETERMS
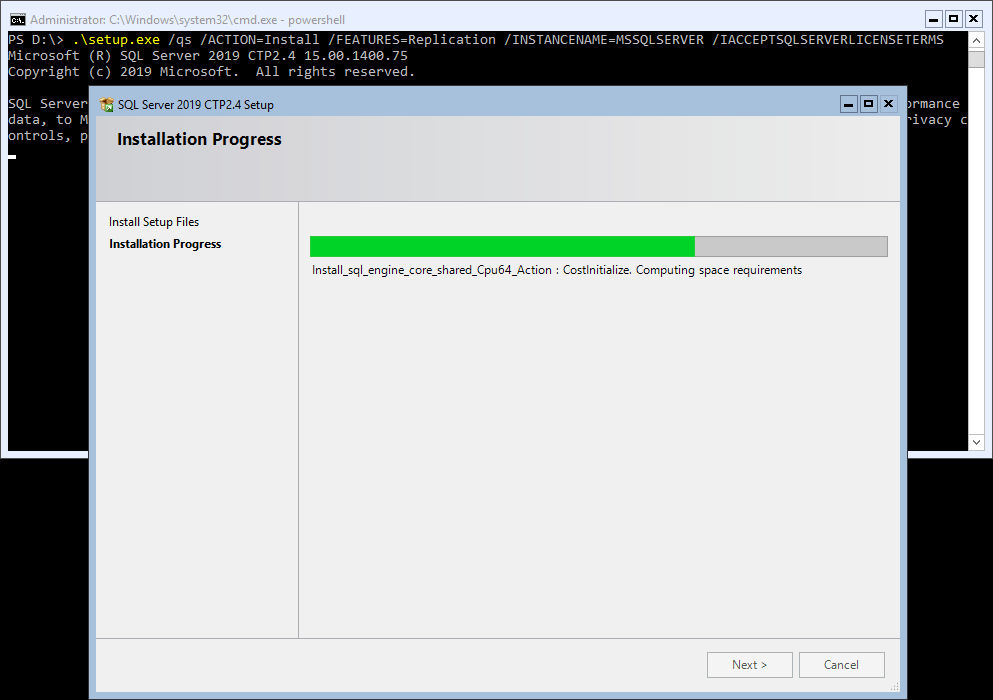
Here’s a breakdown of the parameters:
/ACTION=Install: This tells the installer to install a new feature./FEATURES=Replication: Specifies that you want to install the Replication feature./INSTANCENAME=MSSQLSERVER: Indicates the name of the SQL Server instance where the feature will be installed.Verifying the Installation
After running the installation command, you can verify the feature installation by performing another Discovery.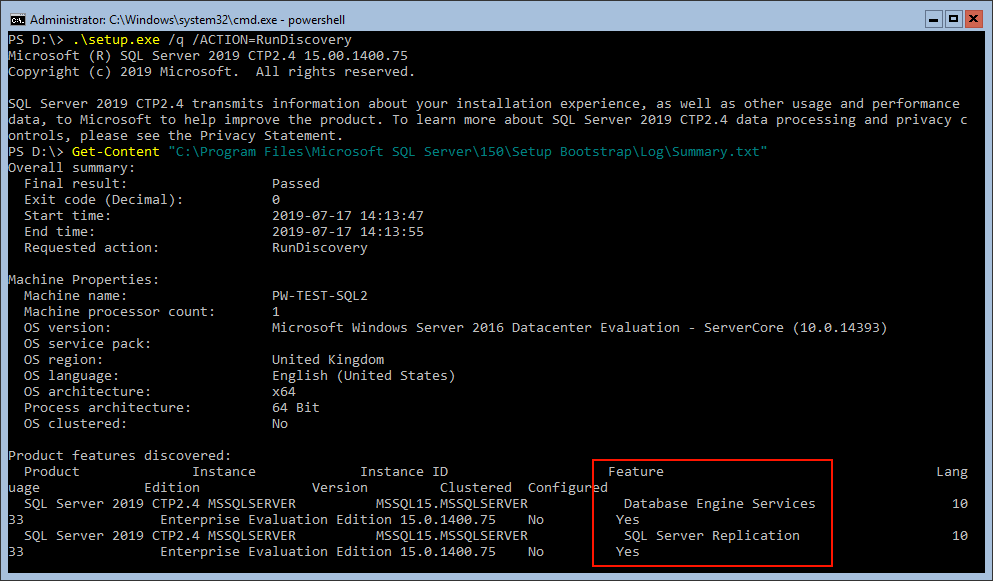
3. Uninstalling a SQL Server Feature (Replication)
If you decide to remove a feature that is no longer needed, the process is just as straightforward as installation.
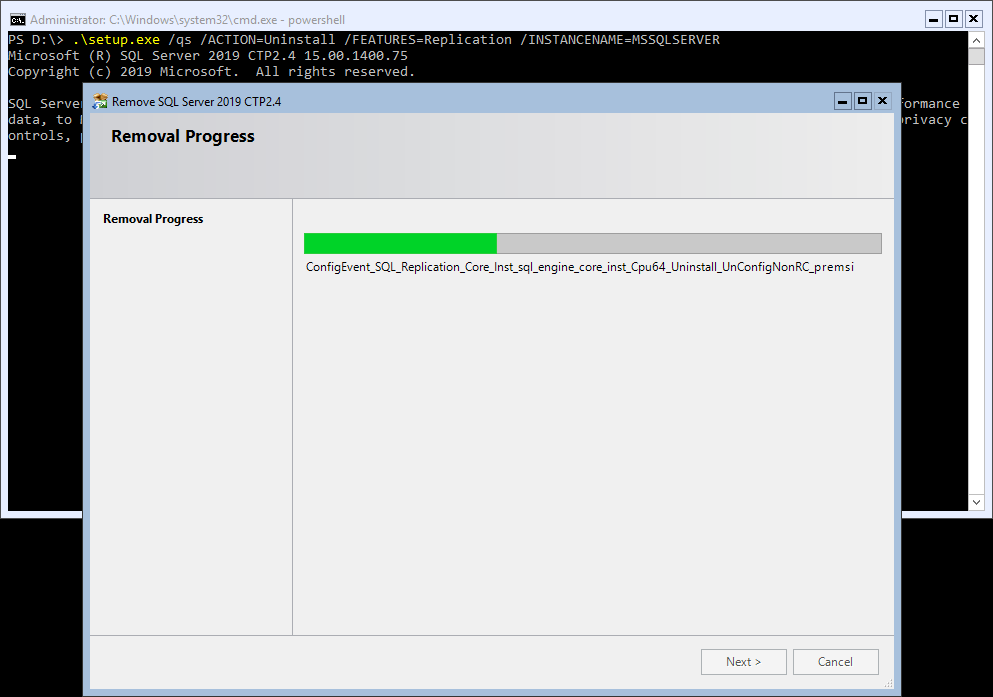
Uninstalling the Replication Feature
To uninstall the Replication feature from your SQL Server instance, use the following command:Setup.exe /q /ACTION=Uninstall /FEATURES=Replication /INSTANCENAME=MSSQLSERVER
Verifying the Uninstallation
Once uninstallation is complete, run the Discovery command once more to verify that Replication has been removed.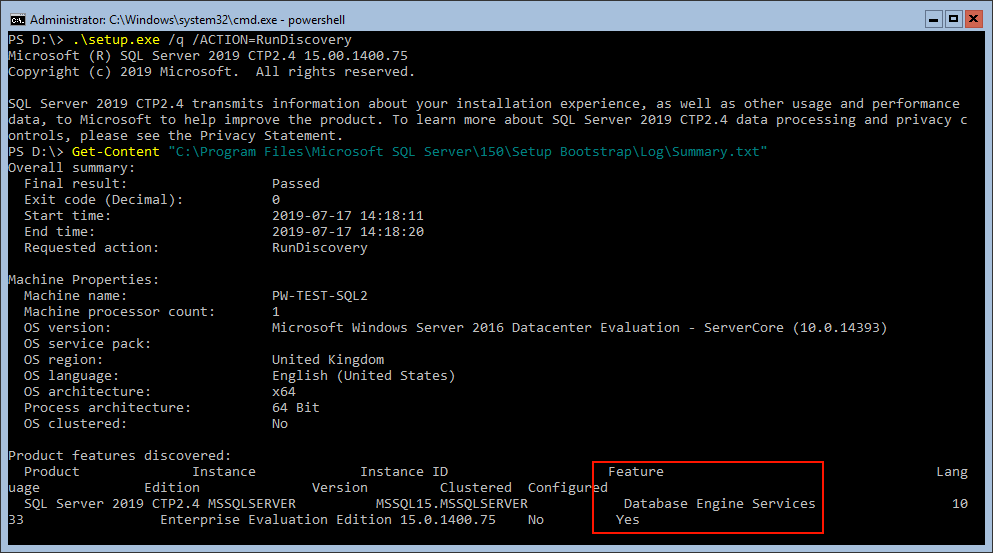
We can check the
Summary.txtfile to confirm that the Replication feature is no longer listed.Hope this was all useful for you. For more information, check out the MS Docs on adding new features to SQL Server. We should always read those docs before making any changes.
-
Install/Uninstall SQL Server via Command
Installing and uninstalling SQL Server via command line can be useful, especially in environments without a GUI.
In this guide, I’ll walk through installing SQL Server on Windows Server Core, in a local Hyper-V test environment. At the end I’ll also uninstall SQL Server from a PowerShell terminal window.
There’s 4 parts to this one:
> 1, Download a SQL Server ISO
> 2. Mount the ISO on a Hyper-V Virtual Machine
> 3. Install SQL Server via Command Line
> 4. Uninstall SQL Server via Command Line1. Download a SQL Server ISO
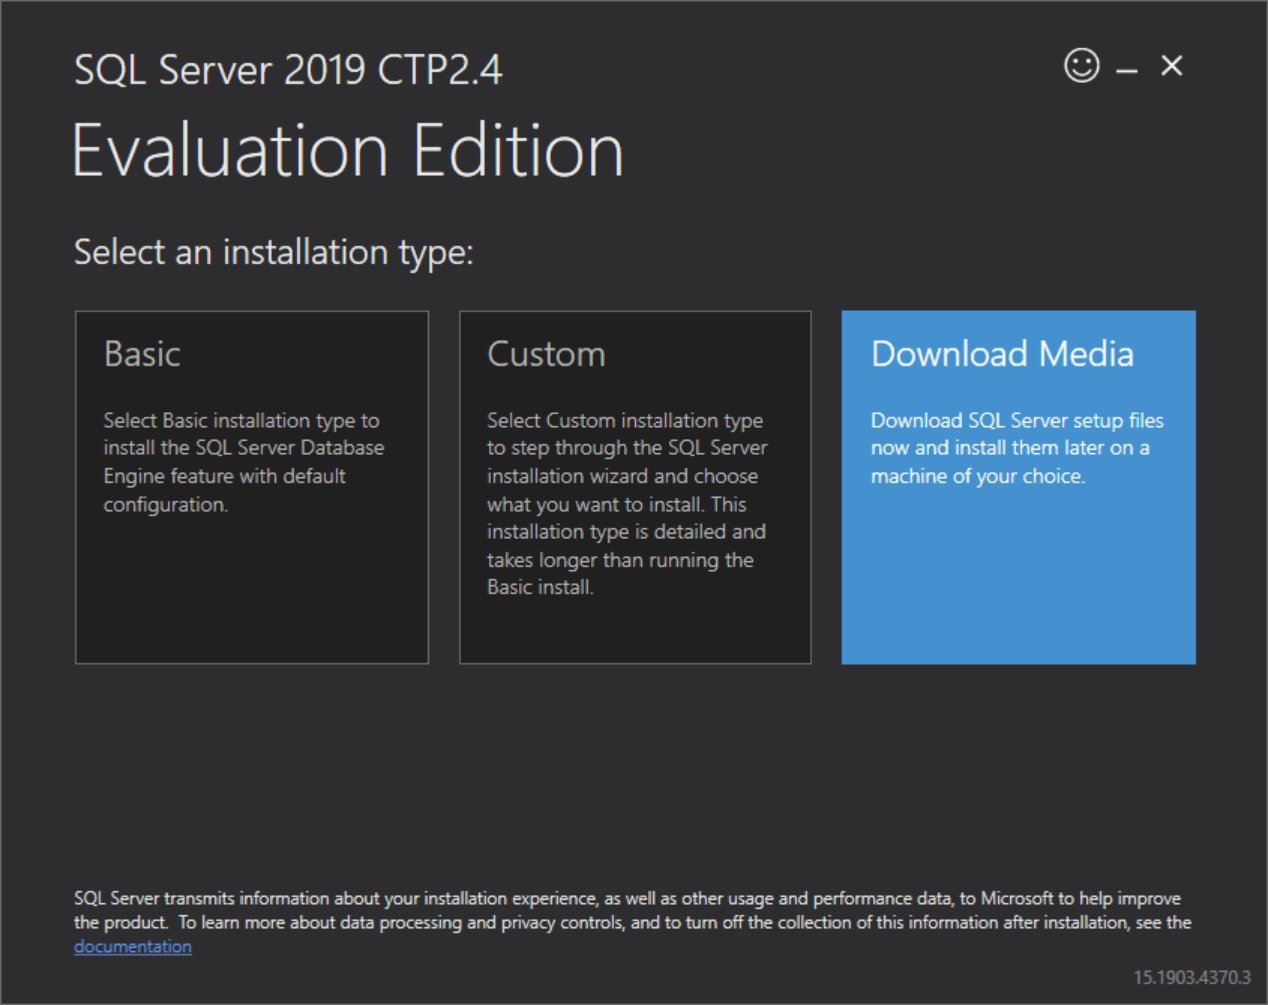
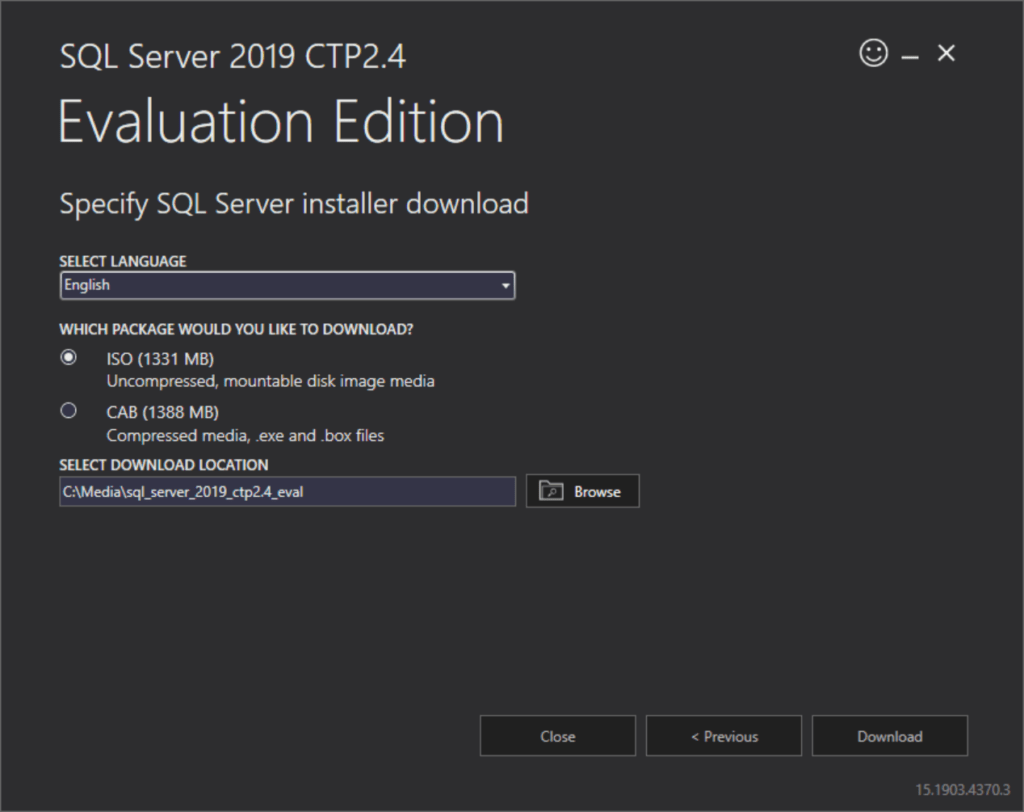
For my test environment, I’m using SQL Server 2019 CTP 2.4, the latest version available at the time.
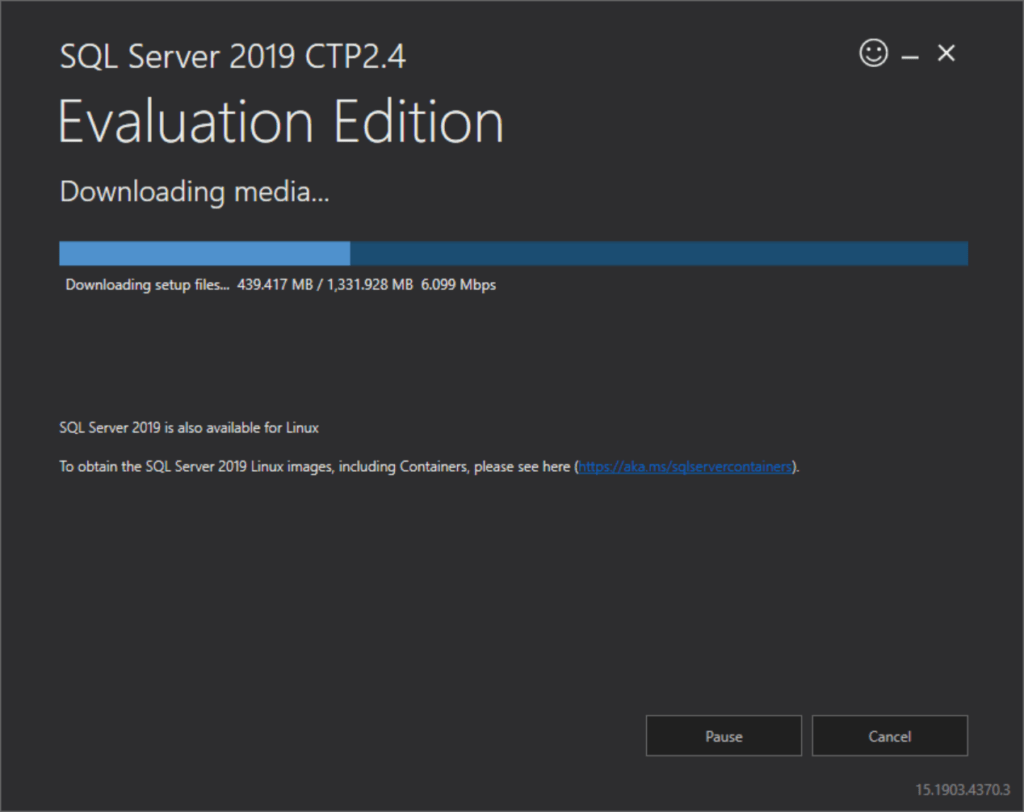
You can download SQL Server 2019 from Microsoft’s official site. Choose the media type that suits your setup, ISO files work well for virtual environments like Hyper-V.

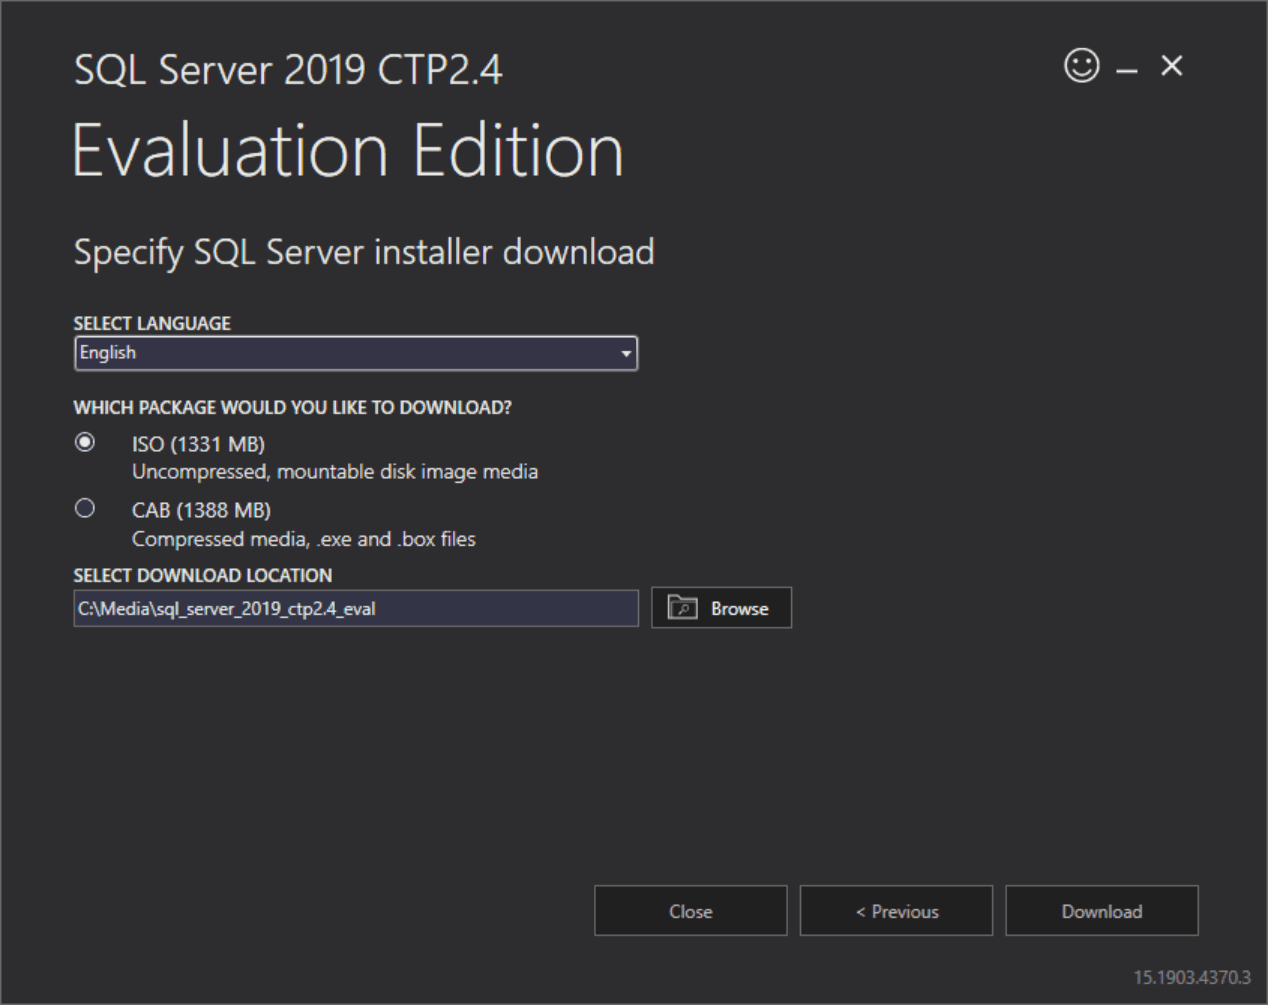
Select ISO within this setup menu, and select a download location:
2. Mount the ISO on a Hyper-V Virtual Machine
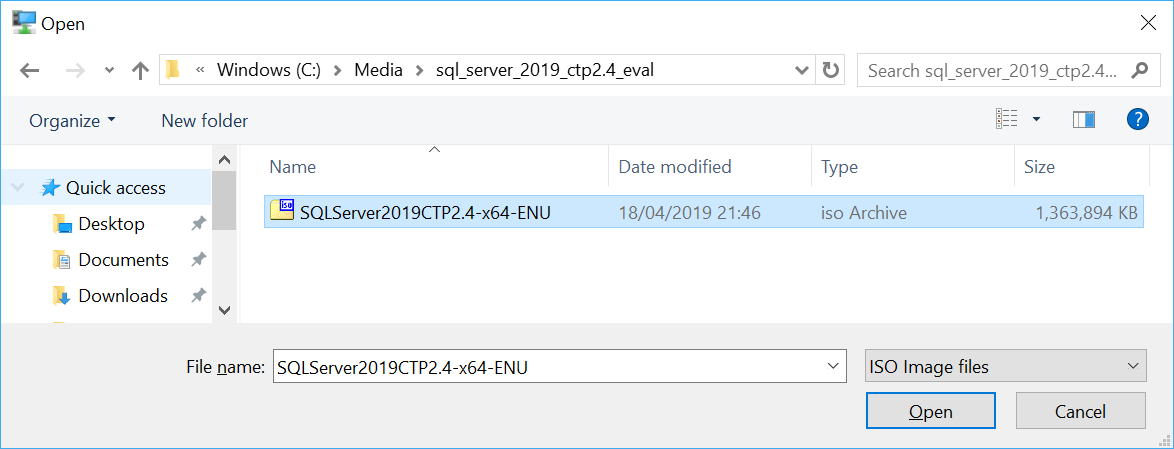
In Hyper-V, navigate to Media > Insert Disk…

Select the downloaded SQL Server ISO file.

3. Install SQL Server via Command Line
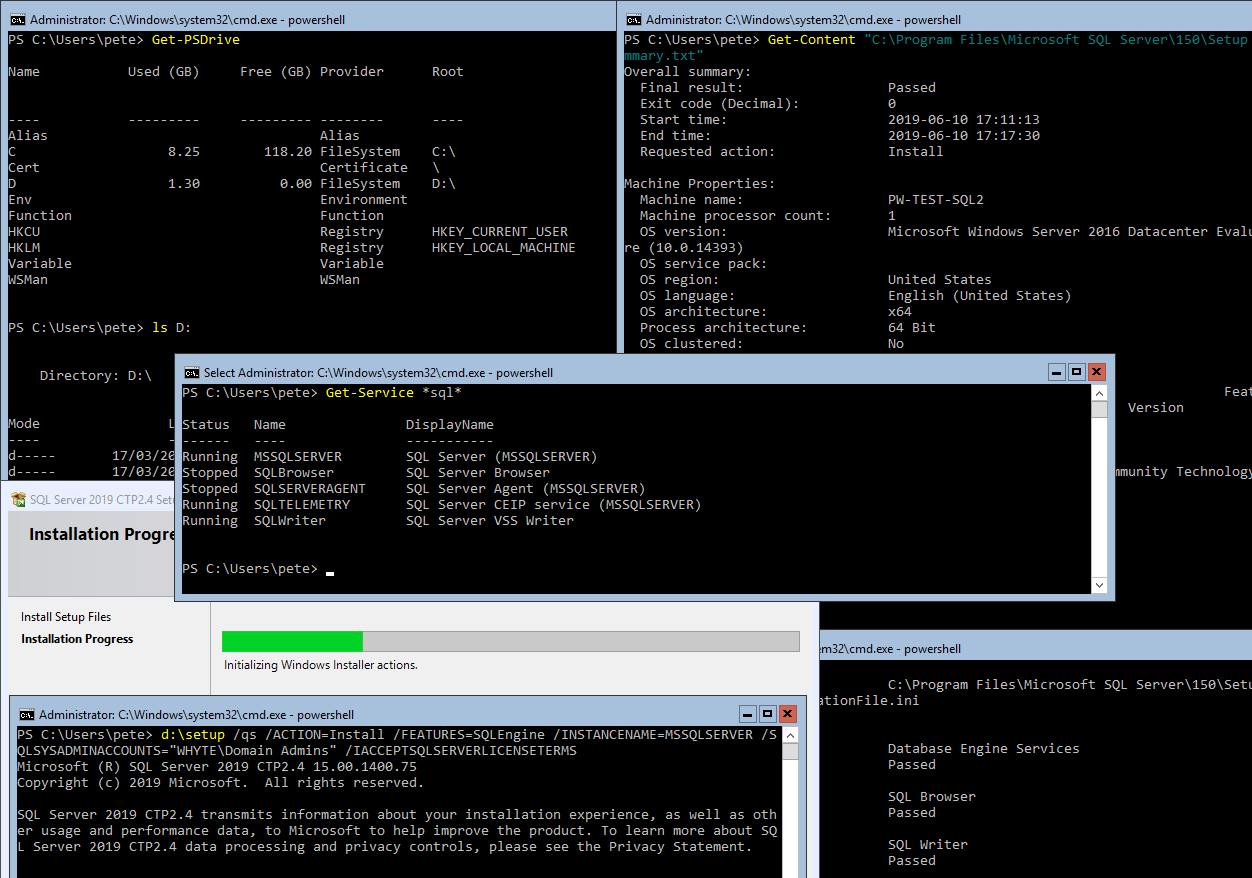
1. First, check available drives using the following PowerShell command:
# Show mounted drives (includes ISO's)
Get-PSDrive

# List contents of directory
ls

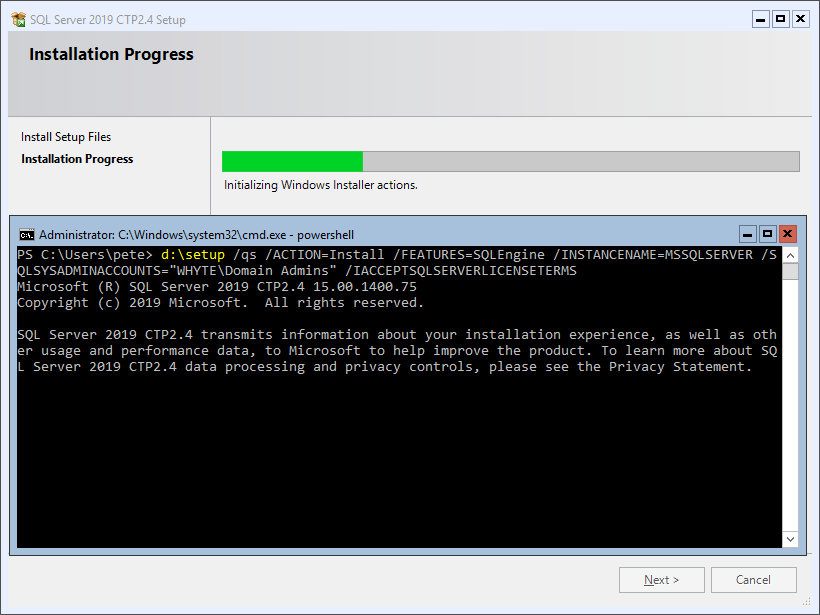
2. Install SQL Server using your preferred parameters. Here’s an example where I add the Domain Admins group as sysadmins for quick access:
# Start SQL Server install via command
d:\setup.exe /qs /ACTION=Install /FEATURES=SQLEngine /INSTANCENAME=MSSQLSERVER /SQLSYSADMINACCOUNTS="WHYTE\Domain Admins" /IACCEPTSQLSERVERLICENSETERMS
3. Verify the installation by checking the Summary.txt file:
# Check SQL installation/upgrade log file
Get-Content "C:\Program Files\Microsoft SQL Server\150\Setup Bootstrap\Log\Summary.txt"
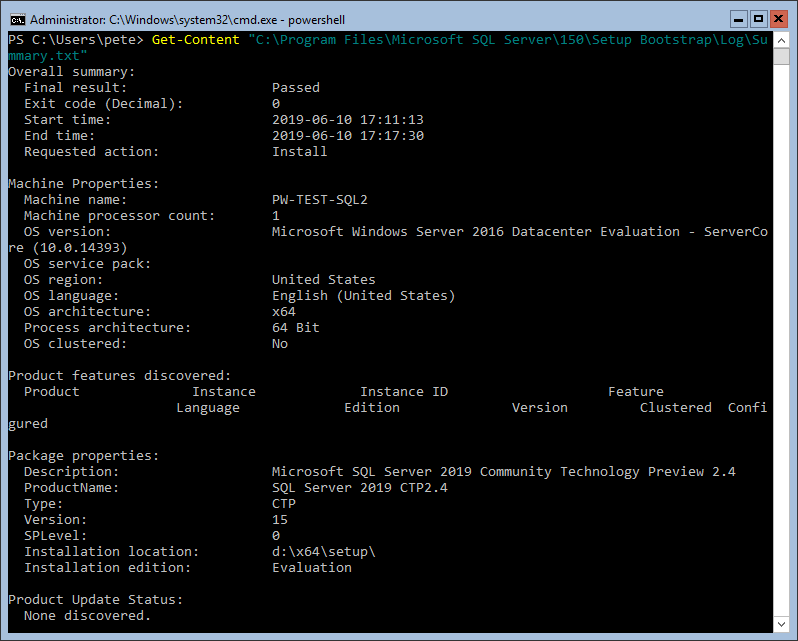
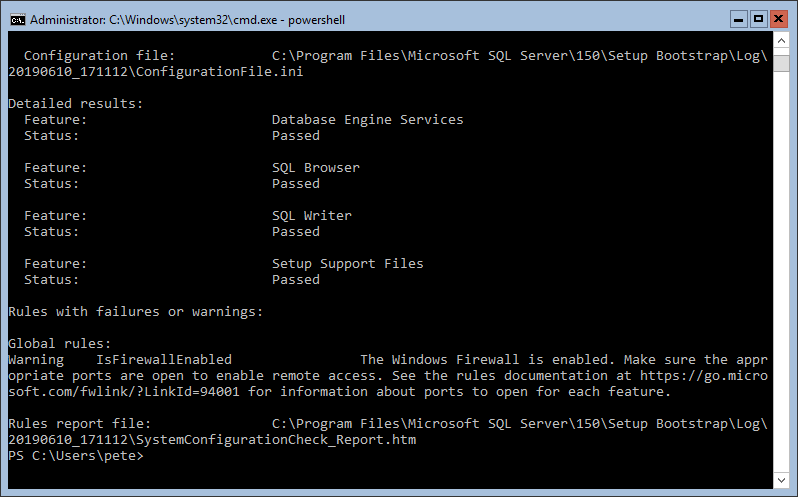
This file provides installation details, including the configuration INI file used for unattended installs.
4. Finally, confirm that SQL Server services are running:
# Show running SQL Services
Get-Service | Where-Object { $_.Name -like "*SQL*" }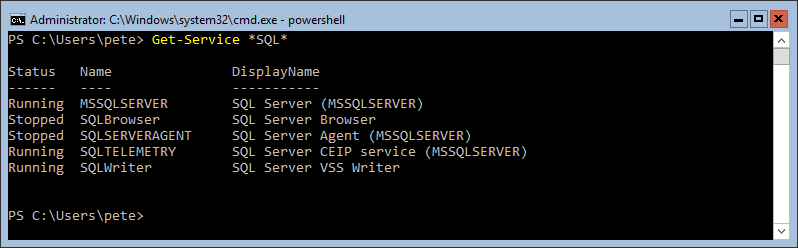
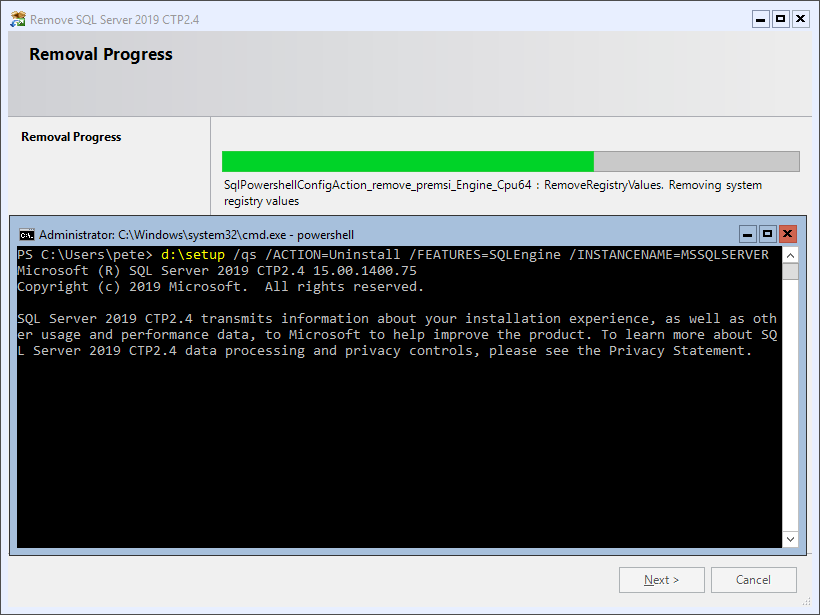
4. Uninstall SQL Server via Command Line
Uninstalling SQL Server via CLI is just as straightforward:
# Uninstall SQL Server via command
d:\setup.exe /qs /ACTION=Uninstall /INSTANCENAME=MSSQLSERVER
Once completed, check the Summary.txt file as we done post install, and verify that all SQL services have been removed:
# Show any running SQL Services
Get-Service | Where-Object { $_.Name -like "*SQL*" }
With these commands, you can efficiently manage SQL Server installations in a non-GUI environment. Hope this was useful for you!
-
Guide for Setting Up Windows Server Core
When you need to setup Windows Server Core, it’s useful to first familiarize ourselves with the key PowerShell commands that configure the server.
Windows Server Core is a minimal installation option that provides a lightweight, command-line interface (CLI)-only environment, making it ideal for environments requiring lower resource usage and enhanced security. However, if you’re new to PowerShell, navigating this environment may seem challenging at first.
This guide provides a step-by-step walkthrough for configuring a new Windows Server 2016 Core host, covering the following:
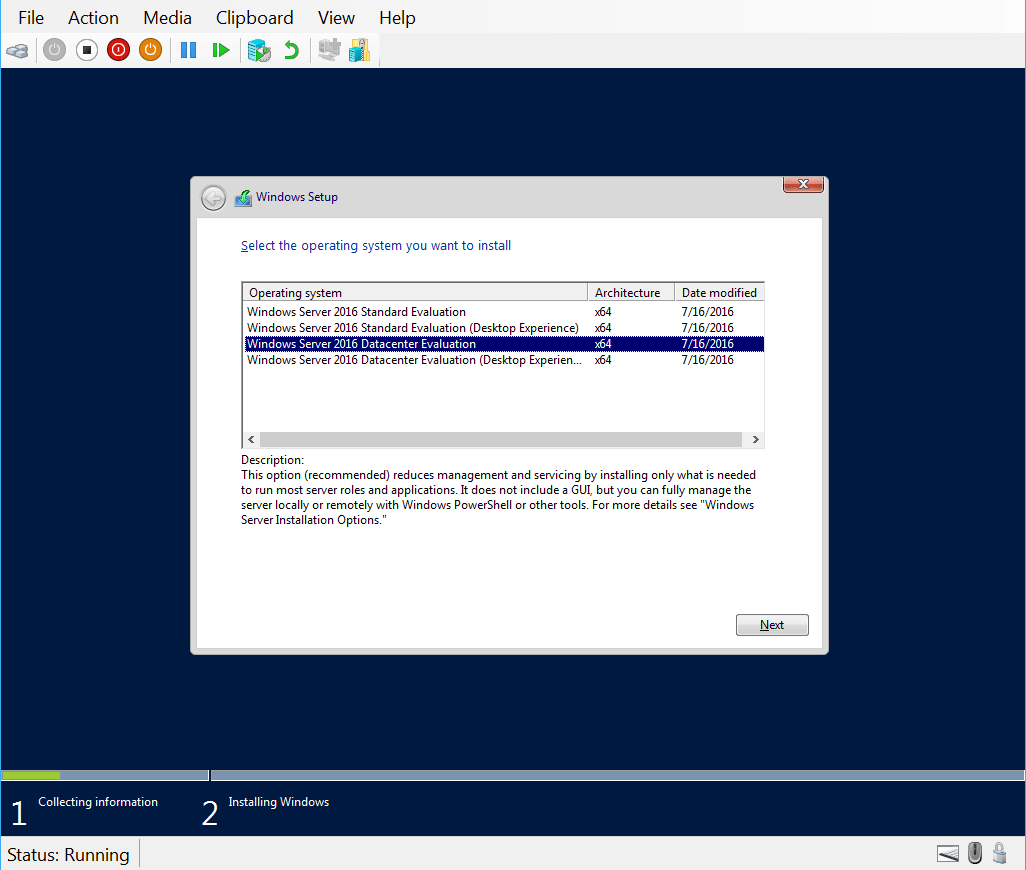
> Installing Windows Server Core
> Changing a Windows Server Hostname via CLI
> Configuring TCP/IP & DNS Settings
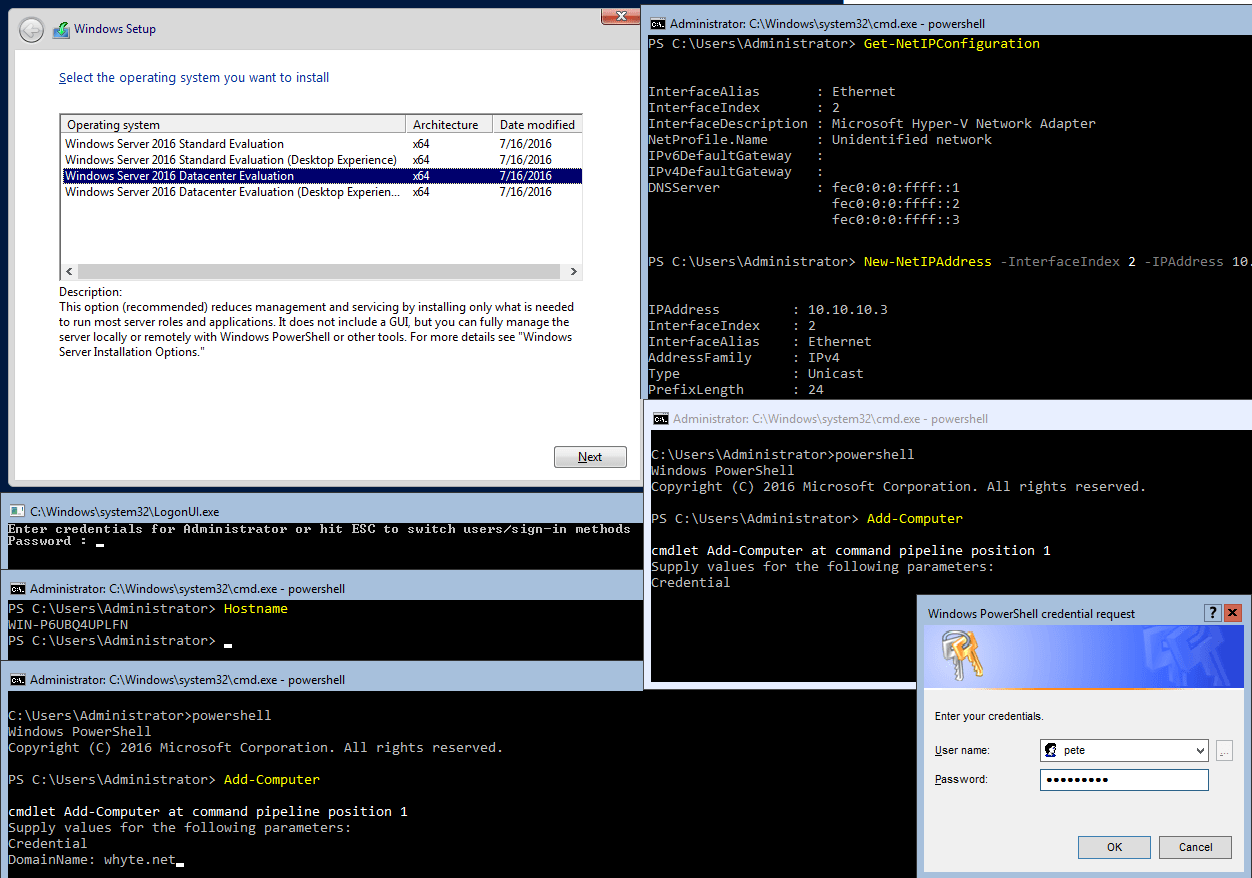
> Joining a Windows Server to a Domain1. Installing Windows Server Core
During the Windows Server OS installation, select the Windows Server Core option:

Once the installation completes, you’ll be prompted to set an Administrator password:

Enter a secure password for the built-in Administrator user:

After logging in, you’ll see the CLI environment, ready for configuration:

2. Changing a Windows Server Hostname
To change the hostname, use the
Rename-Computercmdlet in PowerShell, followed by a reboot:
Tip: Always choose a meaningful hostname that reflects the server’s role in your environment.
3. Configuring TCP/IP & DNS Settings
To configure the server’s network settings, follow these steps:
Step 1: Check Current Network Interfaces
Use theGet-NetIPConfigurationcmdlet to display current IP configurations:
Step 2: Set a Static IP Address
Use theNew-NetIPAddresscmdlet to configure a private IP address: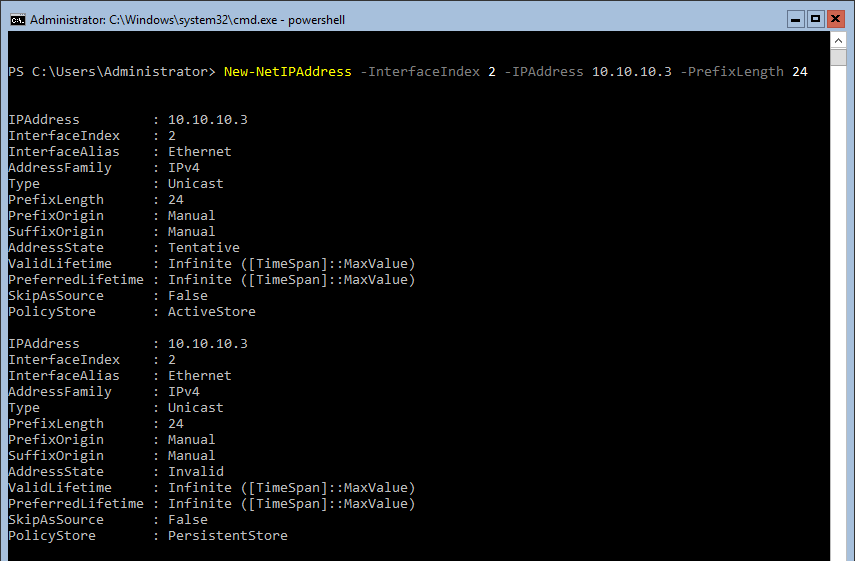
Step 3: Configure DNS Server
Set the DNS server address using theSet-DnsClientServerAddresscmdlet:
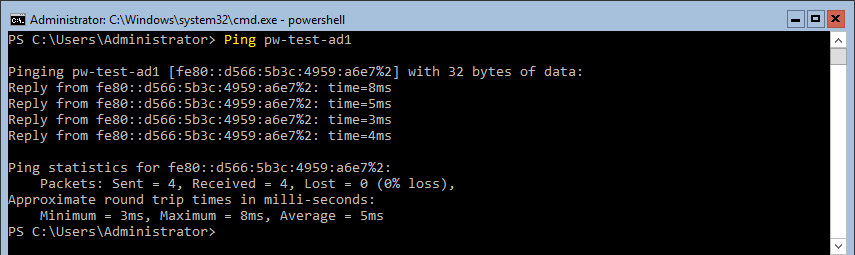
Step 4: Verify Network Connectivity
Ping the gateway and other hosts to confirm connectivity is good between servers: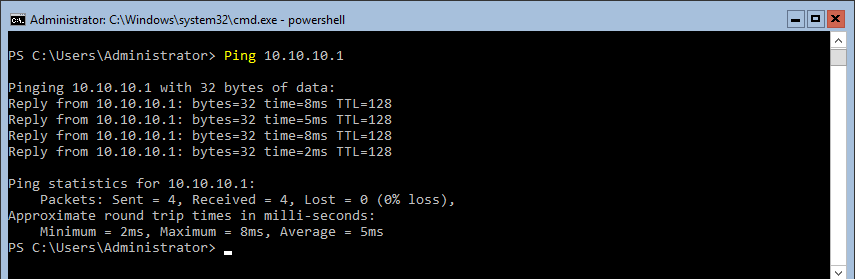
4. Joining a Windows Server to a Domain
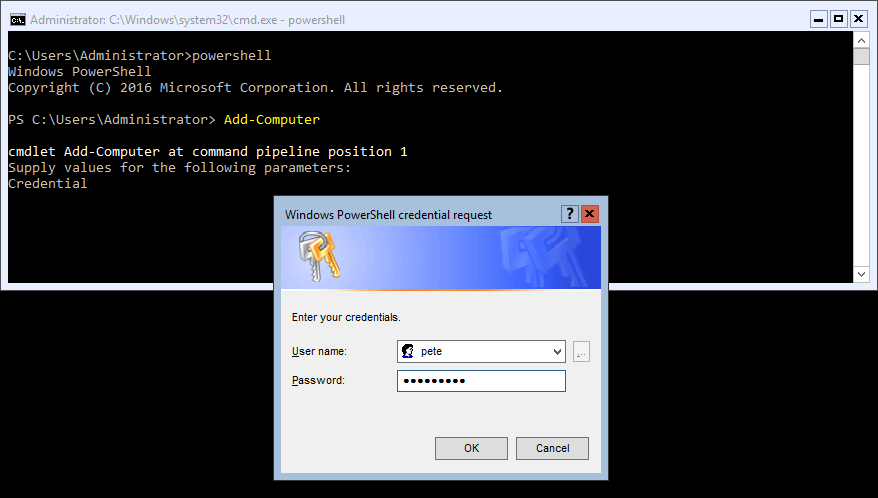
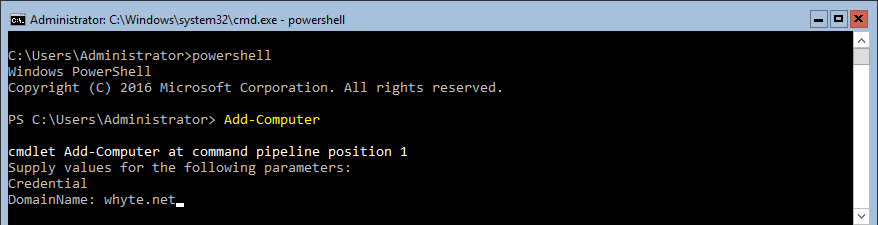
To join a Windows Server to a Domain via CLI, use the
Add-ComputerPowerShell cmdlet:# join computer to domain powershell Add-Computer -DomainName "yourdomain.local" -Credential (Get-Credential)
Enter the domain name and credentials of an account with the necessary permissions.
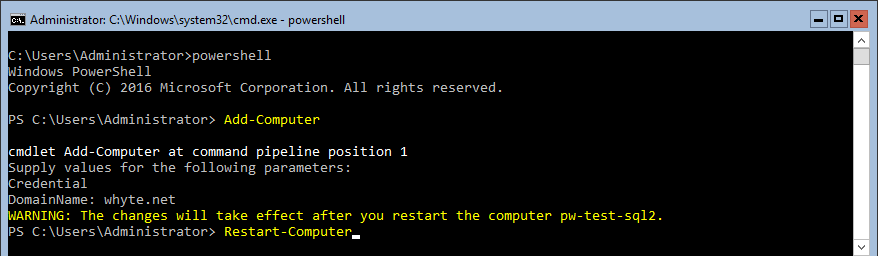
Reboot the server to complete the process:
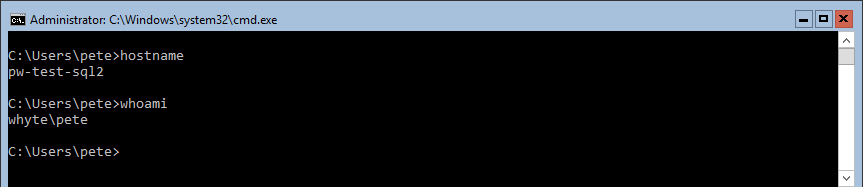
After rebooting, you can log in with either the Local Administrator account or a domain user account:

For domain logins, select Other User and specify the domain credentials.

Hope this Windows Core configuration guide was useful for you!