
This post will guide you on how to add and remove features from SQL Server via the command line. The process includes checking installed features, installing a new feature (such as replication), and uninstalling a feature when no longer needed.
The following areas will be covered within this post:
1. Checking Features Installed on a SQL Server
2. 2. Installing a SQL Server Feature (Replication)
3. 3. Uninstalling a SQL Server Feature (Replication)
1. Checking Features Installed on a SQL Server
Before installing or removing features, it’s essential to know which features are already installed on your SQL Server instance.
Prerequisite: Mounted SQL Server ISO
We should ensure that the SQL Server installation media is available and mounted before continuing. This will allow you to run the discovery process necessary for feature management.
Running the Discovery Command
To check the installed features, run the following command to perform a “Discovery” of the SQL Server instance.
This command will initiate the discovery process, which will briefly scan your system and provide details about the features installed on your SQL Server instance.
Setup.exe /q /ACTION=RunDiscovery

Viewing the Discovery Results
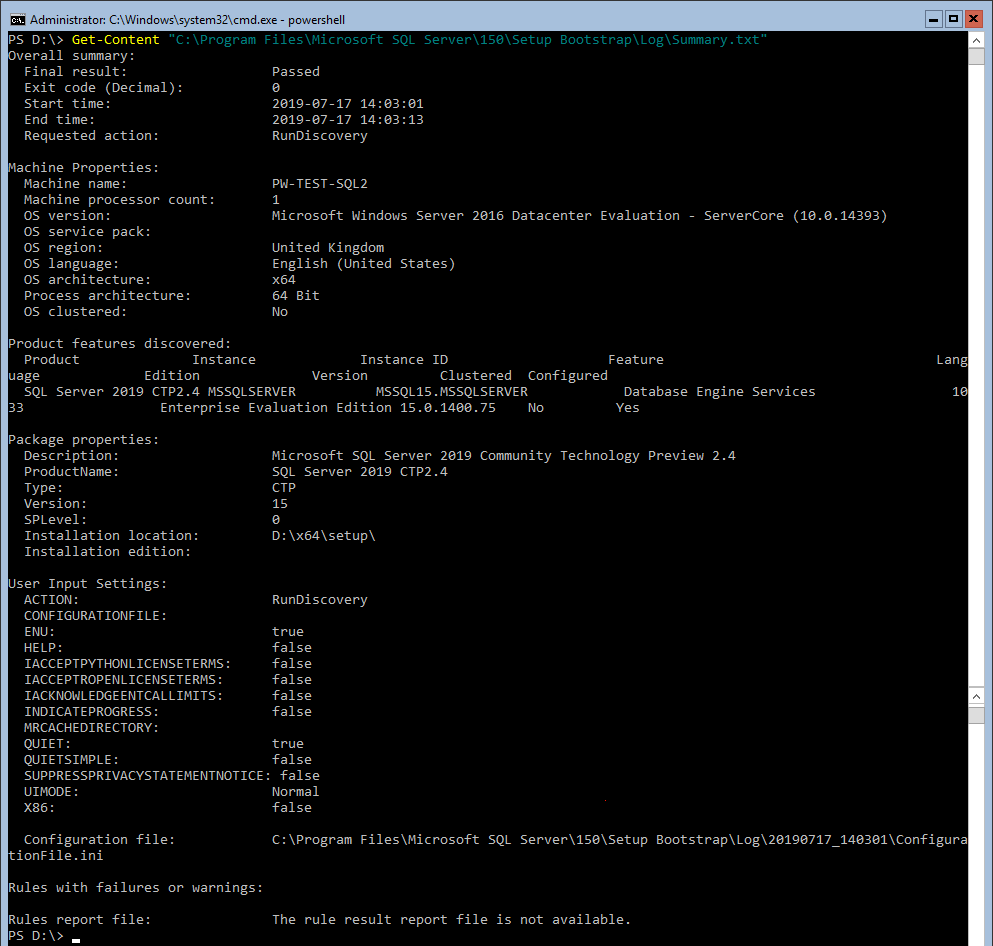
Once the discovery process completes, you can view the results in the Summary.txt file. The file will typically be located in the C:\Program Files\Microsoft SQL Server\<version>\Setup Bootstrap\Log directory.
2. Installing a SQL Server Feature (Replication)
Now that you know how to check for existing features, let’s move on to adding a new feature. In this example, we will install the Replication feature.
Installing the Replication Feature
To install the Replication feature via the command line, use the following syntax:
.\Setup.exe /qs /ACTION=Install /FEATURES=Replication /INSTANCENAME=MSSQLSERVER /IACCEPTSQLSERVERLICENSETERMS
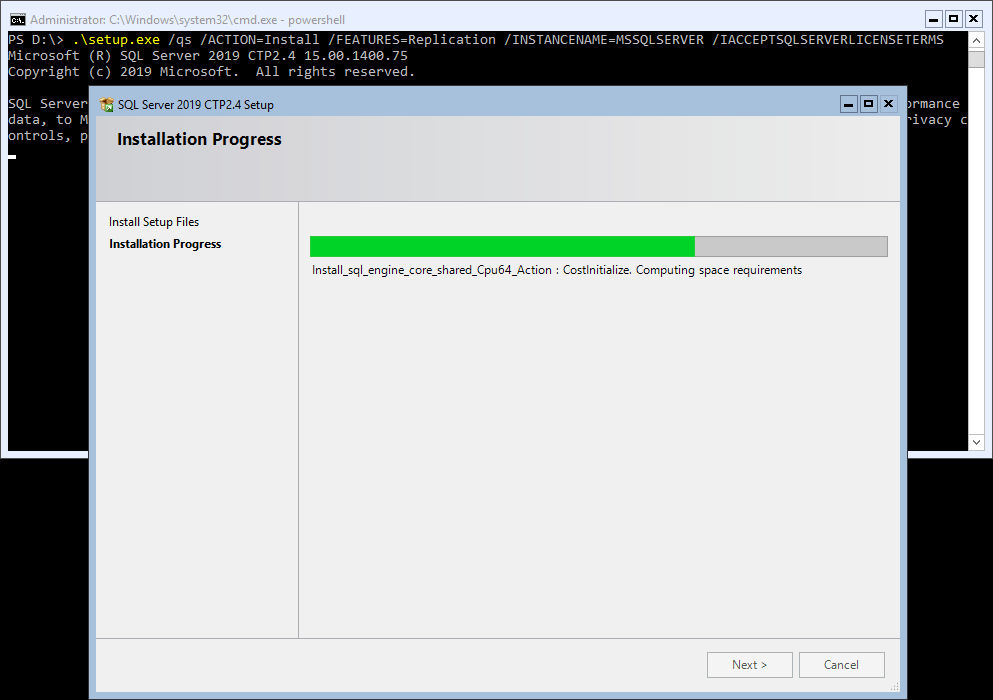
Here’s a breakdown of the parameters: /ACTION=Install : This tells the installer to install a new feature. /FEATURES=Replication : Specifies that you want to install the Replication feature. /INSTANCENAME=MSSQLSERVER : Indicates the name of the SQL Server instance where the feature will be installed.
Verifying the Installation
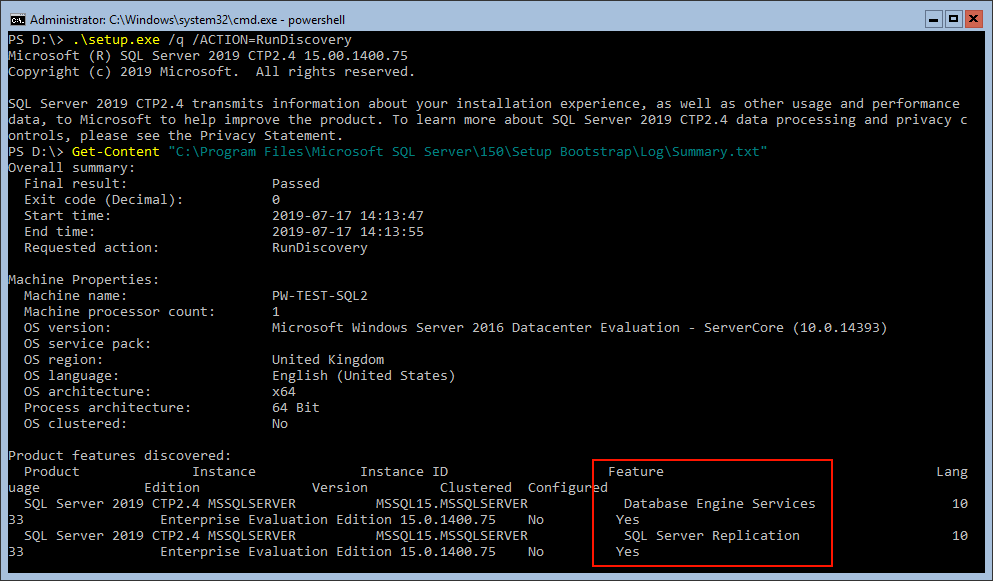
After running the installation command, you can verify the feature installation by performing another Discovery.
3. Uninstalling a SQL Server Feature (Replication)
If you decide to remove a feature that is no longer needed, the process is just as straightforward as installation.
Uninstalling the Replication Feature
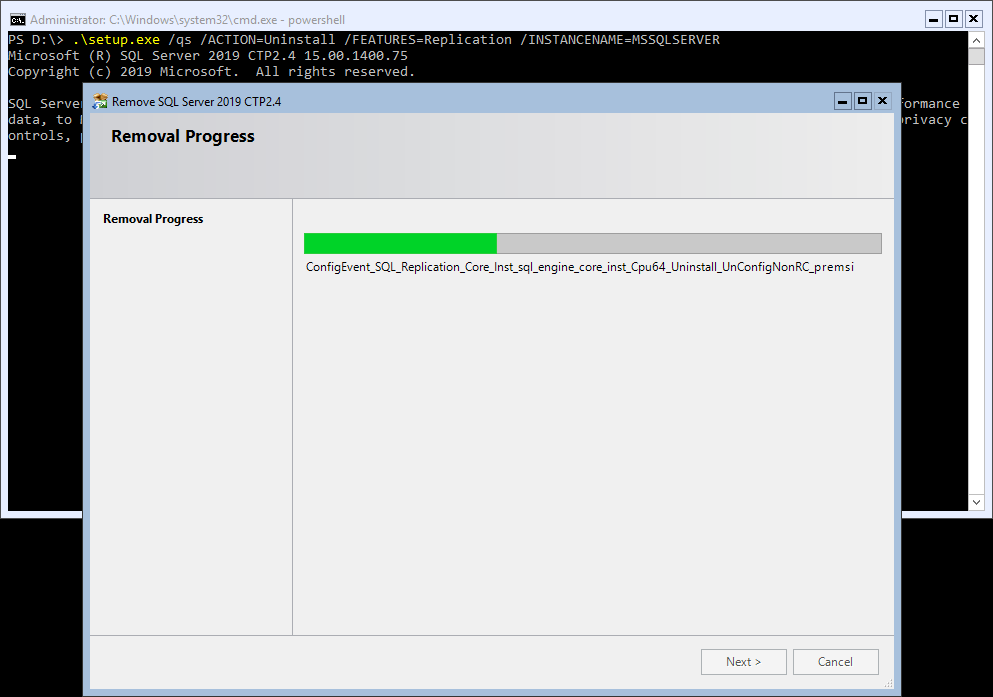
To uninstall the Replication feature from your SQL Server instance, use the following command:
Setup.exe /q /ACTION=Uninstall /FEATURES=Replication /INSTANCENAME=MSSQLSERVER
Verifying the Uninstallation
Once uninstallation is complete, run the Discovery command once more to verify that Replication has been removed.
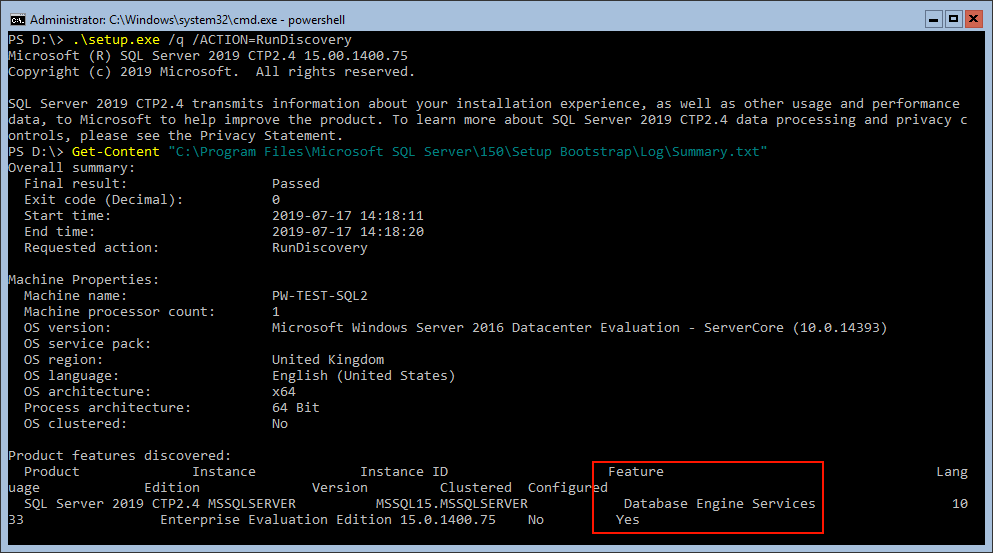
We can check the Summary.txt file to confirm that the Replication feature is no longer listed.
Hope this was all useful for you. For more information, check out the MS Docs on adding new features to SQL Server. We should always read those docs before making any changes.
The Media and Patch Level Trap
The part of this job that catches people is not the command, it is the media. Adding a feature needs setup media for the same major version as the instance, so keep the ISO for every version you run somewhere findable. On a SQL Server 2025 instance I verified the layout: the cached setup files live under C:\Program Files\Microsoft SQL Server\170\Setup Bootstrap\SQL2025, and that folder can run a discovery, but for adding features Microsoft documents using the original installation media rather than the cached copy.
The second half of the trap is patch level. Your instance is likely patched to a recent Cumulative Update, but the ISO is RTM. A feature added from RTM media is installed at RTM level, leaving the instance with mixed binaries until you re-apply the latest CU. So the real procedure is three steps, not one: add the feature, re-run the current CU, then verify. The documented /UpdateSource parameter can pull the CU in during the install itself if you point it at a folder holding the update package. My current patching workflow, including the verification queries, is on sqldba.blog in DBA Scripts: SQL Server Installation and Patching.
Silent Mode Hides the Errors
With /q there is no window to show you a failure, and a failed run can look exactly like a successful one from the prompt. Two habits keep this honest. First, run the console elevated, because setup needs administrator rights and the failure without them is immediate. Second, treat Summary.txt as the verdict. The top of the file gives you the outcome in two lines:
Overall summary:
  Final result:    Passed
  Exit code (Decimal):  0
  Requested action:     Install
That format is from a real run on SQL Server 2025, where the log sits under 170\Setup Bootstrap\Log. Anything other than Passed with exit code 0 means the change did not land, and the Detail.txt file in the same date-stamped folder holds the actual reason. Check it before running the command a second time, because re-running a partially failed setup without knowing why it failed tends to make the log harder to read, not the problem go away.
After Replication Is Installed, and Before It Is Removed
Installing the Replication feature only lays down binaries. There is still no distributor, no publications and no agents until you configure them, so do not expect anything in SSMS to look different beyond the feature being available. Once replication is actually configured and running, the health checks I use daily are on sqldba.blog in DBA Scripts: Get Replication Status, which covers agent state and latency in one pass.
Removal deserves the same respect in reverse. If the instance is acting as a publisher or distributor, tear the replication configuration down first, dropping publications and disabling distribution, before uninstalling the feature. Removing binaries out from under a live topology leaves orphaned metadata on the other servers involved. And as with the install, confirm the removal in Summary.txt rather than trusting a silent prompt, then run one final discovery so the report on file matches reality.
Leave a Reply