-
How to Get Environment Variables on Windows
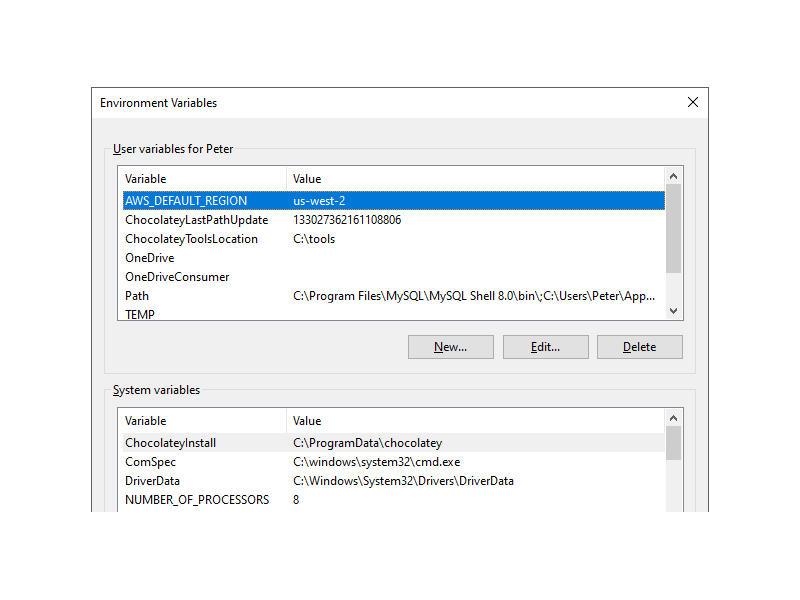
Environment variables in Windows contain information about the system’s environment, such as the directories containing executables or the system’s PATH. Programs can use these variables to find resources on the computer. They can be set at the system level or for individual user accounts and can be modified through the Control Panel or the command line.
To change environment variables in Windows, follow these steps:
– Open the Start menu and search for “Environment Variables.”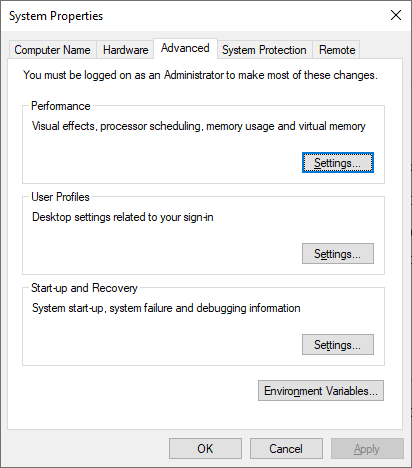
– Click on the “Environment Variables” button.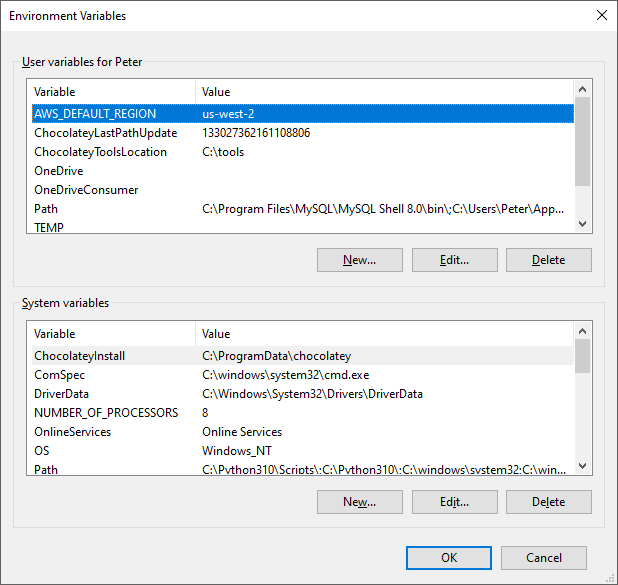
For experienced administrators, modifying environment variables via the command line is the preferred method. It allows for quick and efficient changes to be made without the need for navigating through the Control Panel. If you want to know more, check out my other blog post on: How to Get Environment Variables in PowerShell
-
Git Log Author Command Example
If you’re a Git user, you’ll be familiar with the git log command, which allows you to view the commit history for a repository. This blog post is to share an extra tip while using the command, utilising the
--authorparameter which allows you to filter the commits displayed by the author’s name.This can be particularly useful if you are working on a large project with multiple contributors and want to see only the commits made by a specific person.
Show Commits by Author in Git
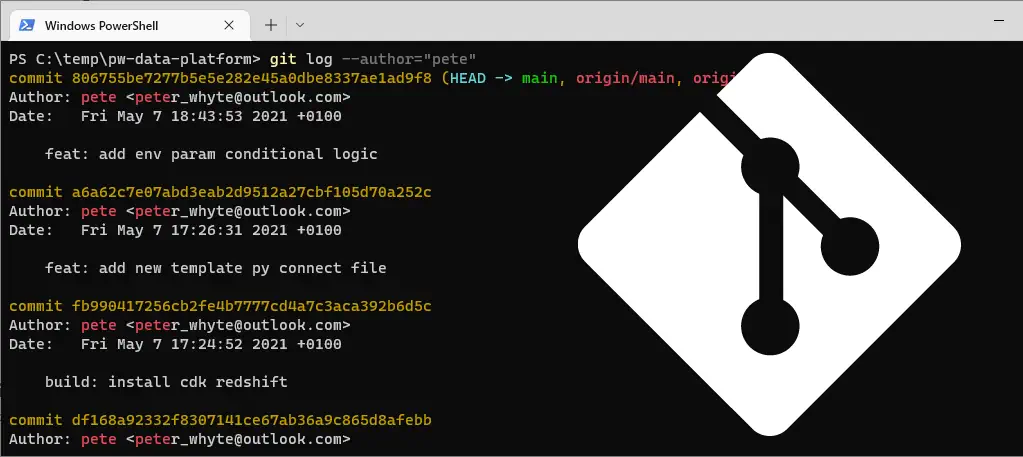
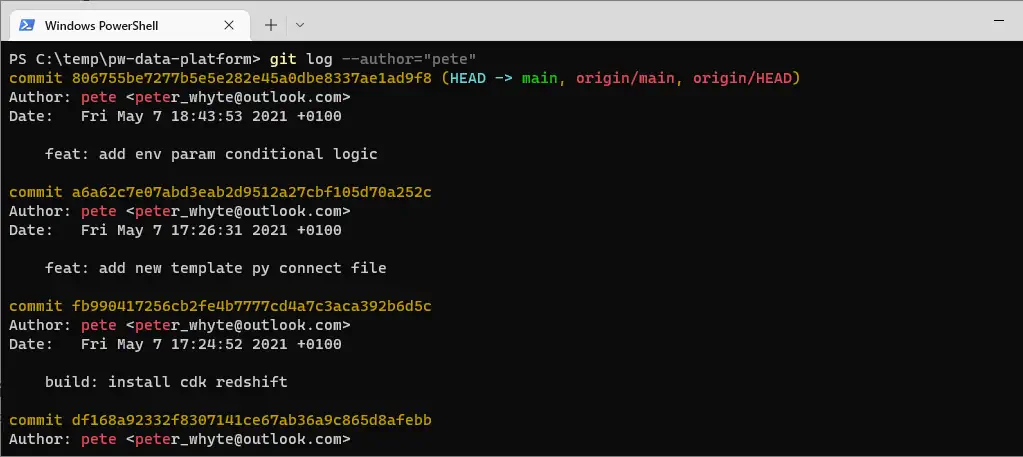
To use the –author option, simply pass the name of the author as an argument when running the git log command.
For example, if you only want to see the commits made by “pete”, you would run the following command:
git log --author="pete"
Hit ‘
q‘ to exit out of the git log return feed.We can also use the git one-line parameter while searching commits for an author, with a wildcard:
git log --author="Sukki*" --oneline
This will display a list of commits, each on a single line, with the author, commit message, and SHA hash of the commit.
Hope this random tip is a good one! Feel free to check out my other Git tips by clicking the tag below.
-

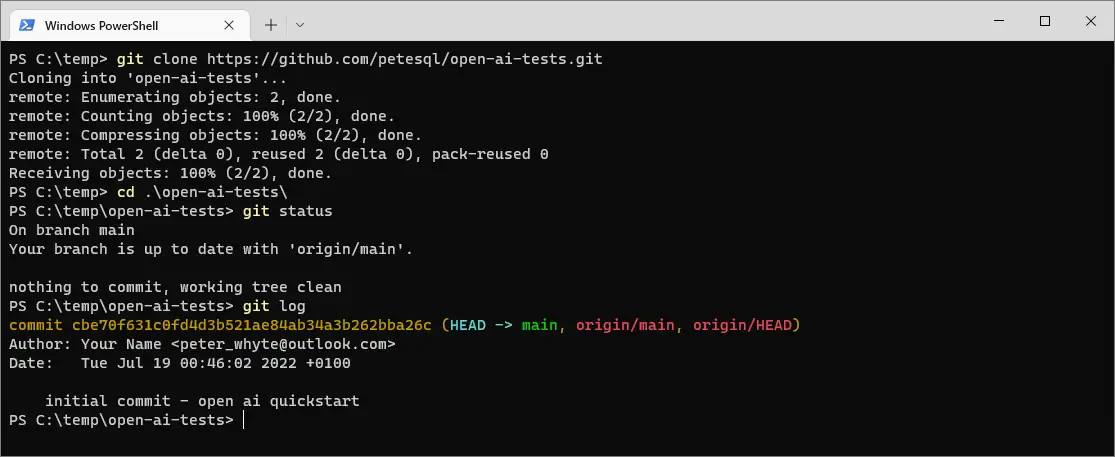
Git Log Command Examples
Git log is an essential command when working with git version control. It allows you to see the history of a repository, including details about each commit like the author, date, and commit message. It lets you know what’s changed, when it changed and by who.
In this post I’m sharing some examples of using the
git logcommand to help get you started.
Basic Git Log Example
Using the
git-logcommand is simple:$ git log
his will display a list of most recent commits in your repo, starting with the most recent

Git Log Parameters & Options
The
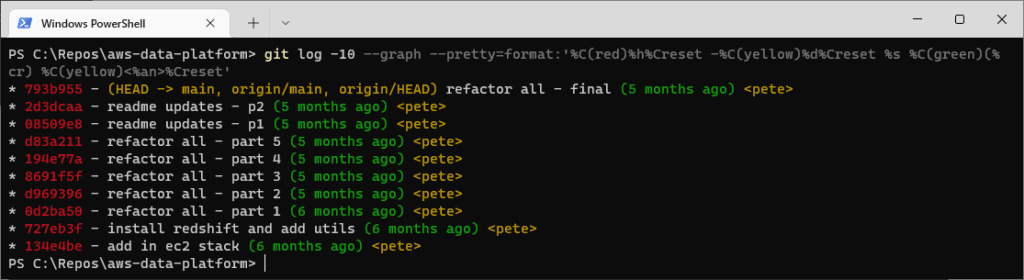
git logcommand has several options that allow us to tailor the information it displays. For instance, you can use it with the –oneline parameter to condense results, or with the –auther paramter to filter results by user.We can also change the output format:
# show most recent 5 commits on one line, with formatting
git log -5 --graph --pretty=format:'%C(red)%h%Creset -%C(yellow)%d%Creset %s %C(green)(%cr) %C(yellow)<%an>%Creset'
-
How to Install PowerShell on Ubuntu 20.04
This guide will walk you through installing PowerShell on Ubuntu 20.04. I’m doing this on Windows Subsystem for Linux (WSL), and have not encountered any compatibility issues with the PowerShell & Ubuntu combo.
For the latest updates on PowerShell installation, version compatibility, and support dates, refer to MS Docs for Installing PowerShell on Linux (Ubuntu).
Installing PowerShell on Ubuntu
Follow the steps below to install PowerShell on Ubuntu 20.04 using the official Microsoft package repository.
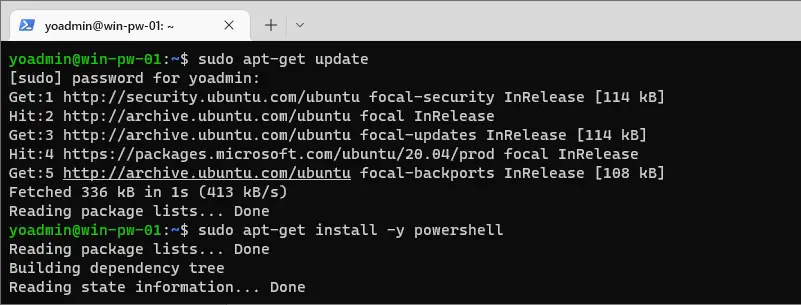
Step 1: Update System Packages
Run the following command to update the list of available packages:# Update the list of packages sudo apt-get update
Step 2: Install Required Dependencies
Install the necessary packages to add the Microsoft repository:# Install pre-requisite packages. sudo apt-get install -y wget apt-transport-https software-properties-common
Step 3: Download and Register the Microsoft Repository GPG Keys
# Register the Microsoft repository GPG keys
sudo dpkg -i packages-microsoft-prod.deb
Step 4: Update Package List Again
After adding the Microsoft repository, refresh the package list:# Update the list of packages after we added packages.microsoft.com sudo apt-get update
Step 5: Install PowerShell
# Install PowerShell on Ubuntu
sudo apt-get install -y powershell
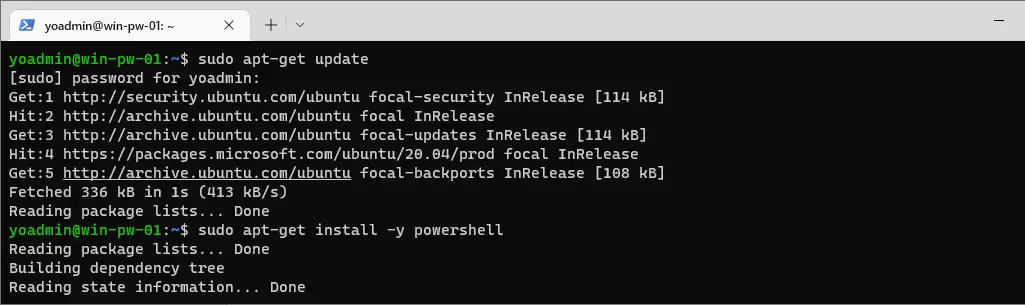
The installation process should only take a minute, including the updates via the Advanced Package Tool (APT).
The above PowerShell installation should only take a minute or so to complete, including the Advanced Package Tool (apt) updates.
Running PowerShell on Ubuntu
After installation, you can start PowerShell on Ubuntu and check the installed version.
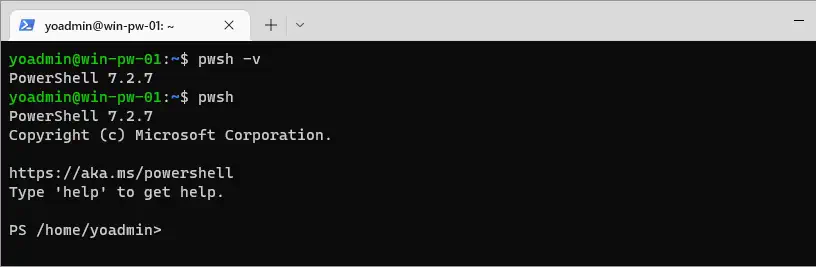
Step 1: Verify PowerShell Installation
To check the installed PowerShell version, run:# Check PowerShell Version on Ubuntu pwsh -v
Step 2: Launch PowerShell
To start PowerShell, use the following command:# Start PowerShell on Ubuntu pwsh
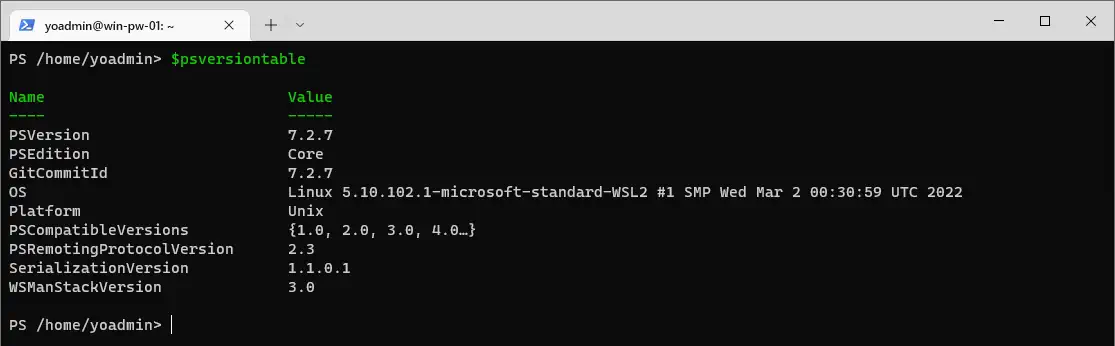
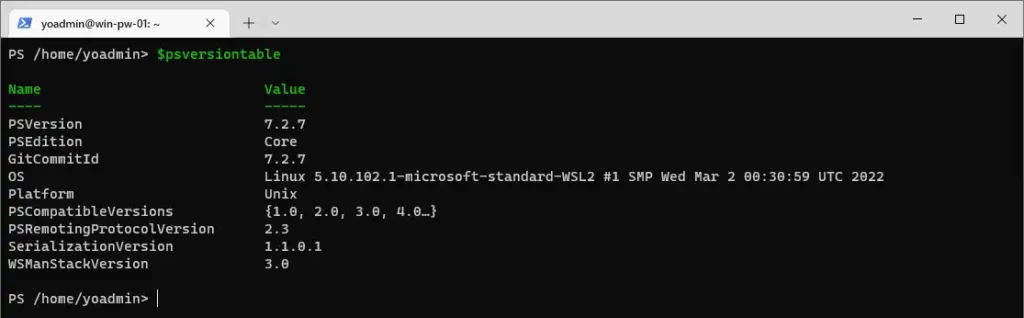
Once inside PowerShell, you can check more details about the installation and OS info by running the following:
# Check PowerShell Version
$PSVersionTable
I have a short post for how to check running PowerShell version if you’d like to check that out too.
Conclusion
You have successfully installed PowerShell on Ubuntu 20.04, and maybe you also did this on WSL Ubuntu like me!
The default Alias for PowerShell is
pwsh. You can find information about pwsh and pwsh parameters in the Microsoft Docs page, About Pwsh: ParametersHope all this was useful, cheers!
-
How to Check Your SQL Server Version
This post contains various ways for how to check the running Microsoft SQL Server version numbers, including:
– Check SQL Version in SSMS Object Explorer
– SQL Query to get SQL Version Info
– Check SQL Server Log Files
– Run the SQL Server Feature Discovery ReportWhy Check SQL Versions?
Checking your SQL Server versions is a thing we need to do quite often as Database Administrators (DBAs). We know how important it is to keep our software up to date. This post is here to help you check the version of your running SQL Server instances, with added tips to help you understand what’s needed.
You can have multiple versions of SQL Server running on the same host. Whether that’s multi-tenant (many SQL instances), or left-over old SQL installations. We should aim to keep them all with the latest SQL CU, or at minimum GDR. For more information on the differences of each, check out my other post, Keeping SQL Server and Critical Systems Up to Date.
Regular monthly patching is a critical practice, especially for Windows servers, to ensure a secure and issue-free database environment. At minimum, we really need to make sure we’re operating within supported SQL Server Versions & Extended Support Dates:
SQL Server 2014 – Currently Supported, End Date: >> JULY 9, 2024 <<
SQL Server 2016 – Currently Supported, End Date: JULY 14, 2026
SQL Server 2017 – Currently Supported, End Date: 2027
SQL Server 2019 – Currently Supported, End Date: 2030
SQL Server 2022 – Currently Supported, End Date: 2033If you’re still running with SQL Server 2012 or below… what can I say. Just try upgrade it, do your best, because it’s worth it.
The reason I say this is because if you have a critical issue with your server, you can’t ask for help. A SQL Consultant might be able to save the day with some issues, however you’re really making life more difficult in the long run by doing nothing.
Staying Proactive with Patching
Our commitment to security aligns with Patch Tuesday schedules, which is the second Tuesday of every Month, Microsoft releases their updates. It’s important for us to proactively check for updates to keep servers up to date.
Having a proactive approach not only ensures compatibility with the latest technologies but also guarantees that any bugs or issues present in previous versions have been addressed. By applying our cumulative updates (CUs), we have an added advantage when troubleshooting complex issues with Microsoft support, they may request you to be on an updated CU to rule out any potential compatibility concerns. For the latest information on new SQL patches, refer to the Microsoft Docs link for SQL Server Updates and Version History.
Checking SQL Server Versions
There’s many ways to check our running SQL Server Version. I’m going to run through this from most preferred to least, for your convenience.
Example 1: SSMS Object Explorer
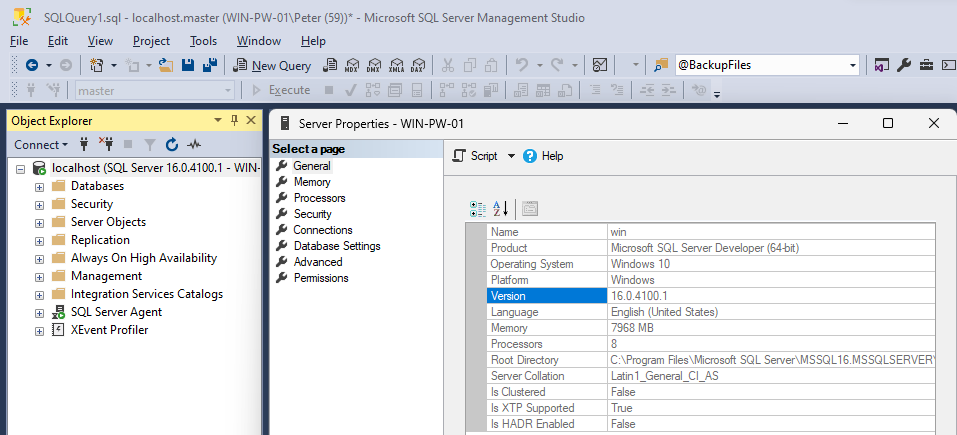
The quickest way to obtain the version number of your SQL Server instance is within SQL Server Management Studio (SSMS).
When we connect to a SQL Server we see the version number next to the server name as displayed in the example below, 16.0.4100.1:
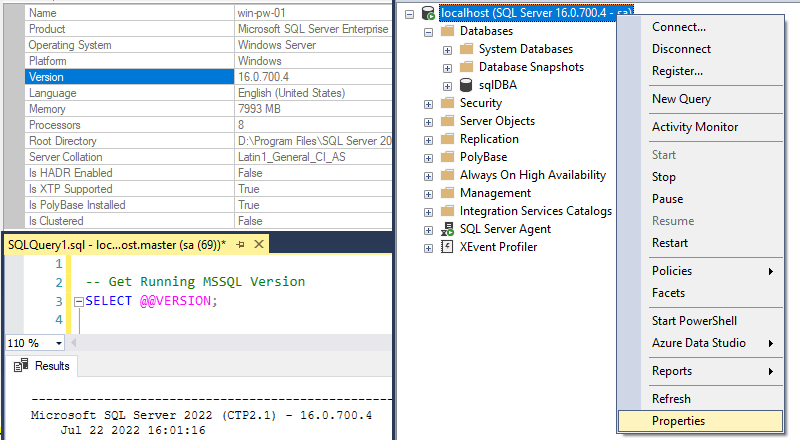
As well as this, we can right-click the server you are connected to, click Properties, and we can view the SQL Server version number including other useful information.
Example 2: SQL Query to Get SQL Server Version
Another quick way to retrieve the SQL Server version number is using a SQL query.
In the example below we are querying
@@VERSIONandSERVERPROPERTY, 2 different ways to show SQL version info.-- Query 1: Using @@version to Retrieve SQL Server Version Information SELECT @@VERSION AS 'SQL_Server_Version'; -- Query 2: Using SERVERPROPERTY to Extract Detailed SQL Server Information SELECT SERVERPROPERTY('productversion') AS 'Product_Version', SERVERPROPERTY('productlevel') AS 'Product_Level', SERVERPROPERTY('edition') AS 'Edition_Info';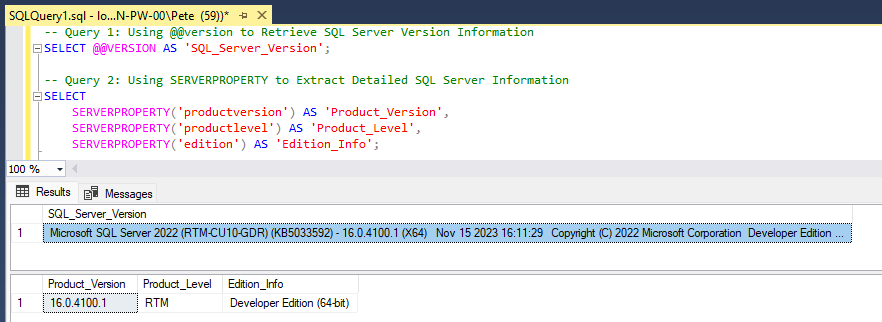
Example 3: Check the SQL Server Logs for Version Info
To check a SQL Server Version via File Explorer, we can find the appropriate SQL Log files and check for entries resembling the version format (16.0.x, 15.x, 14.x, …).
To identify the installed SQL Server version, examine the following files:
C:\Program Files\Microsoft SQL Server\160\Setup Bootstrap\Log\Summary.txtThis file provides a summary log for the SQL Server installation. The “160” in the file path corresponds to SQL Server 2022. For other versions, replace “160” with the respective version number (e.g., “150” for SQL Server 2019, “140” for SQL Server 2017).C:\Program Files\Microsoft SQL Server\MSSQL16.MSSQLSERVER\MSSQL\Log\Error.logThe “16” in the file path pertains to the SQL Server instance version. For SQL Server 2022, it represents the major version. Similarly, for other versions, replace “16” with the respective major version number. This log file contains error information and is instrumental for troubleshooting and version identification.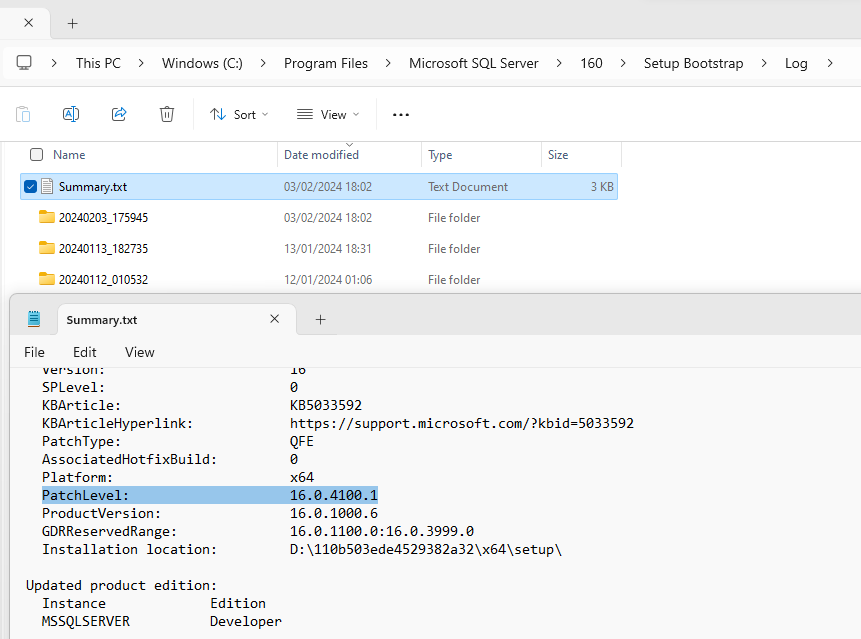
Example 4: Run the SQL Server Features Discovery Report for Version Info
The SQL Server Features Discovery Report, while slower, offers more comprehensive info into your installed features and versions.
To run the SQL Server Feature Discovery Report, start by accessing the SQL Server Installation Center. If SQL Server is already installed on your machine, the Installation Center should be available in the Start menu under the SQL Server folder. Once the Installation Center is launched, navigate to the “Tools” section, and select “Feature Discovery Report.”.
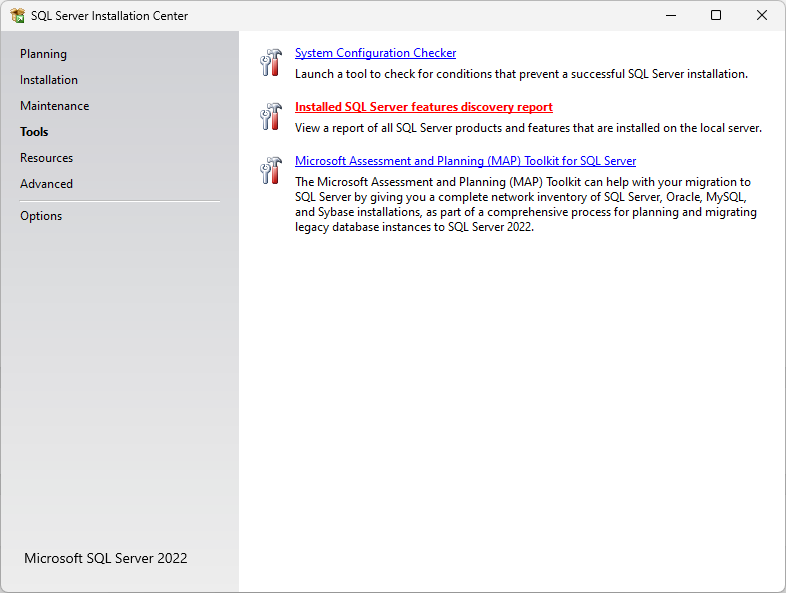

In the example above, the SQL Server Engine is the sole feature installed. Typically, a SQL Server installation will include many features/services, like Replication, Full-Text Analysis Services, Integration Services, Reporting Services, and more.
Conclusion
Now that you’ve successfully identified the version of your SQL Server instance, the next steps revolve around ensuring its currency and security. For routine updates, especially for non-critical servers, SQL Server patching can be handled by your regular Windows Updates maintenance window.
In cases where a more immediate or manual update is necessary, visiting the Microsoft site to download the latest MSSQL version directly.
For business critical servers, planning and arranging downtime for the upgrade process is more important. If you’re in more an Enterprise environment, you’ll be running on, or considering High Available (HA) infrastructure using Always On Availability Groups (AAGs).
Hope all this was useful info for you!