
If you’re planning to allow external connections to a SQL Server, one of the first security measures to implement is encryption, both at rest and in transit.
SQL Server provides an option to force encryption for all connections, ensuring secure SQL connectivity. This guide walks you through the steps to enforce encryption, following Microsoft’s official documentation: Enable Encrypted Connections to the Database Engine. Given the complexity of this process, it’s essential to review the official docs thoroughly before proceeding.
What This Guide Covers:
1. Creating a Certificate for SQL Server
2. Importing the Certificate to Trusted Root Certificates
3. Importing the Certificate into SQL Server
4. Forcing Encryption in SQL Server
5. Verifying Encrypted SQL Server Connections
1. Creating a Certificate for SQL Server
A certificate issued for Server Authentication is required, and its name must match the fully qualified domain name (FQDN) of the server.
For this tutorial, we’ll use PowerShell to create a new self-signed certificate. Modify the output file location and DNS names to match your environment if you are using this script.
# Create a new self signed certificate
New-SelfSignedCertificate -DnsName lab-sql1.whyte.net -CertStoreLocation cert:\LocalMachine\My -FriendlyName lab-sql1-cert -KeySpec KeyExchange -NotAfter (get-date).AddYears(99)
$thumbprint = $(Get-ChildItem Cert:\LocalMachine\My).thumbprint
$Pwd = ConvertTo-SecureString -String "Str0ngePassword1!" -Force -AsPlainText
Export-PfxCertificate -Cert "Cert:\LocalMachine\My\$thumbprint" -FilePath "C:\temp_certificates\lab-sql1pk.pfx" -Password $Pwd -Force
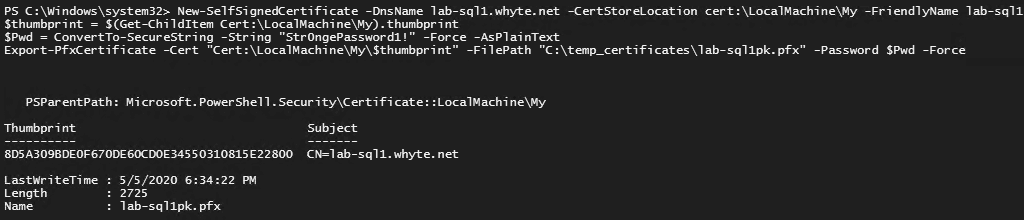
Here’s the output .pk file:

2. Importing the Certificate to Trusted Root Certificates
1. Open Microsoft Management Console (MMC), and add the Certificates (Local Computer) Snap-in.
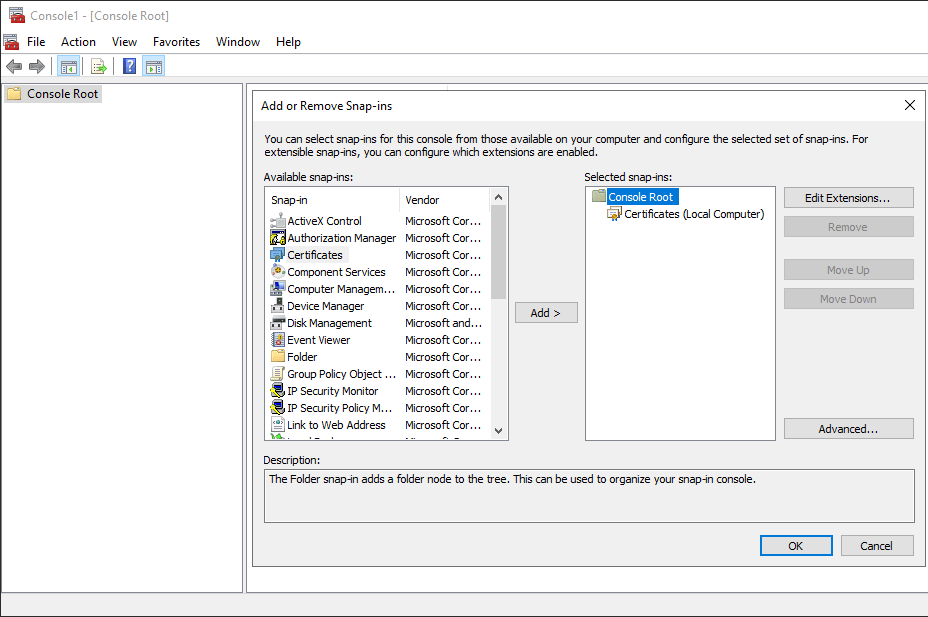
2. Expand Trusted Root Certification Authorities.
3. Right-click and select All Tasks > Import.
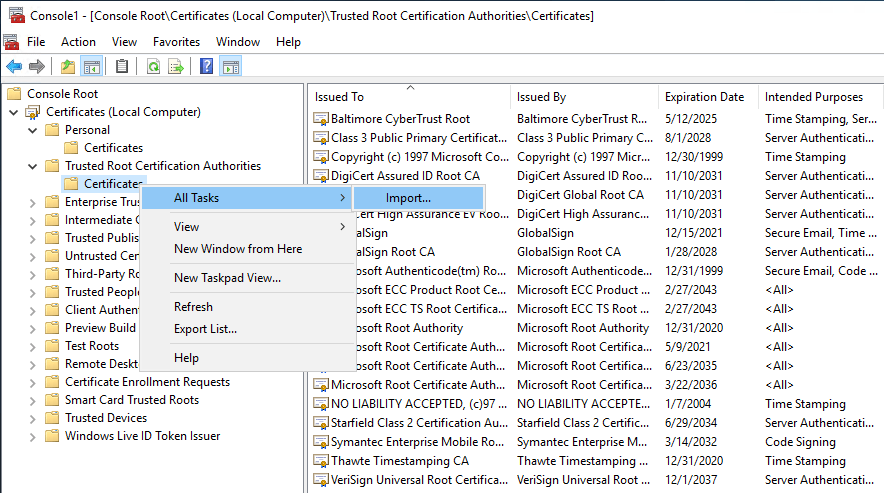
4. Navigate to the .pfx file.
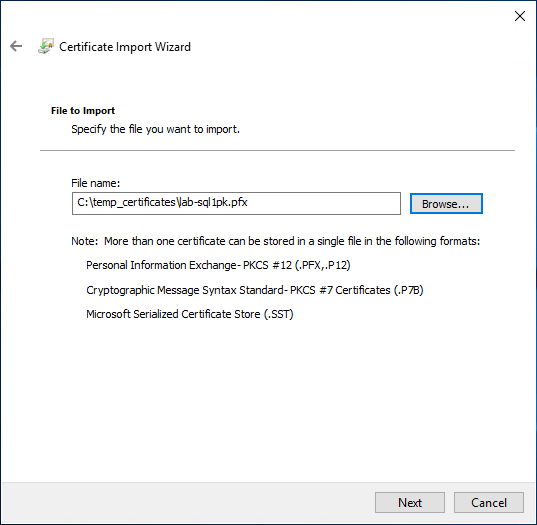
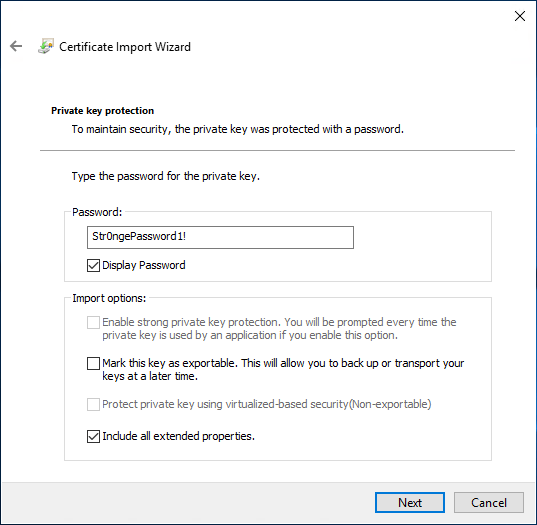
5. Enter a password & continue.
6. Finish up the wizard.
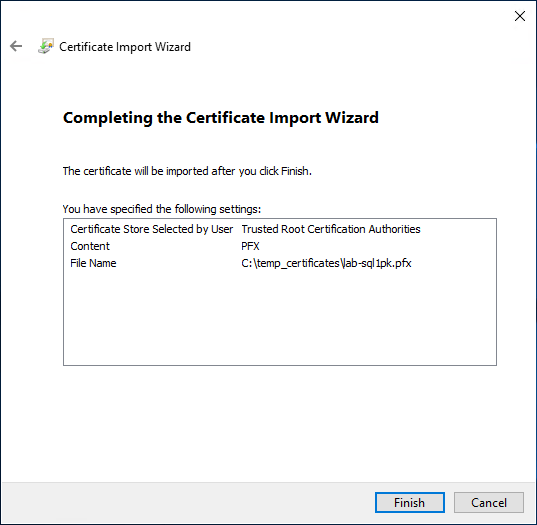
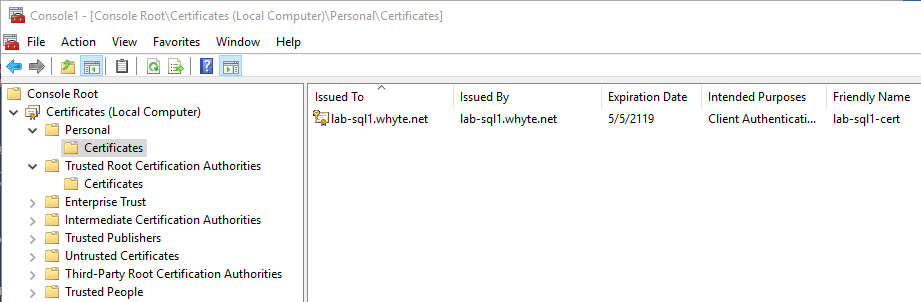
7. Verify the imported certificate in MMC.

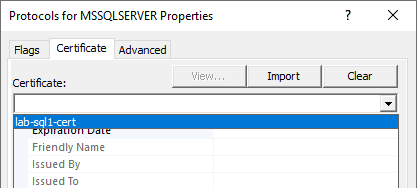
3. Importing the Certificate into SQL Server
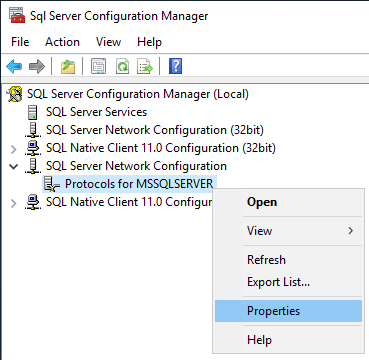
1. Open SQL Server Configuration Manager.
2. Right-click Protocols for MSSQLSERVER and select Properties.
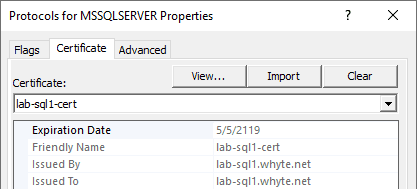
3. Open the Certificate tab and you should be able to view & select the new certificate from the drop-down menu.
4. Click to Apply & Ok out of the window – I’m doing the Forcing of Encryption separate next.
You’ll get this prompt.
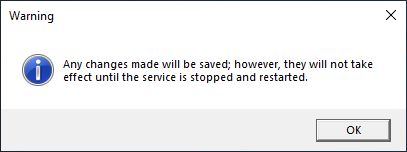
Now, restart the SQL Services from the configuration manager.
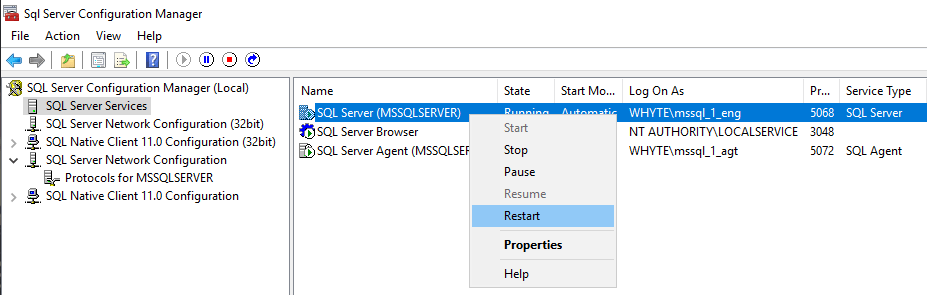
If your services don’t start back up again, then ensure the service accounts have the appropriate permissions. For this demo, my AD Service Accounts are members of the local Administrators group.
4. Forcing Encryption in SQL Server
To force connections to be encrypted in SQL Server:
1. In SQL Server Configuration Manager, right-click Protocols for MSSQLSERVER and select Properties.
2. Within the Flags tab, enable Force Encryption.
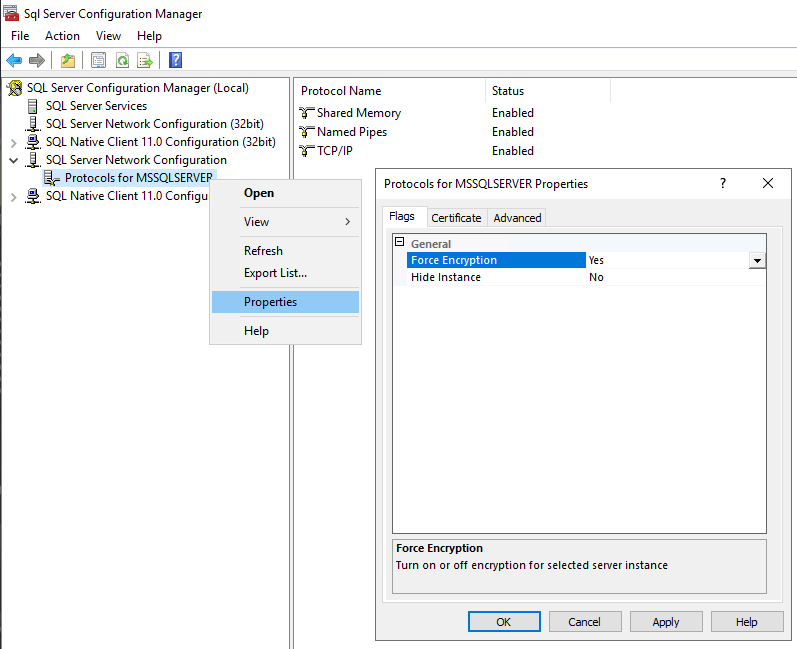
3. Restart the SQL Services.
5. Verifying Encrypted SQL Server Connections
Now that we have configured our SQL Server to force connections to be encrypted, lets verify that’s the case.
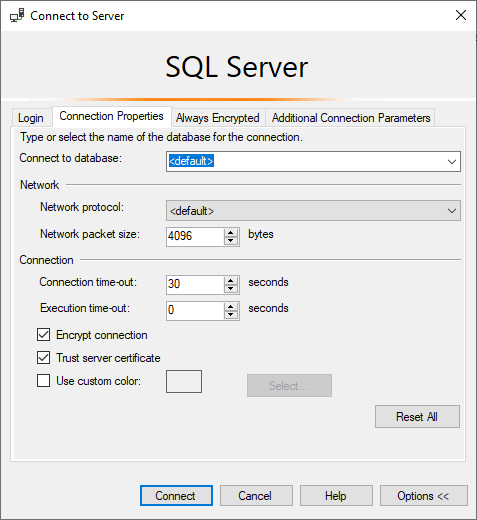
1. Open SSMS and connect to the SQL Server.
You may now have to ensure the Encrypt connection & Trust server certificate options are checked!
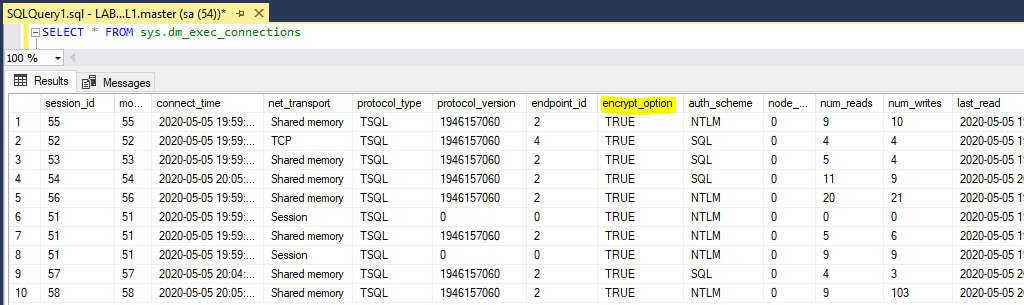
2. Once connected, query the sys.dm_exec_connections table and check the encryption_option column for all the incoming SQL connections.
Checkout the MS Docs as linked for more information on the meaning behind the information displayed below.
-- check if connections are encrypted (encrypt_option col)
SELECT *
FROM sys.dm_exec_connections
I hope this guide provided clear and actionable steps to help you configure forced encryption in SQL Server!
Leave a Reply