
Changing the default Windows Subsystem for Linux (WSL) distribution is simple. This guide shows you how to list your installed distros and set a new default using just a couple of commands.
1. Listing Installed WSL Distributions
Before setting a new default, check which distributions are installed on your system. Open a terminal and run:
# show installed wsl distros
wsl -l -v
This command lists all installed WSL distributions along with their version numbers. Take note of the exact name of the distribution you want to set as the default.
2. Changing the Default WSL Distro
Once you have identified the distro you want to use as the default, run the following command:
# set default wsl distro
wsl -s <wsl-distribution-name>
Replace <distro-name> with the name of your preferred default distribution.
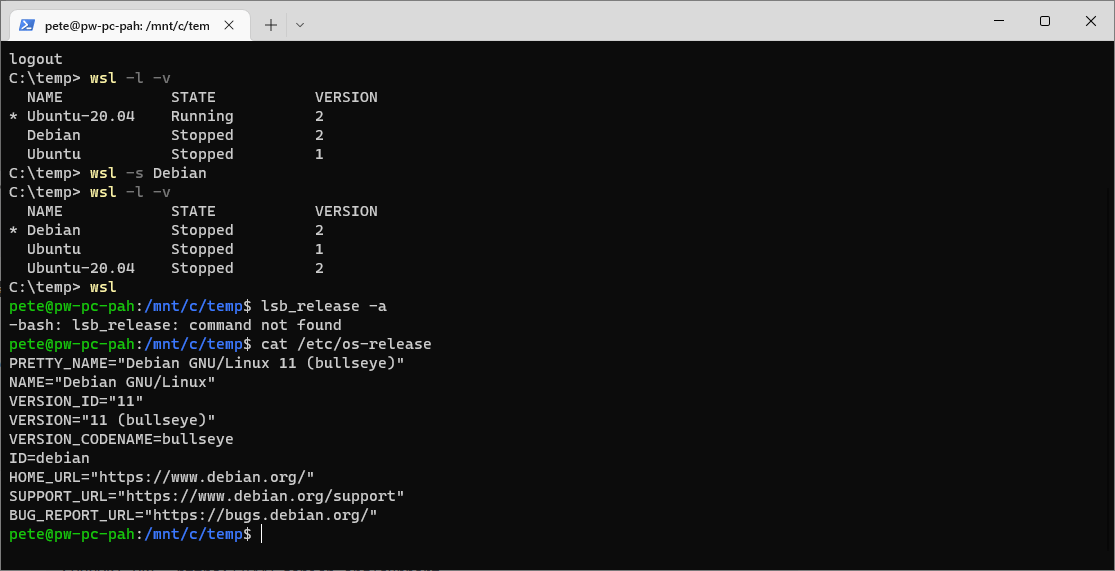
In my example above, I’m setting Debian as the default distro and then when I enter that WSL Debian, I’m running cat /etc/os-release to verify what Linux flavor I’m running.
That’s it, you’ve now set your default WSL distribution! For more random WSL tips, feel free to check out my other WSL Blog posts.