When renaming a computer hosting SQL Server, you need to update system metadata to maintain connectivity for remote connections and applications. This process involves updating SQL Server’s registered hostname to match the new computer name.
To rename a computer that hosts SQL Server, checkout my latest post on this which includes information for why you shouldn’t perform this task: How to Rename a Computer that Hosts SQL Server
Below is the quick / alt version for renaming SQL Server:
Quick Steps to Update SQL Server After a Hostname Change:
1. Rename the Computer & Reboot:
Update the Windows computer name.
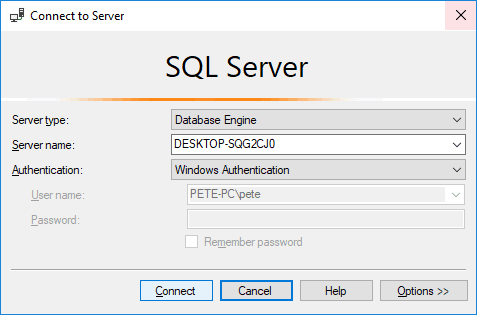
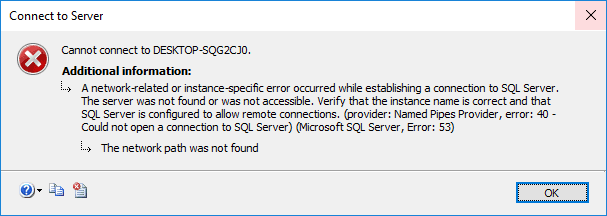
2. Connect to SQL Server:
Use localhost temporarily if a connection error occurs.
3. Check Hostnames:
Run xp_getnetname to verify the current hostname.
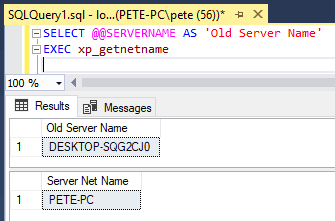
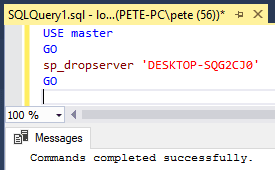
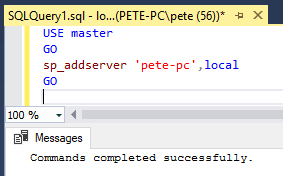
4. Update SQL Metadata:
Drop the old name with sp_dropserver and register the new one using sp_addserver.
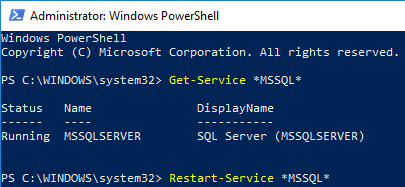
5. Restart SQL Server:
Apply changes by restarting the service.
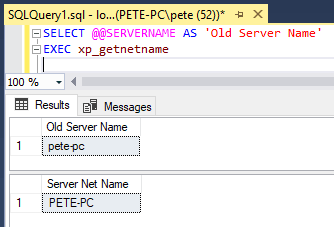
6. Verify Changes:
Confirm the update by checking the new hostname.
When you next open SSMS, ‘localhost’ should be shown in the Server name field. Changing this to your new hostname will now work.
Detailed Guide Available:
For a complete, step-by-step walkthrough with code and MS Docs links, check out my other post: How to Rename a Computer that Hosts SQL Server
SQL Code Used
-- Get currently registered hostname:
SELECT @@SERVERNAME AS 'Old Server Name'
-- Get
EXEC xp_getnetname

-- Drop current hostname registration.
USE [master] GO sp_dropserver 'enter old hostname returned by @@SERVERNAME above'
GO

--Register new hostname.
USE [master] GO sp_addserver 'enter hostname returned from xp_getnetname above',local -- having local updates the metadata for @@SERVERNAME
GO

-- Restart SQL to apply changes
Leave a Reply