Tag: Git

  • Git Log Author

    Git Log Author

    If you’re a Git user, you’re likely familiar with the git log command, which allows you to view the commit history for a repository. This blog post is an extra tip on the git log command, showing the --author option parameter which allows you to filter the commits displayed by the author’s name.

    This can be particularly useful if you are working on a large project with multiple contributors and want to see only the commits made by a specific person.

    Show Commits by Author in Git

    To use the –author option, simply pass the name of the author as an argument when running the git log command.

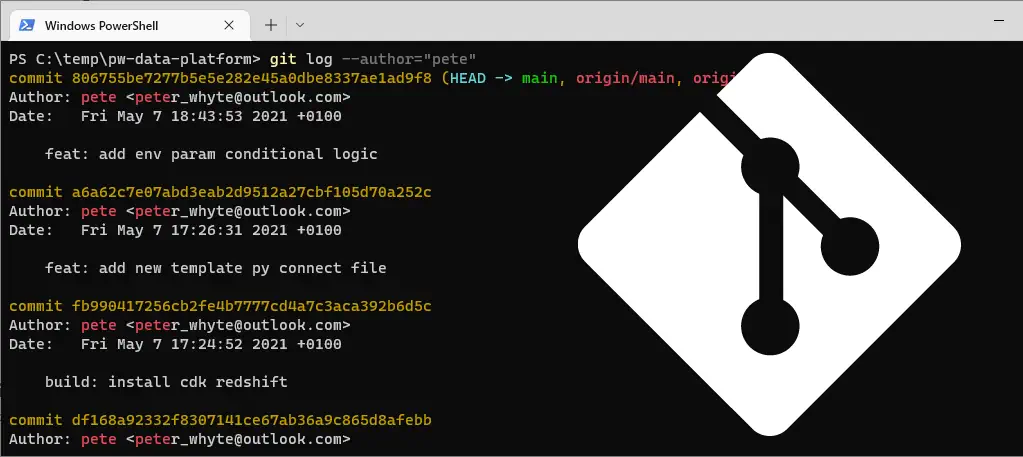
    For example, if you only want to see the commits made by “pete”, you would run the following command:

    git log --author="pete"
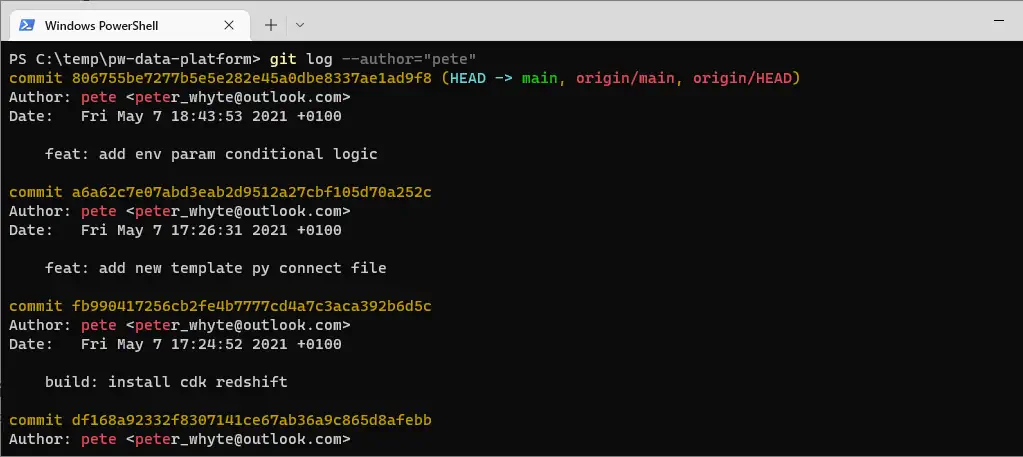
    

    Hit ‘q‘ to exit out of the git log return feed.

    We can also use the git one-line parameter while searching commits for an author, with a wildcard:

    git log --author="Sukki*" --oneline
    

    This will display a list of commits, each on a single line, with the author, commit message, and SHA hash of the commit.

    The git log command has options that allow you to tailor the information it displays. For example, you can use the –oneline parameter, which I covered in another blog post (including git log formatting).

  • Git Log Command

    Git Log Command

    Git log is an essential command for working with Git. It allows you to see the history of a repository, including details about each commit like the author, date, and commit message.

    Using the git log command is simple. Just navigate to your Git repository in a terminal or command prompt and run the git log command. This will display a list of all the commits in your repository, starting with the most recent.

    $ git log
    commit a1b2c3d4e5f6g7h8i9j0k1l2m3n4o5p6q7r8s9t0u1v2w3x4y5z6
    Author: John Doe <john.doe@example.com>
    Date:   Tue Dec 1 13:45:26 2020 -0500
    
        Add new feature X
    
    commit a1b2c3d4e5f6g7h8i9j0k1l2m3n4o5p6q7r8s9t0u1v2w3x4y5z6
    Author: Jane Smith <jane.smith@example.com>
    Date:   Mon Nov 30 12:15:43 2020 -0500
    
        Fix bug Y
    

    The git log command offers several options that allow you to tailor the information it displays. For instance, you can use the –oneline parameter, which I covered in another blog post (including git log formatting).
  • Git Log Show in One Line (–oneline)

    Git Log Show in One Line (–oneline)

    To check our commit history on a Repository within Git, we use the git log command. When using this command we scroll through the commit log within our Terminal by hitting the Enter key, and then we need to hit q on our keyboard to exit reading the git log.

    This post is to demo the --online parameter that can be added to the git log statement. Adding this parameter to the git log command will return a condensed commit log history, which shows the first part of the commit hash and message on one line.

    The following is included in this demo post:
    # Git Log
    # Git Log –OneLine
    # Git Log –OneLine -5
    # Git Log –OneLine with Custom Formatting

    Git Log

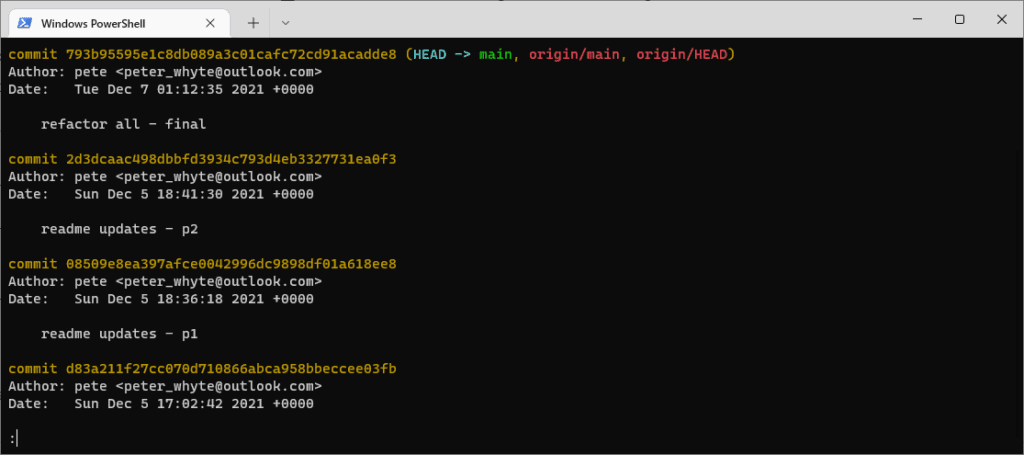
    In the following example, I’m running the standard git log command on one of my Repos. This is what we’d use if we want information including full commit hashes, commit dates/times, and authors.

    Git Log

    Git Log –Oneline

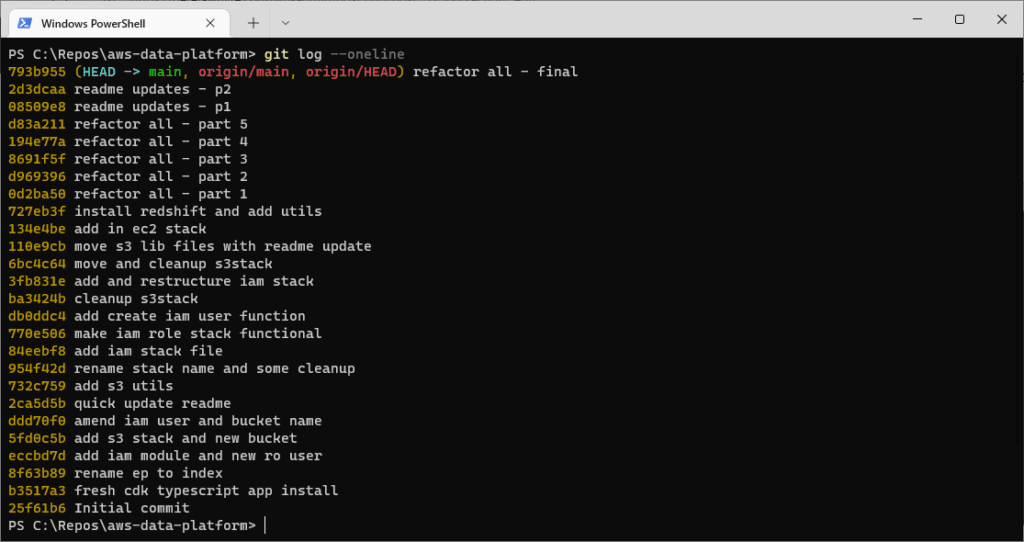
    This next example shows will return a condensed commit log history. It’s the same command as above but we’re adding the --oneline parameter.

    # Show git log in one line
    git log --oneline
    Git Log --oneline

    Git Log –Oneline -5

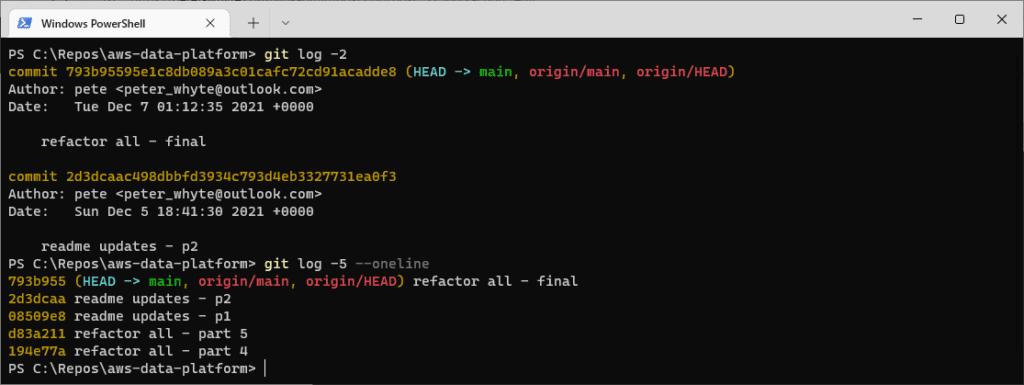
    You might think the above shows too many logs on the screen. We can pass in a line number parameter for it to return a specific number of commits.

    This next example shows with and without the above –oneline parameter. We limit the number of commits/rows being returned by adding ‘-5‘ (can be any number).

    # show most recent 2 commits
    git log -2
    
    # show most recent 5 commits on one line
    git log -5 --oneline
    Git Log -5

    Git Log –Oneline -5 with Custom Formatting

    We can amend the formatting of the returned list, including changing colours, adding in commit times, and adding the contributor.

    This would be ideal if it was added as a function on your Terminal Profile.

    # show most recent 5 commites on one line, with formatting
    git log -5 --graph --pretty=format:'%C(red)%h%Creset -%C(yellow)%d%Creset %s %C(green)(%cr) %C(yellow)<%an>%Creset'
    Git Log Formatting

    That’s it for this tip, check out my other posts on this topic in the Git Tag if of interest.

  • Install oh-my-posh On Windows

    Install oh-my-posh On Windows

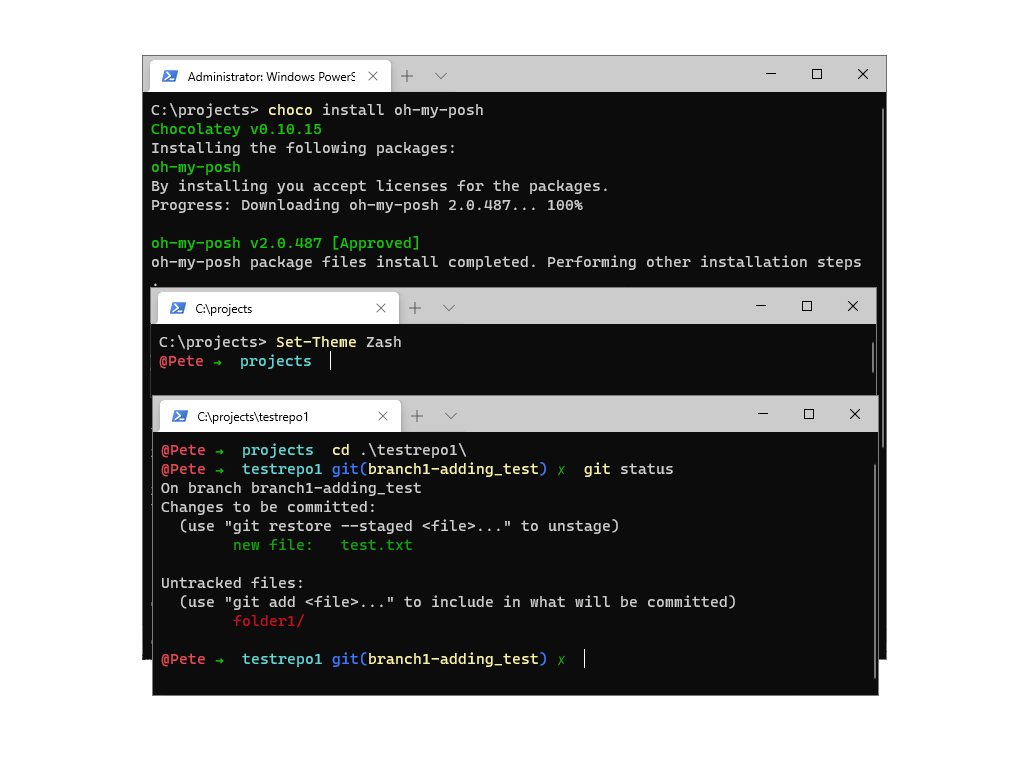
    Oh-my-posh is a theme engine for PowerShell that’s separate from your default PowerShell console. It’s powered by posh-git and has status indications for git, failed, and admin commands.

    Oh-my-posh requires and runs in Windows Terminal which was my previous blog post.

    This post is just a quick guide on installing oh-my-posh and showing off my current favourite theme.


    Install oh-my-posh

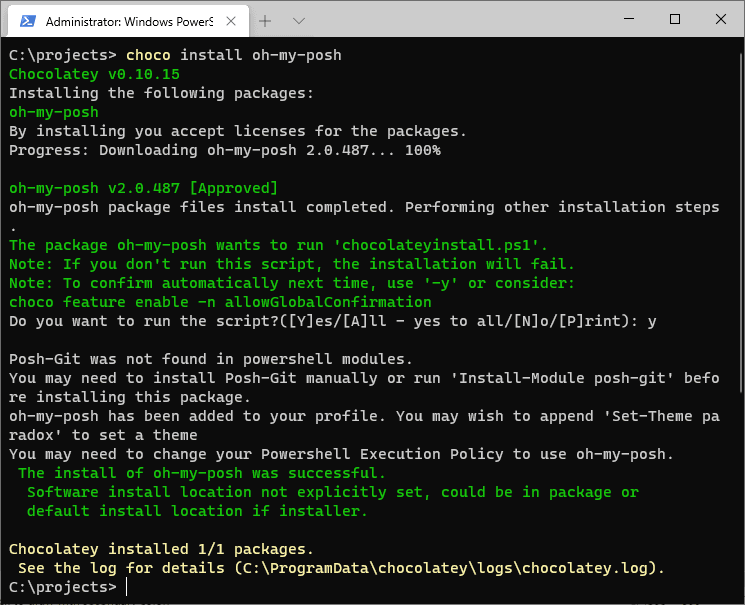
    Installing using Chocolatey here and you’ll also need to install posh-git too. This can also be done with the Import-Module cmdlet, an example of which is included in the docs.

    choco install oh-my-posh

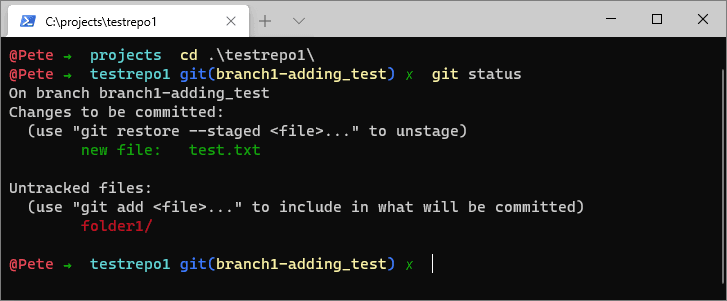
    Once installed pick a theme – see this link in the oh-my-posh documentation for screenshot examples for each of the themes

    Set-Theme Zash

    Looking good now…


  • How to Install Windows Terminal

    How to Install Windows Terminal

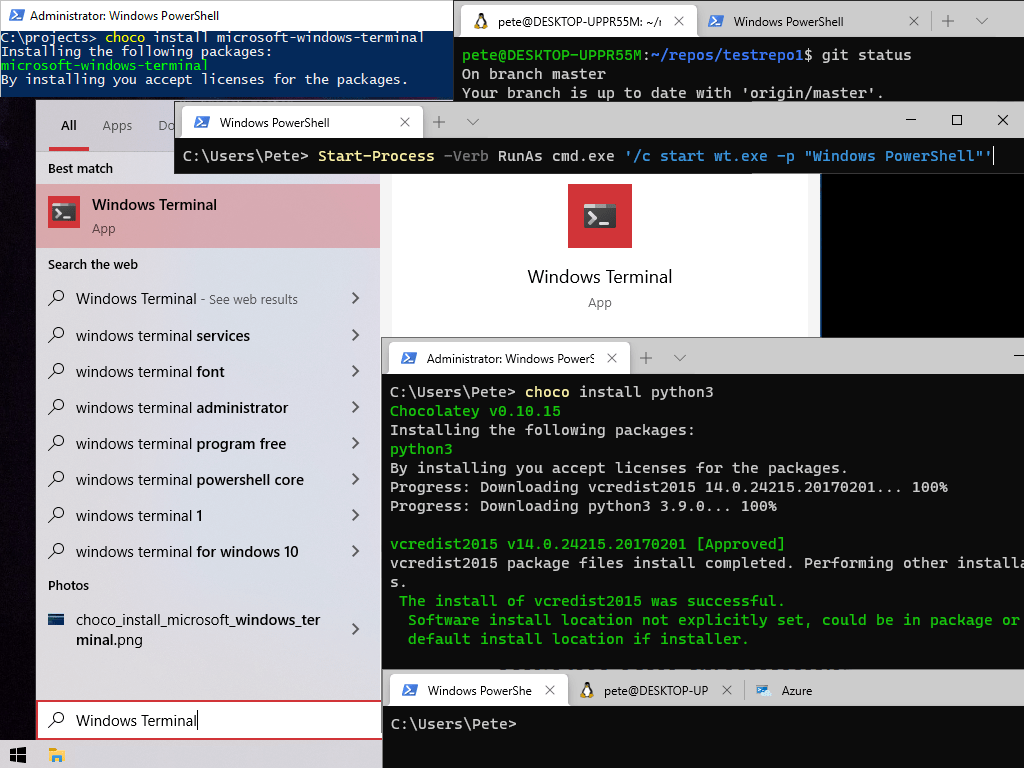
    Windows Terminal is a more modern command-line tool that has many additional features. A major benefit of WT is the multiple tabs feature.

    Windows Terminal multiple tabs

    Other benefits of Windows Terminal include Unicode / UTF-8 character support, GPU-accelerated text rendering, and the ability to create your own themes & shortcuts.

    This blog post contains a demo on how to install Windows Terminal, with an added tip on how to open PowerShell as Administrator using Windows Terminal.

    # Install Windows Terminal (WT)
    # Run PowerShell WT Session as Administrator

    Install Windows Terminal (WT)

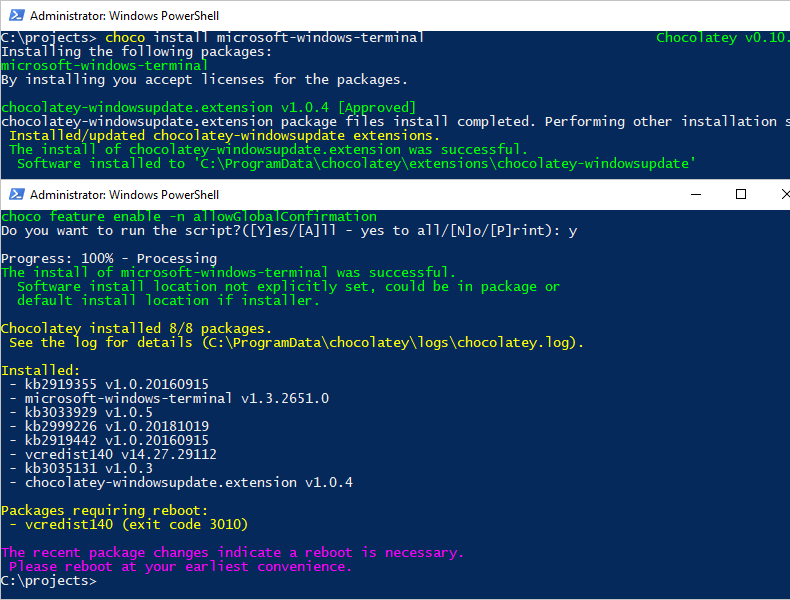
    I’m installing using Chocolatey, the Windows package manager. Note, a reboot is required post-install.

    # install windows terminal chocolatey
    choco install microsoft-windows-terminal

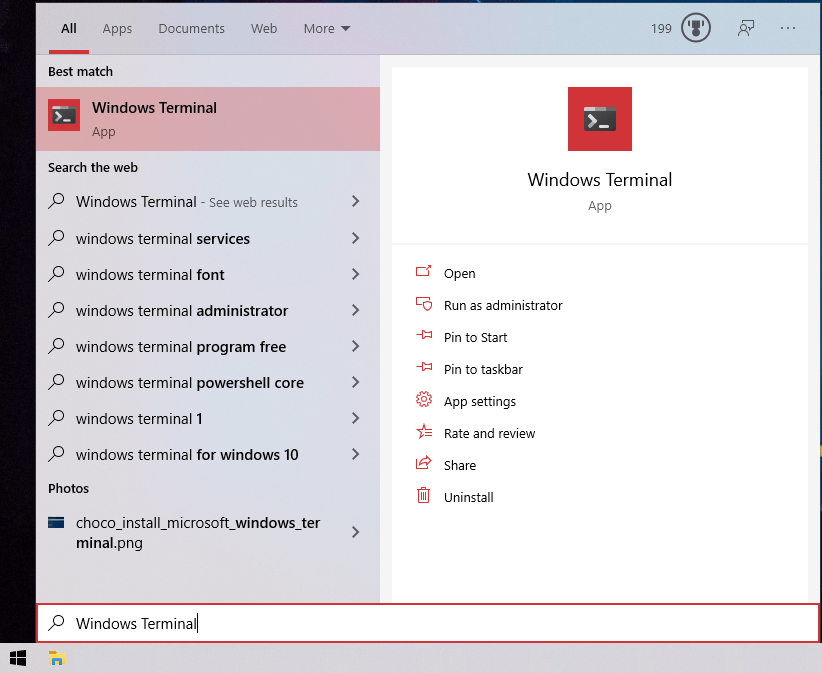
    Search and open Windows Terminal.

    Click the drop-down to open new tabs and you’re good to go.

    Run PowerShell WT Session as Administrator

    Run the command below and a new Windows Terminal will open.

    # Run PowerShell as administrator with Windows Terminal
    Start-Process -Verb RunAs cmd.exe '/c start wt.exe -p "Windows PowerShell"'

    And here’s a typical command that would require admin elevation.


  • Install posh-git on Windows

    Install posh-git on Windows

    Posh-git is a PowerShell module that integrates with Git to show git status information on the command line, and it comes with tab completion for common commands.

    This post is a quick guide on installing this using the Chocolatey package manager.

    Install Posh-Git

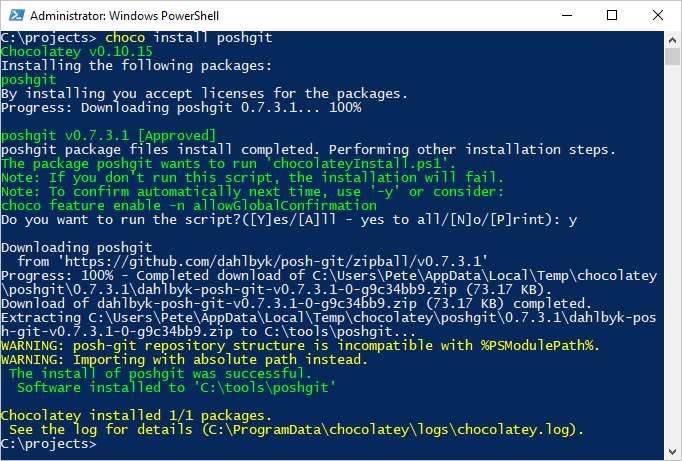
    With Chocolately the posh-git install command is:

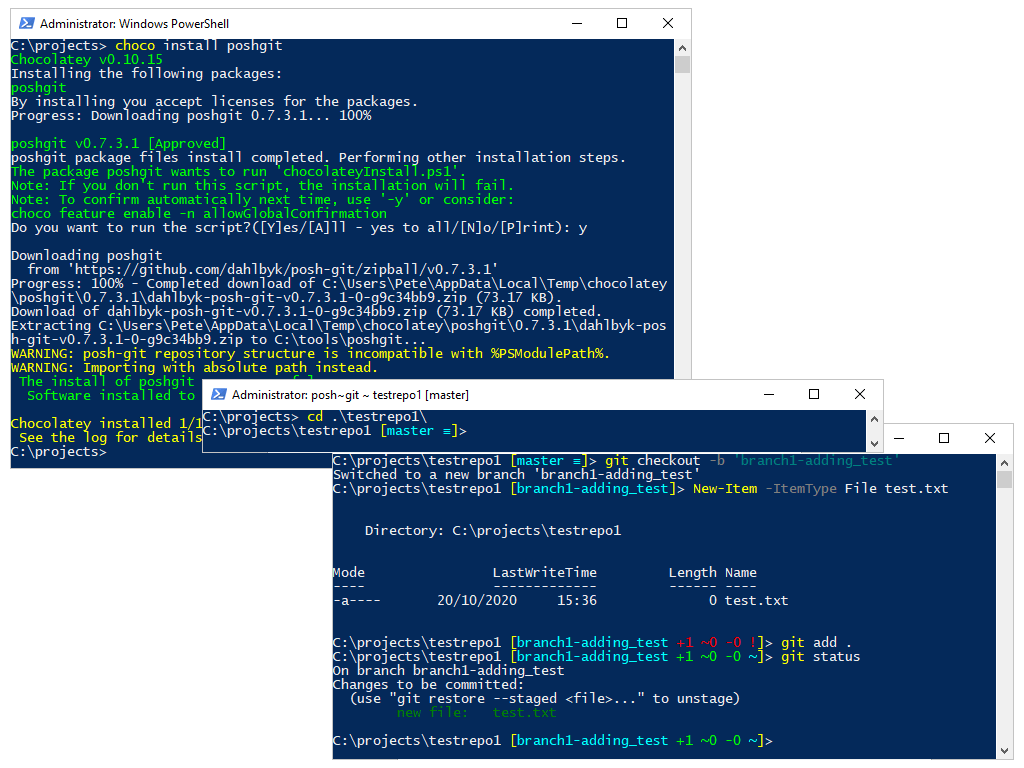
    choco install poshgit

    How Posh-Git Looks

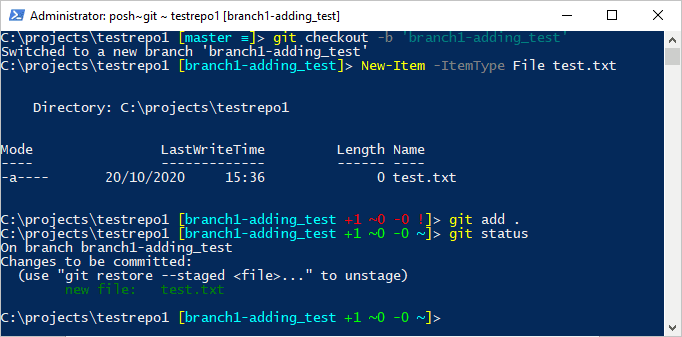
    After install navigate into a local git repo. It’s showing me to be on the master branch.

    Below is a quick demo of it working – I’m creating a new branch, creating a new text file and staging the file.


  • Change Git Remote URL to SSH from HTTPS

    Change Git Remote URL to SSH from HTTPS

    This post is a guide on how to change Git from using SSH to HTTPS for authentication.

    Using SSH for your version control system is more efficient as we do not have to enter a password every time we need to contact the remote repository.

    You should have SSH keys already setup before proceeding with the steps below. If you don’t yet have SSH keys setup, have a look at my other post which will help guide you through creating SSH keys on an Ubuntu WSL instance – Setup SSH on Ubuntu (WSL)

    The following steps demo changing SSH to HTTPS:
    # Check Current Git URL
    # Change Git from HTTPS to SSH auth

    Check Current Git URL

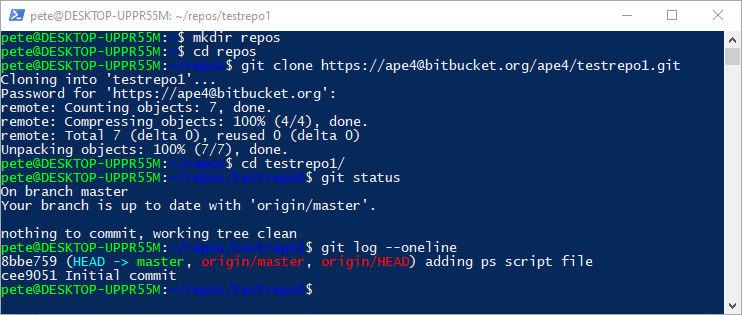
    I’m going to clone a git repo using HTTPS to set this demo up –

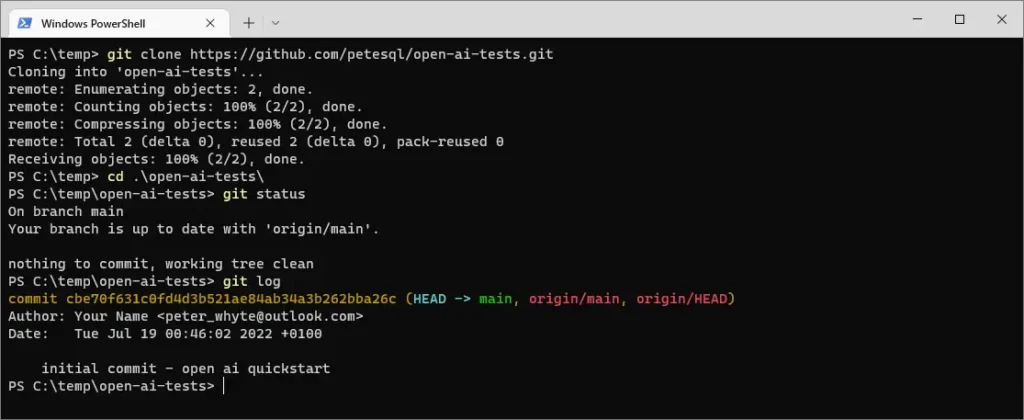
    Git Clone Repo HTTPS

    Now that we are authenticating to Git using HTTPS, we should check the Git remote URL.

    The following command will return your remote Git URL –

    # Check current remote git url
    git remote get-url origin

    If the returned value starts with HTTPS, that means we are using HTTPS to auth to Git, not SSH.

    As mentioned above, we want to move from this to SSH so we can avoid entering a password everytime we need to authenticate to the Git system. Lets make the move over to SSH auth!

    Change Git from HTTPS to SSH Auth

    We are now going to change from HTTPS to SSH in Git.

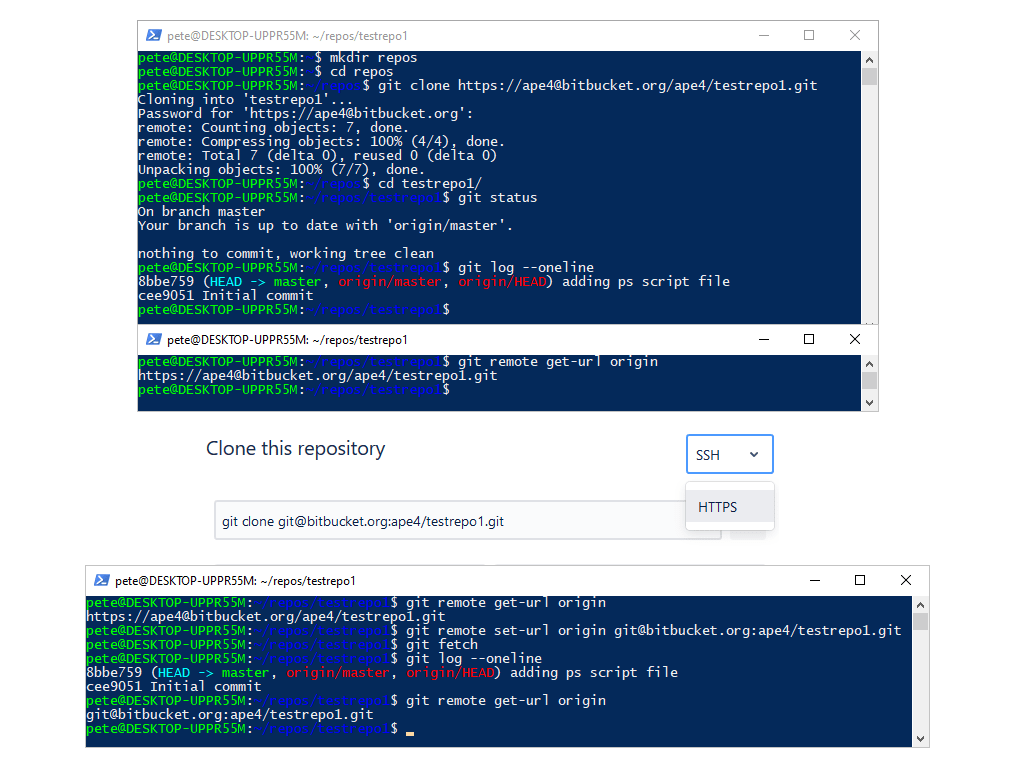
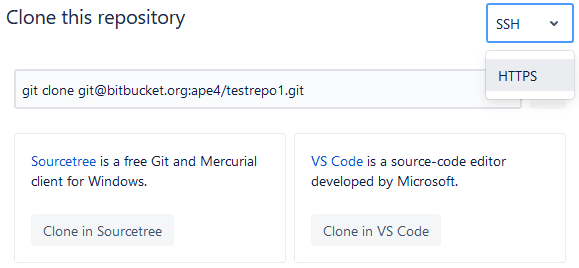
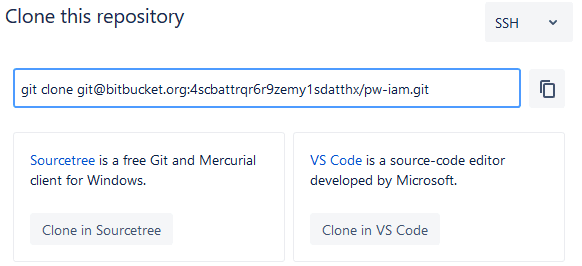
    Navigate to your Git repository link and select SSH. For this demo I’m using the Bitbucket version control system. It’s all the same though and you should be able to find the similar drop-down menu below.

    Bitbucket Remote URL

    Run the following command to set the new Git URL and make the move to SSH auth –

    # Set remote URL for Git (to SSH)
    git remote set-url origin <ssh-url>
    Git Set URL to SSH

    The above screenshot shows various commands to verify this works as expected, including git log –online which is great for checking recent repo commits with a condensed output.

  • Setup SSH Keys in WSL

    Setup SSH Keys in WSL

    Setting up SSH keys on Windows is generally done via OpenSSL or Putty. We can set this up and have quick authentication to places like GitHub or Bitbucket. But, we are also able to rely on a Linux distro in WSL for our SSH. If you are developing in WSL, this might be useful as that’s where you will be cloning your git repos to.

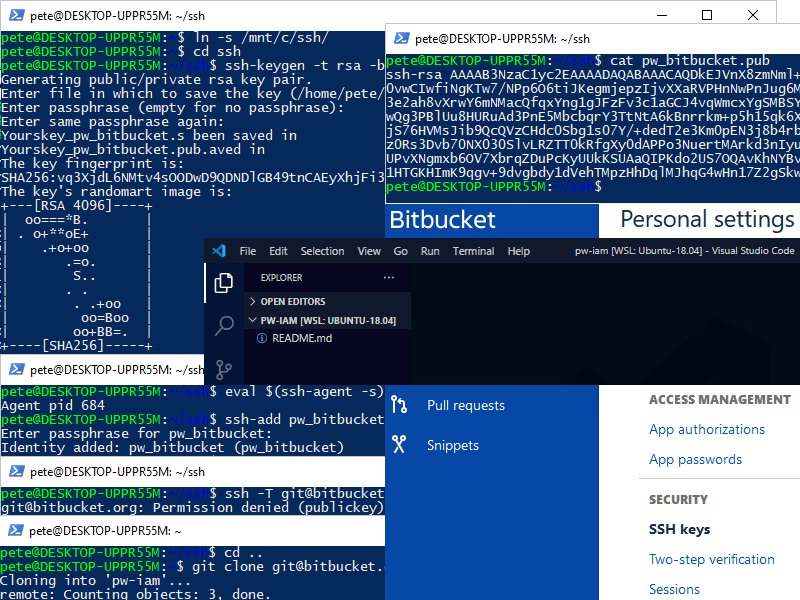
    This post contains a demo of setting up SSH keys in WSL (Windows Subsystem for Linux), on an Ubuntu 20.04 distro. The version-control system being used here is Bitbucket.

    The steps included in this SSH WSL setup are as follows:
    # Create New SSH Key
    # Add SSH Key to Agent
    # Add SSH Key to Project

    Create New SSH Key

    I’m creating a new SSH key within a WSL linked folder, which means my SSH keys are backed up on the local machine in case anything happens on this WSL instance. Even though I can easily recreate and add a new SSH key to my Bitbucket account if need be.

    This SSH key is being created with a password and being added to the SSH Agent so I don’t need to enter the password each time.

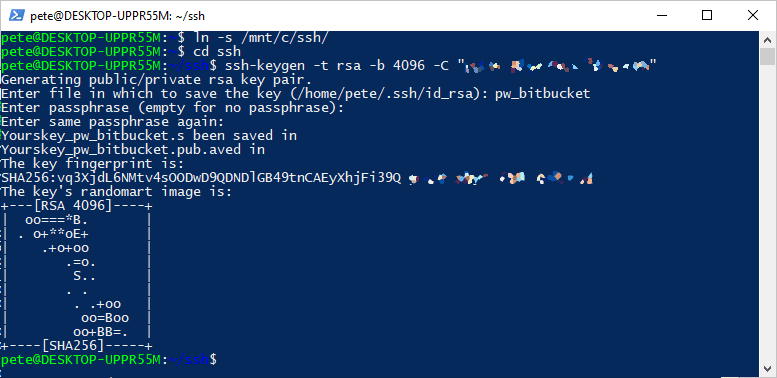
    The following command will create a new SSH key in my WSL Ubuntu instance –

    # Create a new ssh key
    ssh-keygen -t rsa -b 4096 -C "someone@email.com"
    WSL ssh-keygen

    Add SSH Key to Agent

    As mentioned above by adding our new SSH key to the ssh-agent so we don’t have to enter the passphrase every time we use it.

    Run the following to add the SSH key to SSH Agent –

    # Add ssh key to agent
    eval $(ssh-agent -s)
    ssh-add pw_bitbucket

    Add SSH Key to Project

    Now that the SSH key is ready, we just need to add that to the Git account you’re using. As mentioned, I’m using Bitbucket in this demo.

    Run the cat Linux command on the public SSH key (.pub file) to show the SSH key for Bitbucket. Copy everything except the email at the end.

    # Ssh to app/host
    ssh -T git@bitbucket.org

    Below is an example of when you haven’t added the SSH key to your account yet –

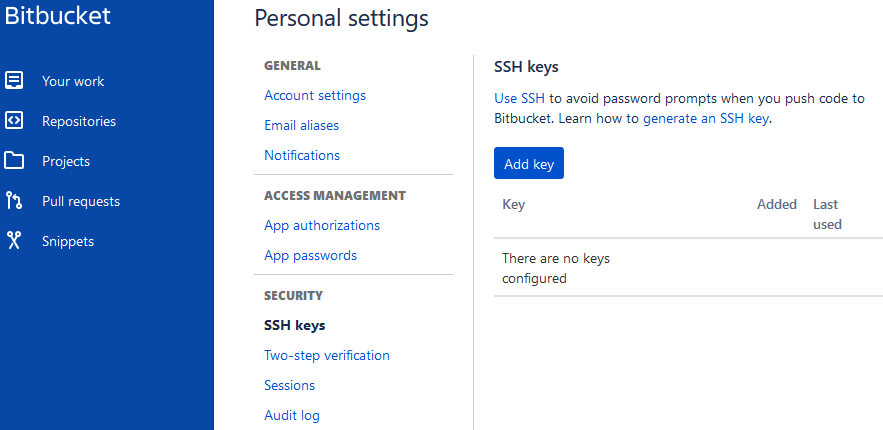
    This is what we are going to do now. Add the SSH key to your git/Bitbucket account.

    Now re-trying the SSH connection –

    logged in as bl4h130b1aH” – We can see it has worked this time. Our SSH keys are stored in Bitbucket and we are logged in, and authenticated via SSH.

    We are ready to clone a repo into WSL. Navigate to the desired folder in the WSL Linux terminal and run the git clone command as per the repo link.

    The git repo has been cloned successfully. I will now open Visual Studio Code and get to work!

  • “Config Lock Failed Operation not Permitted” – Git

    “Config Lock Failed Operation not Permitted” – Git

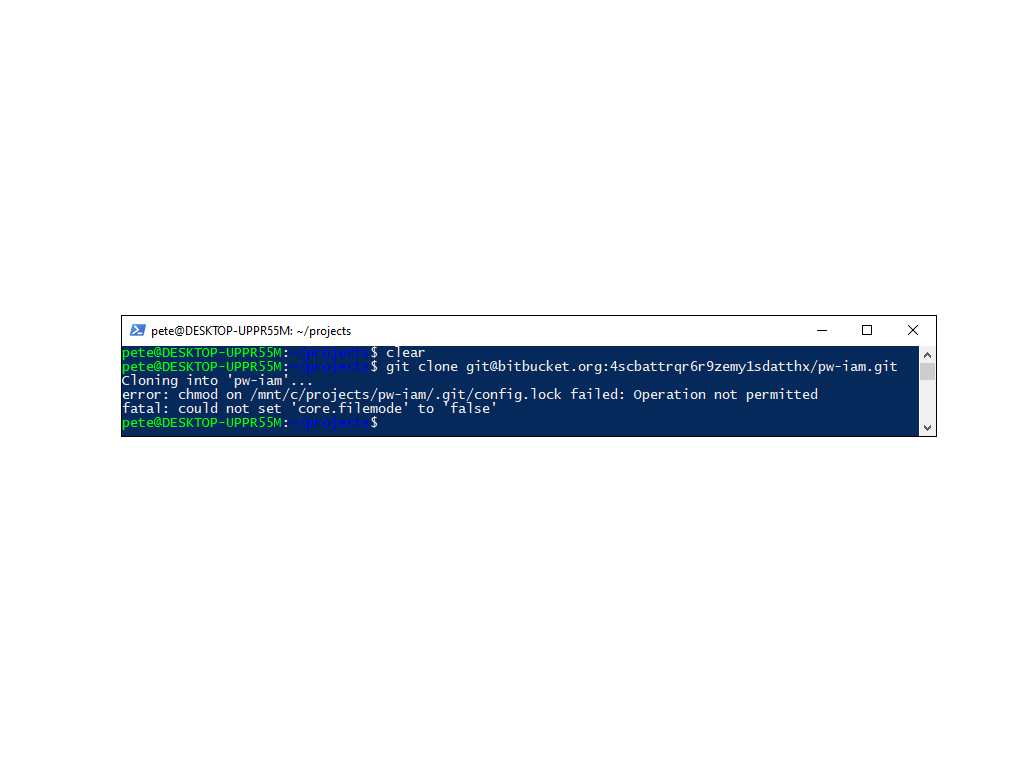
    When attempting to clone a git repository on a linked folder within Windows Subsystem for Linux (WSL), I encountered the following error message:

    Cloning into 'pw-iam'...
    error: chmod on /mnt/c/projects/pw-iam/.git/config.lock failed: Operation not permitted
    fatal: could not set 'core.filemode' to 'false'
    
    WSL Git Clone Linked Folder Error

    This error occurs when cloning repos to a mounted Windows drive in WSL. I am not sure of the fix for this issue, but if anyone has a solution, please let me know. Otherwise, this post serves as a note-to-self for me to try and figure out the solution in the future.

  • Install Git on Windows

    Install Git on Windows

    This is a post on how to install Git (version control system) on a Windows computer.

    For more information have a look at the git-scm page, which is where we can download the client.

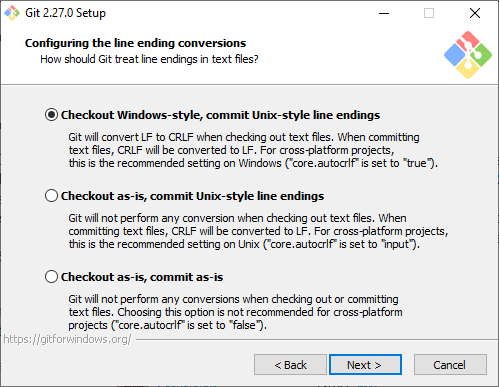
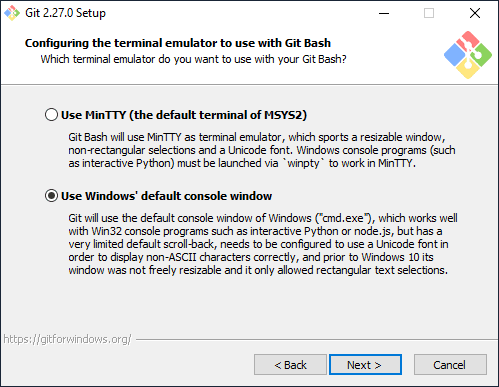
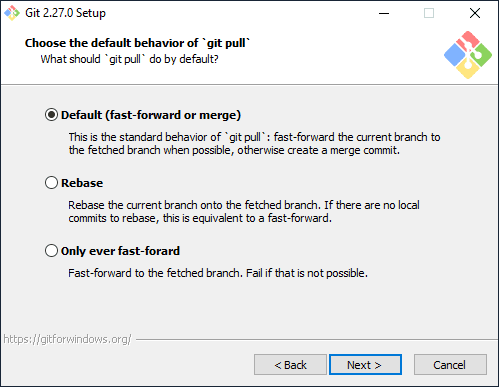
    There are a lot of configuration options throughout this wizard install, but there is no need to worry – most settings can be changed post-install, and in the worse case, reinstalling Git will not set you far back in life!


    Install Git on Windows (GUI)

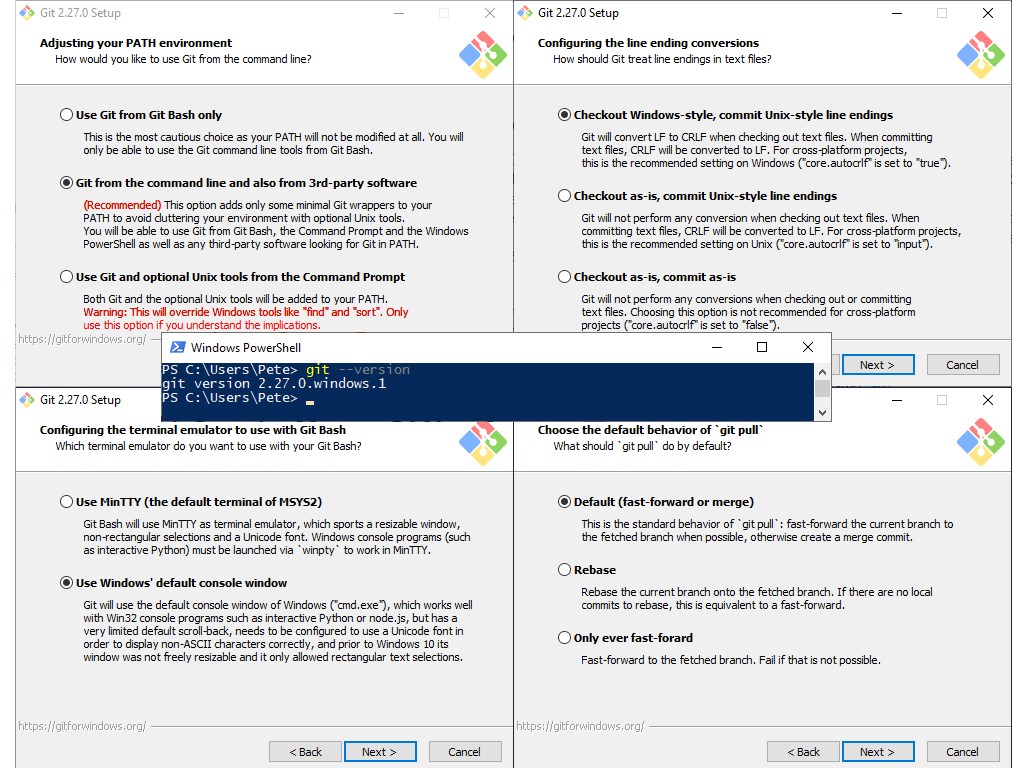
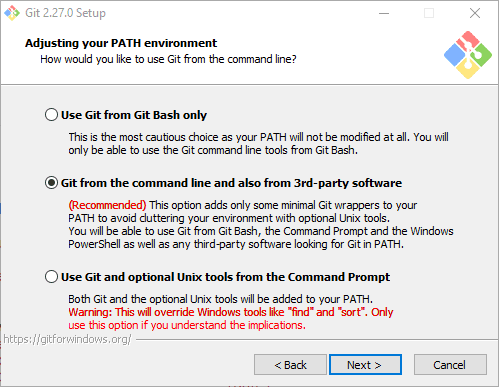
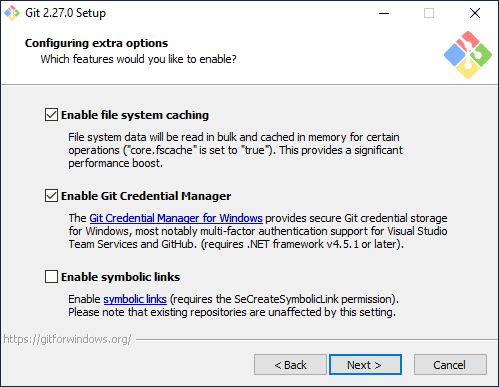
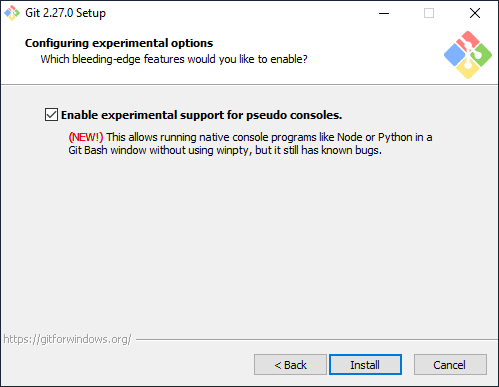
    A simple download and wizard run; here are the notable configuration options throughout.

    Git Install Configure Extra Options

    Once the above is done, restart PowerShell / VS Code.

    Run ‘git –version’ in PowerShell to confirm.

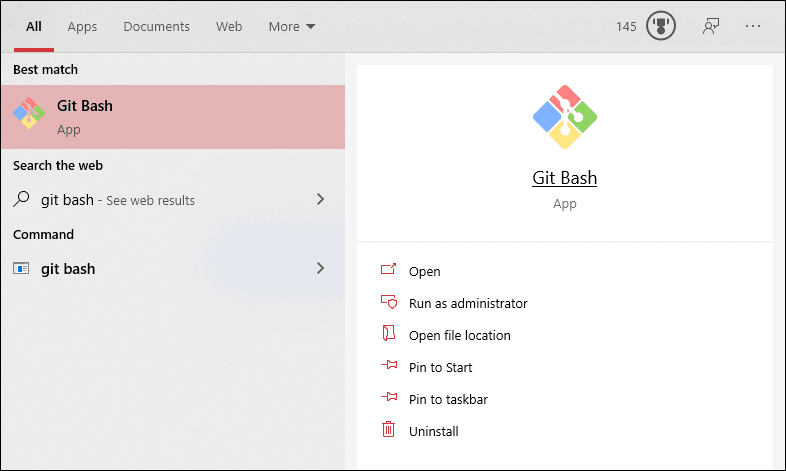
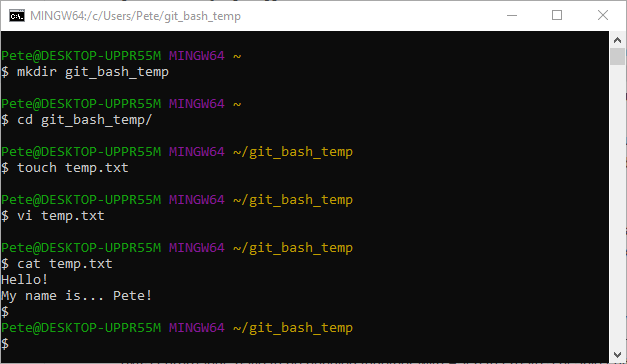
    Open Git Bash from the Start Menu.