-
Create Folder If Not Exists in PowerShell
Creating folders programmatically can streamline tasks and ensure that required directory structures are in place.
In this guide, we explore a simple yet effective PowerShell script to check if a folder exists and create it if it doesn’t. By leveraging the
Test-PathandNew-Itemcommands, you can automate this task for any directory you need.Key Topics Covered:
> UsingTest-Pathto Check for Folder Existence
> Creating a Folder withNew-Item
> Customizing the Script for Different Use Cases1. Using
Test-Pathto Check if a Folder ExistsThe first step is to determine if the folder already exists using the
Test-Pathcommand. This command returns a boolean value:Trueif the path exists, andFalseotherwise.Here’s the basic syntax to check for a folder:
# Define the folder path
$path = "C:\temp\"

# Check if folder exists
If (!(Test-Path $path)) {
    Write-Host "Folder does not exist."
}
–
$path:
Stores the folder path to check.–
!(Test-Path $path):
The!operator negates the result. The condition evaluates toTrueonly if the folder does not exist.Write-Host:
Outputs a message to the console for feedback.2. Creating a Folder with
New-ItemIf the folder does not exist, you can create it using
New-Item. This command allows you to specify the type of item (in this case, a directory) and the location for creation.Here’s the full script to check for and create a folder:
# Define the folder path
$path = "C:\temp\"

# Check if folder exists
If (!(Test-Path $path)) {
    Write-Host "Folder does not exist."
}
3. Customizing the Script for Different Folders
You can easily adapt this script to check and create different folders by modifying the
$pathvariable.For example, to check for and create the folder
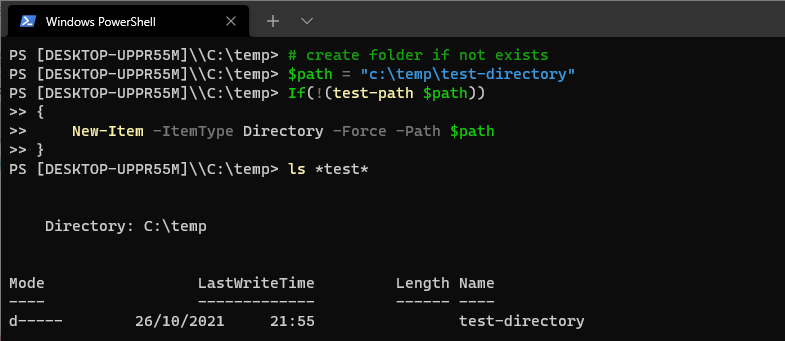
C:\myfolder\:# Define the custom folder path $path = "C:\myfolder\" # Check and create folder if not exists If (!(Test-Path $path)) { New-Item -ItemType Directory -Force -Path $path Write-Host "Folder created at $path." } Else { Write-Host "Folder already exists." }By modifying the
$pathvariable, you can use this script to check for and create any folder you need.
Additional Tips:
Dynamic Paths:
You can use environment variables or parameters to dynamically define folder paths.$userProfilePath = "$env:USERPROFILE\Documents\NewFolder"Error Handling:
UseTry-Catchblocks to handle unexpected errors when creating folders.Automation:
Integrate the script into larger automation tasks for efficient file management. -
Get-TimeZone in PowerShell
The
Get-TimeZonecmdlet in PowerShell retrieves the current time zone of a computer. It can also list all available time zones, which is helpful if you’re planning to make changes to the system’s time zone settings.In this post I’m sharing two examples of how to check the local time zone with PowerShell:
> Get Time Zone using PowerShell
> Script to Output Available Time Zones to a CSV FileGet the Time Zone using PowerShell
Running
Get-TimeZonein PowerShell will return the currently set timezone of the local Windows Computer.# get timezone powershell Get-TimeZone
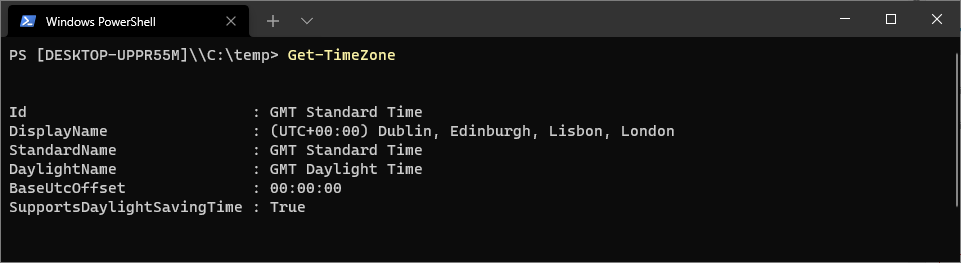
The above shows we are on GMT Standard Time, UTC+00:00. Script to Output Available Time Zones to a CSV File
The following PowerShell script outputs all available time zones to a CSV file in a specified directory:
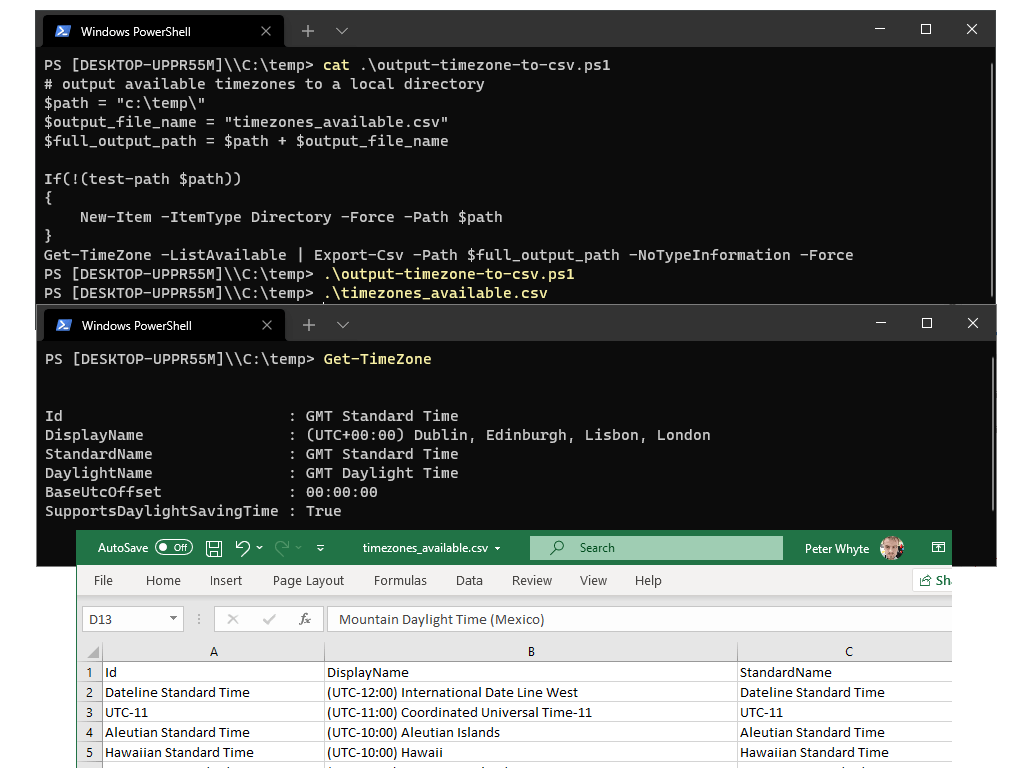
# output available timezones to a local directory
$path = "c:\temp\"
$output_file_name = "timezones_available.csv"
$full_output_path = $path + $output_file_name

If(!(test-path $path))
{
    New-Item -ItemType Directory -Force -Path $path
}
Get-TimeZone -ListAvailable | Export-Csv -Path $full_output_path -NoTypeInformation -Force
I saved this script to my c:\temp folder and ran it:
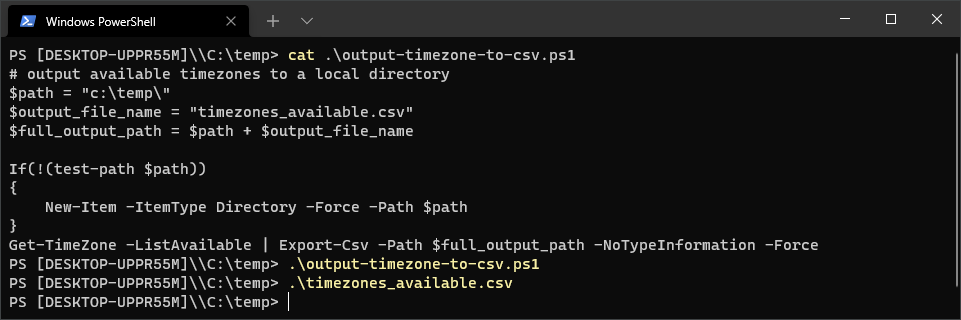
The CSV will contain all time zones available:

This isn’t really a regular or task that you’d be doing often. I’m more just noting a different way of saving this info.
-
Get-Service in PowerShell
The
Get-Servicecommand in PowerShell is the tool for listing, filtering, and managing the services running on a computer. This quick guide is aimed at helping you understand it’s capabilities, with examples that sysadmins will find especially useful.Contents:
> Listing All Services on a Computer
> Filtering Services by Name
> Filtering Services by Status
> Starting, Stopping, and Managing Services
> Checking Service Dependencies
> Using Get-Service Remotely
> Exporting Service Info to CSVBasic Usage of Get-Service
To get a list of all services on your computer, simply run the
Get-Servicecmdlet:# list all services on computer Get-Service
This will return a complete list of services, showing key details like the service name, display name, and status (Running, Stopped, etc.).
Filtering Services by Name
You can use wildcards (
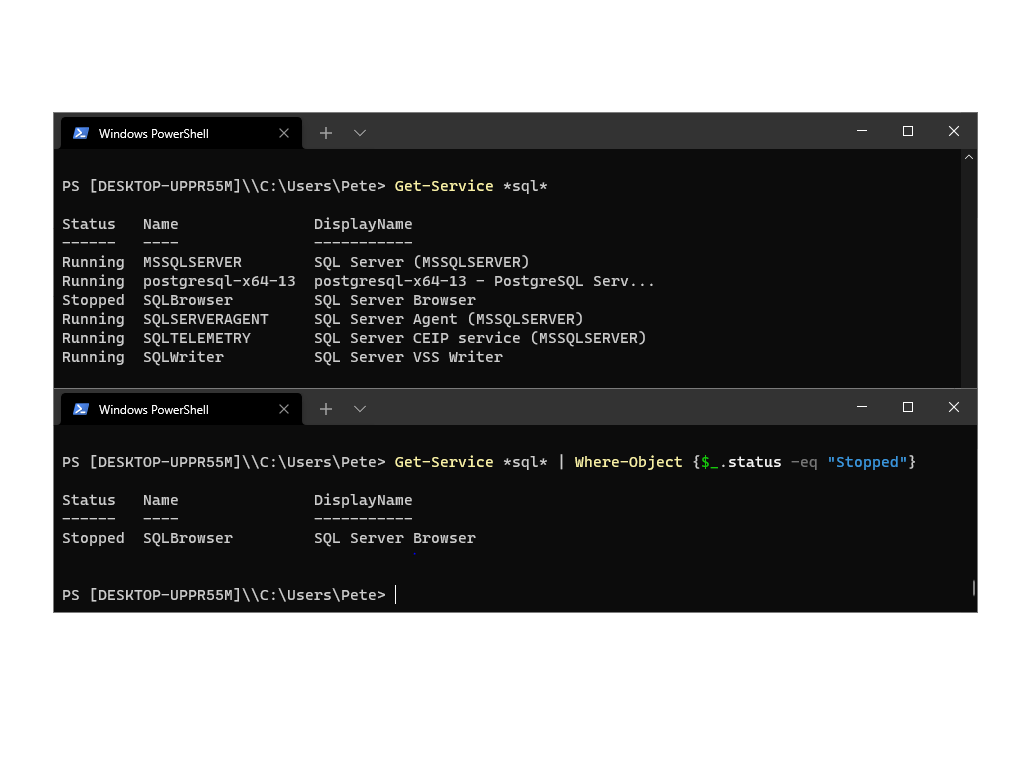
*) to filter services by name. For example, to display all services with “SQL” in the name:# list all sql services on computer Get-Service *sql*

This is particularly useful for identifying services related to a specific application or feature, such as all SQL
Filtering Services by Status
To narrow down the results further, you can filter services based on their status. For example, to list only “Stopped” services with “SQL” in the name:
# show all 'Stopped' SQL Services
Get-Service *sql* | Where-Object {$_.Status -eq "Stopped"}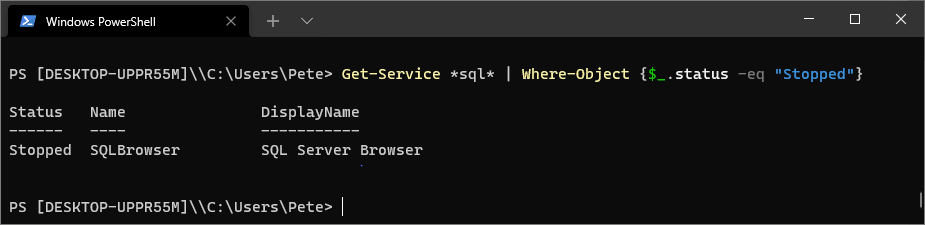
Common Service Status Values:
– Running
– Stopped
– Paused
– StartPending
– StopPendingKnowing these values can help you create specific filters to meet your needs.
Starting or Stopping a Service
DBAs & Sysadmins often need to start or stop services. You can use
Start-ServiceandStop-Servicein combination withGet-Service.For example, to start all stopped SQL services run the following:
# start SQL Services if they are not running
Get-Service *sql* | Where-Object {$_.Status -eq "Stopped"} | Start-Service
Or to stop all running SQL services:
# stop SQL agent service if its running
# this is for demo purposes only
Get-Service *sqlserveragent* | Where-Object {$_.Status -eq "Running"} | Stop-Service
Checking Service Dependencies
To investigate dependencies for a specific service, use the
-DependentServicesor-RequiredServicesparameters:# show dependent services for service example (Get-Service -Name MSSQLSERVER).DependentServices
This will list all services that depend on the specified service, helping you understand the impact of stopping or restarting it.
Using Get-Service Remotely
You can query services on a remote computer using the
-ComputerNameparameter:# Get services for remote computer Get-Service -ComputerName Server01
Combine this with filtering to check specific services on remote systems:
# check running sql services for remote computer
Get-Service *sql* -ComputerName Server01 | Where-Object {$_.Status -eq "Running"}
Exporting Service Information to CSV
To save service details for reporting or documentation, you can export the results to a file:
# export service details to csv files
Get-Service *sql* | Export-Csv -Path "C:\ServicesReport.csv" -NoTypeInformation
This generates a CSV file with the filtered service details, which can be easily shared or archived.
-

How to Install & Configure AWS CLI on Ubuntu
This guide will walk you through the steps to install and configure AWS CLI version 1 on Ubuntu (20.04).
Topics Covered:
1. Updating Local Packages
2. Installing AWS CLI on Ubuntu
3. Checking Installed AWS CLI Version
4. Configuring AWS Profile
5. Running AWS CLI Commands1. Updating Local Packages
To start, update your local packages by running the following command:
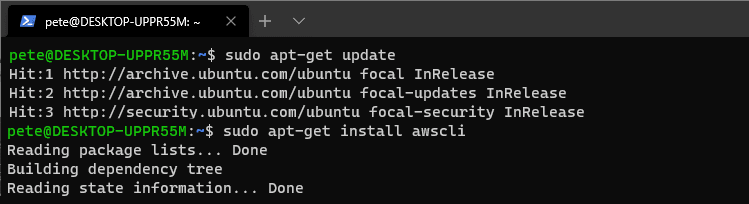
# update local packages ubuntu
sudo apt-get update
2. Installing AWS CLI on Ubuntu
To install AWS CLI on your Ubuntu machine, run the following command:
# install awscli ubuntu
sudo apt-get install awscli
3. Checking Installed AWS CLI Version
After the installation is complete, check the version of AWS CLI installed by running:
# check version of awscli installed
aws --version

4. Configuring Your AWS Profile
Once the installation is confirmed, set up your AWS profile by running the
aws configurecommand as shown below.You will need your AWS Access Key ID and Secret Access Key, which you can retrieve or create in the AWS IAM Console.
# configure aws profile
aws configure
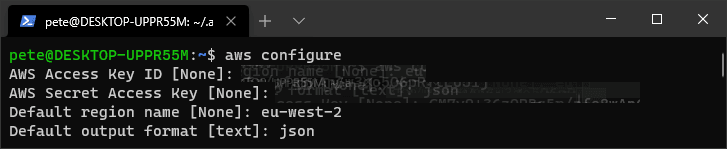
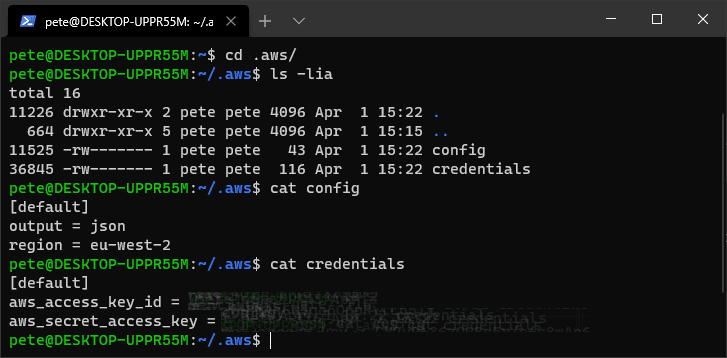
For reference, here are the output config files:
5. Running AWS CLI Commands
Once your profile is set up, you can run AWS CLI commands. For example, the following command lists all S3 buckets in your AWS account that begin with the “pw-” prefix:

Hope this was useful for you!
-
How to Install and Configure AWS CLI on Windows
This post is a how-to for installing & configuring AWS CLI (Version 2) on Windows.
In this guide, we’re going to download the AWS Command Line Interface installation media and run through the simple installation. Once done we’ll configure AWS CLI, which you’ll need an AWS Account to do so.
> Install AWS CLI V2 on Windows
> Configure AWS CLI V2Install AWS CLI V2
Download AWS CLI V2 and run through the MSI installer. Run the .msi file you downloaded, and click next, next & done to complete the installation.
Alternatively, we can install AWS CLI using the PowerShell commands below.
# Download AWS CLI msi file, output to current directory
Invoke-WebRequest -Uri https://awscli.amazonaws.com/AWSCLIV2.msi -UseBasicParsing -OutFile 'AWSCLIV2.msi'

# Run AWS CLI install
.\AWSCLIV2.msi
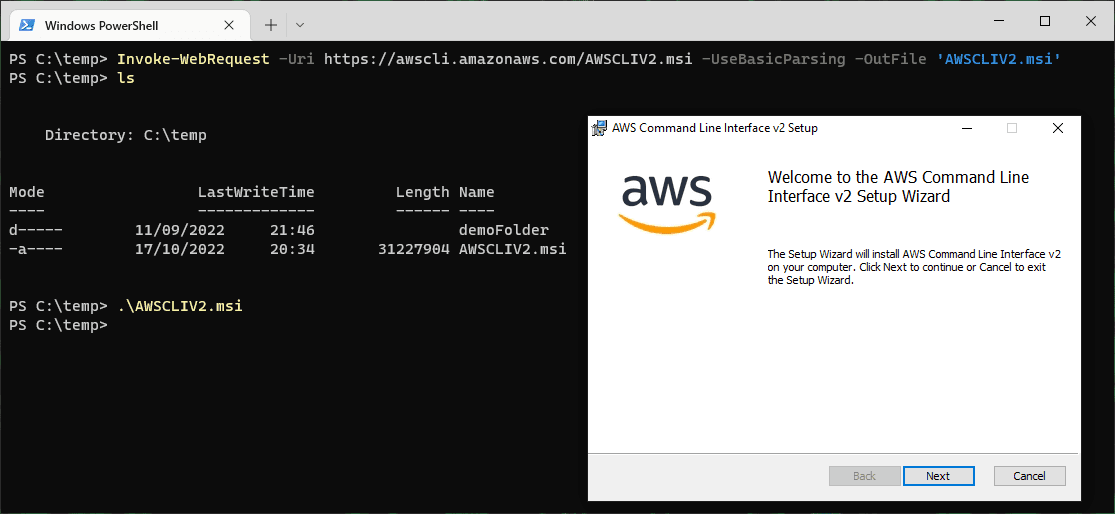
When the installation completes, close and re-open any terminals you have open. You should remember/consider doing this every time you install a package for development, close/reopen your VS Code or Windows Terminal.
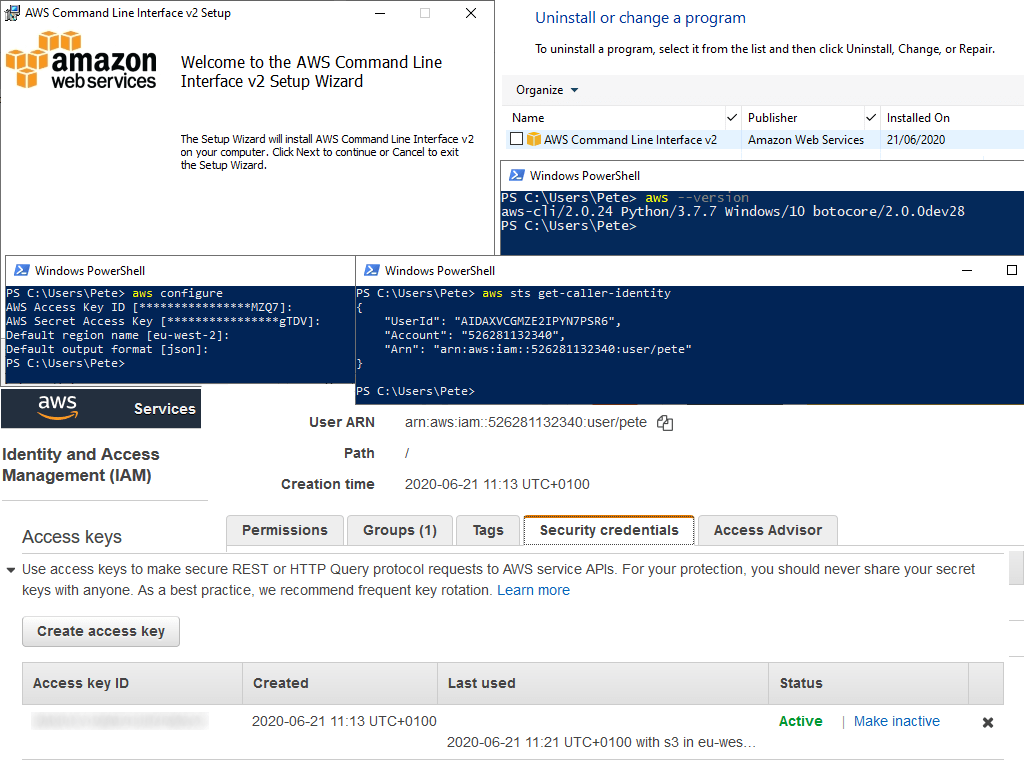
Open your command terminal and verify the AWS CLI install by checking the version. Run ‘aws –version‘ as shown in the example below.

Configure AWS CLI V2
Now that we have AWS CLI installed on our machine, we need to open a web browser for the next steps, and head to the AWS Console.
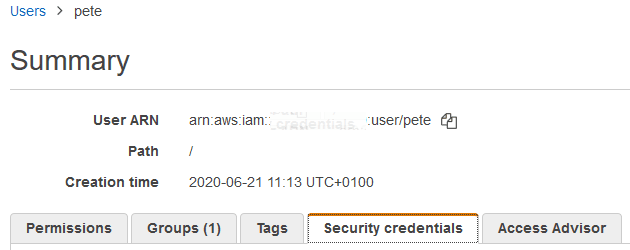
Open AWS IAM and create/select a user with appropriate permissions. My ‘pete‘ login has full Admin (AdministratorAccess Policy) in this case.
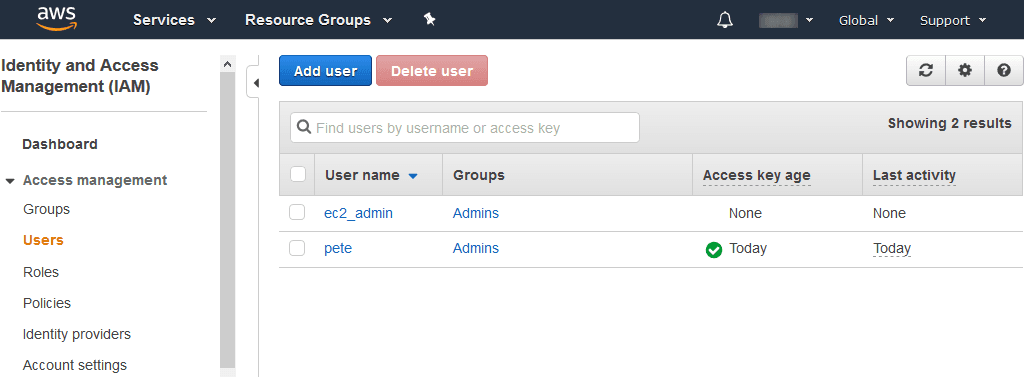
Click on the Security Credentials tab within the user properties.
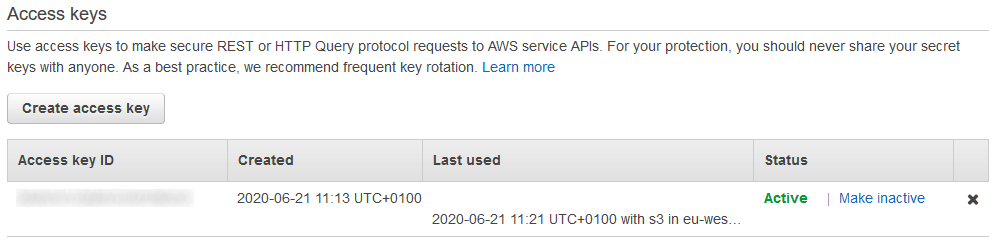
Scroll down to view & create Access Keys. Click to create a new key to see both the Access key ID and Secret Access Key of existing keys.
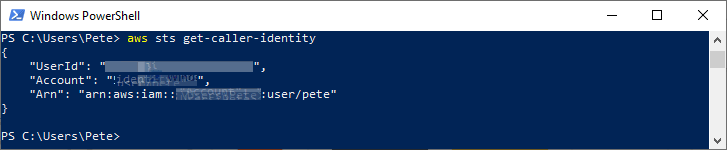
Open PowerShell and run ‘aws configure‘. You’ll be prompted for:
– AWS Access Key ID (above)
– AWS Secret Access Key (above)
– Default Region Name
– Default Output Format
Once you’ve entered these details for the first time it’ll save your details, so for me above I’m just hitting enter at each prompt.
Run ‘aws sts get-caller-identity‘ to confirm what you’re logged in as.