This post will guide you on how to add and remove features from SQL Server via the command line. The process includes checking installed features, installing a new feature (such as replication), and uninstalling a feature when no longer needed.
The following areas will be covered within this post:
1. Checking Features Installed on a SQL Server
2. 2. Installing a SQL Server Feature (Replication)
3. 3. Uninstalling a SQL Server Feature (Replication)
1. Checking Features Installed on a SQL Server
Before installing or removing features, it’s essential to know which features are already installed on your SQL Server instance.
Prerequisite: Mounted SQL Server ISO
We should ensure that the SQL Server installation media is available and mounted before continuing. This will allow you to run the discovery process necessary for feature management.
Running the Discovery Command
To check the installed features, run the following command to perform a “Discovery” of the SQL Server instance.
This command will initiate the discovery process, which will briefly scan your system and provide details about the features installed on your SQL Server instance.
Setup.exe /q /ACTION=RunDiscovery

Viewing the Discovery Results
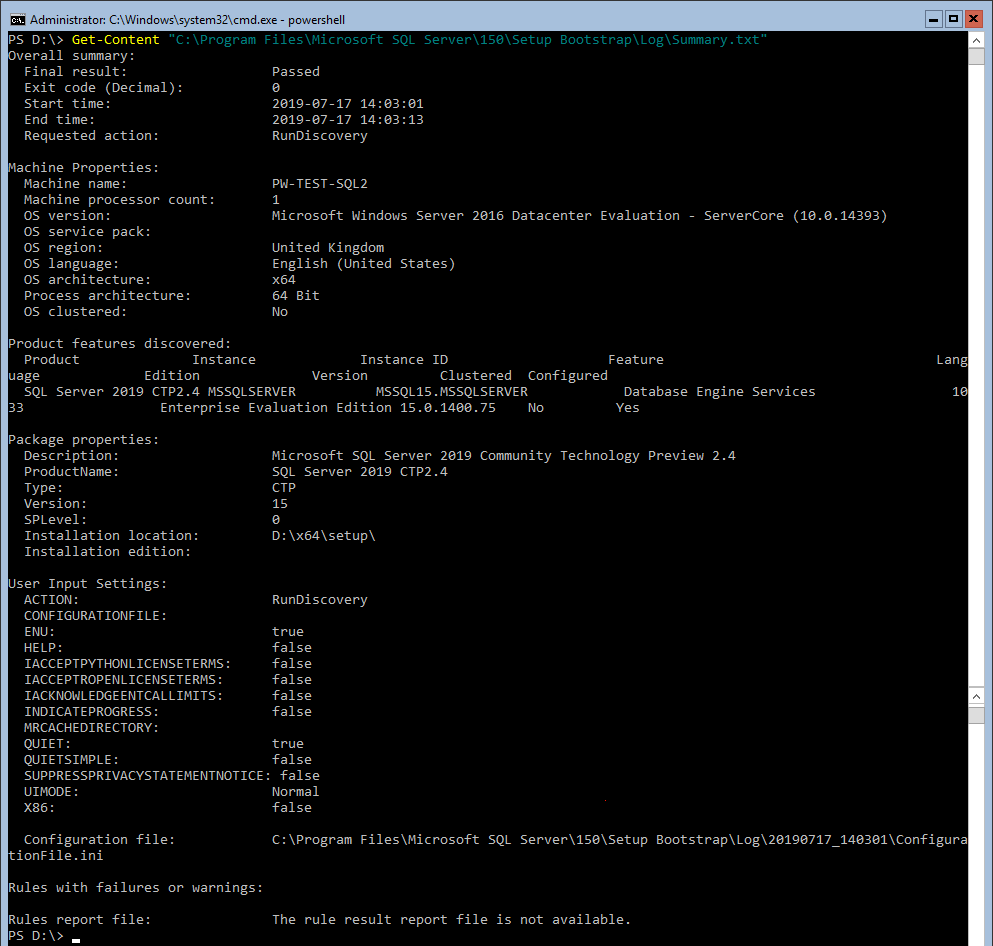
Once the discovery process completes, you can view the results in the Summary.txt file. The file will typically be located in the C:\Program Files\Microsoft SQL Server\<version>\Setup Bootstrap\Log directory.
2. Installing a SQL Server Feature (Replication)
Now that you know how to check for existing features, let’s move on to adding a new feature. In this example, we will install the Replication feature.
Installing the Replication Feature
To install the Replication feature via the command line, use the following syntax:
.\Setup.exe /qs /ACTION=Install /FEATURES=Replication /INSTANCENAME=MSSQLSERVER /IACCEPTSQLSERVERLICENSETERMS
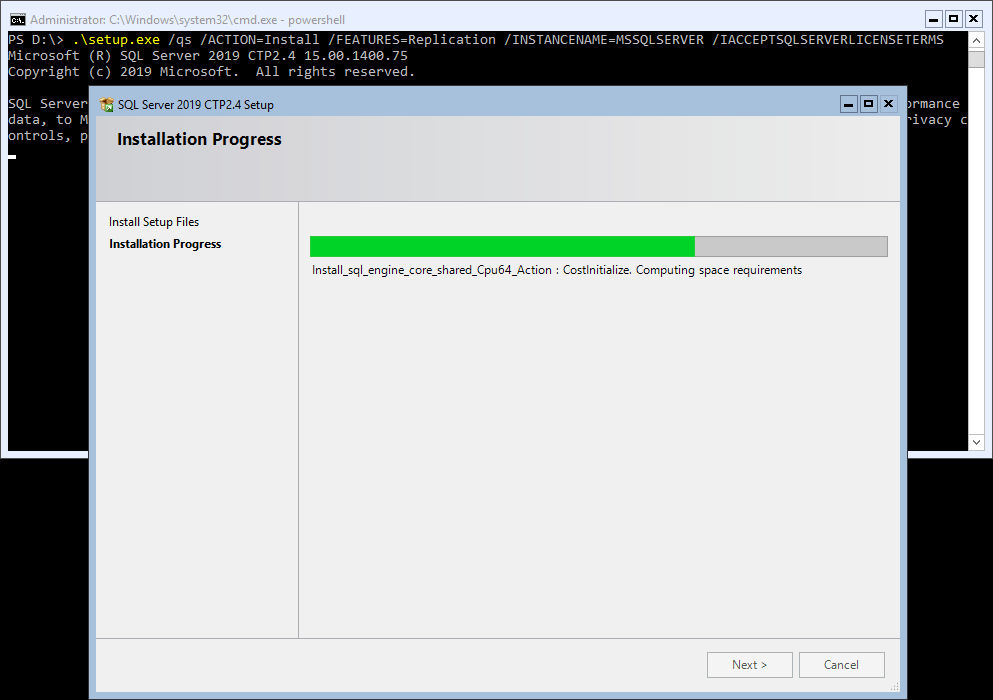
Here’s a breakdown of the parameters: /ACTION=Install : This tells the installer to install a new feature. /FEATURES=Replication : Specifies that you want to install the Replication feature. /INSTANCENAME=MSSQLSERVER : Indicates the name of the SQL Server instance where the feature will be installed.
Verifying the Installation
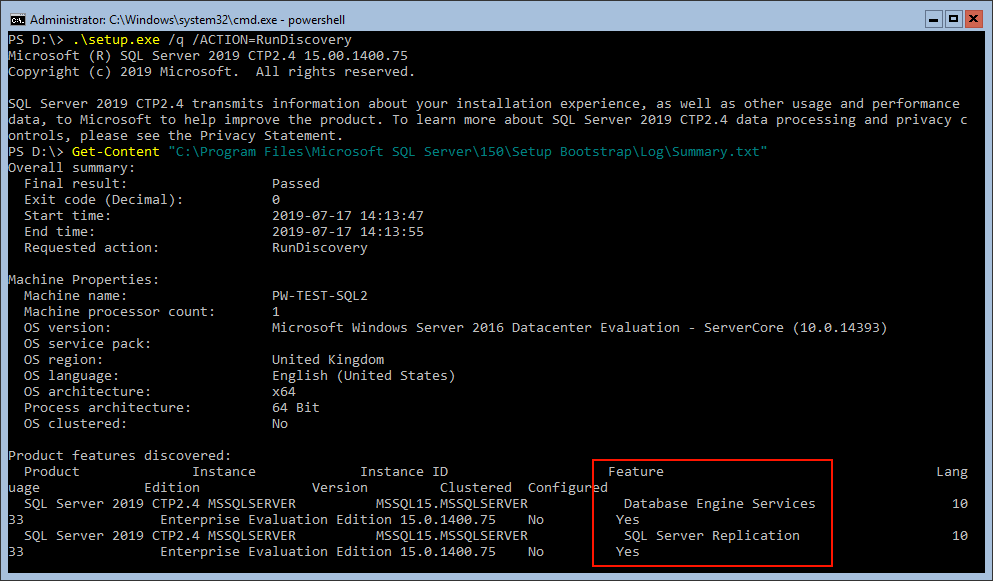
After running the installation command, you can verify the feature installation by performing another Discovery.
3. Uninstalling a SQL Server Feature (Replication)
If you decide to remove a feature that is no longer needed, the process is just as straightforward as installation.
Uninstalling the Replication Feature
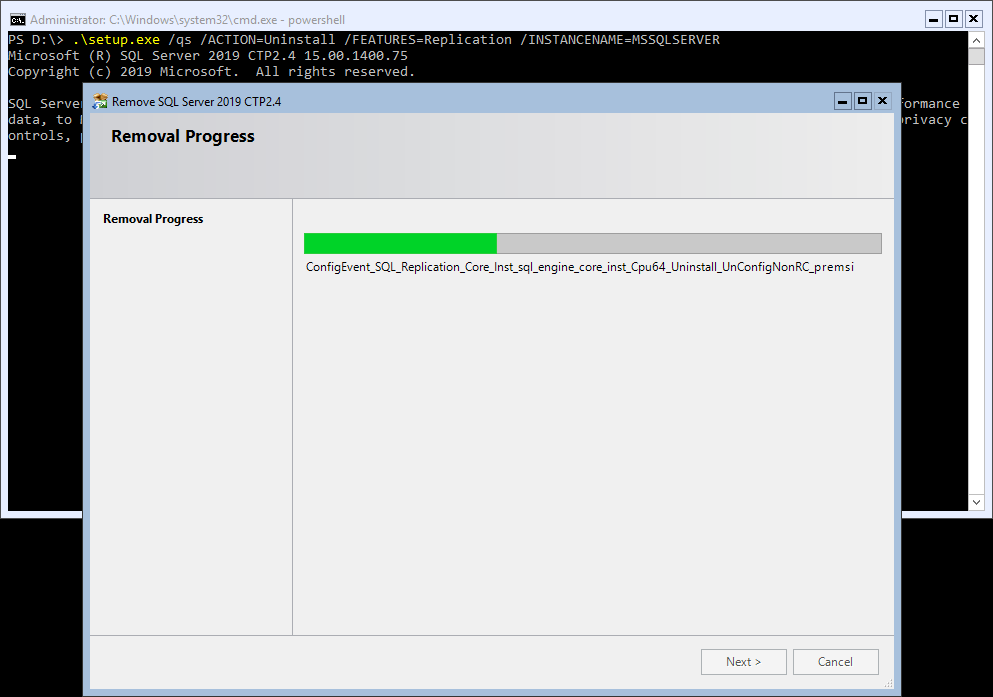
To uninstall the Replication feature from your SQL Server instance, use the following command:
Setup.exe /q /ACTION=Uninstall /FEATURES=Replication /INSTANCENAME=MSSQLSERVER
Verifying the Uninstallation
Once uninstallation is complete, run the Discovery command once more to verify that Replication has been removed.
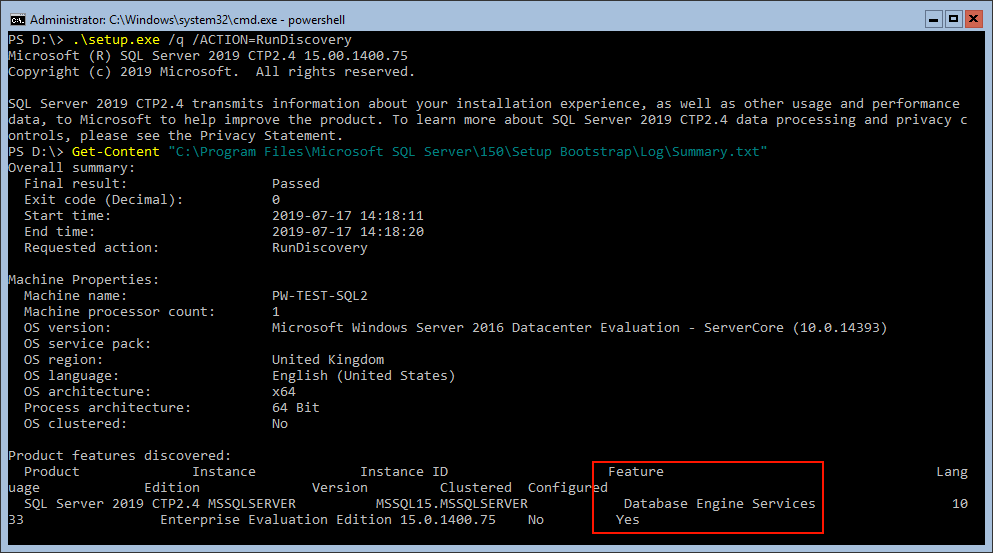
We can check the Summary.txt file to confirm that the Replication feature is no longer listed.
Hope this was all useful for you. For more information, check out the MS Docs on adding new features to SQL Server. We should always read those docs before making any changes.
Leave a Reply