
This is a post on how to change a Windows Subsystem for Linux (WSL) Distribution from running on Version 2 to Version 1.
Windows Subsystem for Linux (WSL) supports two versions:
> WSL2: The latest version with full Linux kernel support, offering better compatibility and performance.
> WSL1: The original version with faster file access on Windows file systems but lacking full kernel support.
Depending on your development needs, you may prefer WSL1 for tasks like faster file operations or using older tools that function better without kernel emulation.
For detailed differences between WSL1 and WSL2, checkout Microsoft’s documentation.
Steps to Switch from WSL2 to WSL1
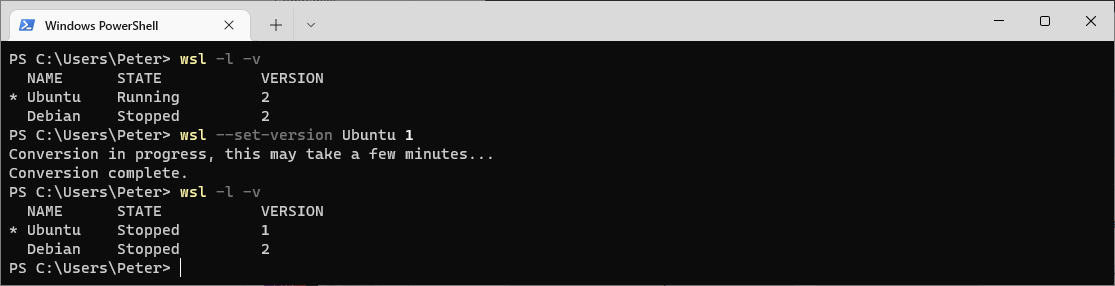
1. List Installed WSL Distributions
Check the current version for each installed distribution:
# check wsl distro versions
wsl -l -v
The output will show all available WSL distributions and their corresponding version numbers.
2. Set the Desired Version
Next, use the following command to switch a specific distribution (replace “Ubuntu” with your distribution name):
# change wsl distro using name above to desired version
wsl --set-version Ubuntu 1
3. Verify the Change
Run the list command again to confirm the distribution is now using WSL1:
While WSL2 provides more features, WSL1 might be better in scenarios such as:
– Faster access to files on Windows drives.
– Lower memory usage without full kernel overhead.
– Legacy software compatibility.
Comments
3 responses to “How To Change From WSL2 to WSL1”
The version argument for the command is actually “–set-version”, not “–wsl-version”.
Cheers for this, I’ll update.
Updated, added words and sorted grammar.