
This guide shows how to install Ubuntu 20.04 on WSL (Windows Subsystem for Linux). Before installing a WSL Linux distribution you should have already enabled WSL on your computer.
All WSL Linux distributions are available for download in the Microsoft Store. This is the easiest way to install a WSL Linux distro. If you are automating WSL installations, you may be looking for the WSL distro download links and PowerShell install command.
This post contains the following methods to get Ubuntu installed on WSL:
> Install WSL Ubuntu 20.04 via Microsoft Store
> Install WSL Ubuntu 20.04 via Command
Install WSL Ubuntu 20.04 via Microsoft Store
You can find all the available WSL Linux distributions in the Microsoft Store available for download. This may be restricted by Group Policy if you’re on a Domain (a work/corporate computer).
Click Start, open the Microsoft Store and simply search for the Ubuntu distribution version you desire.
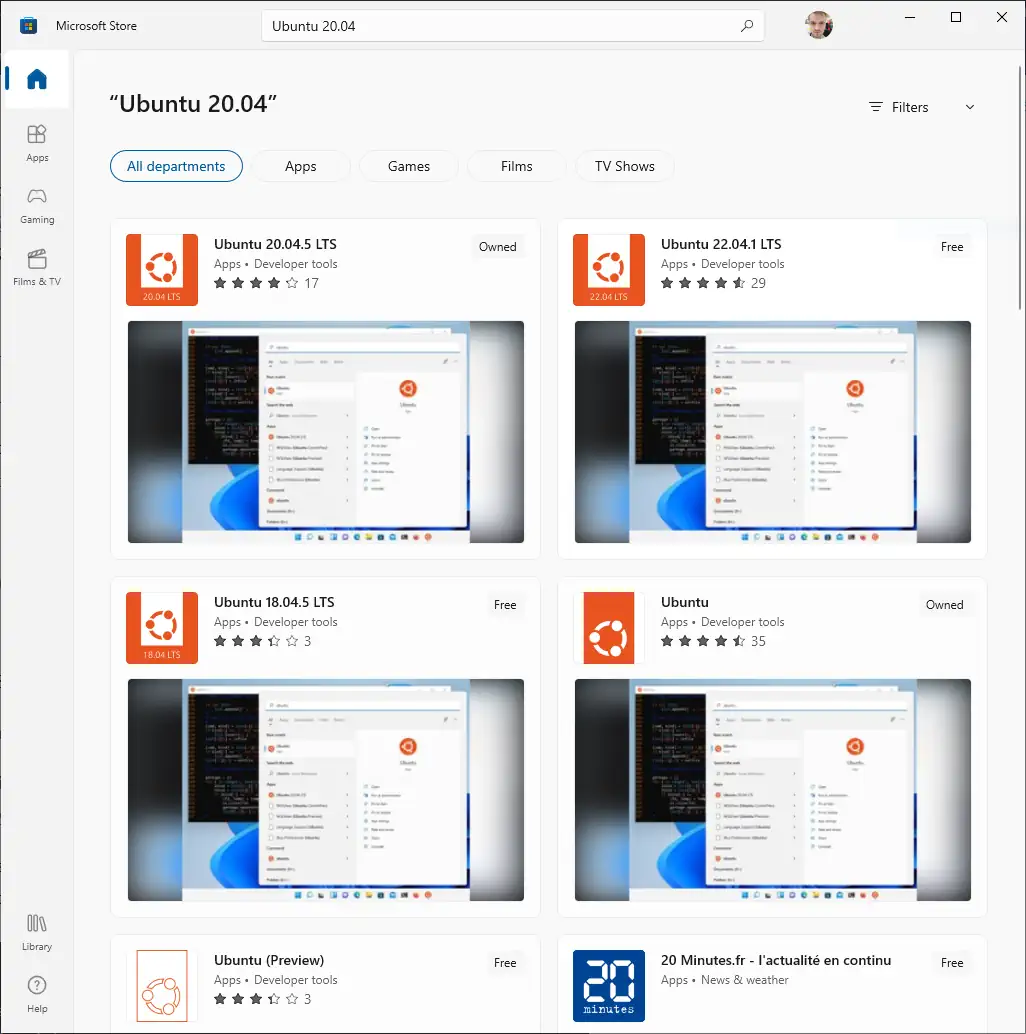
Click to download/install Ubuntu WSL, and then go ahead and install Windows Terminal while you’re at it.

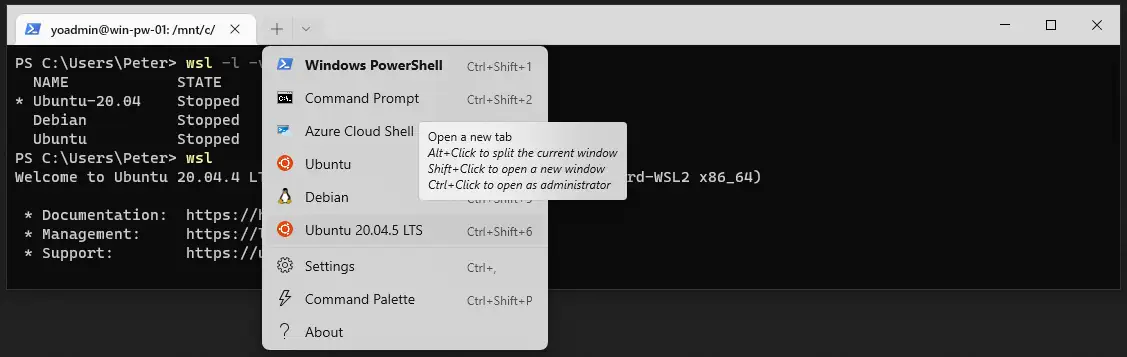
Once both of the above installs are complete, search and run Windows Terminal, then enter Ubuntu by running wsl in the terminal.
Install WSL Ubuntu 20.04 via Command
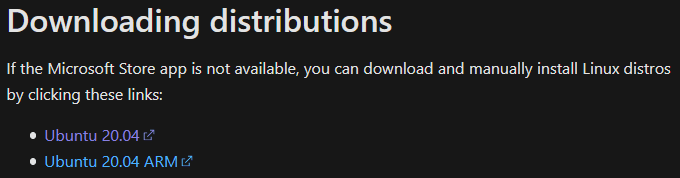
To install WSL via PowerShell script or command, we’d download the WSL Linux distro and then extract/install it.
The Microsoft Documentation contains a full list of WSL download links for each of the available WSL Linux distros:-
– Ubuntu 20.04 (LTS / 18.04 LTS)
– openSUSE Leap 15.1
– SUSE Linux Enterprise Server (15 SP1 / 12 SP5)
– Kali Linux
– Debian GNU/Linux
– Fedora Remix for WSL
– Pengwin (+ Enterprise)
– Alpine WSL
– Raft (Free Trial)
We are installing Ubuntu 20.04 in this demo, manually via a web browser rather than PowerShell Invoke-WebRequest or Curl.
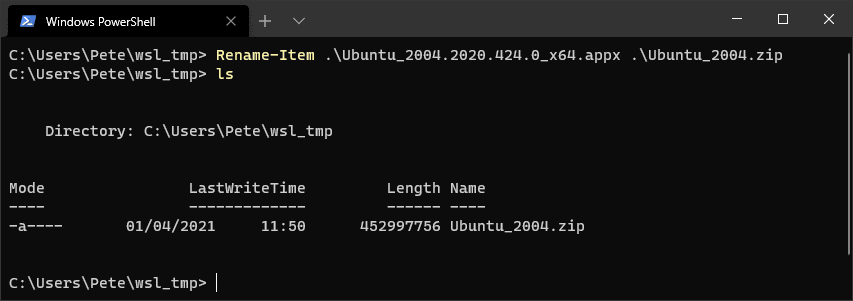
Move the downloaded file into some directory.

Now into the directory within PowerShell, rename the file from .appx to .zip format.
# rename Ubuntu appx file to zip format
# add-appxpackage doesn't always work, extracting the .exe seems better
Rename-Item .\Ubuntu_2004.2020.424.0_x64.appx .\Ubuntu_2004.zip
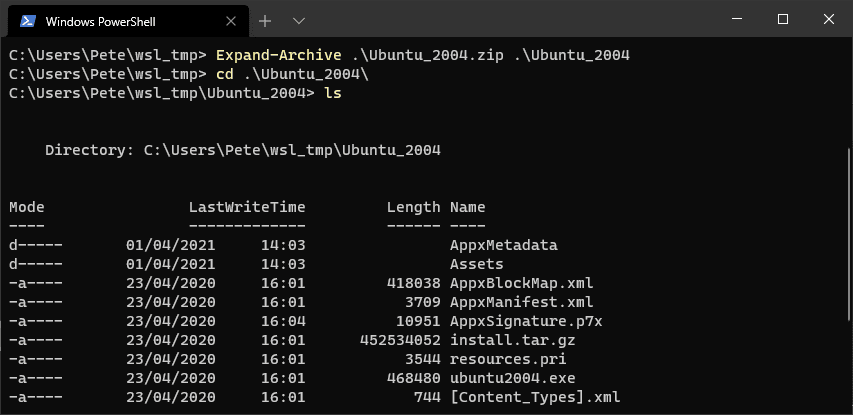
Extract the zip file into a new directory.
# extract the zip file into a new dir
Expand-Archive .\Ubuntu_2004.zip .\Ubuntu_2004
Run the ubuntu2004.exe file within the extracted directory and follow the setup instructions to create a new Linux login.
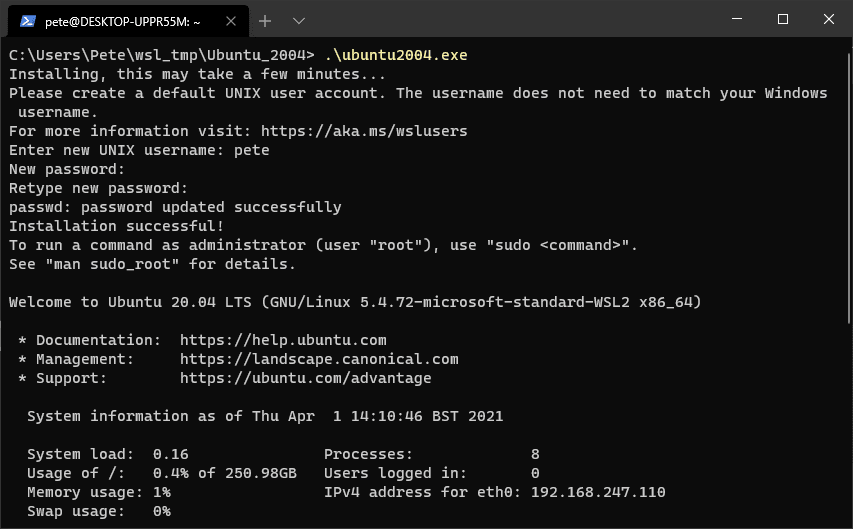
Once done wsl should be waiting for you.

Lastly, I’m now exiting (‘exit’ command) out of WSL, listing out my Linux distros and setting this Ubuntu 20.04 distro as my default.
