Tag: Installing SQL Server

  • SQL Server Default Port

    SQL Server Default Port

    The default port for the SQL Server Engine is 1433, which is a useful thing to know if you’re working as a Database Administrator (DBA) or Database Reliability Engineering (DBRE) type role.

    Though-out my career I’ve seen SQL Server run on the default 1433 port 99% of the time. For the other 1 percent, it didn’t matter much to me what port it was using.

    Occasionally as a DBA, you will need to arrange network line of sight (firewall rule changes) to be carried out by Network teams for MSSQL host-to-host connectivity. This is done via some request form a lot of the time, and we need to send source/destination addresses. Including IP addresses, we would also need to verify which port the SQL Server is using. Always best to double-check which MSSQL is running before submitting these types of requests, the demo below will help get this info.

    We also need to consider the local Windows Firewall on each SQL Server host. The rule should be scoped to the individual IP connecting, or subnet (10.20.30.0\24, all 256 addresses).

    SQL Server uses a lot of ports for various features & services, e.g. SQL Browser 1434 / SSIS 135. For anything beyond this basic SQL port info, MS Docs will provide you with what’s needed – there’s a lot, which I’m currently digesting at the time of writing.

    Anyway, with network stuff out of the way, this post contains the following demos:
    # How to Check Default SQL Server Port
    # How to Add New Windows Firewall Rule for Default MSSQL Port (1433)

    How to Check Default SQL Server Port

    Open SQL Server Configuration Manager, which is accessible via the Start Menu on any SQL Server host.

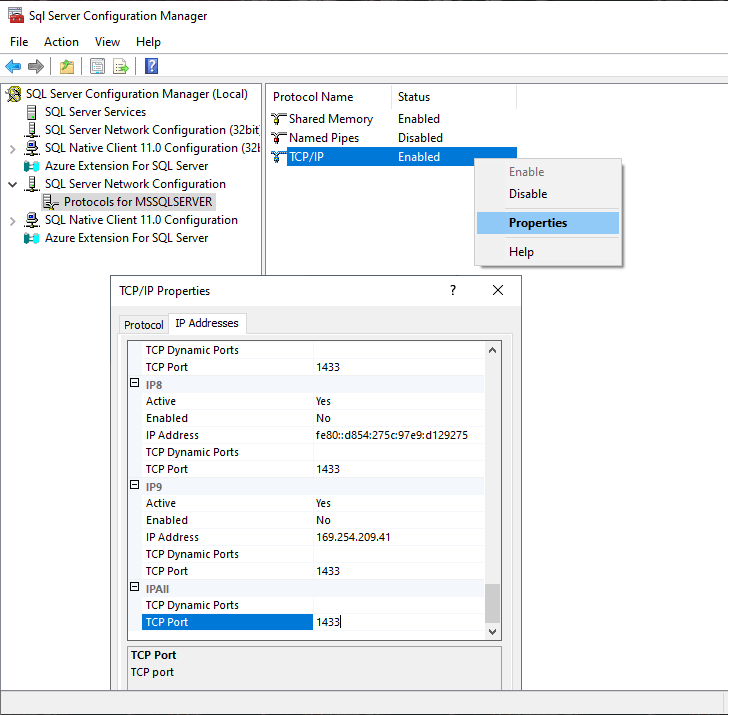
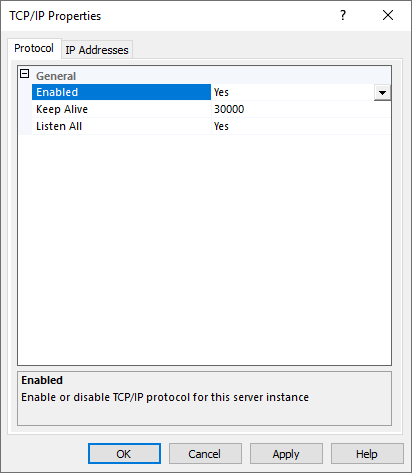
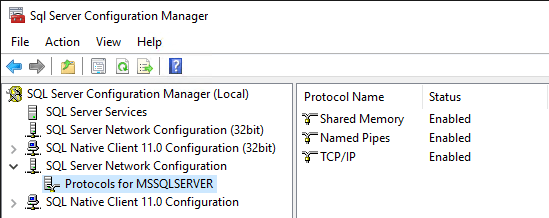
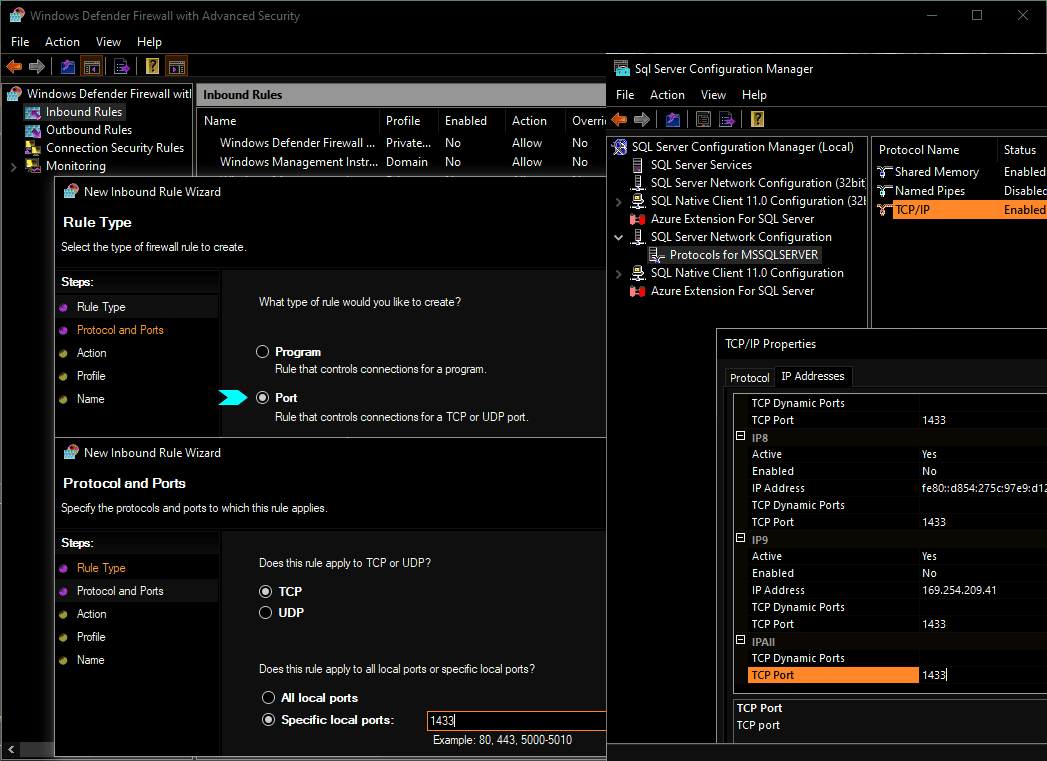
    Navigate as shown on the screenshot below, to SQL Server Network Configuration > Protocols for MSSQLSERVER > TCP/IP Properties > IP Address Tab

    SQL Server Check Default Port

    You can amend ports here too, but read MS Docs and test first if doing on Production, of course.

    How to Add New Windows Firewall Rule for Default MSSQL Port

    This is an added note on how to add the SQL Server 1433 Port & SQL Server Browser 1434 Ports. We can use the GUI >
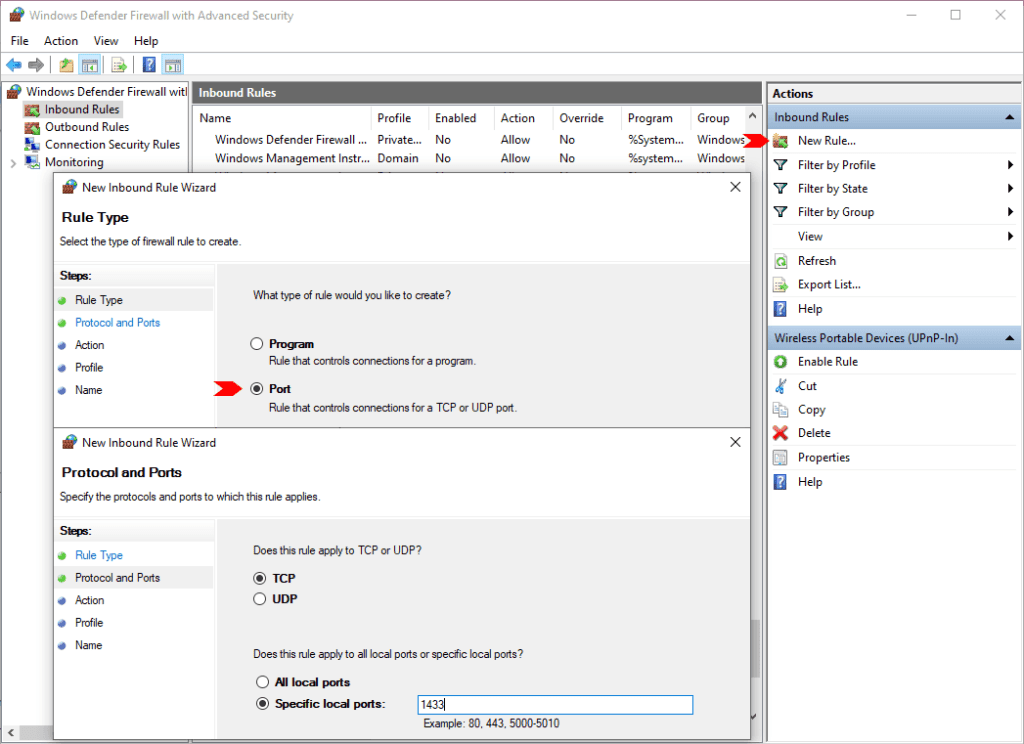
    Windows Firewall Add New Rule

    And we can do the same with PowerShell, using the New-NetFirewallRule cmdlet.

    # Add SQL Server Local Firewall Rule
    New-NetFirewallRule -DisplayName "SQLServer default instance" -Direction Inbound -LocalPort 1433 -Protocol TCP -Action Allow
    # Add SQL Server Browser Local Firewall Rule
    New-NetFirewallRule -DisplayName "SQLServer Browser service" -Direction Inbound -LocalPort 1434 -Protocol UDP -Action Allow

    I hope this was a useful SQL Tip. I have another post that relates to Windows Ports- How to Find Which Process is Listening on a Port in Windows

  • What’s New in the SQL Server 2022 Install

    What’s New in the SQL Server 2022 Install

    SQL Server 2022 was announced last week at the Microsoft Build event, which is an annual summit aimed at those of us who are enthusiastic about Microsoft software. The event revolves around Microsoft Azure development updates and other Microsoft Technologies. It’s an awesome and invaluable opportunity to stay informed, learn, and connect with like-minded folks. It includes many sessions (levels 100-400) on a variety of specialisations within the software development career pathways.

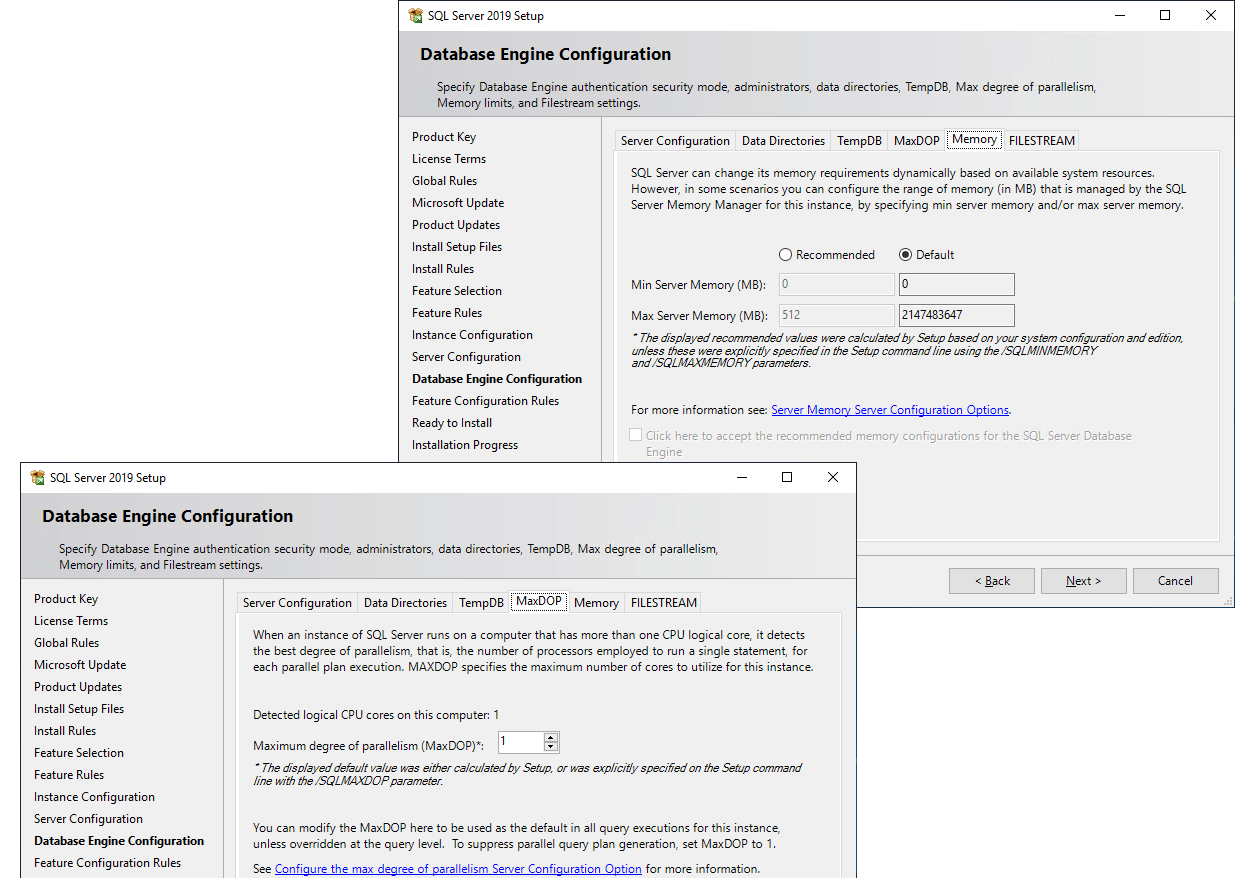
    The last most recent version of SQL Server is 2019. I wrote a short post about installing this version, showing off what was new within the installation wizard. It included the addition of MAXDOP & Max Memory configuration options which MSSQL DBA’s loved seeing I’m sure.

    This post is to share my thoughts and observations during my first local install of SQL Server 2022 (CTP2.0). The software is not yet ready for production use, so this is for testing purposes only.

    For more information on what’s new in SQL Server 2022, see this Microsoft page. Hardware/software requirements can be found here, and also to note, SQL Server 2022 Preview on Linux is coming soon!

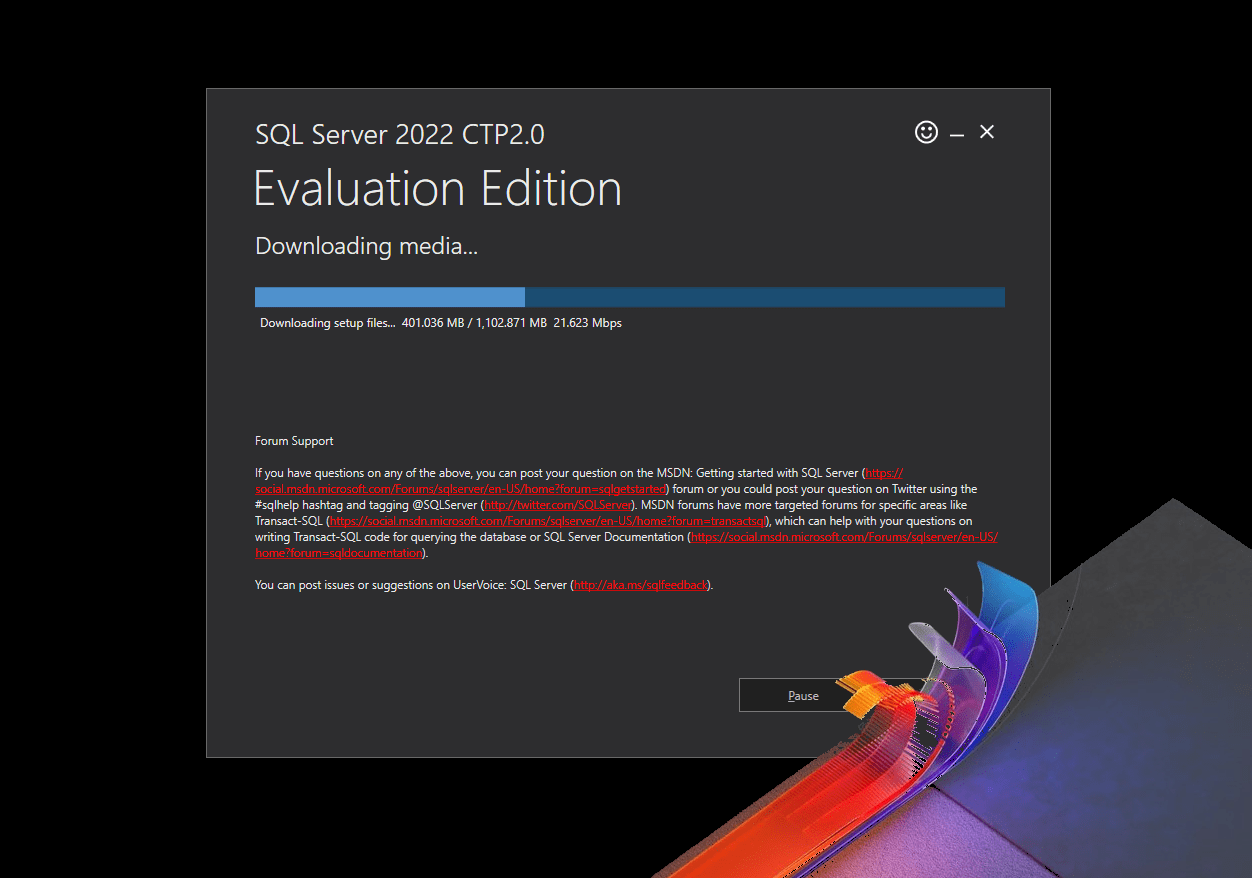
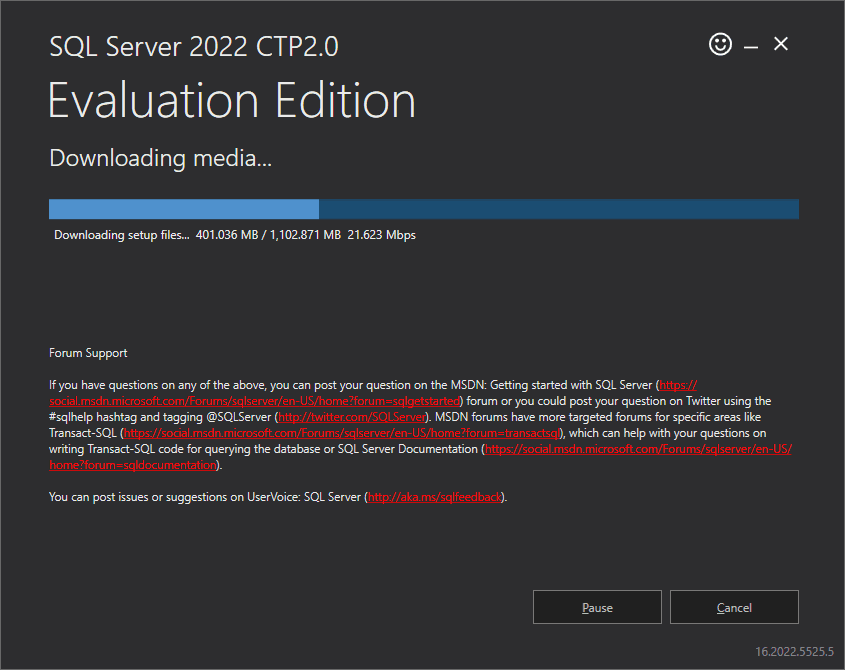
    Here we go with the download (1.1GB). I had to register some personal details for this preview download (Microsoft download link here).

    sql server 2022 download

    Looking at the text above, it reminds if you have questions you can go to the MSDN forum, or post your question on Twitter with the #sqlhelp hashtag, and/or tagging @SQLServer. Personally, I always dig deep in MS Docs before looking anywhere else.

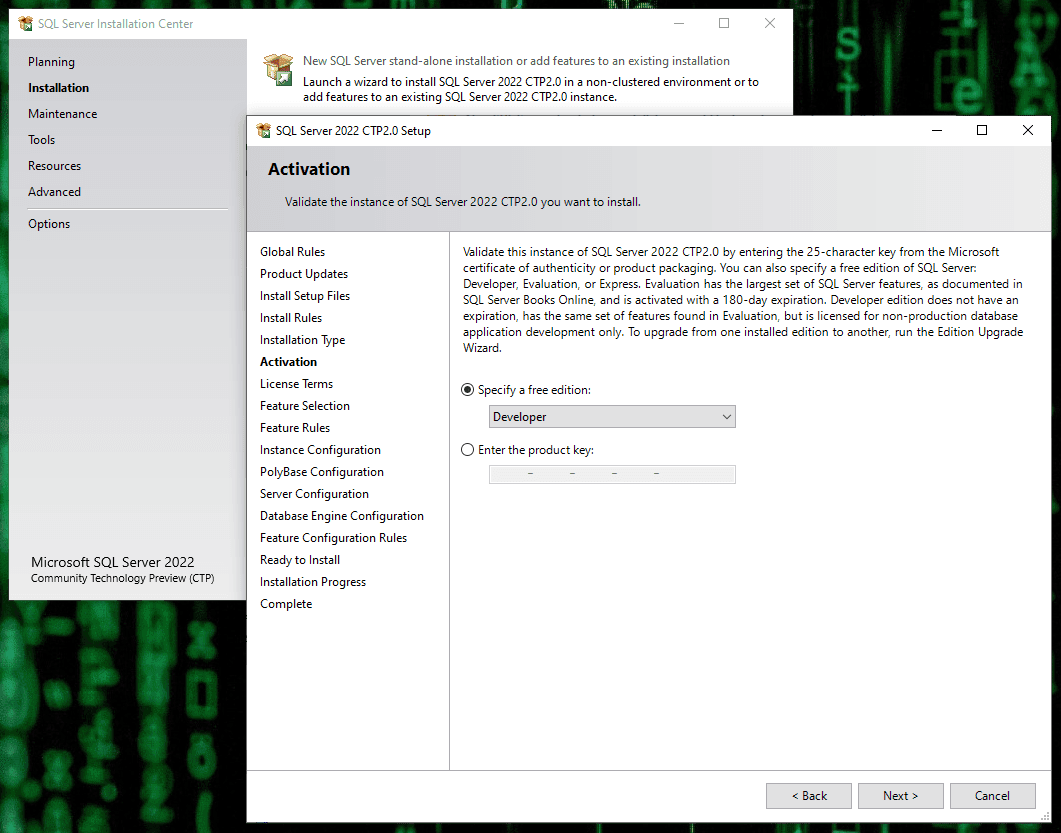
    The download completes and I’m installing a fresh local test SQL Server 2022 instance, the Developer edition should do.

    sql server 2022 developer

    We hit next and have to:
    – Agree to License Terms
    – Decide if we want Microsoft Update to also update MSSQL (enable if you’re testing)
    – Continue to Feature Selection

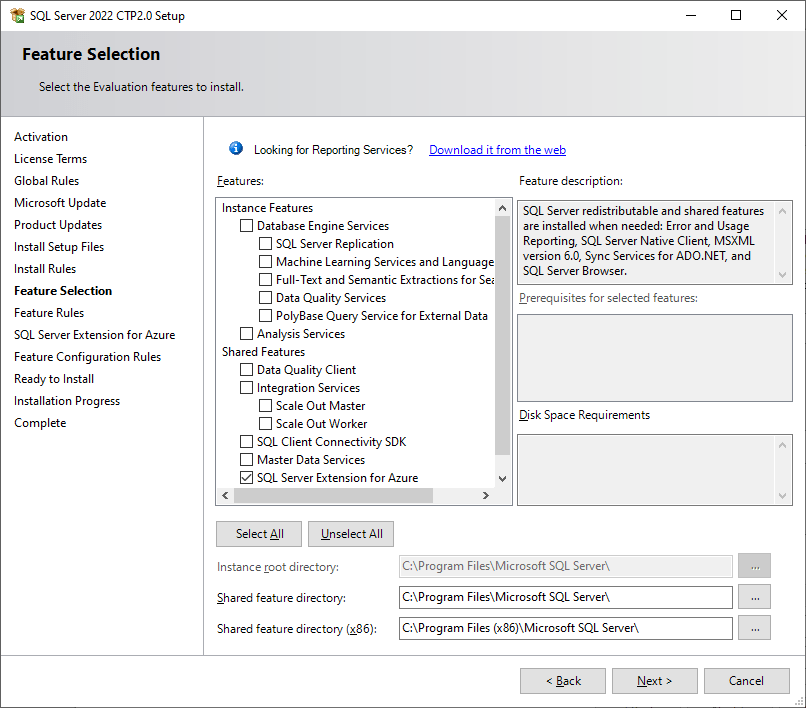
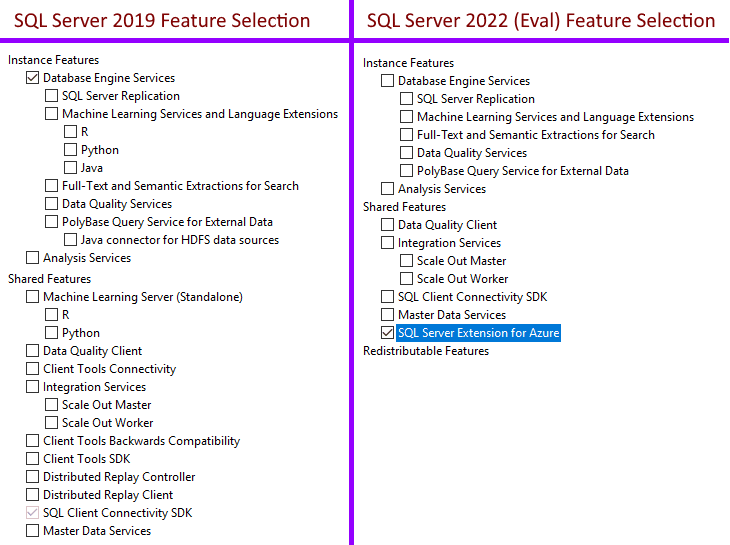
    Next, we reach the Feature selection options. The new SQL Server Extension for Azure Feature is already marked for installation.

    This is the diff from the 2019 version in my last post, just for reference.

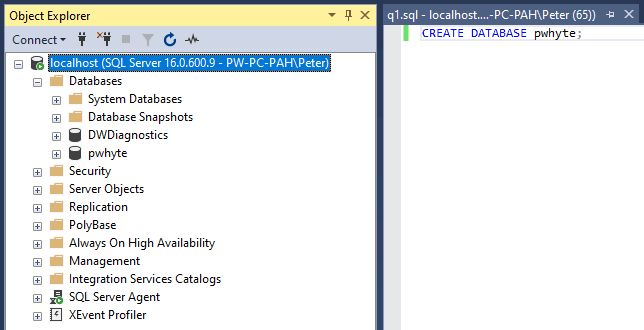
    Even though the SQL Server Extension for Azure was checked by default, I only installed the Engine Services, with Replication, PolyBase & Machine Learning Features. All went well.

    sql server 2022 ssms

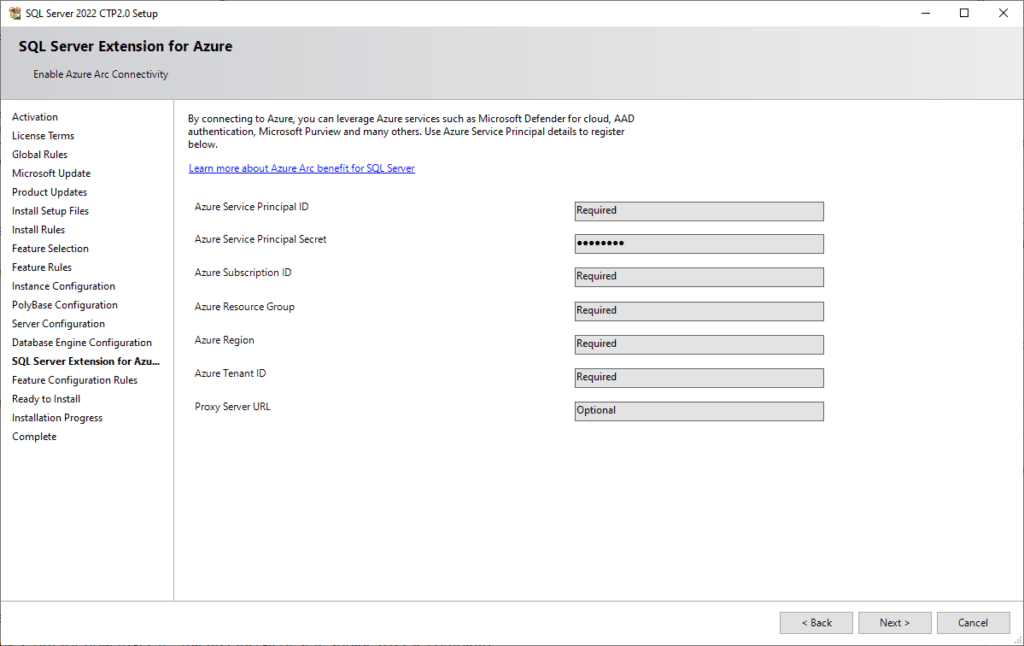
    Looking more at the Azure Extension Feature option – Azure Arc allows you to manage Windows and Linux servers that are hosted outside of Azure. That means MSSQL Instances that are on-prem or in other cloud provider environments will be connected to your Azure environment for management. If you are adding this feature during installation it requires the following information –

    sql server 2022 extension for azure

    For more information on the new Azure Extension see this MS Docs link. Personally, this is very new to me and I’m really keen to get to know more.

    That’s it for now. Whoever might be reading this, I hope you enjoyed the run-through of my first MSSQL 2022 installation!

  • How to Check What Features are Installed in SQL Server

    How to Check What Features are Installed in SQL Server

    This is a quick guide on how to check which features are installed on a SQL Server.


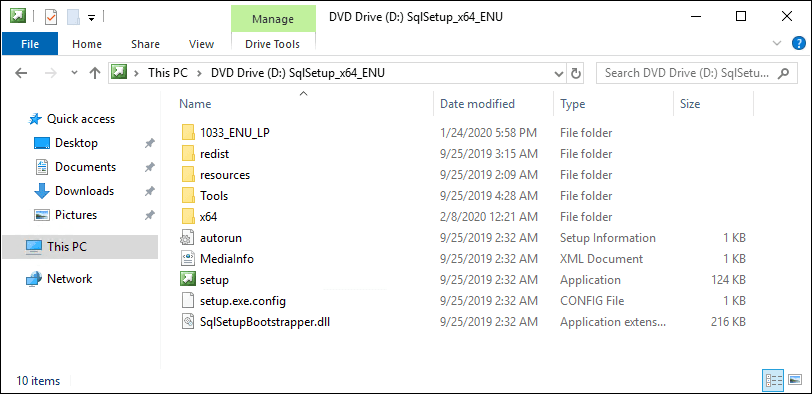
    Open your SQL Server installation files. You may find them within the Setup Bootstrap folder (“C:\Program Files\Microsoft SQL Server\150\Setup Bootstrap\SQL2019”) or you might already have the ISO handy.

    SQL Server Installation Files

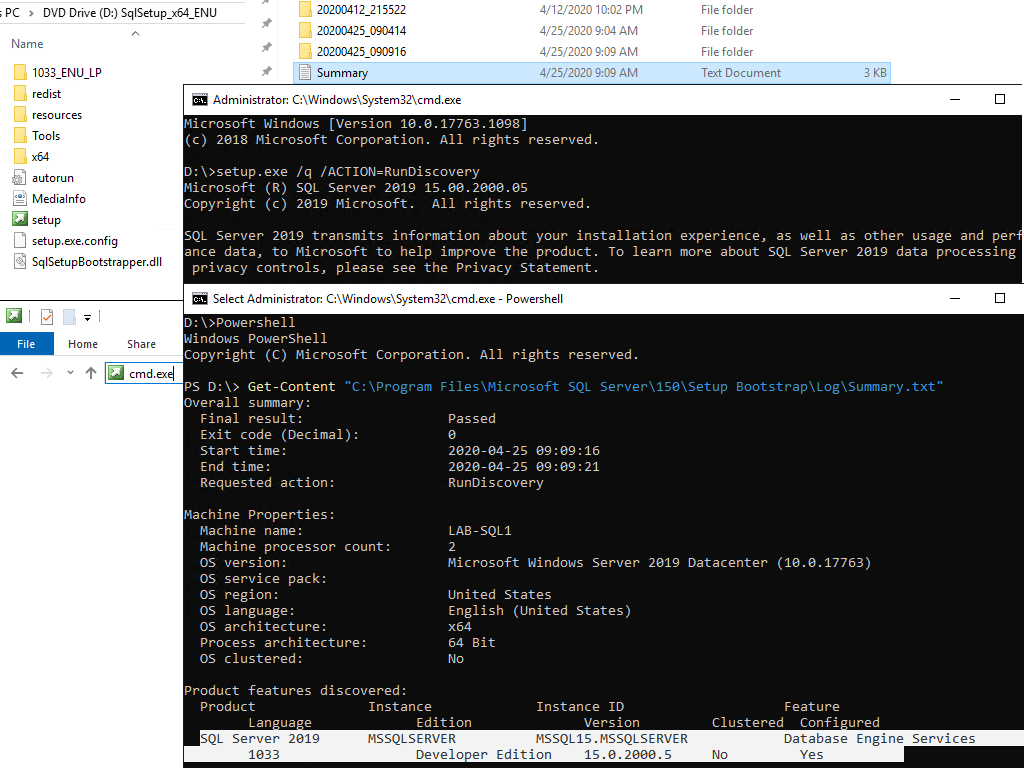
    We can open cmd.exe from the top navigation bar.

    Open CMD from Folder

    Then run the Setup.exe with the /ACTION=RunDiscovery parameter (Microsoft Docs – Installation Parameters).

    SQLSetup RunDiscovery

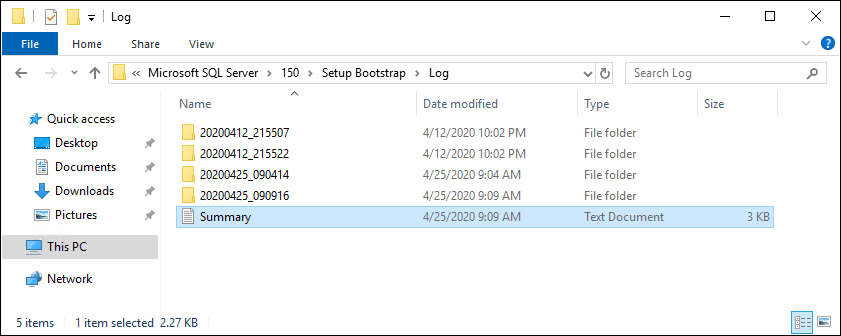
    The SQL Server discovery report is saved to %ProgramFiles%\MicrosoftSQL Server\nnn\Setup Bootstrap\Log\<last Setup Session>.

    ‘nnn’ is whatever version of SQL Server you have:
    # SQL Server 2012 (110)
    # SQL Server 2014 (120)
    # SQL Server 2016 (130)
    # SQL Server 2016 (130)
    # SQL Server 2017 (140)
    # SQL Server 2019 (150)

    SQLSetup Summary File

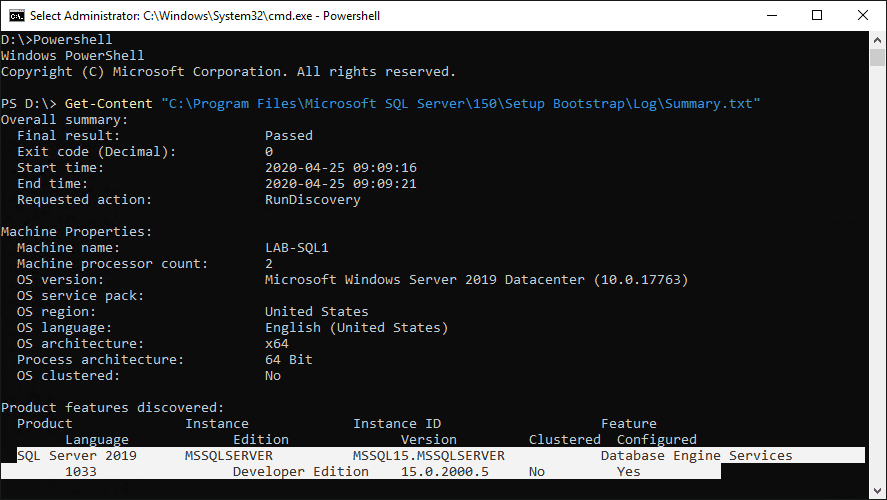
    If you’re using PowerShell, Get-Content will work… tab your way through the sub-folders.

    SQLSetup Summary File PowerShell

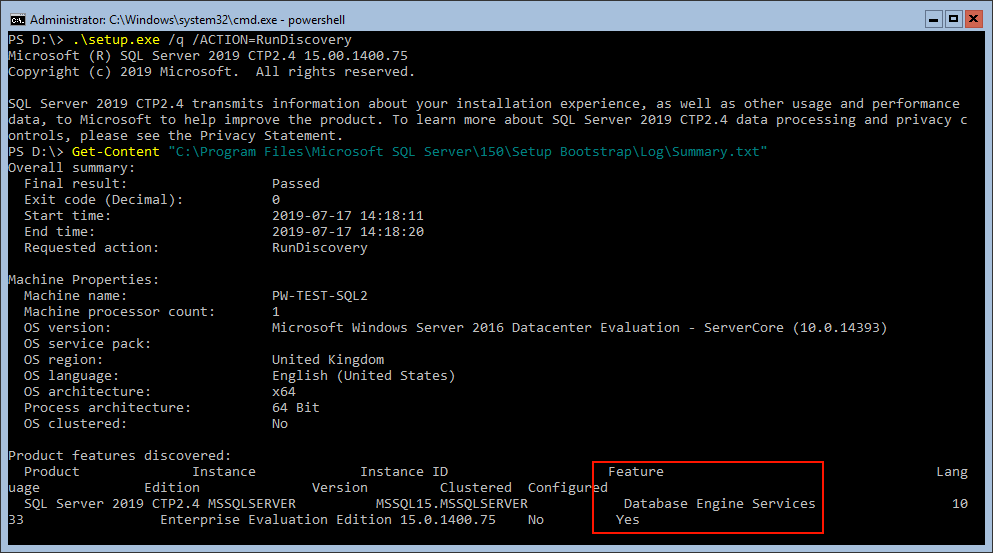
    The highlighted area above shows only the Database Engine Services are installed of SQL Server 2019 Developer Edition.


  • Installing SQL Server on Linux

    Installing SQL Server on Linux

    A post on installing SQL Server on Linux, following the Microsoft SQL Server 2019 Guide (Red Hat).

    # Install SQL Server.
    # Install the SQL Server Command-Line Tools.
    # Connect to SQL Server Locally.
    # Connect to SQL Server Remotely.


    Install SQL Server

    1. Get connected & download the Microsoft SQL Server 2019 Red Hat repository configuration file.

    sudo curl -o /etc/yum.repos.d/mssql-server.repo https://packages.microsoft.com/config/rhel/8/mssql-server-2019.repo
    Linux EC2 Connect Curl MSSQL 2019

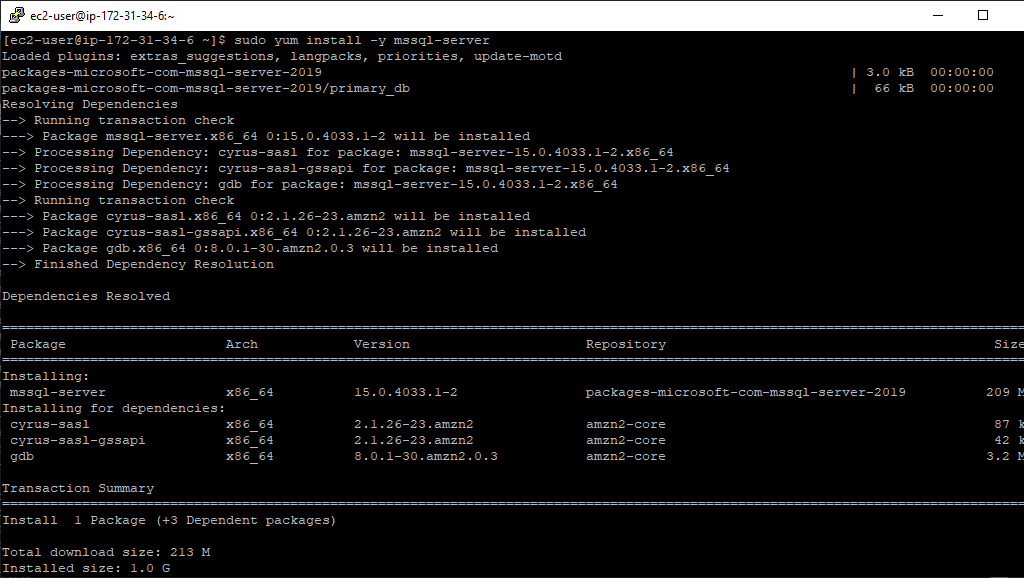
    2. Install SQL Server.

    sudo yum install -y mssql-server
    Linux Yum Install SQL Server 2019

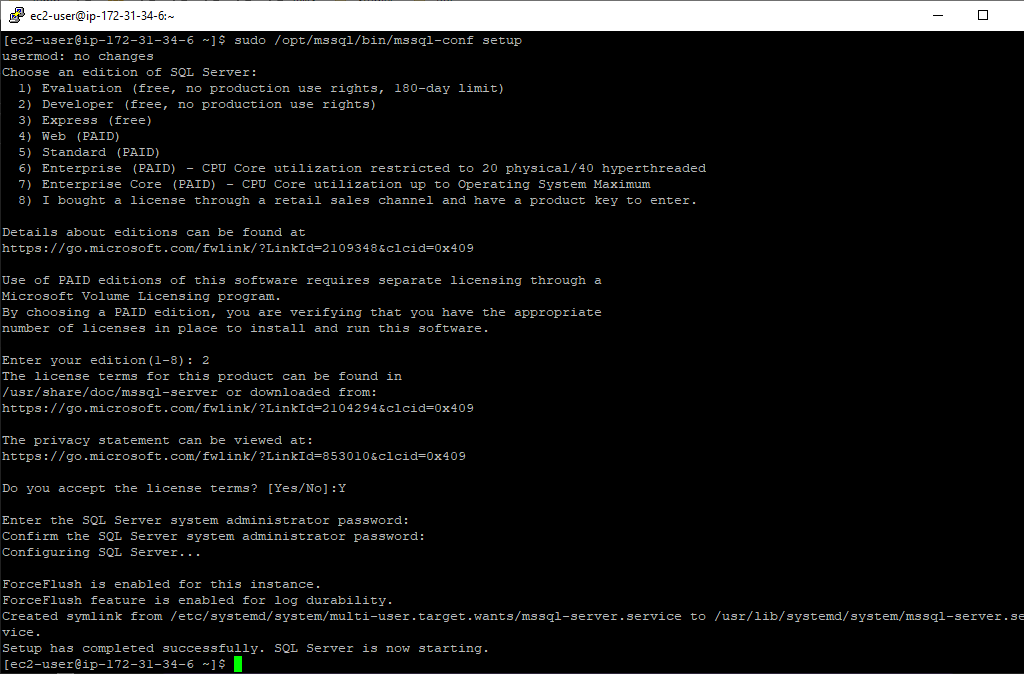
    3. Run mssql-conf setup to choose the SQL Server Edition, SA password and accepting of the Licence Agreement.

    sudo /opt/mssql/bin/mssql-conf setup
    Linux MSSQL Configuration

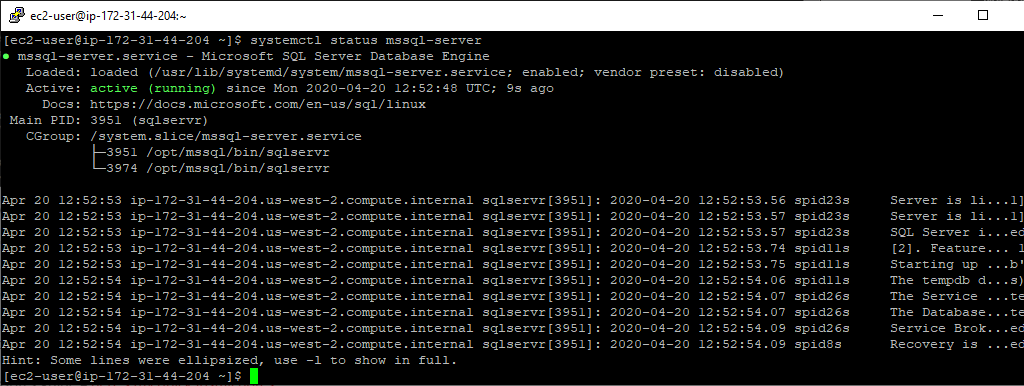
    4. Check the SQL Server service by running systemctl status.

    systemctl status mssql-server
    Linux Systemctl Status MSSQL

    5. Allow in remote 1433 connections.

    I’m using Firewalld as per Microsoft’s guide – here’s my quick install notes.

    sudo firewall-cmd --zone=public --add-port=1433/tcp --permanent
    sudo firewall-cmd --reload
    Linux Open 1433 Firewall

    Install the SQL Server Command-Line Tools

    1. Download the Microsoft Red Hat repo config file.

    sudo curl -o /etc/yum.repos.d/msprod.repo https://packages.microsoft.com/config/rhel/8/prod.repo
    Linux Curl MS RedHat Repo

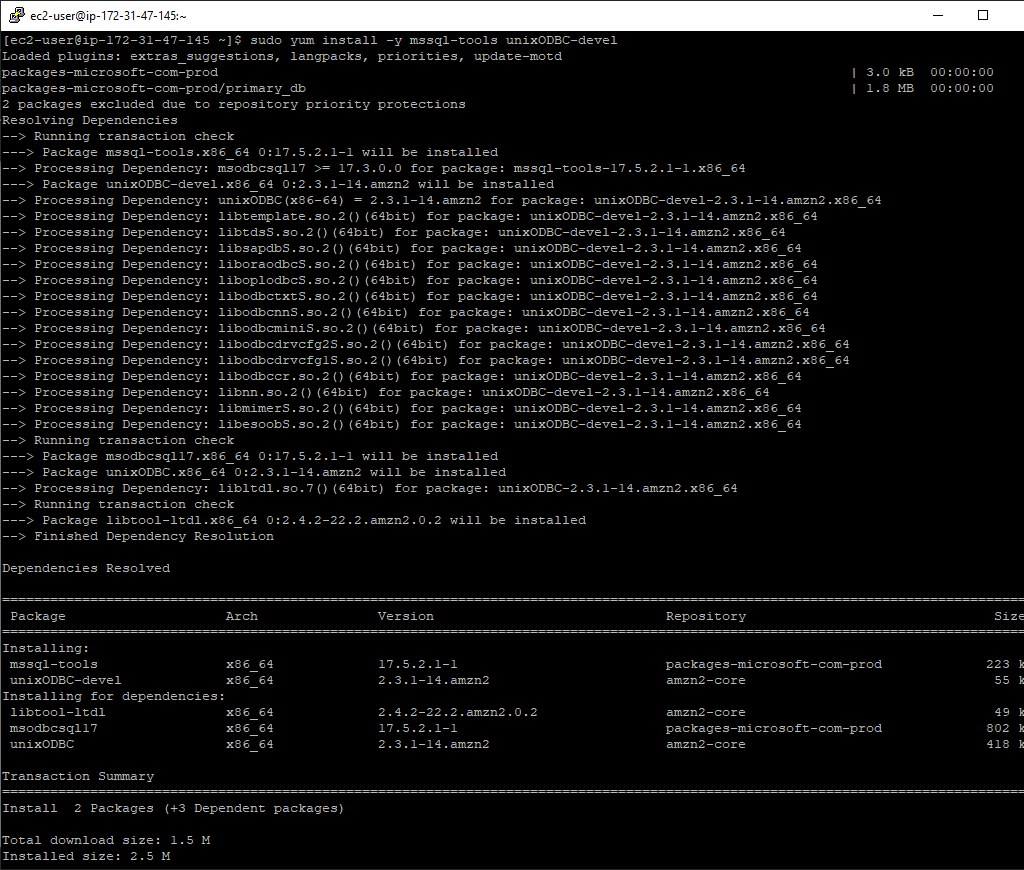
    2. Install ODBC driver for SQL Server (Linux) – allows BCP & SQLCMD.

    sudo yum install -y mssql-tools unixODBC-devel
    Linux Install SQL Server ODBC Driver

    3. Add mssql-tools to PATH environment variable – allows tools to be run without full path.

    echo 'export PATH="$PATH:/opt/mssql-tools/bin"' >> ~/.bash_profile
    echo 'export PATH="$PATH:/opt/mssql-tools/bin"' >> ~/.bashrc
    source ~/.bashrc
    Linux Add MSSQL-Tools to PATH

    Connect to SQL Server Locally

    Using the PATH variable above, call sqlcmd:

    Linux SQLCMD Select Sys.Tables

    Connect to SQL Server Remotely

    I’m connecting to the EC2 Amazon Linux SQL Server instance via SSMS on my local machine (Windows 10).

    For this to work we had to allow in remote 1433 connections (step 5 during install above), and I added my IP into the AWS Security Group.

    SSMS Connect to AWS EC2 Linux SQL Server

  • Enabling TCP Connections in SQL Server

    Enabling TCP Connections in SQL Server

    Some network protocols are not enabled by default in SQL Server. We need to enable the option and restart the SQL Service to allow TCP connections.

    This post is a guide on how this is done:
    # On Windows via SQL Server Configuration Manager.
    # On Windows using PowerShell.

    Enable TCP/IP SQL via Server Configuration Manager

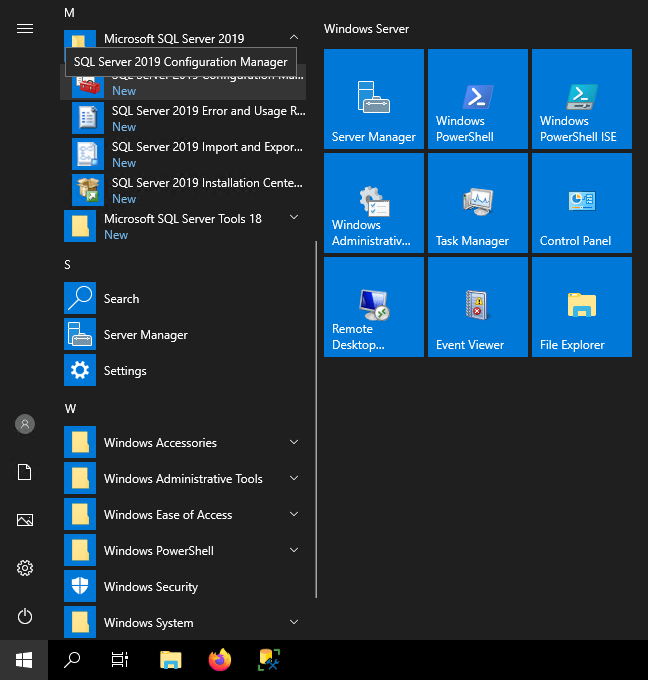
    1. Open SQL Server Configuration Manager.

    SQL Server 2019 Configuration Manager Start Menu

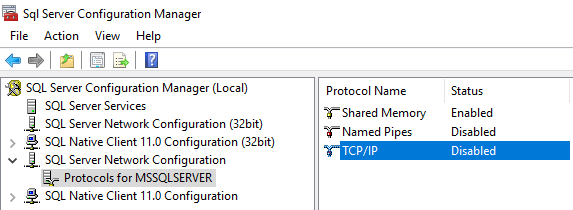
    2. Navigate to TCP/IP Protocols as highlighted and open Properties.

    SQL Server Configuration Manager Protocols

    3. Enable the highlighted option within the Protocol tab.  

    SQL Server Configuration Manager TCP Properties

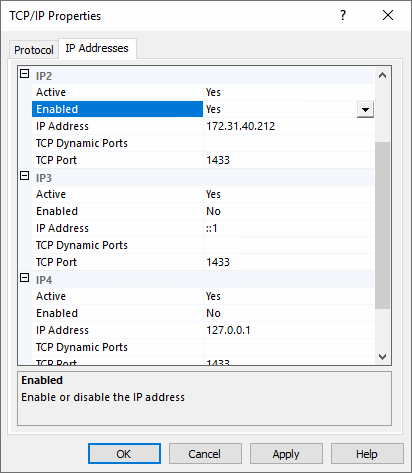
    4. Enable what you need within the IP Addresses tab.

    SQL Server Configuration Manager Enable IPv4

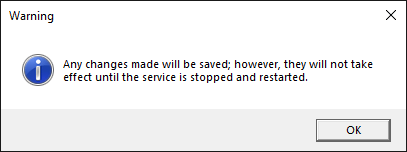
    5. Click Apply.

    SQL Server Changes on Next Service Restart

    6. Navigate to SQL Server Services within the Configuration Manager and restart the SQL Server Service.

    SQL Server Configuration Manager Services

    Enable TCP/IP SQL Server using PowerShell

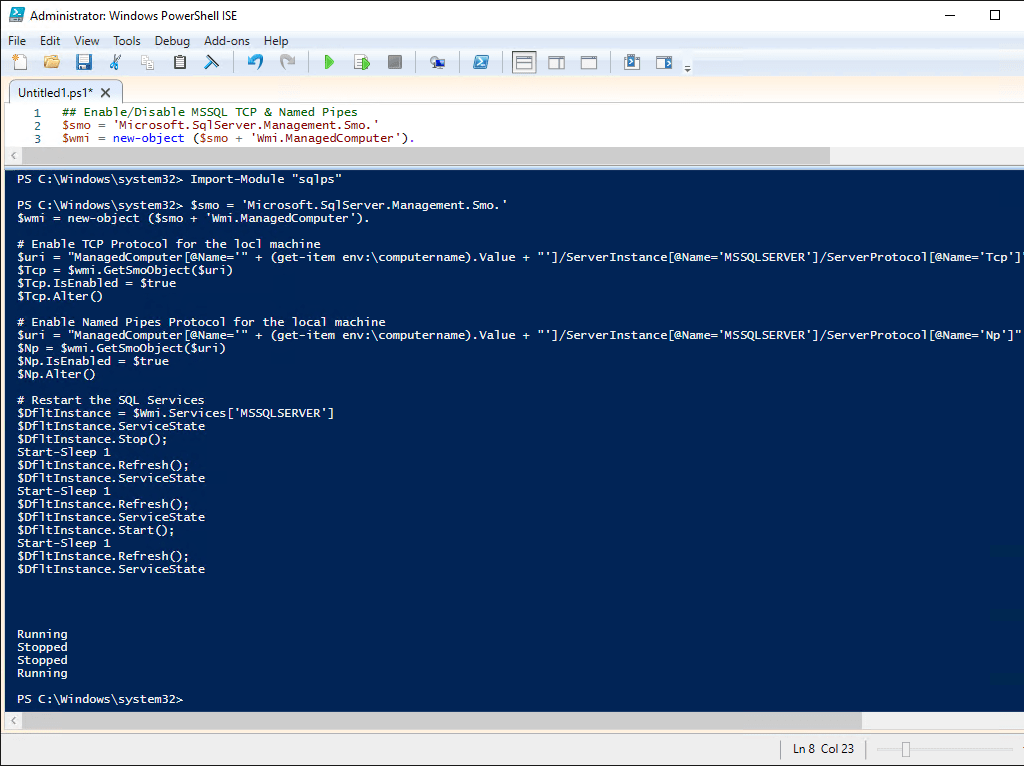
    I’m using a quick script gained from Microsoft Docs, tweaking to run locally as instructed and I added some visibility of the service restart.

    This script requires sqlps, just run Import-Module “sqlps” for the script functions to work.

    ## Enable/Disable MSSQL TCP & Named Pipes
    $smo = 'Microsoft.SqlServer.Management.Smo.'  
    $wmi = new-object ($smo + 'Wmi.ManagedComputer').  
    
    # Enable TCP Protocol for the locl machine  
    $uri = "ManagedComputer[@Name='" + (get-item env:\computername).Value + "']/ServerInstance[@Name='MSSQLSERVER']/ServerProtocol[@Name='Tcp']"
    $Tcp = $wmi.GetSmoObject($uri)  
    $Tcp.IsEnabled = $true
    $Tcp.Alter() 
    
    # Enable Named Pipes Protocol for the local machine
    $uri = "ManagedComputer[@Name='" + (get-item env:\computername).Value + "']/ServerInstance[@Name='MSSQLSERVER']/ServerProtocol[@Name='Np']"  
    $Np = $wmi.GetSmoObject($uri)  
    $Np.IsEnabled = $true  
    $Np.Alter()  
    
    # Restart the SQL Services
    $DfltInstance = $Wmi.Services['MSSQLSERVER']  
    $DfltInstance.ServiceState
    $DfltInstance.Stop(); 
    Start-Sleep 1
    $DfltInstance.Refresh();
    $DfltInstance.ServiceState
    Start-Sleep 1
    $DfltInstance.Refresh();
    $DfltInstance.ServiceState
    $DfltInstance.Start();
    Start-Sleep 1
    $DfltInstance.Refresh();
    $DfltInstance.ServiceState
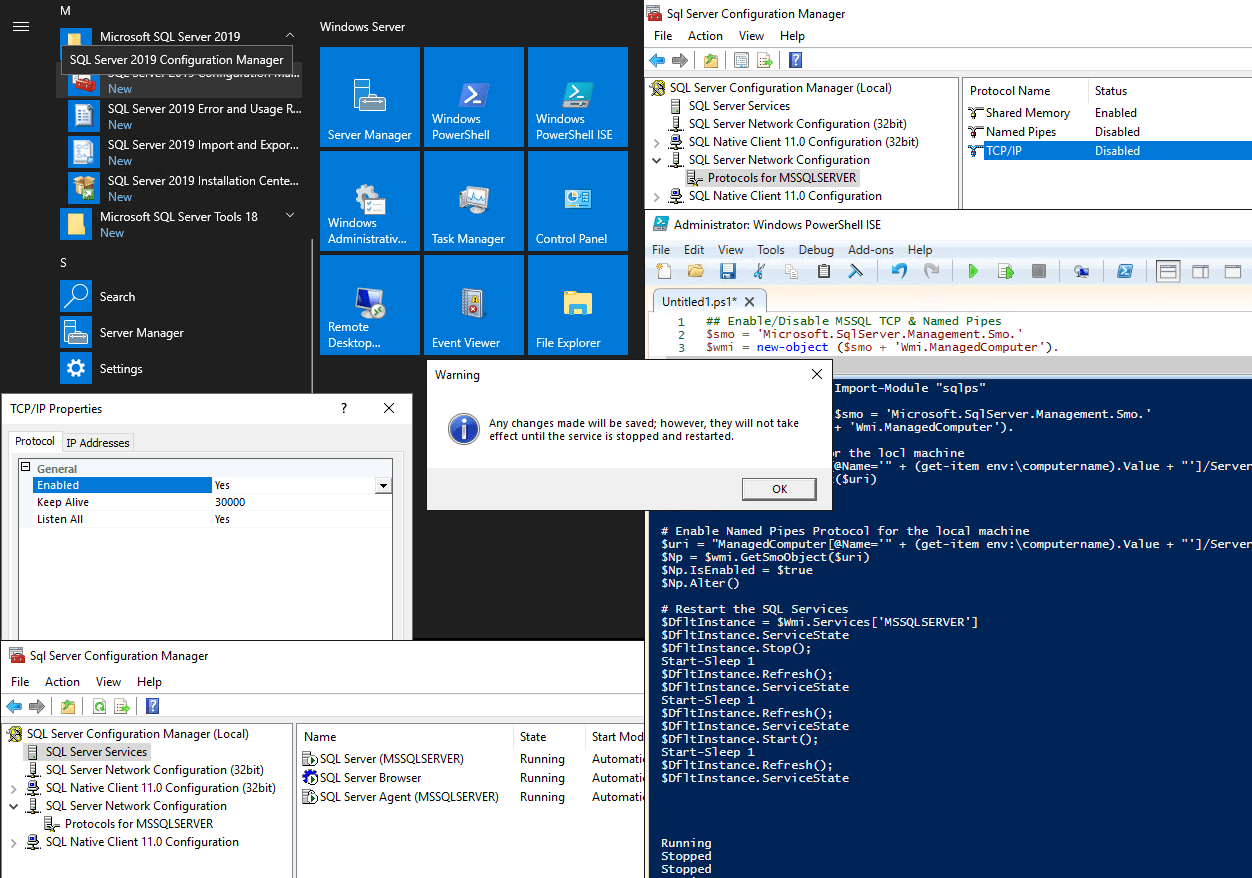
    PowerShell MSSQL TCP & Named Pipes Change

    I was able to verify by looking at SQL Server Configuration Manager, but we can also do with the script info above.

    SQL Server Configuration Manager Protocols

  • What’s New in the SQL Server 2019 Installation Wizard

    What’s New in the SQL Server 2019 Installation Wizard

    The release of SQL Server 2019 happened during the first day of Microsoft Ignite (4th November). Up until now, I’ve been using the release candidates for tests… so it’s good to have it all officialised!

    Here’s some notes during my first official SQL Server 2019 installation, using the wizard on a Windows Server host;

    # Features.
    # MAXDOP.
    # Max Memory.


    Features

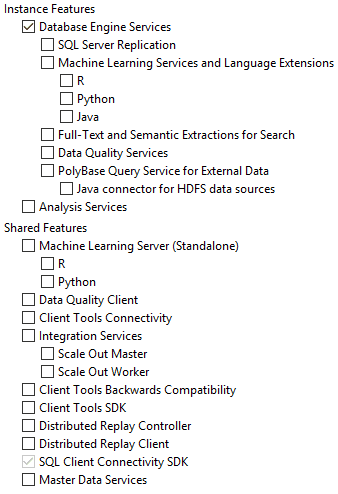
    It’s nice to note down the full feature list for reference…

    SQL Server 2019 Full Feature List

    MAXDOP

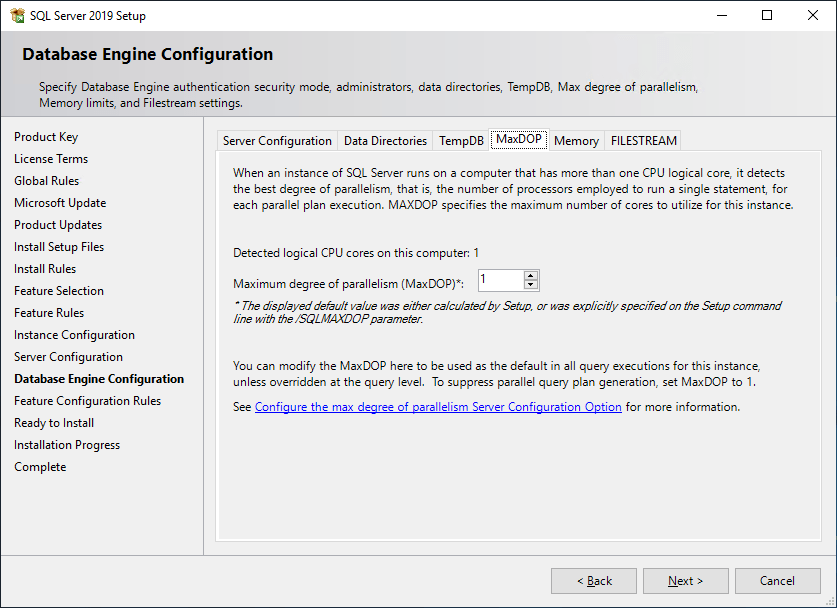
    This is one of 2 changes I love. More visibility on an important configuration option, CPU parallelism for queries that run on your SQL Server instance.

    SQL Server 2019 Installation MAXDOP Configuration

    Max Memory

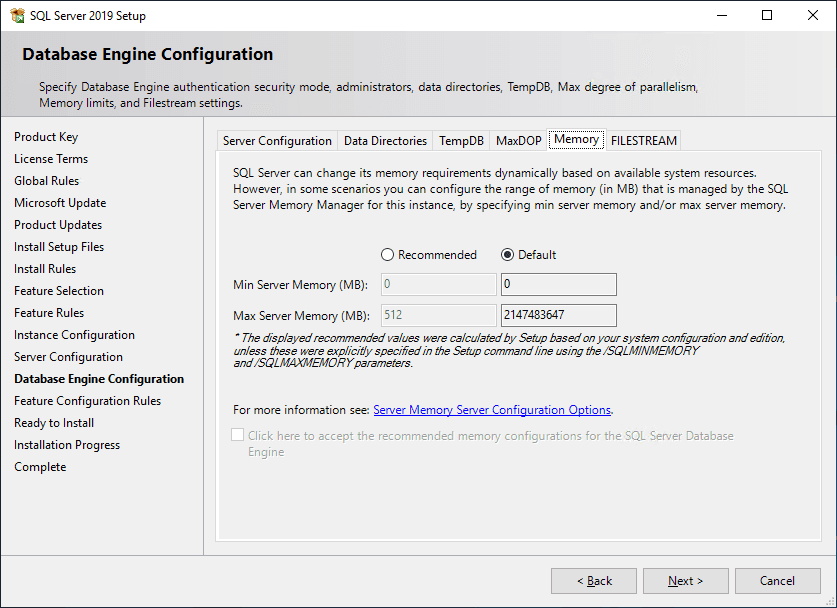
    The out of the box max memory configuration commonly brings chaos… RAM contention is an issue (other things running on the server) and it can be triggering your monitoring alerts (constant 90%+ RAM usage). So it’s amazing to have more visibility on this too!

    SQL Server 2019 Installation Max RAM Configuration

  • Adding & Removing SQL Features via Command

    Adding & Removing SQL Features via Command

    This is a quick guide on how to add and remove features from SQL Server via command, following the theme of recent posts.

    The following areas will be covered within this post;
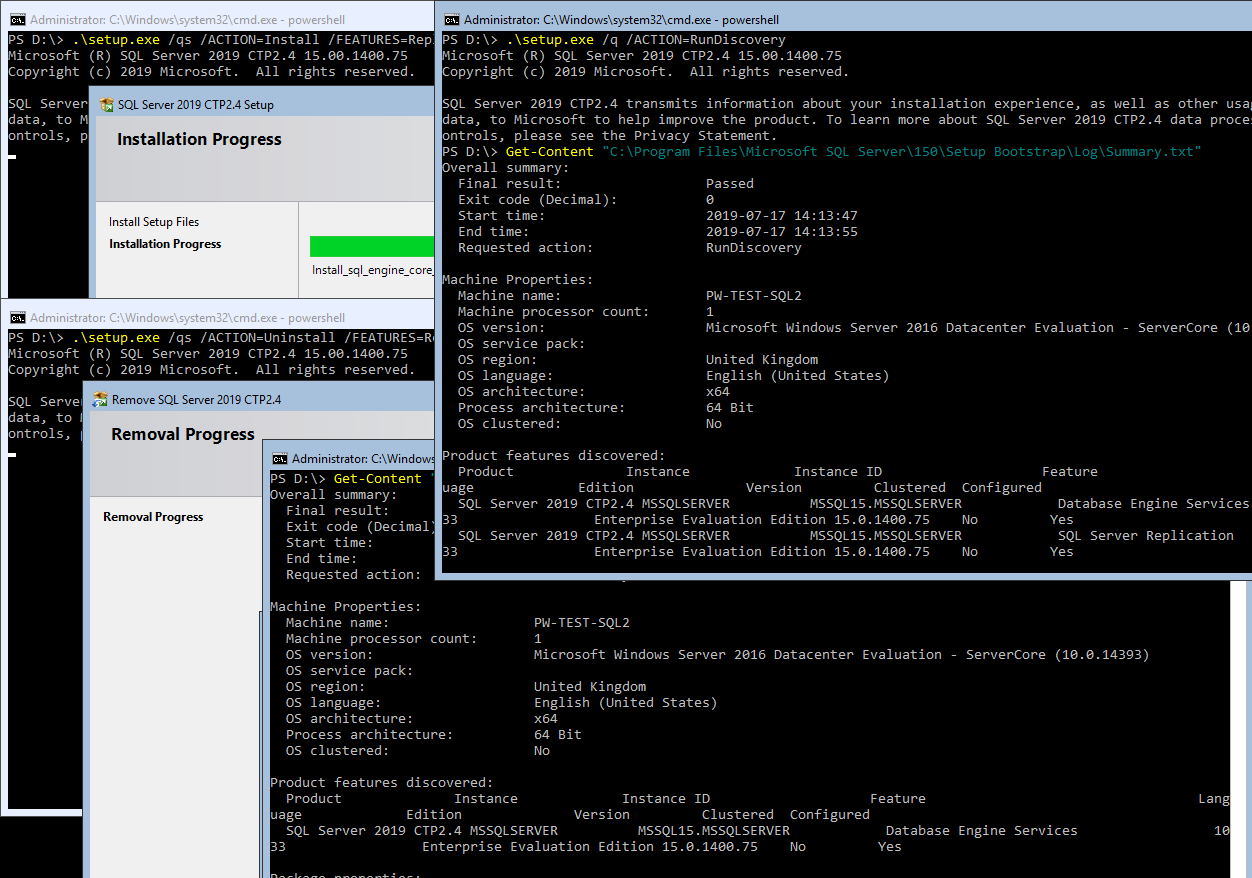
    # Check Features Installed on a SQL Server.
    # Installing a SQL Server Feature (Replication) via Command.
    # Uninstalling a SQL Server Feature (Replication) via Command.


    Check Features Installed on a SQL Server

    A mounted SQL Server ISO is required for us to first RunDiscovery.

    SQL Server Run Discovery via Command

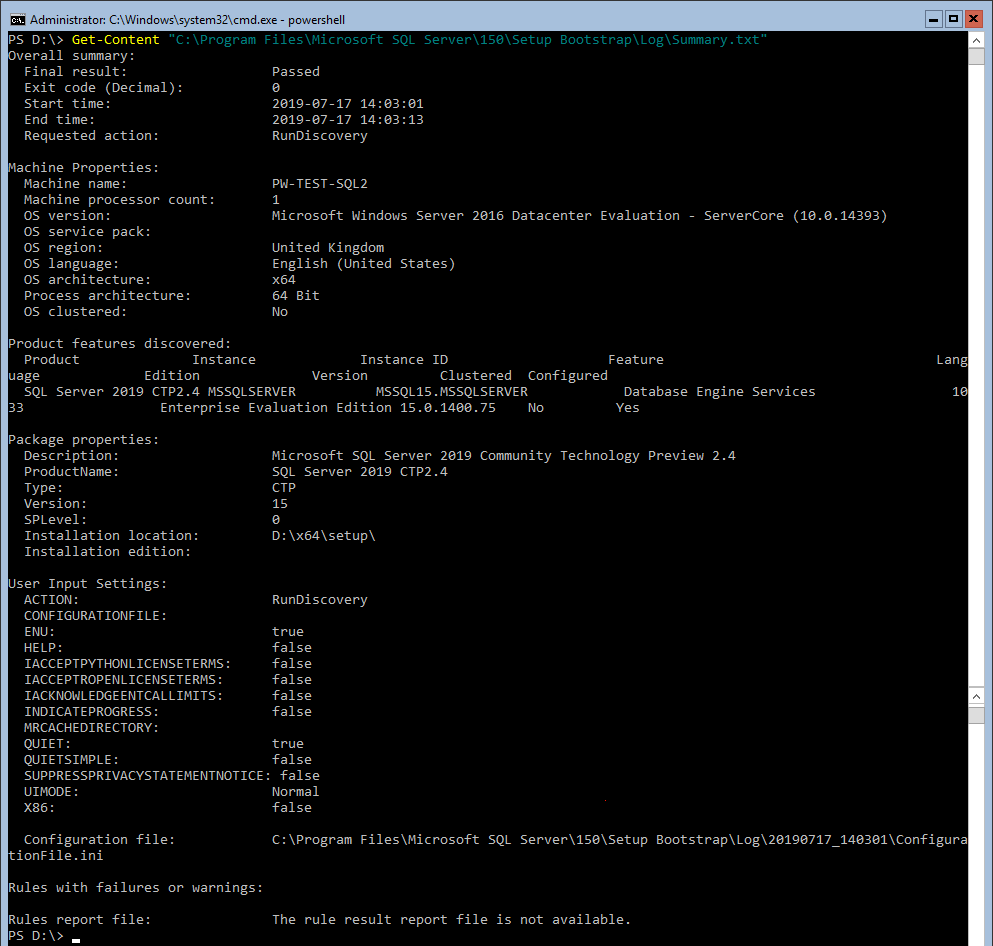
    That’ll only take a second, and once done we can view the contents of the Summary.txt file to see the discovery result.

    SQL Server RunDiscovery Summary File

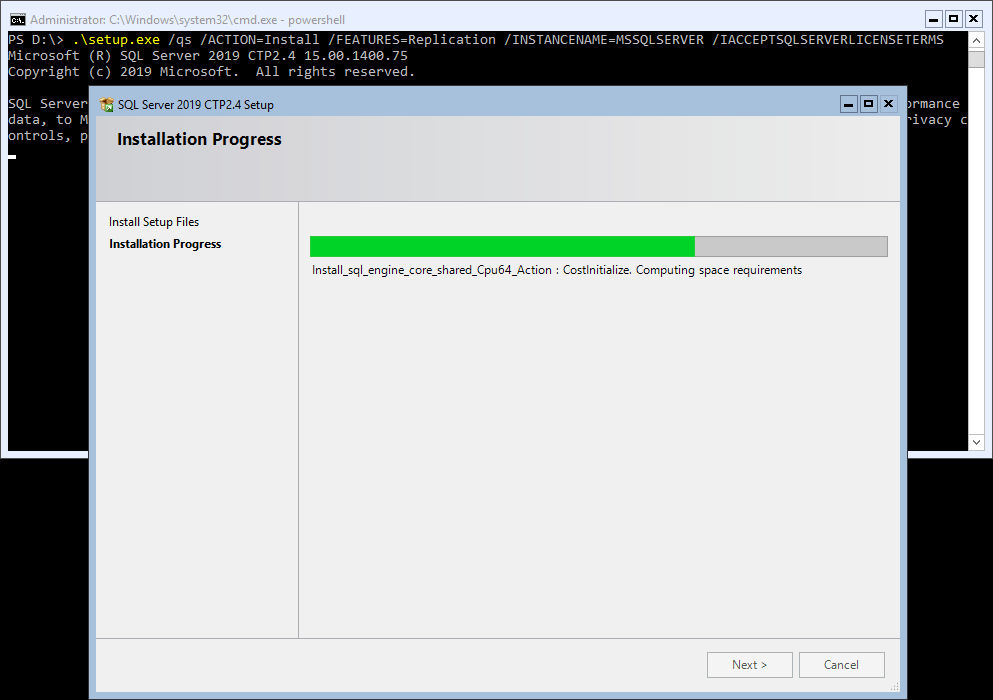
    Installing a SQL Server Feature (Replication) via Command

    The command below should be straight-forward enough to understand. See Microsoft’s documentation for more information on parameters etc.

    SQL Server Install Feature via Command

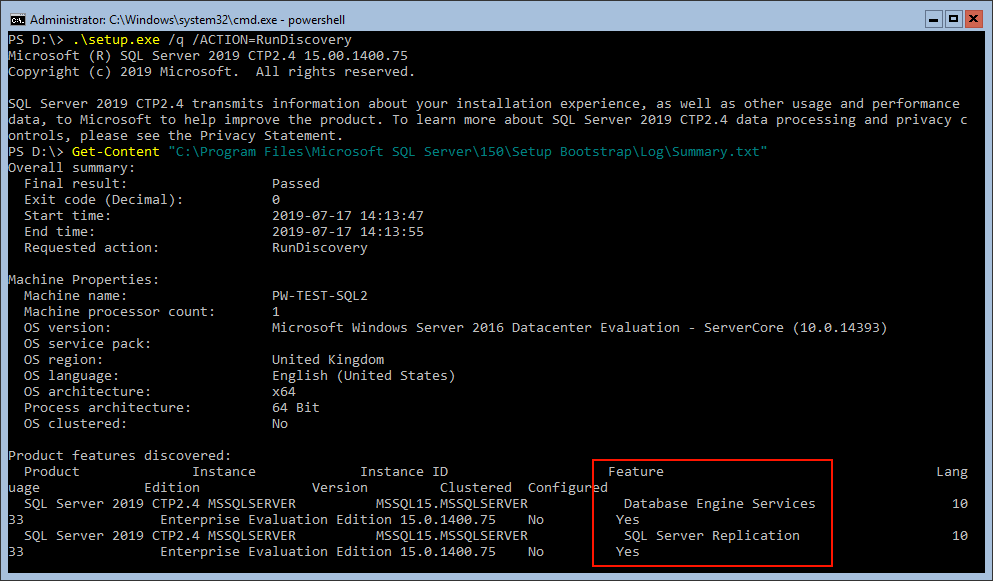
    We can verify the feature installation by running another Discovery.

    SQL Server RunDiscovery Summary File Replication

    Uninstalling a SQL Server Feature (Replication) via Command

    Uninstalling a feature is as easy as the installation of one. Run the command as shown below.

    SQL Server Uninstall Feature via Command

    And finally run another Discovery.

    SQL Server RunDiscovery via Command Removing Feature

  • Install/Uninstall SQL Server via Command

    Install/Uninstall SQL Server via Command

    This is a post on installing SQL Server via command; I have a Windows Server 2016 Core running on a local Hyper-V test environment, and I’m installing SQL Server 2019, then uninstalling it.
    There’s 4 parts to this one;
    # Download a SQL Server ISO.
    # Mount the ISO on a Hyper-V Virtual Machine.
    # Install SQL Server via Command.
    # Uninstall SQL Server via Command.


    Download a SQL Server ISO

    As this is on my test environment, I’m installing the most recent SQL Server Edition available, which is SQL Server 2019 CTP 2.4 at the time of writing.

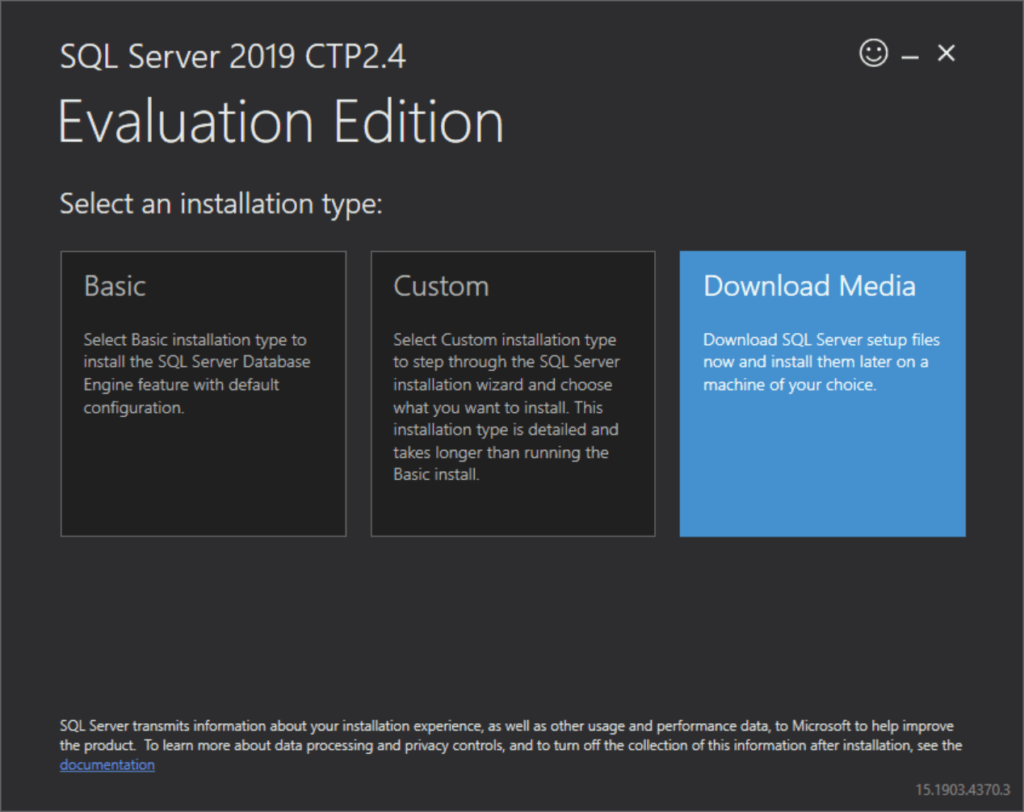
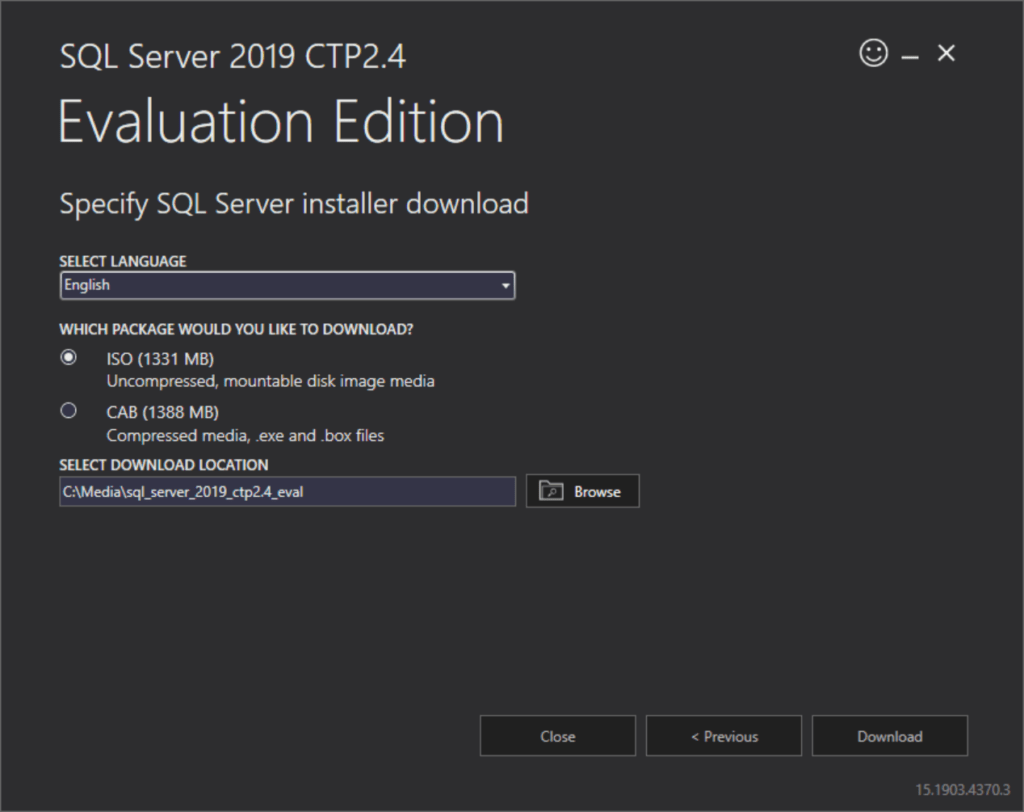
    SQL Server 2019 can be downloaded here – Open it up and select to download the media.

    SQL Server 2019 Download Media

    ISO’s are good for local virtual environments (using HyperV here).

    SQL Server 2019 Download Media Type

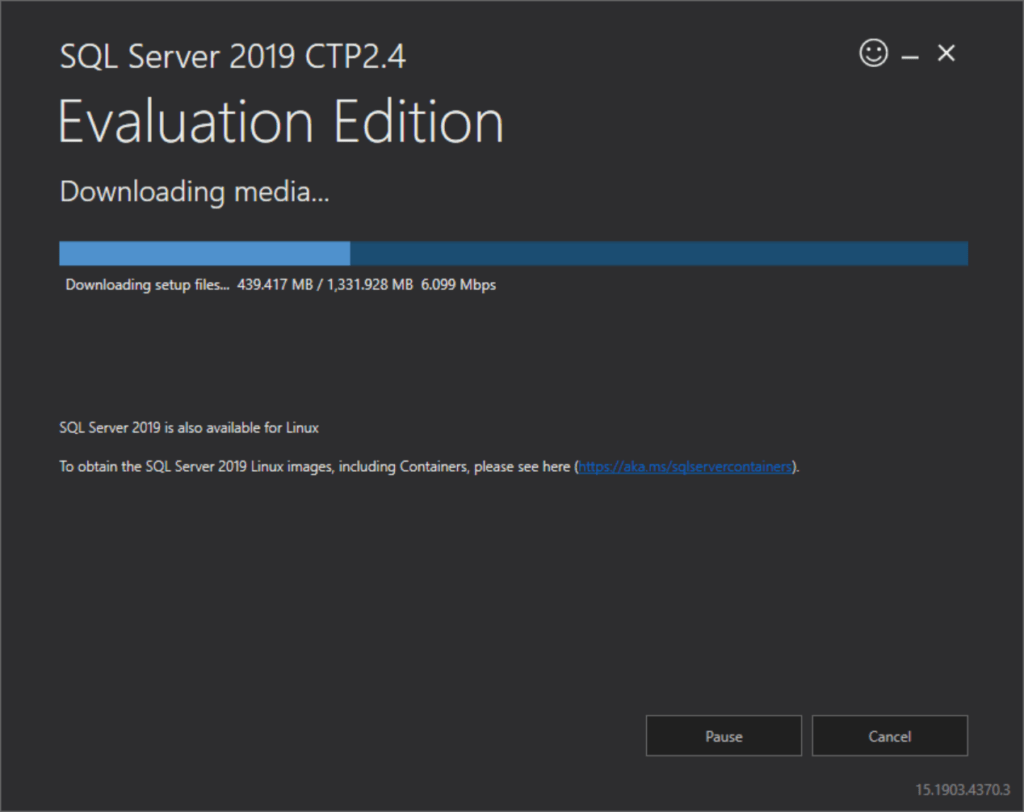
    6Mbps…

    SQL Server 2019 Download Speed

    We’re now ready to get that ISO mounted.


    Mount the ISO on a Hyper-V Virtual Machine

    1. Click Media > Insert Disk…

    HyperV Insert Disk

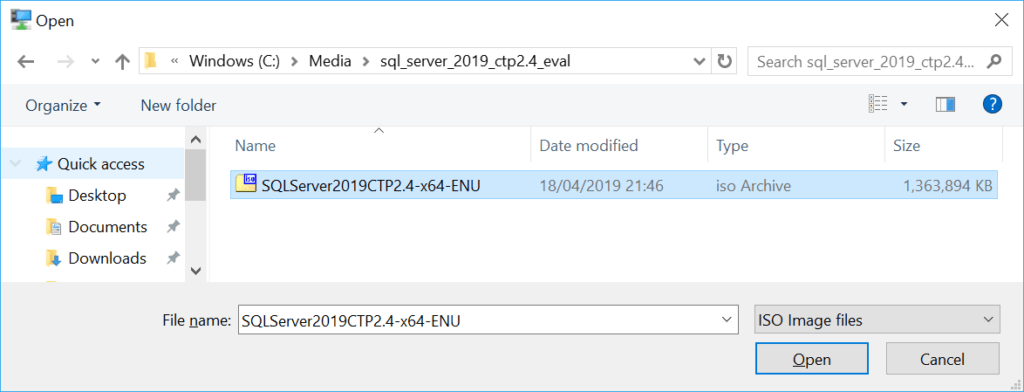
    2. Select the ISO file.

    SQL Server 2019 ISO File

    Install SQL Server via Command

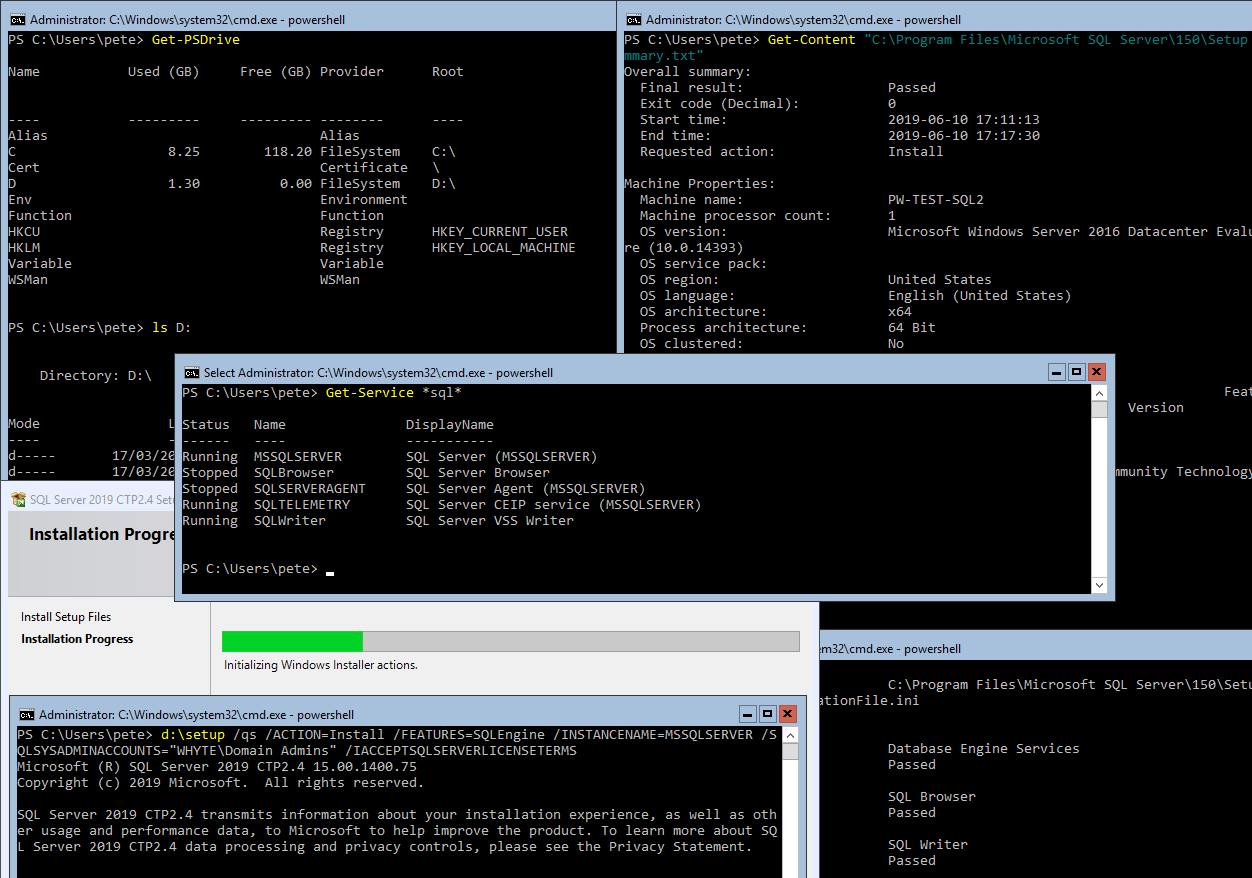
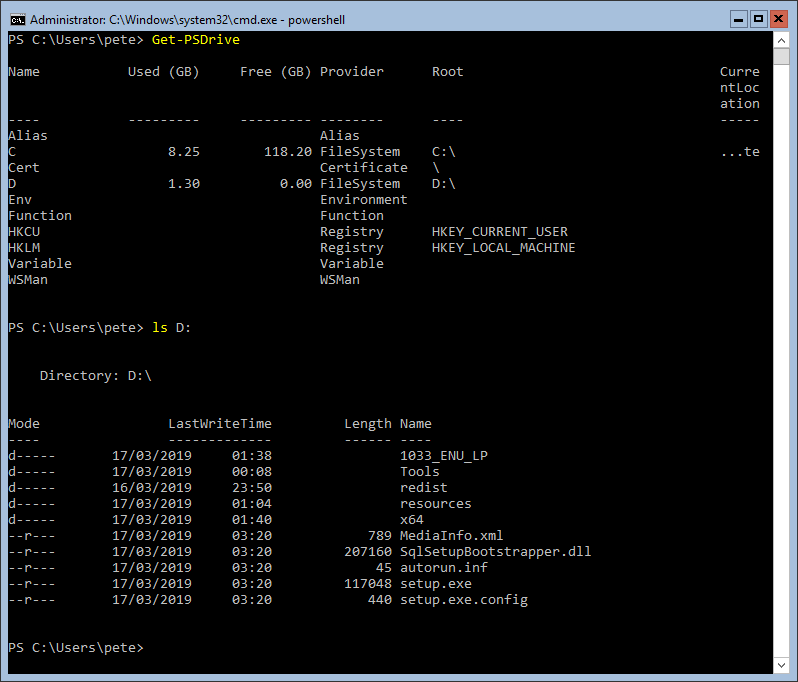
    1. First, lets have a look at our drives using the Get-PSDrive cmdlet.

    PowerShell Get-PSDrive

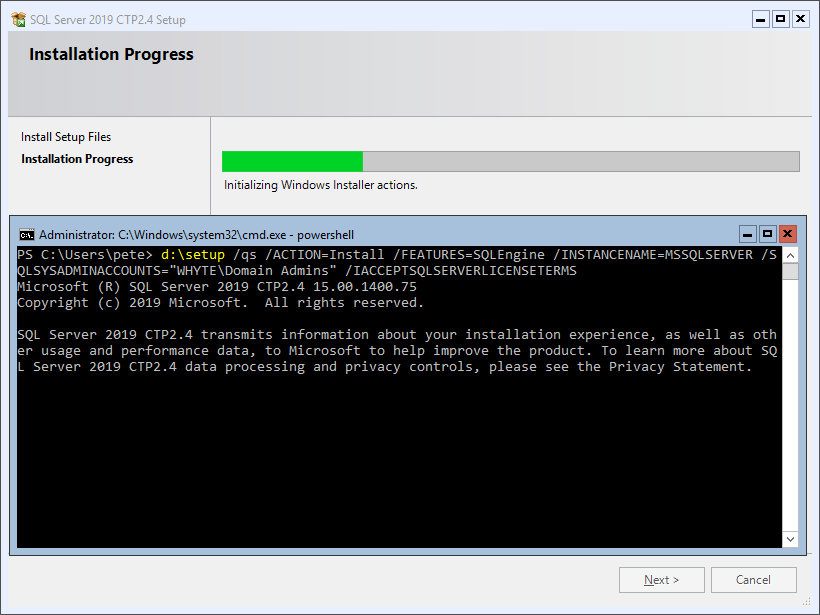
    2. Install using your preferred parameters. I’m adding the Domain Admins group as Sysadmins for quickness.

    SQL Server 2019 Install via Command

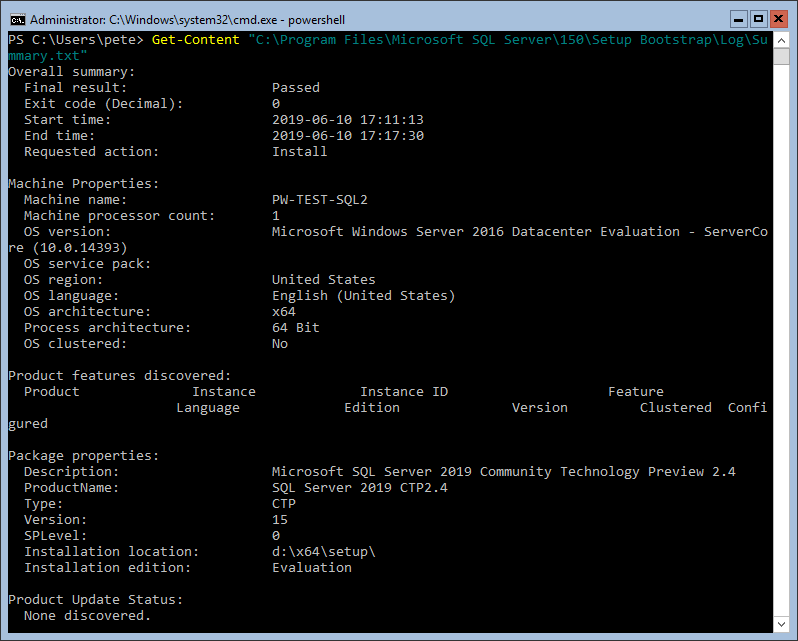
    3. We can look at the Summary.txt file using Get-Content to verify the installation has been successful.

    PowerShell Get-Content SQL Summary File
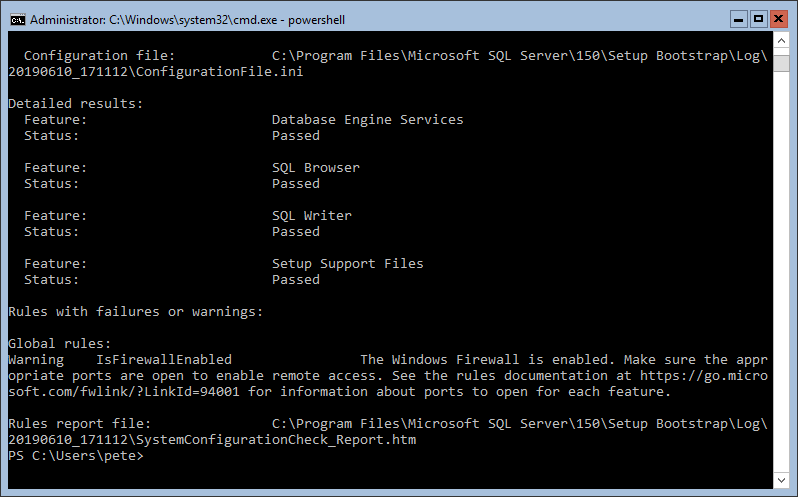
    PowerShell Get-Content SQL Summary

    The above shows the result of the installation was successful, and other things like where the Configuration INI file is (used for Unattended Installs).
    4. Next, we should check the SQL Server services, using Get-Service with “SQL” wrapped in wildcards.

    PowerShell Get-Service

    Uninstall SQL Server via Command

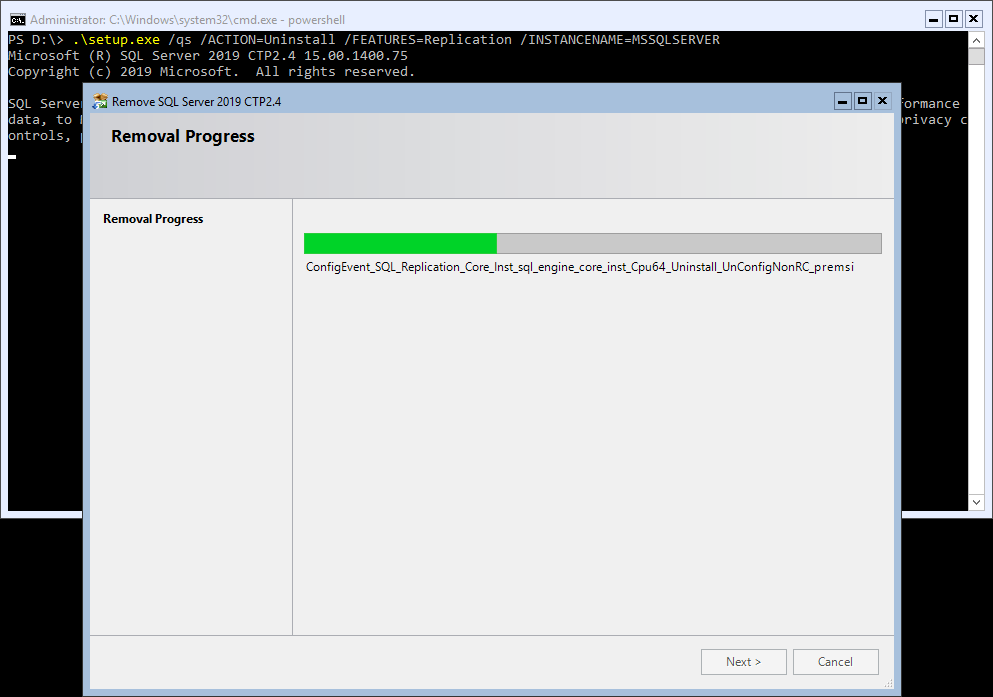
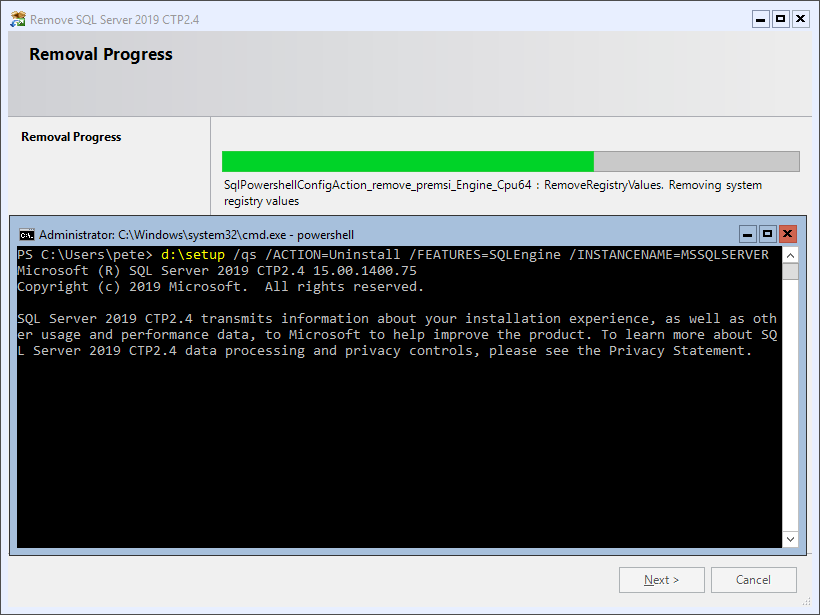
    Uninstalling is as simple as the install, funnily enough..

    SQL Server 2019 Uninstall via Command

    Once it’s done, we can check the summary file status and services to quickly verify the uninstallation has not been unsuccessful.


  • Renaming a computer that hosts SQL Server

    Renaming a computer that hosts SQL Server


    When changing the hostname of a computer running SQL Server, system metadata must be updated so that remote connections and applications do not lose connectivity. Those that use @@SERVERNAME or query sys.servers for the hostname that is.

    Microsoft’s documentation pages are a must read as always. Some considerations include; failover clustering, mirroring, replication, SSRS, local authentication and remote logins currently connected.


    Updating SQL Server after a Hostname Change

    (SQL Server has been installed – you now need to change the hostname of the server.)

    1. Rename Computer & reboot.

    2. Open SSMS & connect to your SQL Instance.
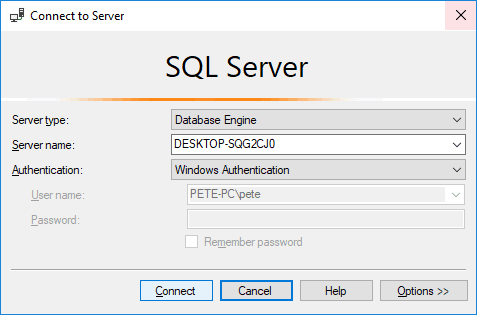
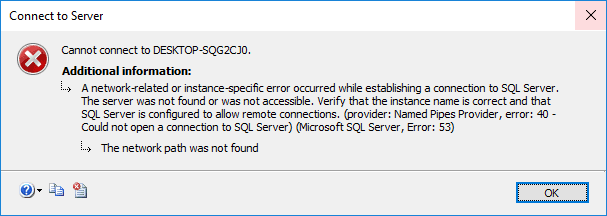
    If the default Server name remains, you’ll receive a connection error:
    Change the Server name to localhost to get connected.

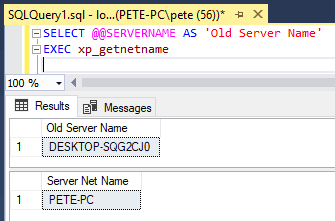
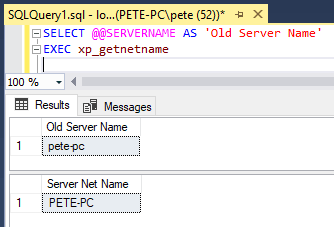
    3. Get SQL’s impression on hostnames.
    xp_getnetname is an undocumented extended stored procedure that returns your current hostname. We want both to return the same result.

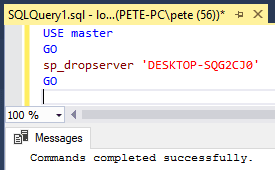
    4. Drop currently registered name (sp_dropserver).

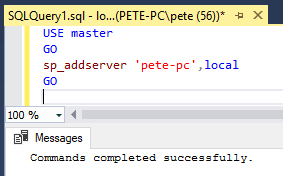
    5. Register new hostname (sp_addserver).

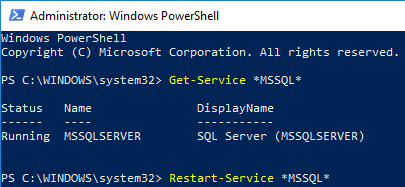
    6. For the change to be applied, restart the SQL Server service.

    7. Get the SQL Server hostname info again.

    That’s it done!

    When you next open SSMS, ‘localhost’ should be shown in the Server name field. Changing this to your new hostname will now work.


    SQL Code

    -- Get currently registered hostname: 
    SELECT @@SERVERNAME AS 'Old Server Name' 
    -- Get 
    EXEC xp_getnetname 
    
    -- Drop current hostname registration. 
    USE [master] GO sp_dropserver 'enter old hostname returned by @@SERVERNAME above' 
    GO 
    
    --Register new hostname. 
    USE [master] GO sp_addserver 'enter hostname returned from xp_getnetname above',local -- having local updates the metadata for @@SERVERNAME 
    GO 
    
    -- Restart SQL to apply changes

  • Installing SQL Server 2017

    Installing SQL Server 2017


    Installing SQL is a straight-forward task… but it’s important that things are in-place from the get-go to prevent having to make changes on a live system. There are a few best practises that can be defined within the installation wizard and many to be applied post install.

    This is a basic guide on installing SQL Server 2017. Before you get started, have a look at the Microsoft documentation, Planning a SQL Server Installation and Install SQL Server 2016.

    The software used; SQL Server 2017 Developer and SSMS 17, can be downloaded for free for your test environment.


    How to Install SQL Server 2017

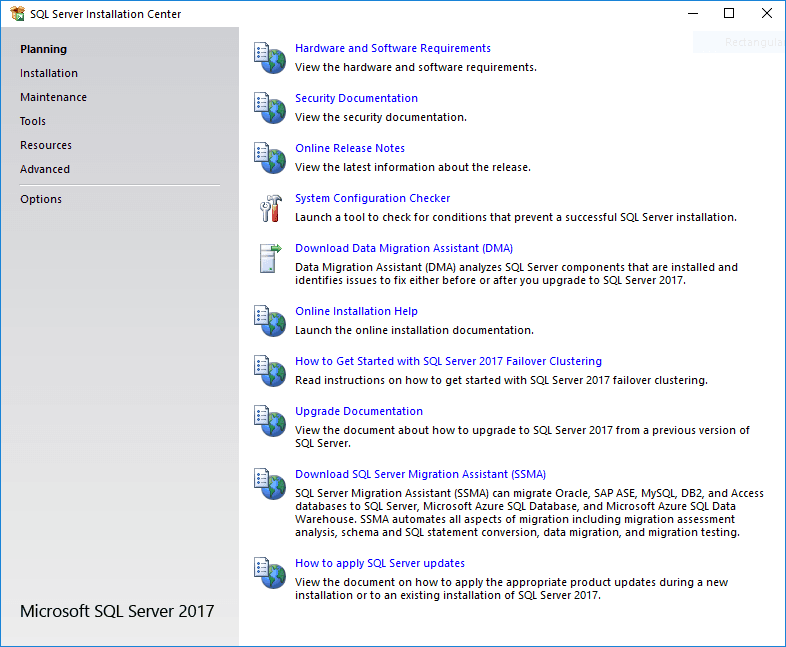
    1. Open Setup.exe within the SQL Server installation files or run your ISO.

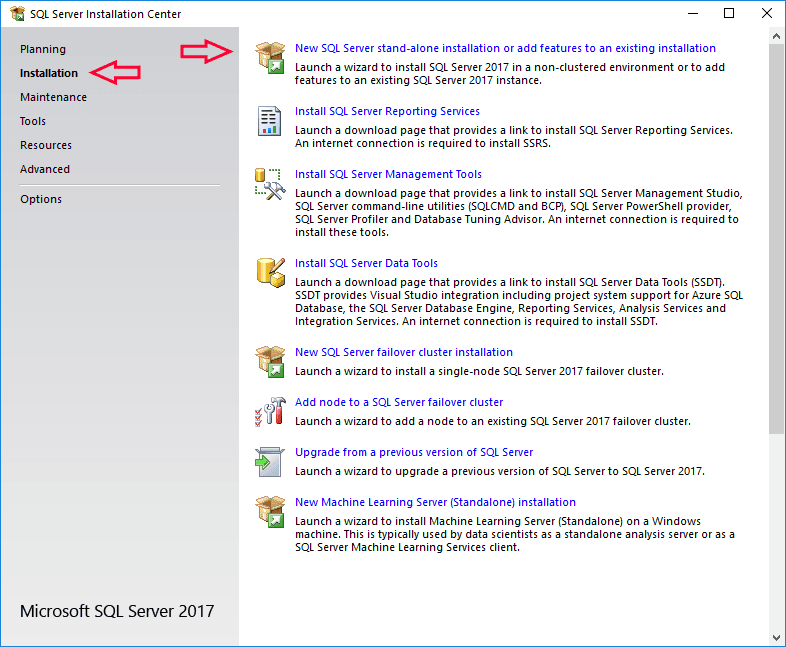
    2. Click on Installation at the left hand side, and then select the top option.

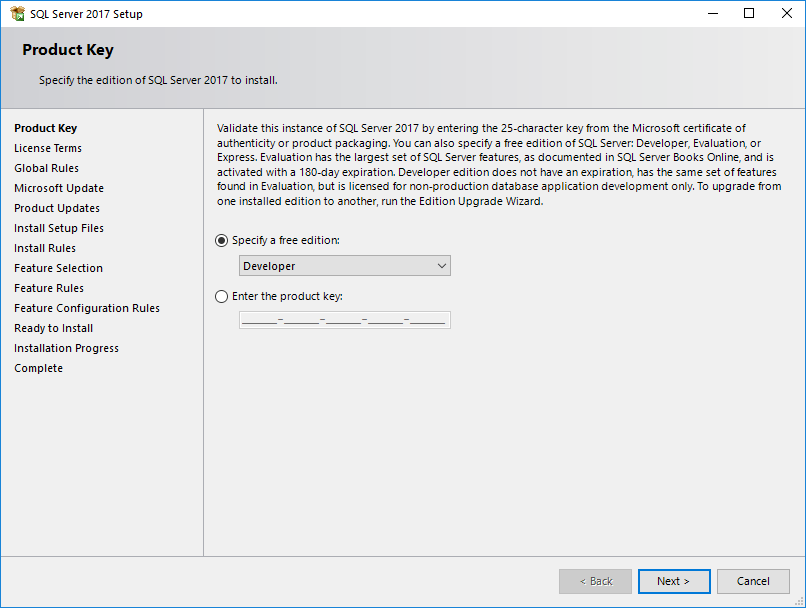
    3. The Edition should be pre-selected as determined by your installation media – click to continue.

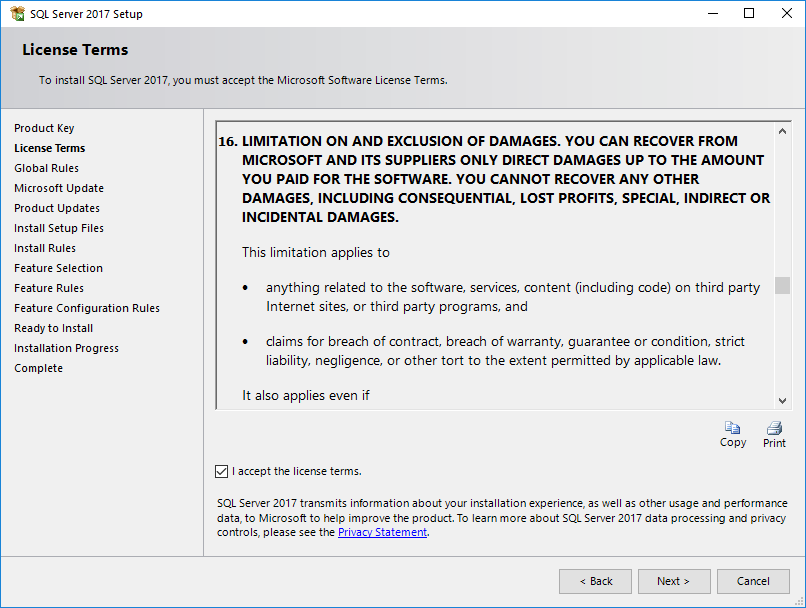
    4. Accept but don’t read the license terms.

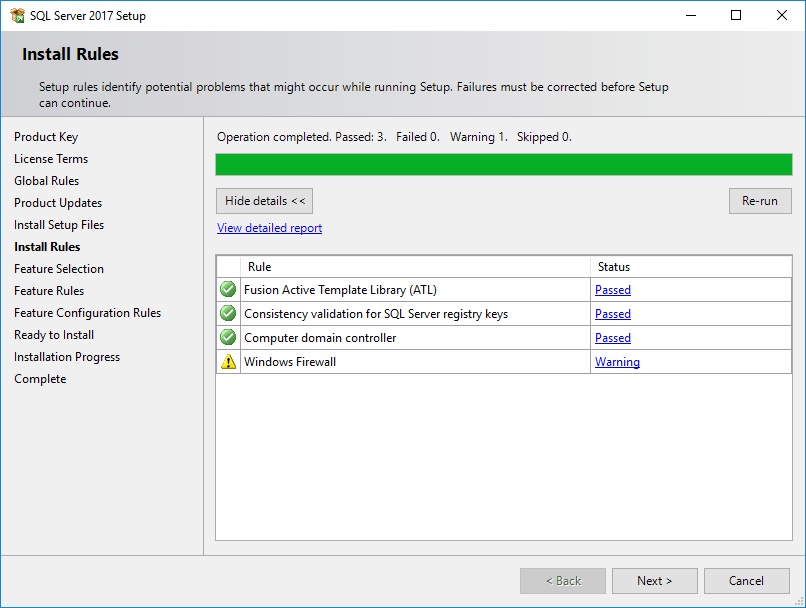
    5. Ignore the Firewall warning and continue.
    You may have already needed to reboot before getting this far.

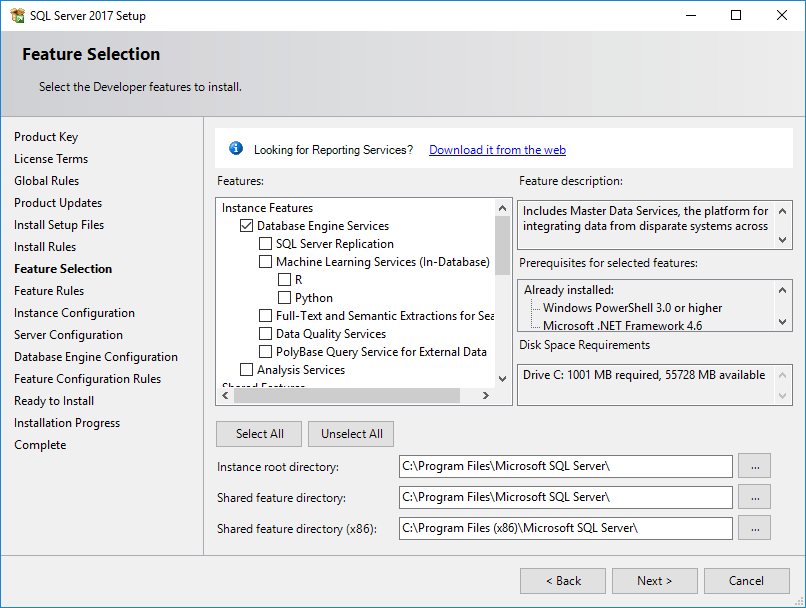
    6. Select required Features and continue.
    When selecting which features to install, a general rule to go by is, if you don’t know what it is then don’t install it. Maybe you’re thinking you’ll use a feature such as SSRS down the line – it’s dead easy to add stuff on so there’s no need to until decisions have been made. Plus, you might want to have as little load on the SQL box due to it having a license per core model.

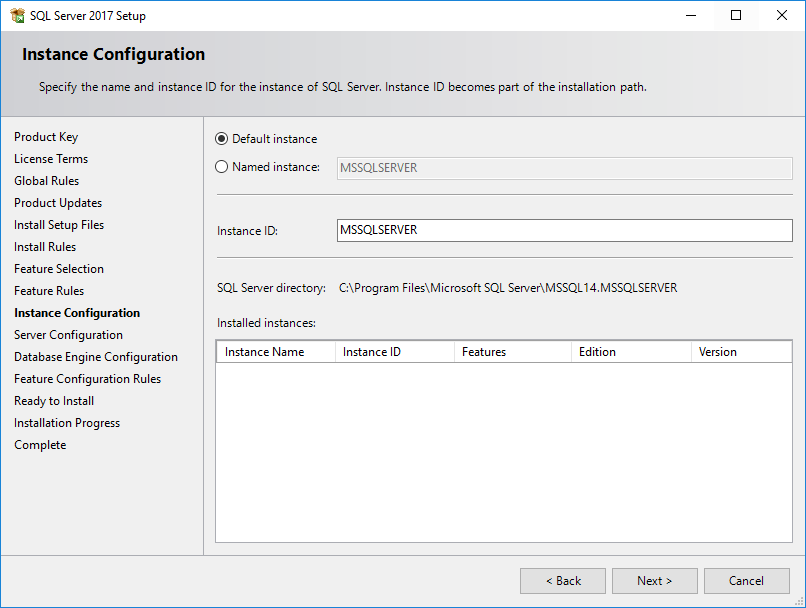
    7. Select Instance Type and continue.
    If working with multiple instances per server, go for named instances. If one server per instance, the default MSSQLSERVER should be suitable.

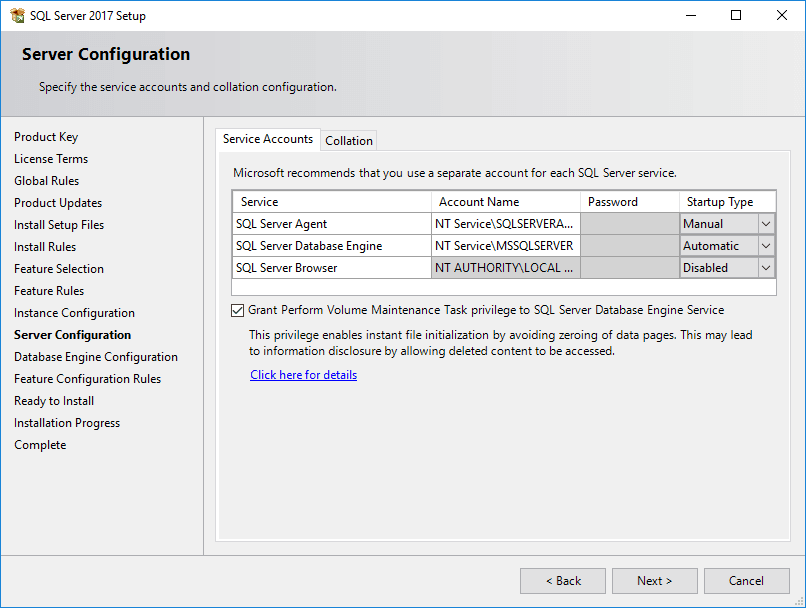
    8. Specify Service Accounts and continue.
    If your SQL Server will be authenticating to other network locations (e.g. backups to a file server), then it’s best to have a domain service accounts created and insert them in here.

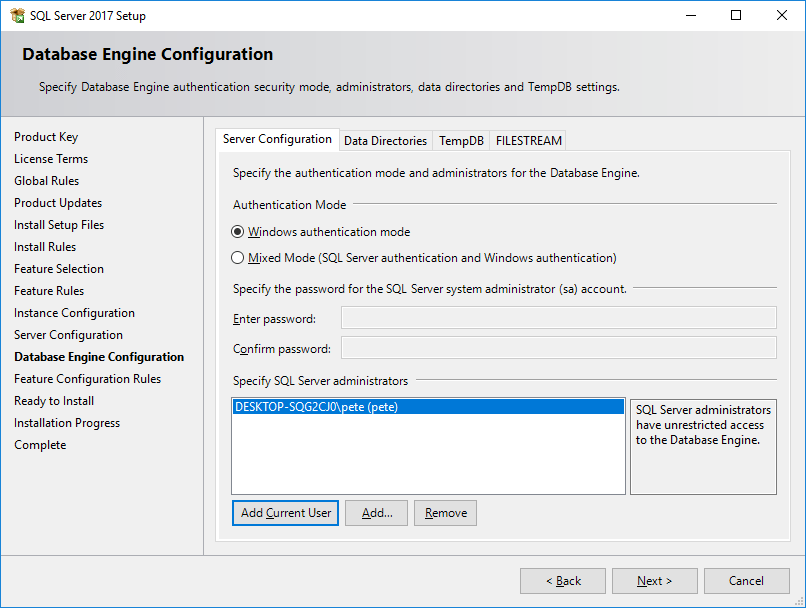
    9. Choose your method of Authentication, entering the password for the ‘sa’ account if using mixed mode.

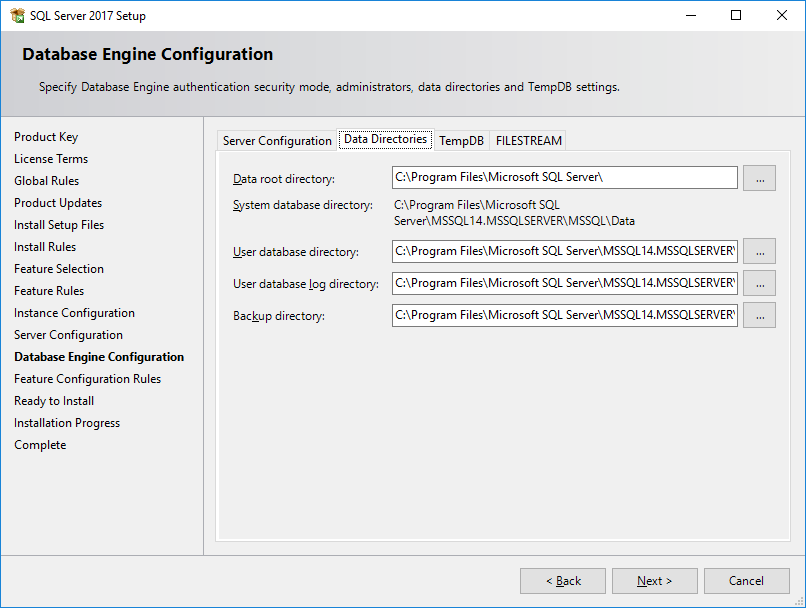
    10. Choose Root Directories within the Data Directories tab.
    The root directory should fit well on the C:\ drive, as long as your user database directories are set to use separate drives. To ensure optimal performance & for added reliability, store your data, log and tempdb files on separate drives.

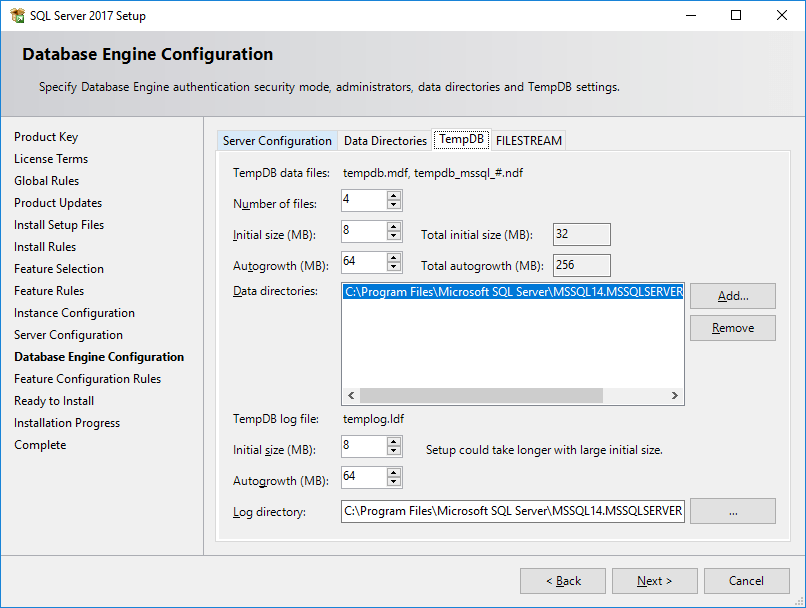
    11. Configure TempDB within the TempDB tab.
    In SQL Server 2016 on-wards you can specify the number of TempDB files to use within the installation wizard. This number should be automatically populated which is driven by the number of CPU cores you have on the machine. There’s a fair amount of reading to be done over how to manage TempDB, but I’m going to leave it at that for now.

    The FILESTREAM tab is for storing files in SQL – not something required in a standard SQL install.

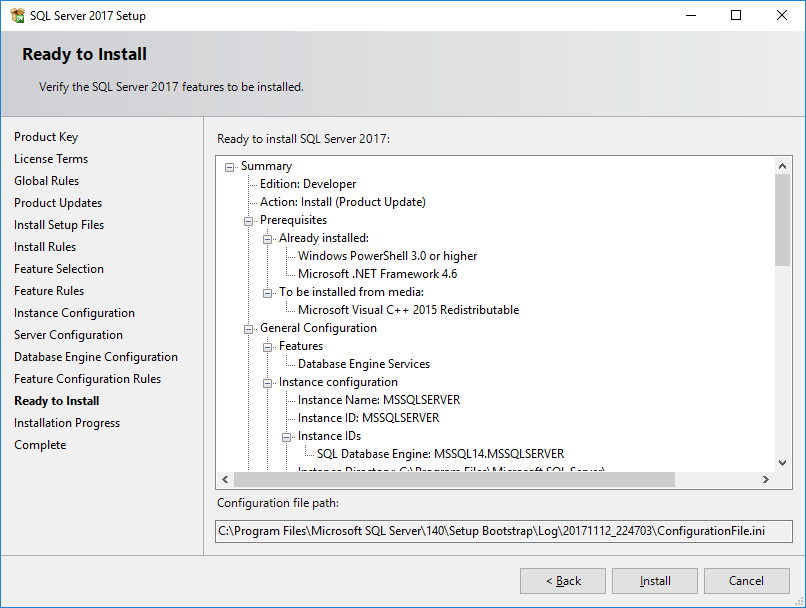
    12. Ready to install.
    The SQL Server installation wizard has created a ConfigurationFile.ini, which is used for unattended installs. Feel free to have a look or save it for documentation purposes.

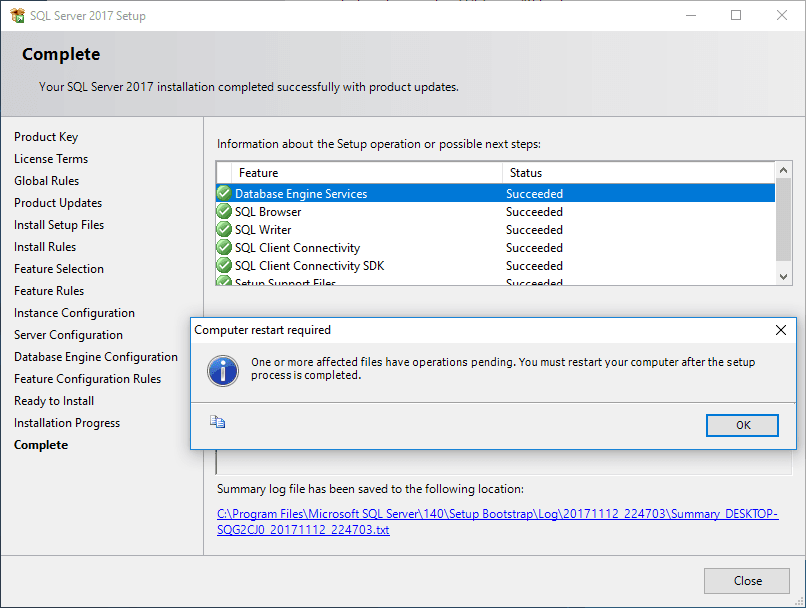
    13. We’re done!

    Now what?

    Your SQL Server services should be running and it’s waiting on you create your databases. As from SQL Server 2016, SSMS was no longer included within the installation media, so this’ll need to be downloaded and installed too.