Tag: WSL Ubuntu

  • How to Install PowerShell on Ubuntu 20.04

    How to Install PowerShell on Ubuntu 20.04

    This post is a guide on installing PowerShell on Ubuntu 20.04.

    The Ubuntu Linux distribution being used in this demo is running as a Windows Subsystem for Linux (WSL) instance. I have not yet encountered issues with the PowerShell, Ubuntu and WSL cocktail.

    Be sure to check out Microsoft Documentation, Installing PowerShell on Linux (Ubuntu) for up-to-date information, particularly for PS Linux version compatibility and end-of-support dates.

    The following is covered in this demo:
    # Install PowerShell on Ubuntu
    # Open PowerShell on Ubuntu

    Install PowerShell on Ubuntu

    As mentioned above, I’m installing PowerShell on Ubuntu WSL for this demo. Why would you want to emulate Linux on Windows to then install PowerShell? Because it’s a great cross-platform programming language? The reason I’m performing this on WSL is that the Windows Subsystem is great for spinning up a test Ubuntu instance.

    To install PowerShell on Ubuntu 20.04, run through the Linux commands below. This is as described in the Install via Package Repository Microsoft documentation page, be sure to check that out for any updated information.

    # Update the list of packages
    sudo apt-get update
    
    # Install pre-requisite packages.
    sudo apt-get install -y wget apt-transport-https software-properties-common
    
    # Download the Microsoft repository GPG keys
    wget -q "https://packages.microsoft.com/config/ubuntu/$(lsb_release -rs)/packages-microsoft-prod.deb"
    
    # Register the Microsoft repository GPG keys
    sudo dpkg -i packages-microsoft-prod.deb
    
    # Update the list of packages after we added packages.microsoft.com
    sudo apt-get update
    
    # Install PowerShell on Ubuntu
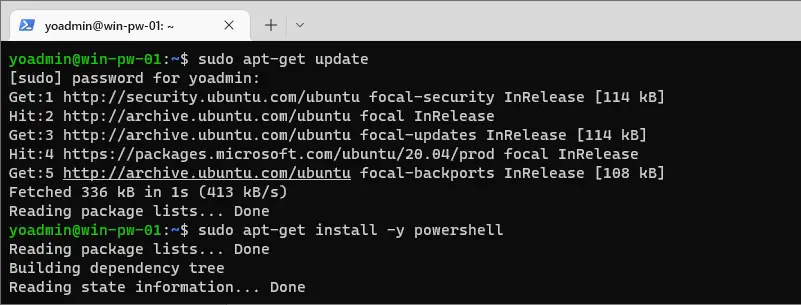
    sudo apt-get install -y powershell
    Ubuntu Install PowerShell

    The above PowerShell installation should only take a minute or so to complete, including the Advanced Package Tool (apt) updates.

    Open PowerShell on Ubuntu

    Now that we have PowerShell installed on this Ubuntu WSL instance, we can check the running PowerShell version and open PowerShell in Ubuntu.

    The default Alias for PowerShell is pwsh. You can find information about pwsh and pwsh parameters within the MS Docs as linked.

    # Check PowerShell Version on Ubuntu
    pwsh -v
    
    # Start PowerShell on Ubuntu
    pwsh
    
    Run PowerShell Ubuntu

    The above shows the running PowerShell version of 7.2.7, and we are entering PowerShell using the pwsh command.

    We can also run $PSVersionTable while in pwsh to check the PowerShell version in Ubuntu, which will show more OS and system information.

    Get PowerShell Version Ubuntu

    I hope this has been a helpful informational guide on installing PowerShell on Ubuntu. If you are interested in running Ubuntu on Windows, check out my other post – How To Install Windows Subsystem for Linux (WSL).

  • How to Check Linux Version in Ubuntu

    How to Check Linux Version in Ubuntu

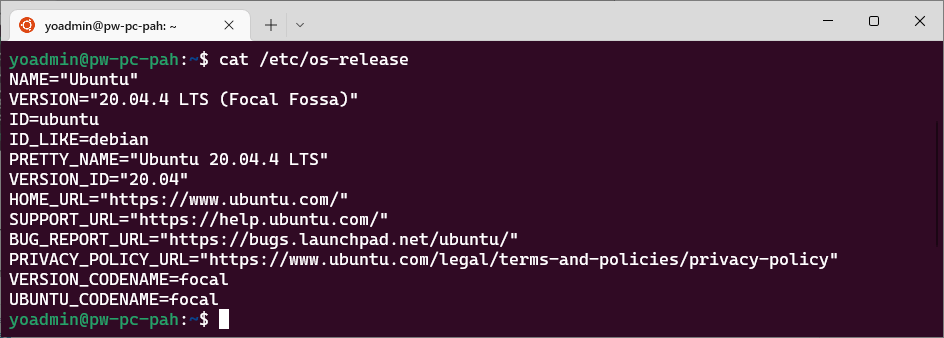
    To check the Linux version in Ubuntu, run the lsb_release -a or cat /etc/os-release command. This is useful when accessing a host for the first time or checking the running Linux distribution and version.

    This blog post shows examples of 2 ways to check the Linux version of Ubuntu:
    # Method 1: lsb_release -a
    # Method 2: cat /etc/os-release

    The demo you see here was done on Ubuntu WSL. Note that the hostnamectl command does not work when running Ubuntu on the Windows Subsystem for Linux (WSL).
    Method 1: lsb_release -a

    The lsb_release command is a simple way to check the version of Linux that is running on your system. To use it, open a terminal and run the following command:

    # check linux version on ubuntu
    lsb_release -a
    
    Ubuntu lsb_release

    Method 2: cat /etc/os-release

    Another way to check your Linux version is to display the contents of the /etc/os-release file on your system. To do this, run the following command in your terminal:

    # check linux version on ubuntu
    cat /etc/os-release
    
    Ubuntu /etc/os-release

    To find out more about WSL and Ubuntu, check out my WSL Ubuntu tag. You’ll find random blog posts on using and managing Ubuntu within Windows Subsystem for Linux.

  • How to Install & Configure AWS CLI on Ubuntu

    How to Install & Configure AWS CLI on Ubuntu

    This post should help guide you through the process of installing and configuring AWS CLI (version 1) on Ubuntu (20.04).

    The following areas are covered in this demo:
    Updating Local Packages
    Installing AWS CLI on Ubuntu
    Checking Installed AWS CLI Version
    Configuring AWS Profile
    Running AWS CLI Commands

    Updating Local Packages

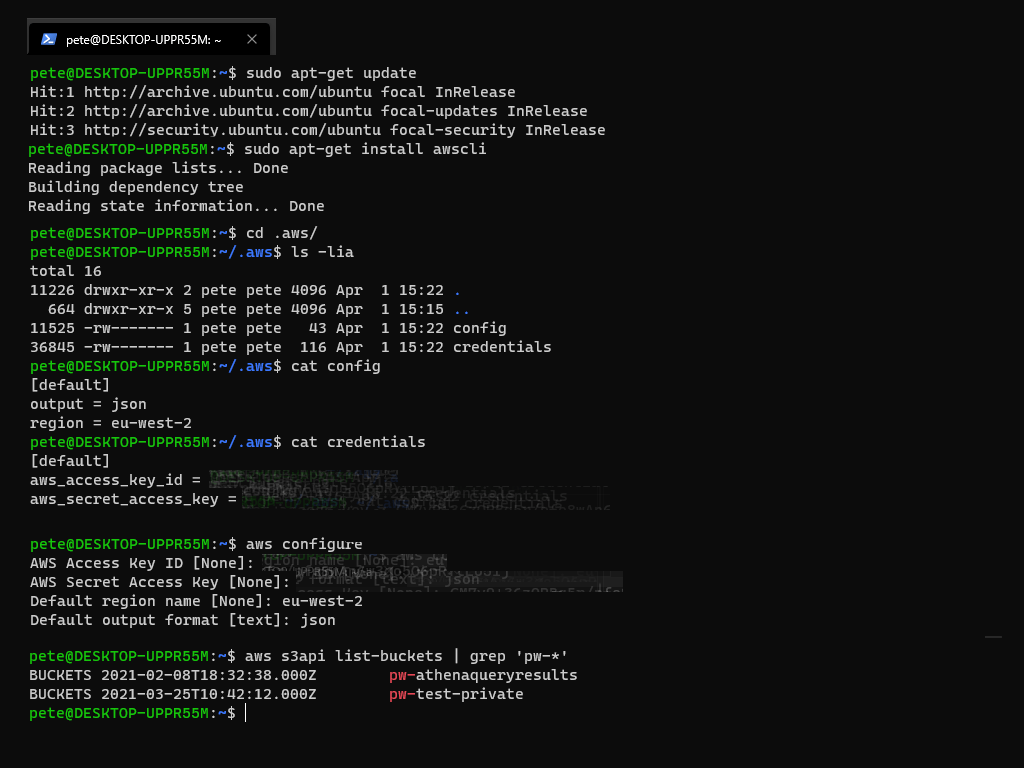
    To start, update your local packages by running the following command:

    # update local packages ubuntu
    sudo apt-get update
    

    Installing AWS CLI on Ubuntu

    You can install AWS CLI on Ubuntu by running the following command:

    # install awscli ubuntu
    sudo apt-get install awscli
    

    Checking Installed AWS CLI Version

    After the installation is complete, check the version of AWS CLI that was installed by running:

    # check version of awscli installed
    aws --version

    Configuring Your AWS Profile

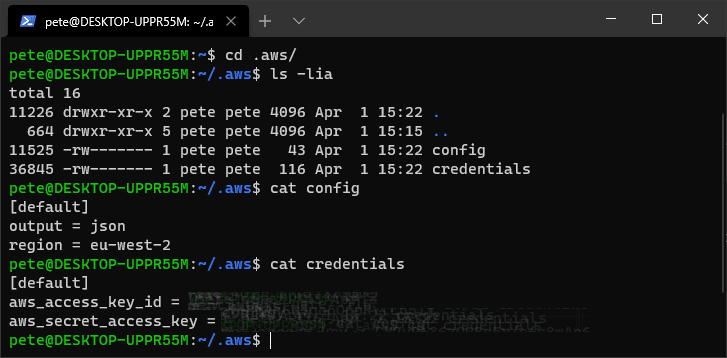
    Once you have confirmed the version, you can run aws configure to set up your AWS profile. Your Access Key ID and Secret Access Key can be found and recreated in the AWS IAM Console, which I have covered in my previous post on installing and configuring AWS CLI on Windows.

    # configure aws profile
    aws configure

    For reference, here are the output config files – this is an area that gets touched a lot.

    Running AWS CLI Commands

    Once you have completed the configuration, you can run AWS CLI commands like the following example, which lists all the buckets in your AWS account that begin with the pw-* prefix:

    Note that this is not the only way to install AWS CLI on Ubuntu, and this guide covers version 1 of AWS CLI.

  • How to Install Ubuntu 20.04 on WSL

    How to Install Ubuntu 20.04 on WSL

    This guide shows how to install Ubuntu 20.04 on WSL (Windows Subsystem for Linux). Before installing a WSL Linux distribution you should have already enabled WSL on your computer.

    All WSL Linux distributions are available for download in the Microsoft Store. This is the easiest way to install a WSL Linux distro. If you are automating WSL installations, you may be looking for the WSL distro download links and PowerShell install command.

    This post contains the following methods to get Ubuntu installed on WSL ->
    # Install WSL Ubuntu 20.04 via Microsoft Store
    # Install WSL Ubuntu 20.04 via Command

    Install WSL Ubuntu 20.04 via Microsoft Store

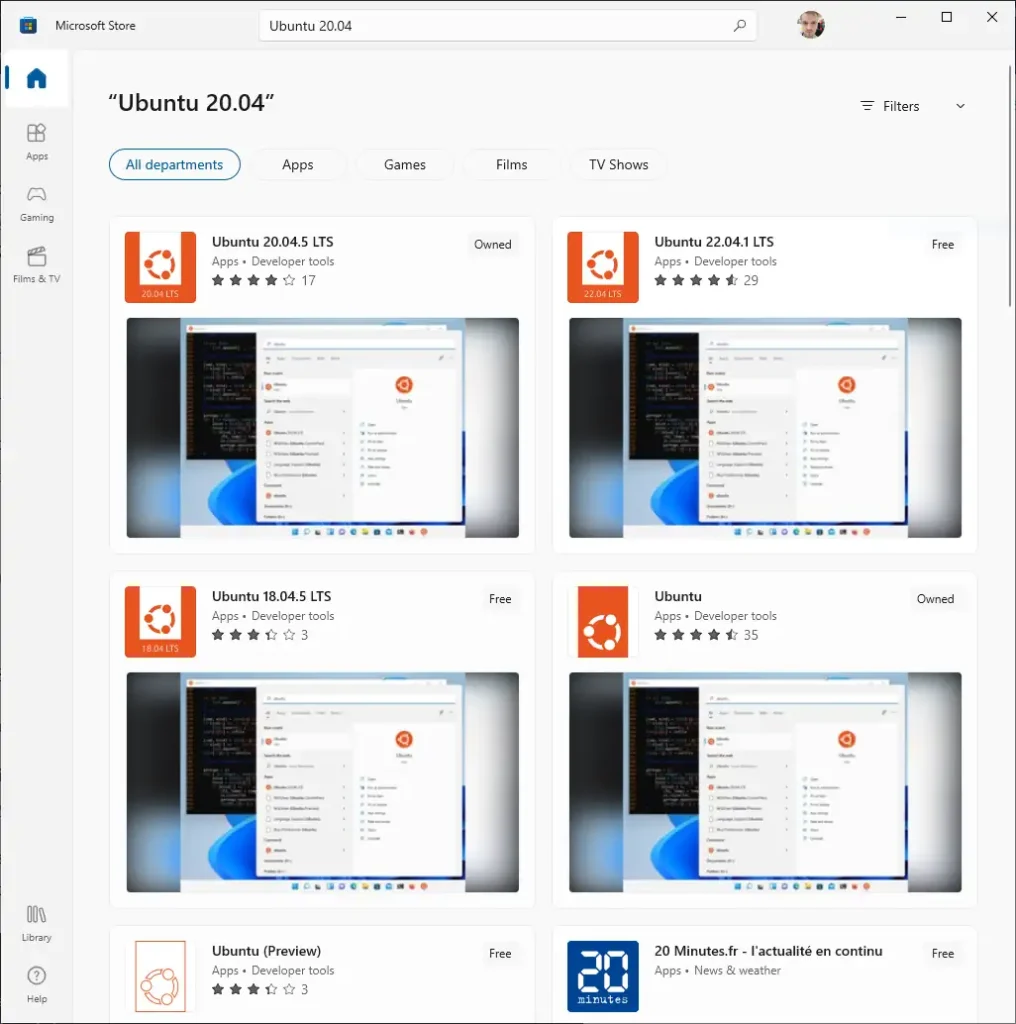
    You can find all the available WSL Linux distributions in the Microsoft Store available for download. This may be restricted by Group Policy if you’re on a Domain (a work/corporate computer).

    Click Start, open the Microsoft Store and simply search for the Ubuntu distribution version you desire.

    Microsoft Store Ubuntu WSL

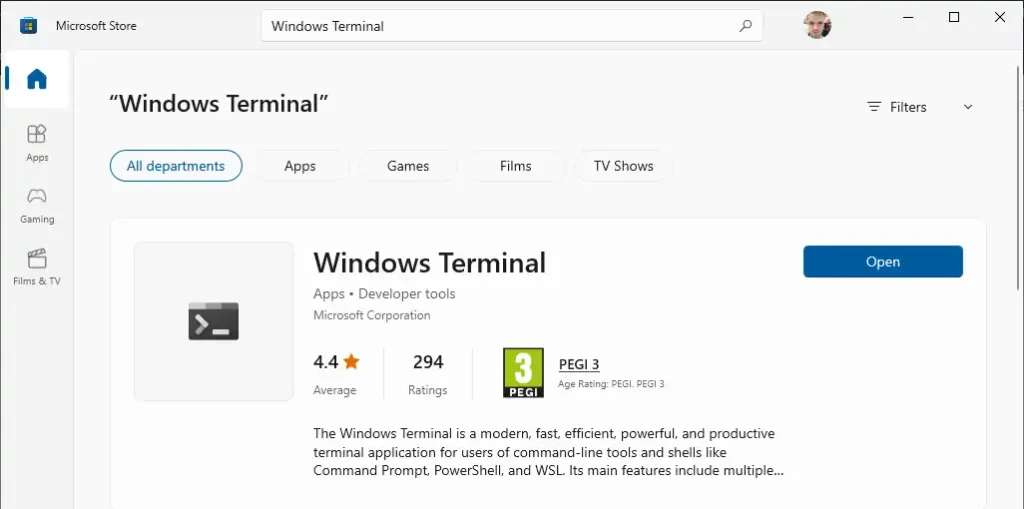
    Click to download/install Ubuntu WSL, and then go ahead and install Windows Terminal while you’re at it.

    Windows Terminal Microsoft Store

    Once both of the above installs are complete, search and run Windows Terminal, then enter Ubuntu by running wsl in the terminal.

    Open WSL Ubuntu

    Install WSL Ubuntu 20.04 via Command

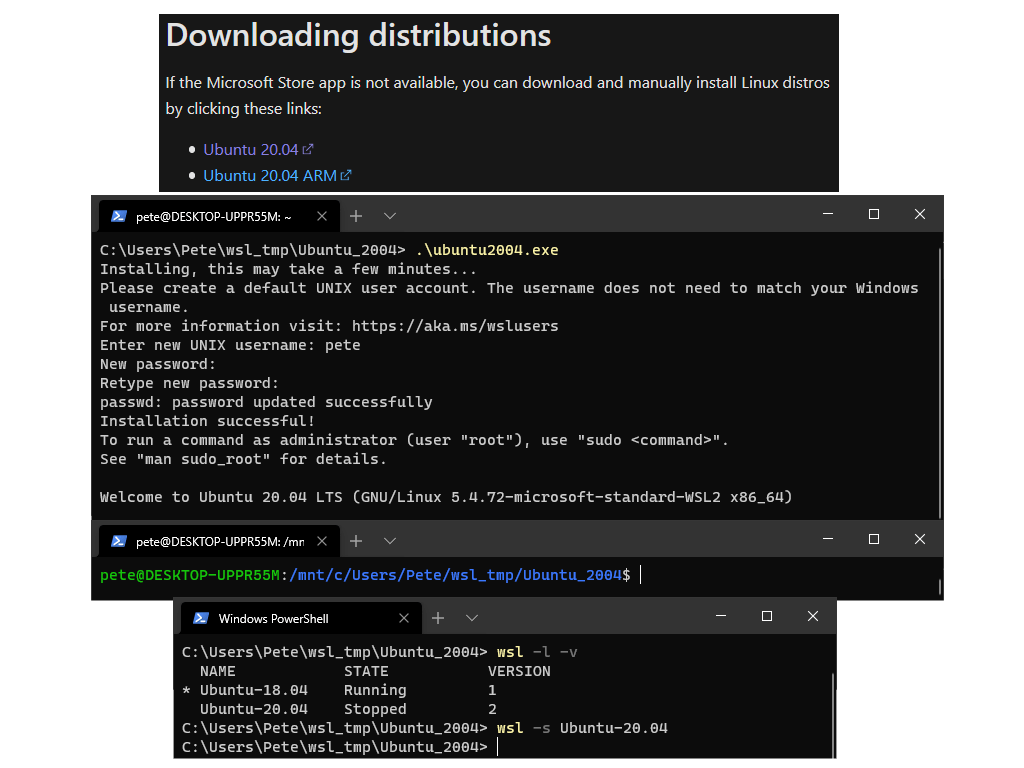
    To install WSL via PowerShell script or command, we’d download the WSL Linux distro and then extract/install it.

    The Microsoft Documentation contains a full list of WSL download links for each of the available WSL Linux distros:-
    – Ubuntu 20.04 (LTS / 18.04 LTS)
    – openSUSE Leap 15.1
    – SUSE Linux Enterprise Server (15 SP1 / 12 SP5)
    – Kali Linux
    – Debian GNU/Linux
    – Fedora Remix for WSL
    – Pengwin (+ Enterprise)
    – Alpine WSL
    – Raft (Free Trial)

    We are installing Ubuntu 20.04 in this demo, manually via a web browser rather than PowerShell Invoke-WebRequest or Curl.

    Move the downloaded file into some directory.

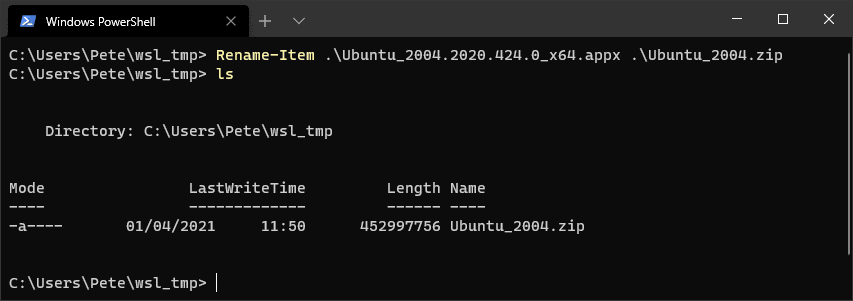
    Now into the directory within PowerShell, rename the file from .appx to .zip format.

    # rename Ubuntu appx file to zip format
    # add-appxpackage doesn't always work, extracting the .exe seems better
    Rename-Item .\Ubuntu_2004.2020.424.0_x64.appx .\Ubuntu_2004.zip

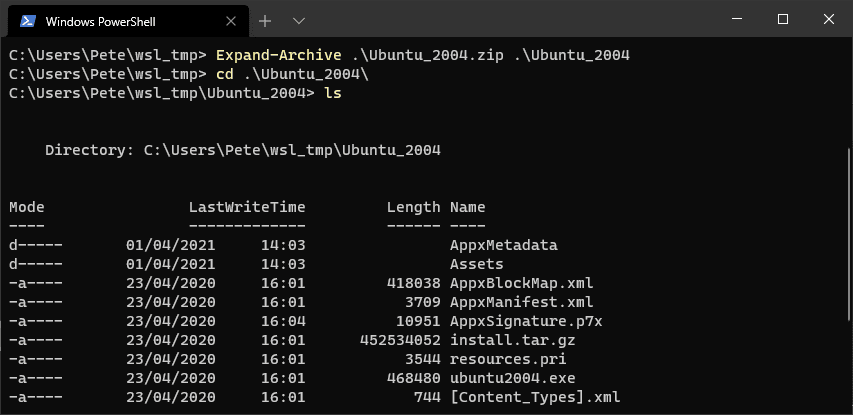
    Extract the zip file into a new directory.

    # extract the zip file into a new dir
    Expand-Archive .\Ubuntu_2004.zip .\Ubuntu_2004

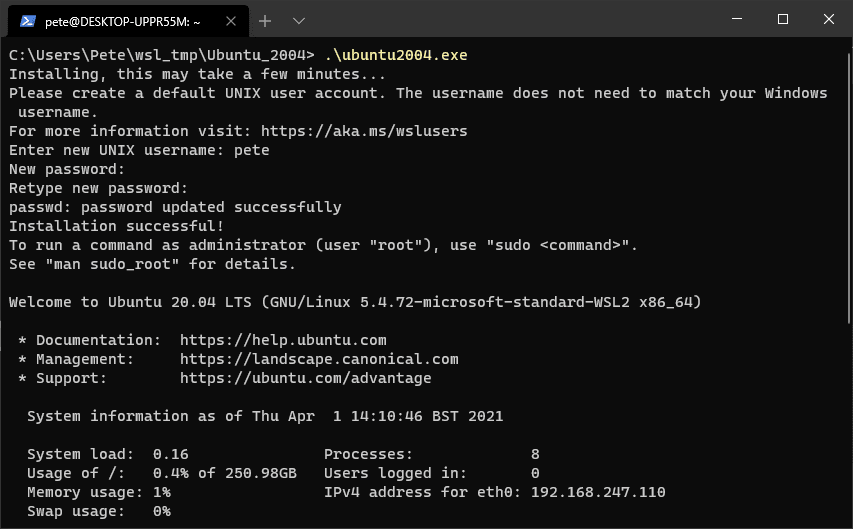
    Run the ubuntu2004.exe file within the extracted directory and follow the setup instructions to create a new Linux login.

    Once done wsl should be waiting for you.

    Lastly, I’m now exiting (‘exit’ command) out of WSL, listing out my Linux distros and setting this Ubuntu 20.04 distro as my default.

  • How to Unregister a Linux Distro in WSL

    How to Unregister a Linux Distro in WSL

    If you want to remove a Linux distro from your Windows Subsystem for Linux (WSL) installation, you can use the wsl --unregister <distro-name> command to unregister it. This is useful for cleaning up an old installation and starting fresh with a new distro.

    To unregister a Linux distro in Windows Subsystem for Linux (WSL), you can follow the steps in this blog post.

    Keep in mind that unregistering a distro will permanently delete all data, settings, and software associated with it. If you want to use the distro again, you will need to reinstall it from the Microsoft Store.

    Uninstall a WSL Distro

    Open a command prompt or terminal and type the following command to show a list of all the WSL distros currently installed on your machine:

    # show list of wsl distros
    wsl -l -v
    

    Identify the distro you want to remove from the list and type the following command, replacing <distro_name> with the name of the distro you want to unregister:

    # unregister a wsl distro
    wsl --unregister <distro_name>
    
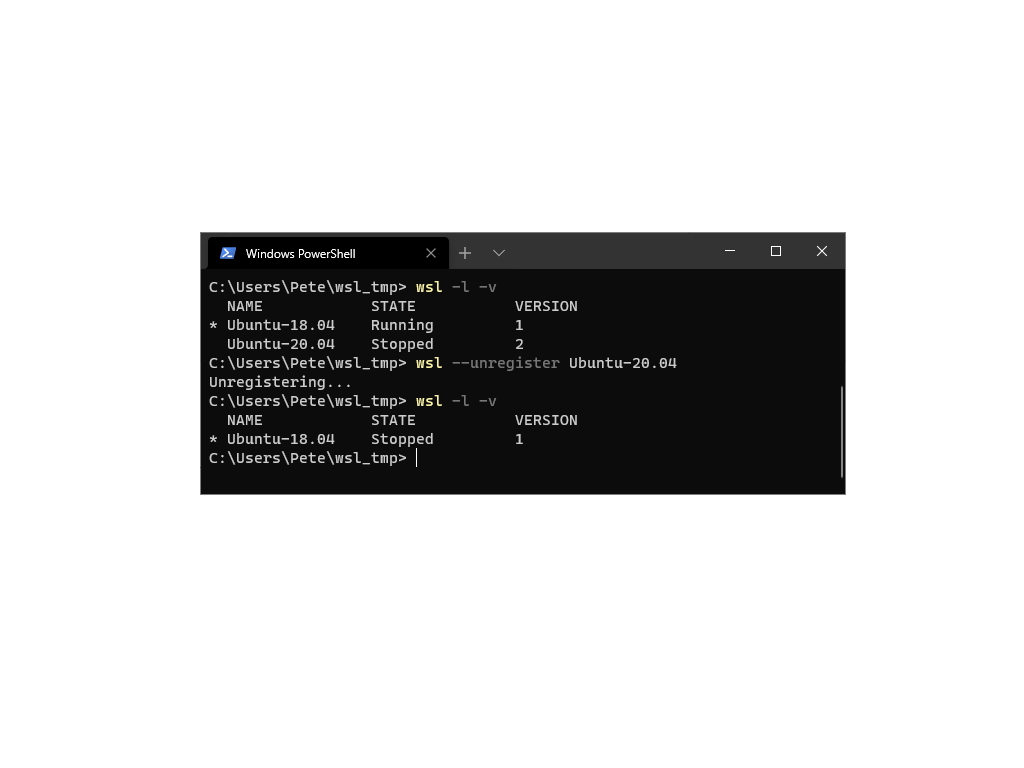
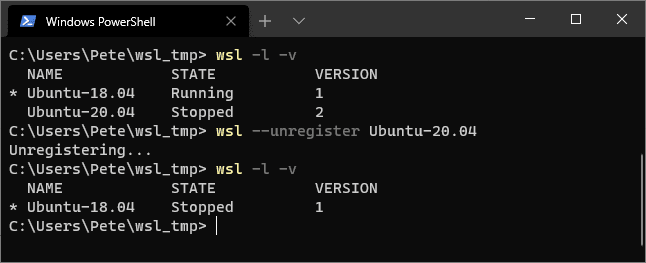
    wsl --unregister

    In the example given above, the user has unregistered their Ubuntu-20.04 distro.

    If you want to learn more about using the Windows Subsystem for Linux (WSL), you can check out my WSL page. It includes a list of all my latest posts and notes on the topic.

  • Setup SSH Keys in WSL

    Setup SSH Keys in WSL

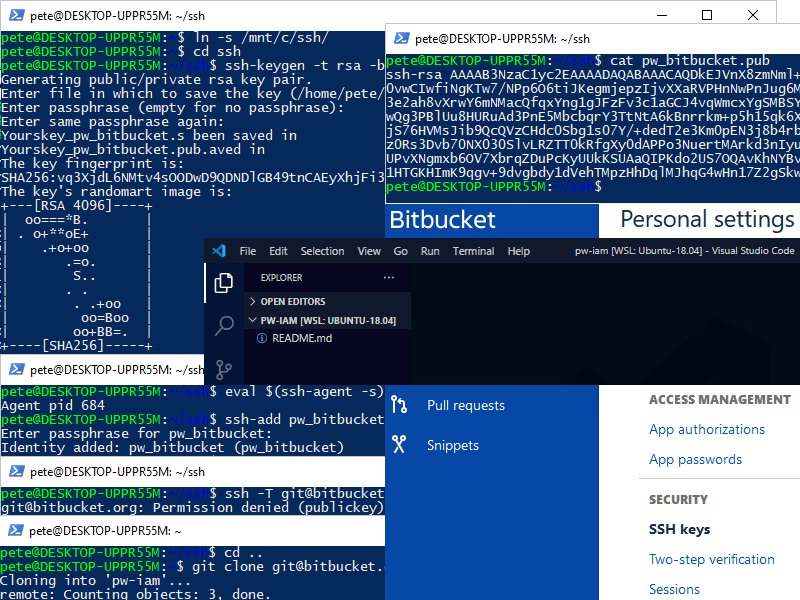
    Setting up SSH keys on Windows is generally done via OpenSSL or Putty. We can set this up and have quick authentication to places like GitHub or Bitbucket. But, we are also able to rely on a Linux distro in WSL for our SSH. If you are developing in WSL, this might be useful as that’s where you will be cloning your git repos to.

    This post contains a demo of setting up SSH keys in WSL (Windows Subsystem for Linux), on an Ubuntu 20.04 distro. The version-control system being used here is Bitbucket.

    The steps included in this SSH WSL setup are as follows:
    # Create New SSH Key
    # Add SSH Key to Agent
    # Add SSH Key to Project

    Create New SSH Key

    I’m creating a new SSH key within a WSL linked folder, which means my SSH keys are backed up on the local machine in case anything happens on this WSL instance. Even though I can easily recreate and add a new SSH key to my Bitbucket account if need be.

    This SSH key is being created with a password and being added to the SSH Agent so I don’t need to enter the password each time.

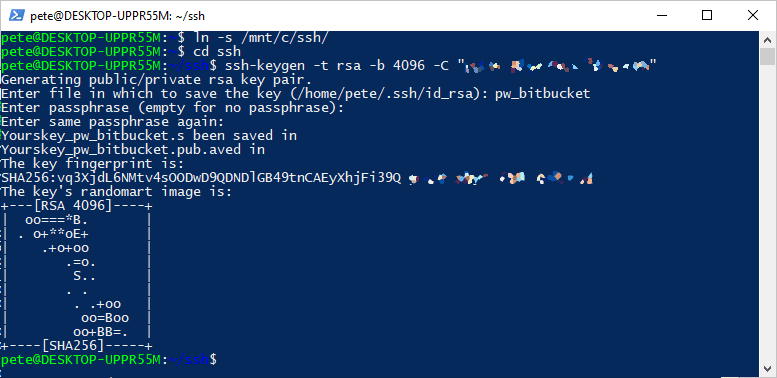
    The following command will create a new SSH key in my WSL Ubuntu instance –

    # Create a new ssh key
    ssh-keygen -t rsa -b 4096 -C "someone@email.com"
    WSL ssh-keygen

    Add SSH Key to Agent

    As mentioned above by adding our new SSH key to the ssh-agent so we don’t have to enter the passphrase every time we use it.

    Run the following to add the SSH key to SSH Agent –

    # Add ssh key to agent
    eval $(ssh-agent -s)
    ssh-add pw_bitbucket

    Add SSH Key to Project

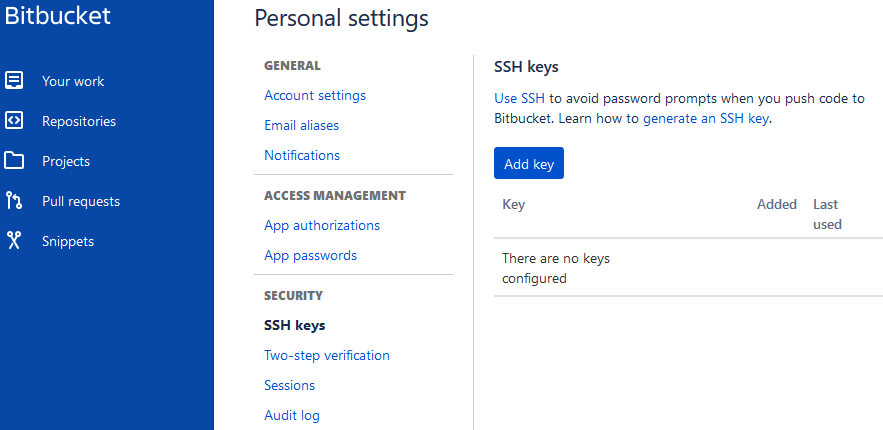
    Now that the SSH key is ready, we just need to add that to the Git account you’re using. As mentioned, I’m using Bitbucket in this demo.

    Run the cat Linux command on the public SSH key (.pub file) to show the SSH key for Bitbucket. Copy everything except the email at the end.

    # Ssh to app/host
    ssh -T git@bitbucket.org

    Below is an example of when you haven’t added the SSH key to your account yet –

    This is what we are going to do now. Add the SSH key to your git/Bitbucket account.

    Now re-trying the SSH connection –

    logged in as bl4h130b1aH” – We can see it has worked this time. Our SSH keys are stored in Bitbucket and we are logged in, and authenticated via SSH.

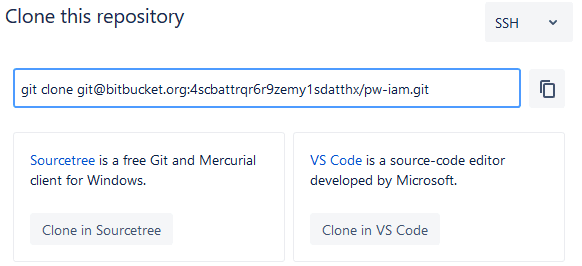
    We are ready to clone a repo into WSL. Navigate to the desired folder in the WSL Linux terminal and run the git clone command as per the repo link.

    The git repo has been cloned successfully. I will now open Visual Studio Code and get to work!