How to Downgrade from WSL Version 2 to WSL Version 1
How to Downgrade from WSL Version 2 to WSL Version 1
This is a post on how to downgrade from WSL version 2 to WSL 1. The demo below will explain the process of downgrading an installed Windows Subsystem for Linux (WSL) distribution, from WSL2 to WSL1.
WSL has two versions, the latest WSL v2, and the original version WSL v1. You can have many different Linux distributions installed on your machine, and it’s easy to change the WSL version for one of them.
My other post, How to Check Installed WSL Versions, will help explain the key and why you might want to perform a WSL upgrade for particular development needs. If you are not going to be using advanced WSL features, then having WSL running on version 2 will be the preferred option.
If you wish to upgrade WSL from version 1 to version 2, instead of downgrading as we are doing in this post, then see my other post – How to Upgrade WSL from Version 1 to Version 2
How to Downgrade from WSL 2 to WSL 1
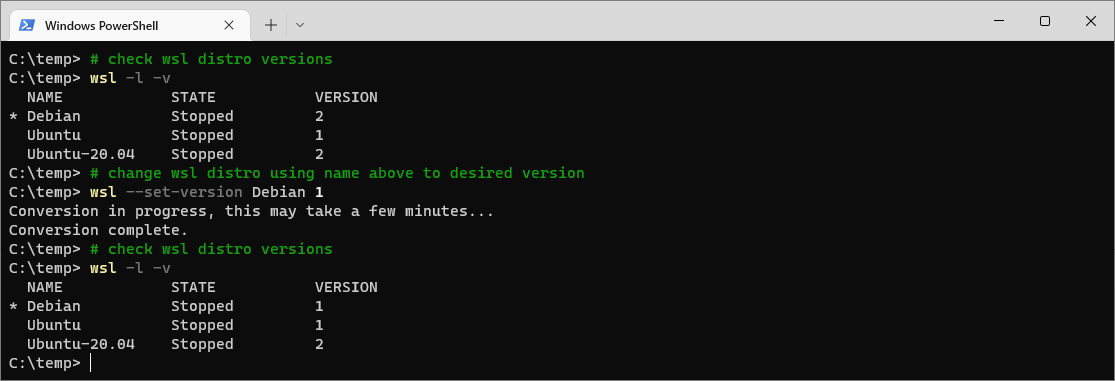
To downgrade a Windows Subsystem for Linux distribution from WSL 2 to WSL 1, run wsl <distro-name> --set-version 2. You can get the Linux distribution by running wsl -l- v.
The first command below will check the version of WSL and the following command will set and update the new WSL version.
# check wsl distro versions
wsl -l -v

# change wsl distro using name above to desired version
wsl --set-version Debian 1
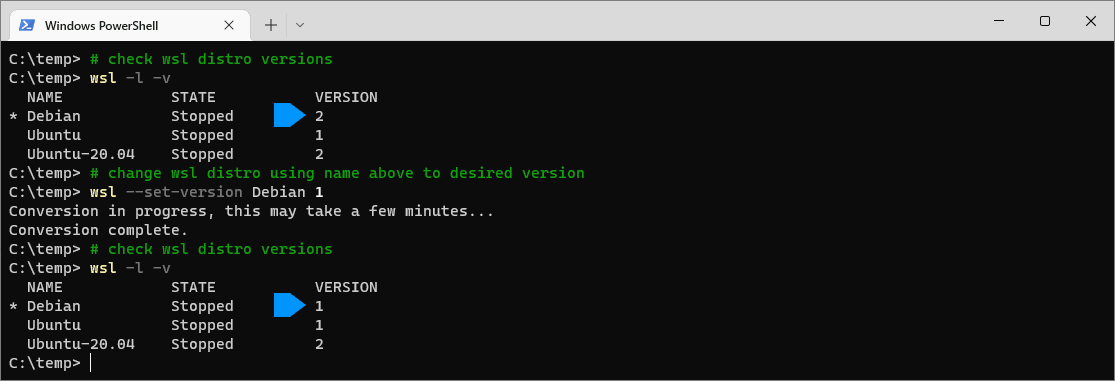
The Debian instance as marked in the screenshot above has now been downgraded from WSL2 to WSL1.
To upgrade back to version 2, it’s as simple as changing the number from a 1 to a 2 in the command.
For more WSL Tips, check out my WSL Windows page which has a list of all my WSL blog posts.