Logging sp_whoisactive to a Table
Logging sp_whoisactive to a Table
This is a follow-on post of sp_who, sp_who2 & sp_whoisactive and is a run-through of logging SQL Server activity to a table, using the sp_whoisactive stored procedure.
Even if you are equipped with a SQL Server monitoring tool, you still may be having trouble finding that slow/blocking query that runs during the night. Running sp_whoisactive periodically (e.g. every 30/60 seconds) and logging the results to a table will help you here.
As mentioned in the previous blog, there’s many parameters to choose from, including one that brings back the Execution Plan to allow you to tune if necessary. With a 2 week retention period set, my table had grown to 2GB in size (plans are heavy). This will vary per instance work-load and you should monitor closely if applying to a production server.
Also, avoid storing this within system databases. I’ve had this stored within a very large user database before, although a separate admin database would always be preferred.
For properly documented info whoisactive.com is the place to be. Below is my simple take on it;
# Create Log Table.
# Test sp_whoisactive Logger.
# Test Trim Period.
# Create & Schedule Agent Jobs.
Create Log Table
First thing to do is confirm what you’d like sp_whoisactive to bring back.
It’ll take a bit of time to customise perfectly the way you want it. If you have time, great!
Parameters can also be tweaked to your needs. One I have added might be of interest:
“@get_transaction_info = 1 is a lightweight mode that pulls the top non-CXPACKET wait, giving preference to blockers”
For further reading on CXPACKET waits, look no further. Read this post by Nikola Dimitrijevic and it’ll explain it all!
We’re now ready to create the table. Enter your database/schema/table name and un-comment the EXEC statement when ready.
Test sp_whoisactive Logger
Again, just amend the database/schema/table name and hit go.
Test Trim Period
You don’t want your table to get noticeably large, and it may grow relatively quickly. Set the retention period to whatever you think you’ll need.
Create & Schedule Agent Jobs
1. Open up a new SQL Server Agent Job.
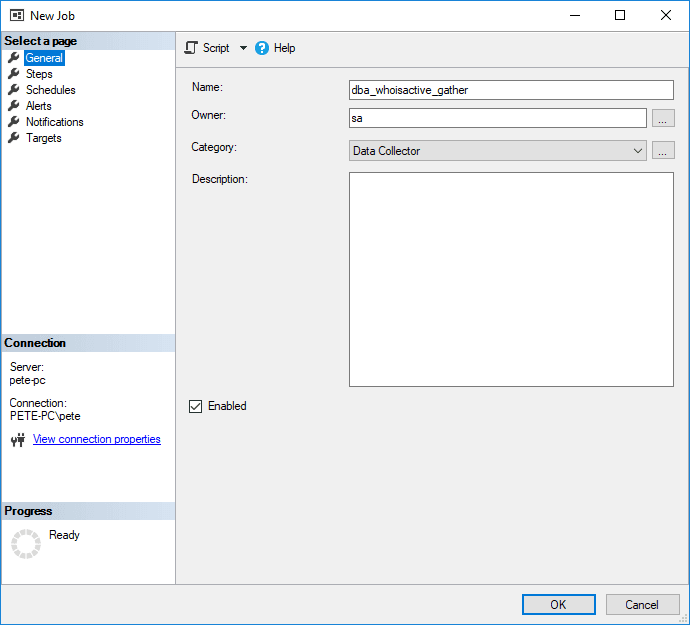
2. Name and categorise appropriately.
3. Jump to Steps on the left-hand menu and click on New Job.
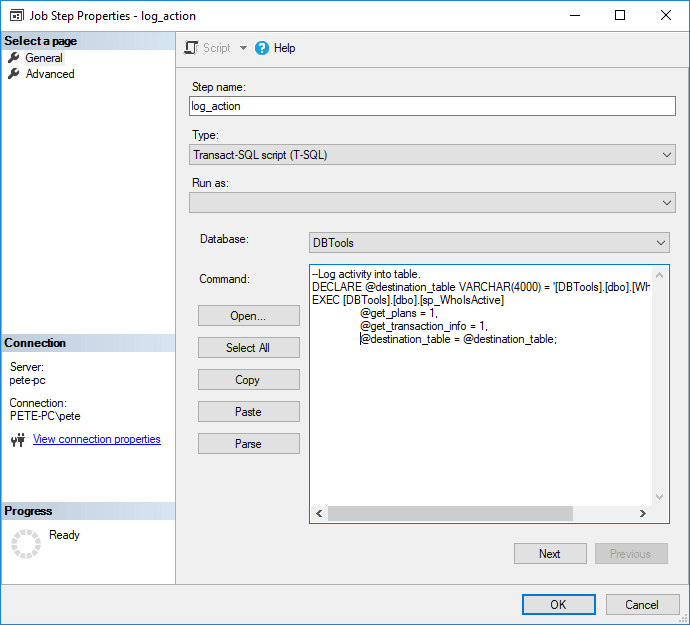
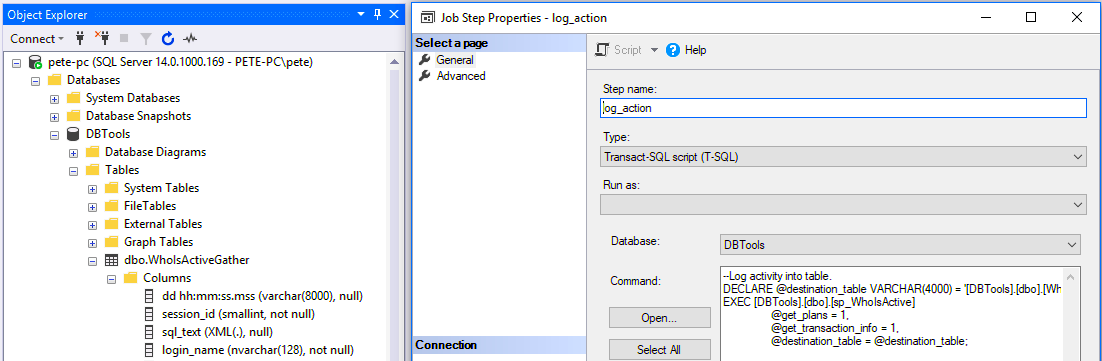
4. Set the step name and ensure the correct database is selected (or include a USE statement to the code).
5. Apply appropriate job step logic within Advanced.
If you’d rather run deletes during a quiet period of the day, add as a separate job (this’ll change the logic of-course).
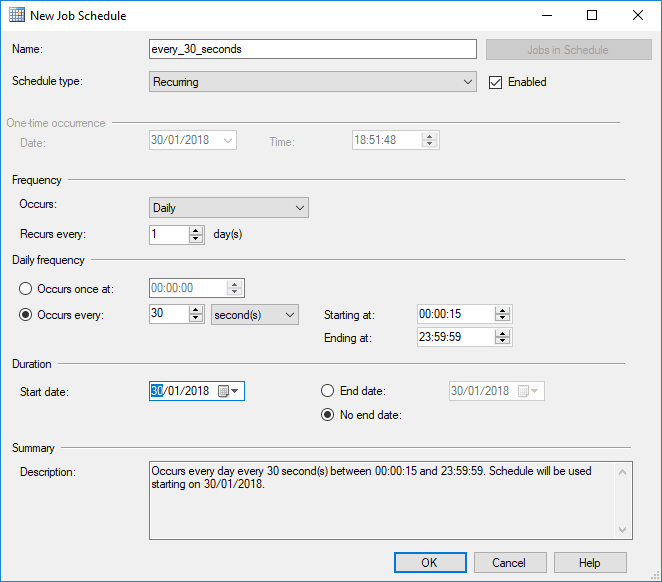
6. Once the above has been OK’d, navigate to the Schedules tab and click New.
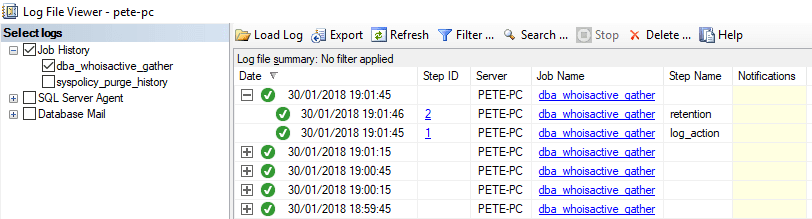
7. Monitor by looking at the job history.

3 Comments
[…] Another common use of this stored proc is to have it running as an agent job every 30-60 seconds, storing the results into a table. See my other blog post – Logging sp_whoisactive to a table […]
Thank you,
I just want to mention that there is a way to create the table:
declare @definition varchar(max)
exec sp_WhoIsActive @return_schema = 1, @schema = @definition output
print @definition
It will print out the CREATE TABLE script
Sorry, 5 months later 🙂
Thanks for the added tip! It’s been a few years since I last used this proc, and much longer since I wrote this. SP_WhoIsActive will always be a go-to MSSQL tool though!